If you want to create an animated gif then it is important that your AE comp does not have any duplicate frames. What do I mean by that. The sample has the entire arrow graphic move into position, then sit there for a little while, then spin and change color, then sit for a while. In your AE comp you only need one frame of the graphic sitting still. You export a movie with a transparent background using the Render Cue and the Lossless with Alpha preset, then you import that rendered file into Photoshop, use the Motion workspace, then set the timing of the frames in Photoshop. This keeps your file size small and gives you the best option for creating a high quality 256 color gif with decent edges.
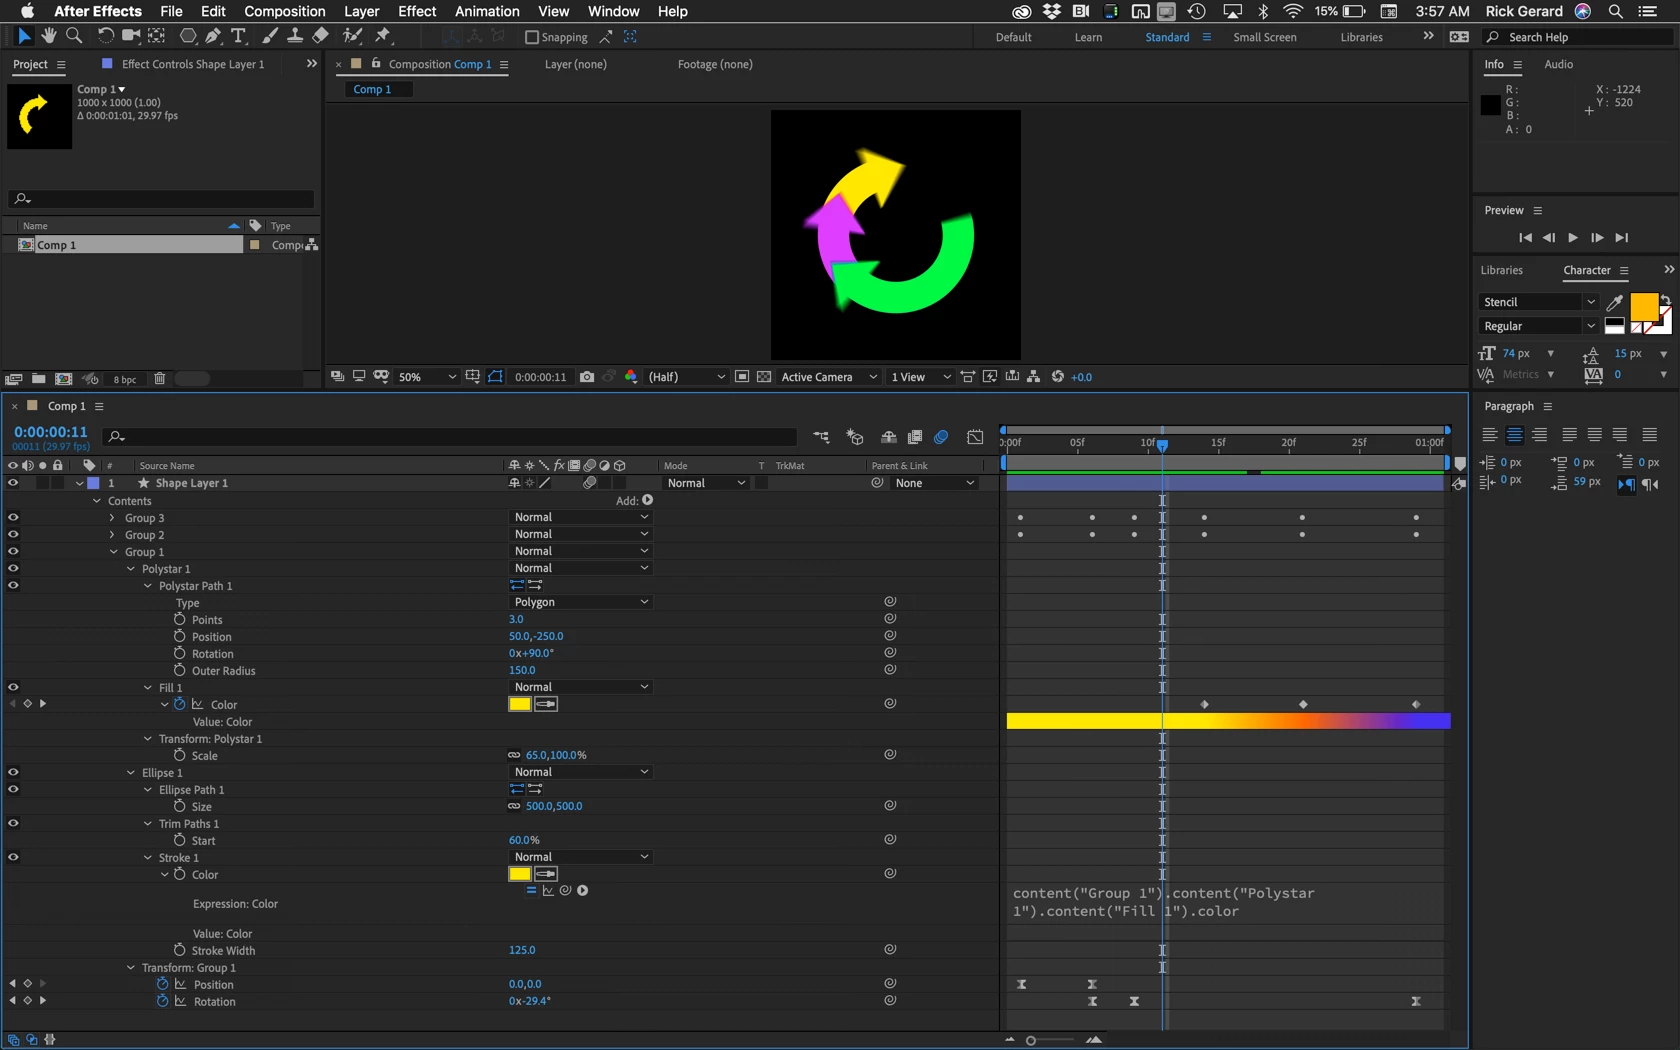
That exact design is pretty easy to create and animate using a single shape layer, an ellipse with a stroke only, trim paths to only show part of the circle, and a 3 sided polystar with 3 sides. The sizes can all be mathematically setup, then the first curved arrow can be placed in a group. You can tie the color of the stroke to the color of the fill with a simple epression created using the pickwhip, then add a few keyframes and end up with a single group that moves up, spins, and changes color. using the transform properties available for each shape. Then all that is necessary is to duplicate the group twice and offset the rotation values. Here's what that looks like. I'm showing you everything except the expression that I added to the rotation property of Group 2 and Group 3. The expression was simply value + 60 and value + 120.
I hope this helps. The screenshot should get you there because I am showing you everyting that I did to the first group.