The tutorial is very basic, the workflow is a little inefficient, there is no compensation for text layer scale or position, so all Valentina Vee taught you was a very basic approach to creating a box behind a text layer. The idea of changing Transform Rectangle/Scale is not at all useful in a day to day workflow. In my opinion shifting the text layer Anchor Point to the center of the text layer is also not a very good idea, but if you really want to do that you should do it with an expression.
If you want to just use the simple expression in the tutorial you need to select the shape layer, press the U key twice to reveal all of the modified properties of the layer, look for the Rectangle 1/ Rectangle Path 1/Transform property, or the Transform Rectangle 1 property, not the layer/transform property, and adjust the Shape Layer/Contents/Rectangle 1/Rectangle Path 1/ Positon or the Transform Rectangle 1/ Anchor Point or Position property and make your adjustment for left justified text there. That will properly position the text box but the text box will not stay lined up with the text layer if you move the text.
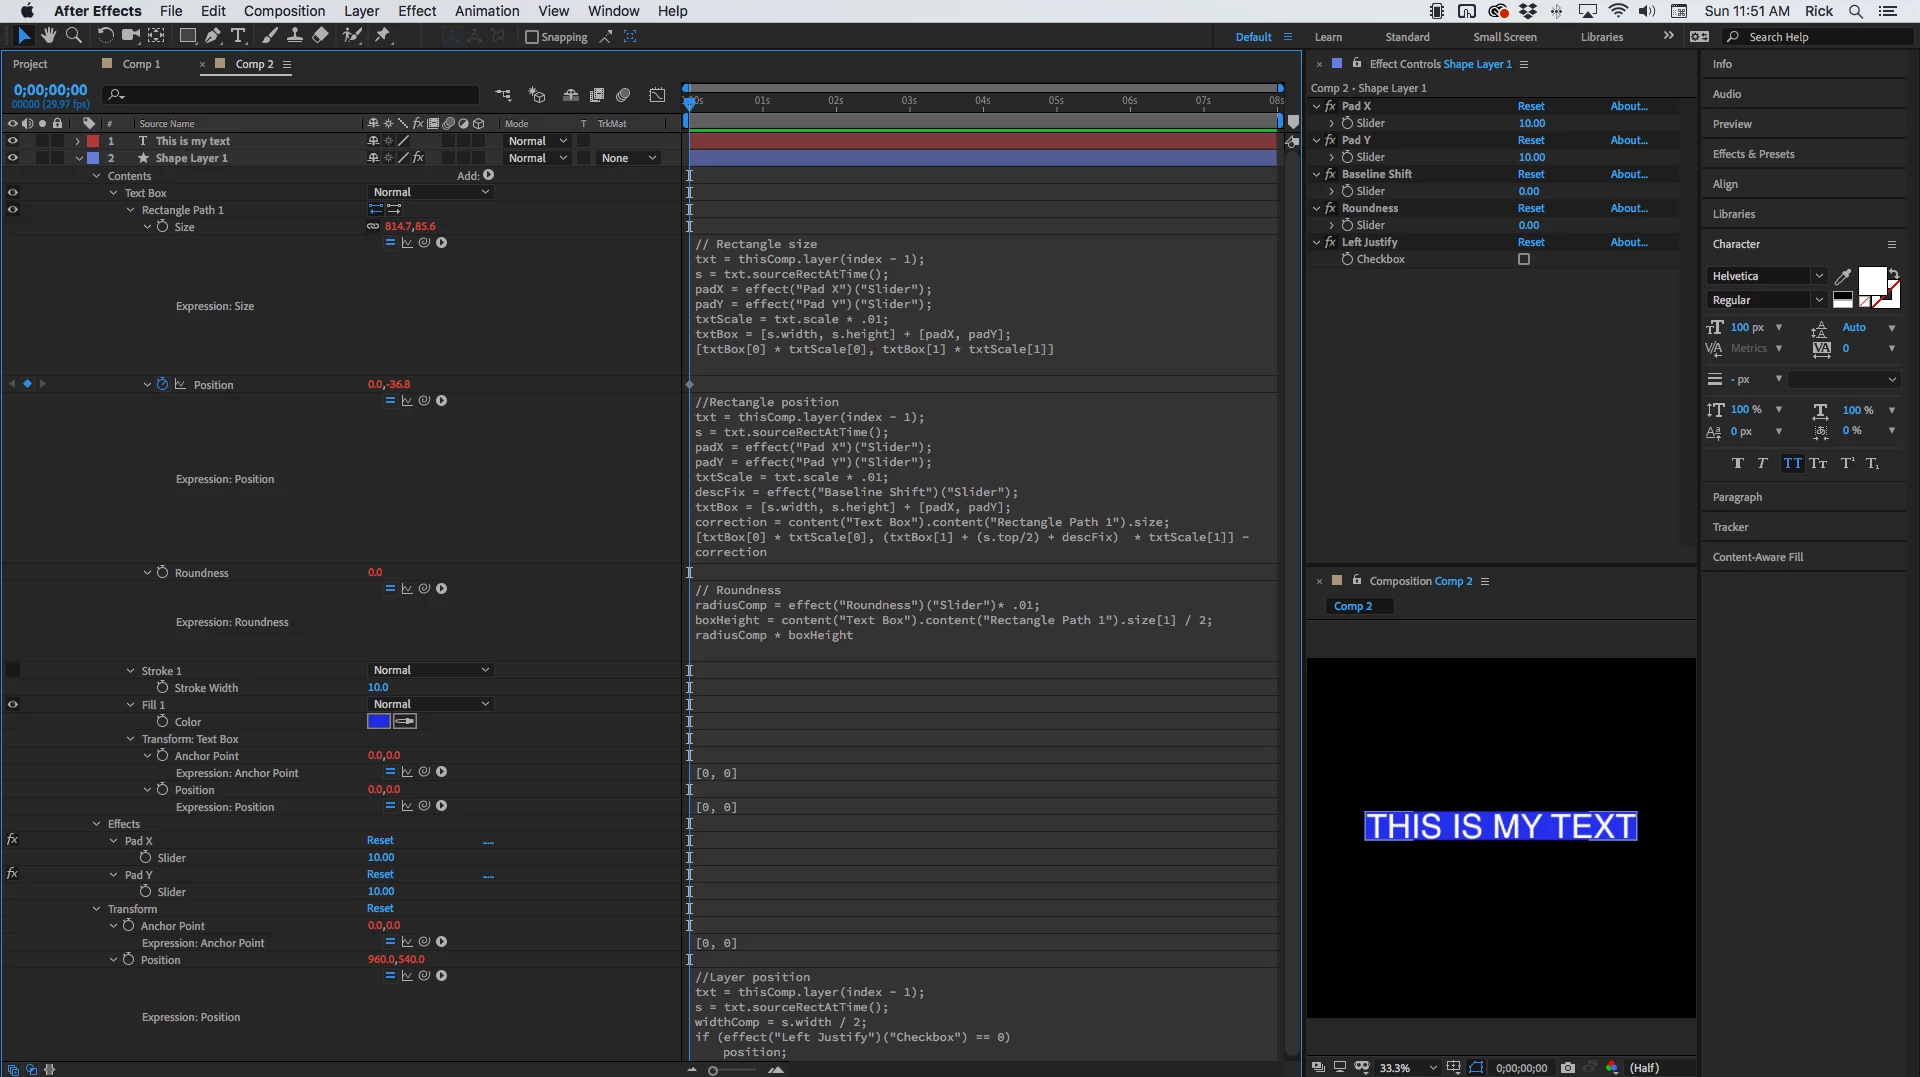
My Magic Text Box animation preset includes sliders for X Pad, Y Pad, Baseline Shift, Roundness, and a check box for Left Justified text. Expressions are added to Rectangle Path 1/Size, Rectangle Path 1/Position, Roundness, Transform Rectangle 1/ anchor Point, Transform Rectangle 1/Position, Layer/Transform/Anchor Point, and Layer/Transform Position. I use index-1 instead of a layer name to look at the text layer above. Three of the expressions, Transform Rectangle 1/Anchor Point, Transform Rectangle 1/Position, and Layer/Transform/Anchor Point are just a simple array setting the x and y values to zero.
Here are the expressions:
// Rectangle size
txt = thisComp.layer(index - 1);
s = txt.sourceRectAtTime();
padX = effect("Pad X")("Slider");
padY = effect("Pad Y")("Slider");
txtScale = txt.scale * .01;
txtBox = [s.width, s.height] + [padX, padY];
[txtBox[0] * txtScale[0], txtBox[1] * txtScale[1]]

//Rectangle position
txt = thisComp.layer(index - 1);
s = txt.sourceRectAtTime();
padX = effect("Pad X")("Slider");
padY = effect("Pad Y")("Slider");
txtScale = txt.scale * .01;
descFix = effect("Baseline Shift")("Slider");
txtBox = [s.width, s.height] + [padX, padY];
correction = content("Text Box").content("Rectangle Path 1").size;
[txtBox[0] * txtScale[0], (txtBox[1] + (s.top/2) + descFix)  * txtScale[1]] - correction

// Roundness
radiusComp = effect("Roundness")("Slider")* .01;
boxHeight = content("Text Box").content("Rectangle Path 1").size[1] / 2;
radiusComp * boxHeight

// Transform Rectangle 1 Anchor Point, Transform Rectangle 1 Position, Layer Anchor Point
[0, 0]

//Layer position
txt = thisComp.layer(index - 1);
s = txt.sourceRectAtTime();
widthComp = s.width / 2;
if (effect("Left Justify")("Checkbox") == 0)
	txt.position;
else
	[txt.position[0] + widthComp, txt.position[1]]
This is what the comp looks like. I have rearranged the pannels and expanded everything after pressing 'uu' to show you everything I did to the shape layer. I also renamed Rectangle 1 to Text Box to keep things organized.
With these expressions applied to a shape layer you can position the text anywhere you want on a layer, compensate for descenders, set horizontal and vertical padding, and scale the text layer any way you want. I use it all the time. All of the controls can also be added to the Extended Graphics Panel and you can export a mogrt with a text box you can use In Premiere Pro.
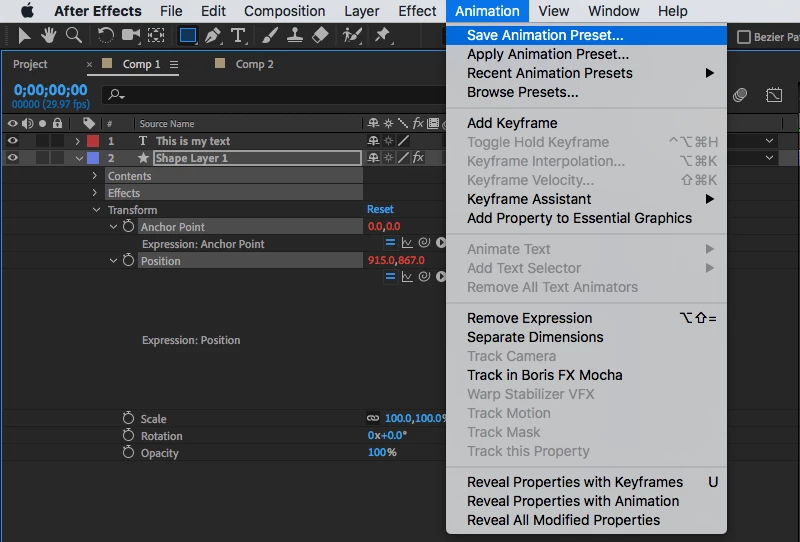
When you get it working select the Contents of the Shape layer, the Effects header, and the layer Anchor Point and Position property and save your own animation preset. Selecting the properties in this way will give you an animation preset that you can just double click to create the shape layer, then just drag it under any text layer that has the baseline shift set to zero in the character panel and you have a perfect text box ready to customize.
I have a set of about 100 animation presets along with a tutorial series will soon be available for purchase. I will make the announcement as soon as they are ready.
I should also mention that all of these expressions need to be modified if you want to parent the shape layer to the text layer. When you get a little more experience you should be able to do that by using layer space transformations, but that is a topic for another thread.