For a hand erasing a chalkboard, I would probably use the following technique. The footage for the project I will share come from Adobe Stock. The project is not polished but it will show you the technique of creating a track matte to erase your line drawing using Motion Tracking and Paint. You'll find the footage here: 216033535, and you can download a watermarked copy for free. This took me about 15 minutes to do.
Here's a step by step to reproduce this project:
- Create a library in Adobe stock and download this clip 216033535
- Drag the clip from the Library panel in AE to your Project panel
- Create a new comp from the clip (File>New Composition from selected is an easy way to do that)
- Open up the Motion Tracking workspace, select the clip, move down the timeline to the place where the hand first starts to erase the board
- Make sure the footage is selected in the Motion Tracking Panel and check Track Motion
- Adjust the feature region and search area to include enough detail that the track will hold. Tracking will be fairly slow with this setup but it is still going to be faster than setting up a bunch of keyframes by hand fo most footage. The setup should look something like this:
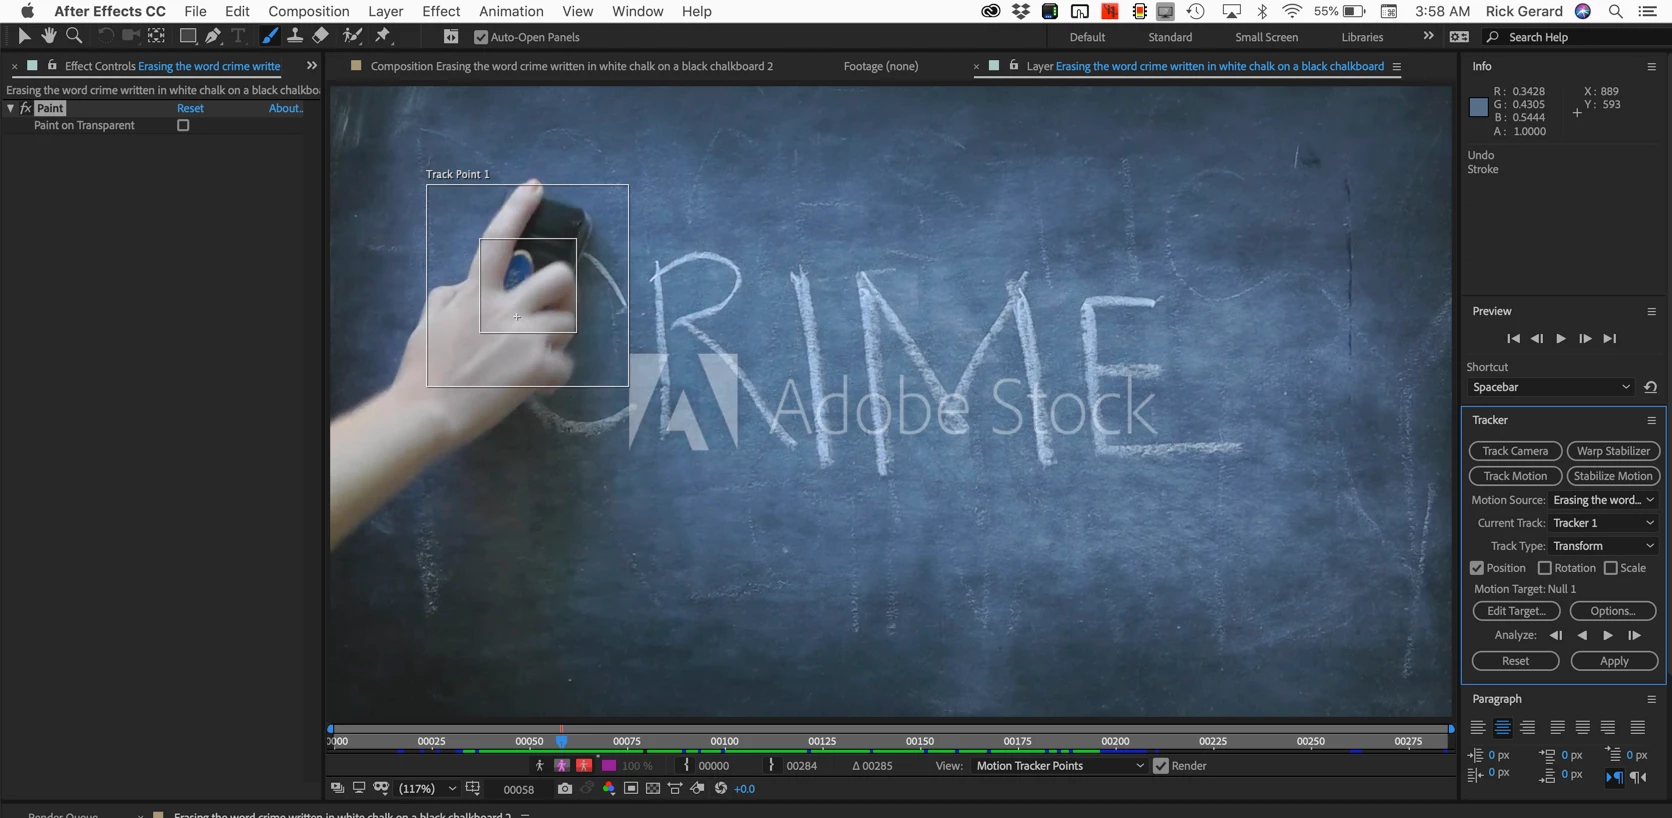
- When I do motion tracking I usually go to the Preferences>Display and select no motion path because it's easier to make adjustments without all of those keyframes cluttering up the scene
- Start tracking forward. If the tracker loses its way stop, adjust the position of the Feature Area and continue. I had to stop 3 times during this track and make adjustments
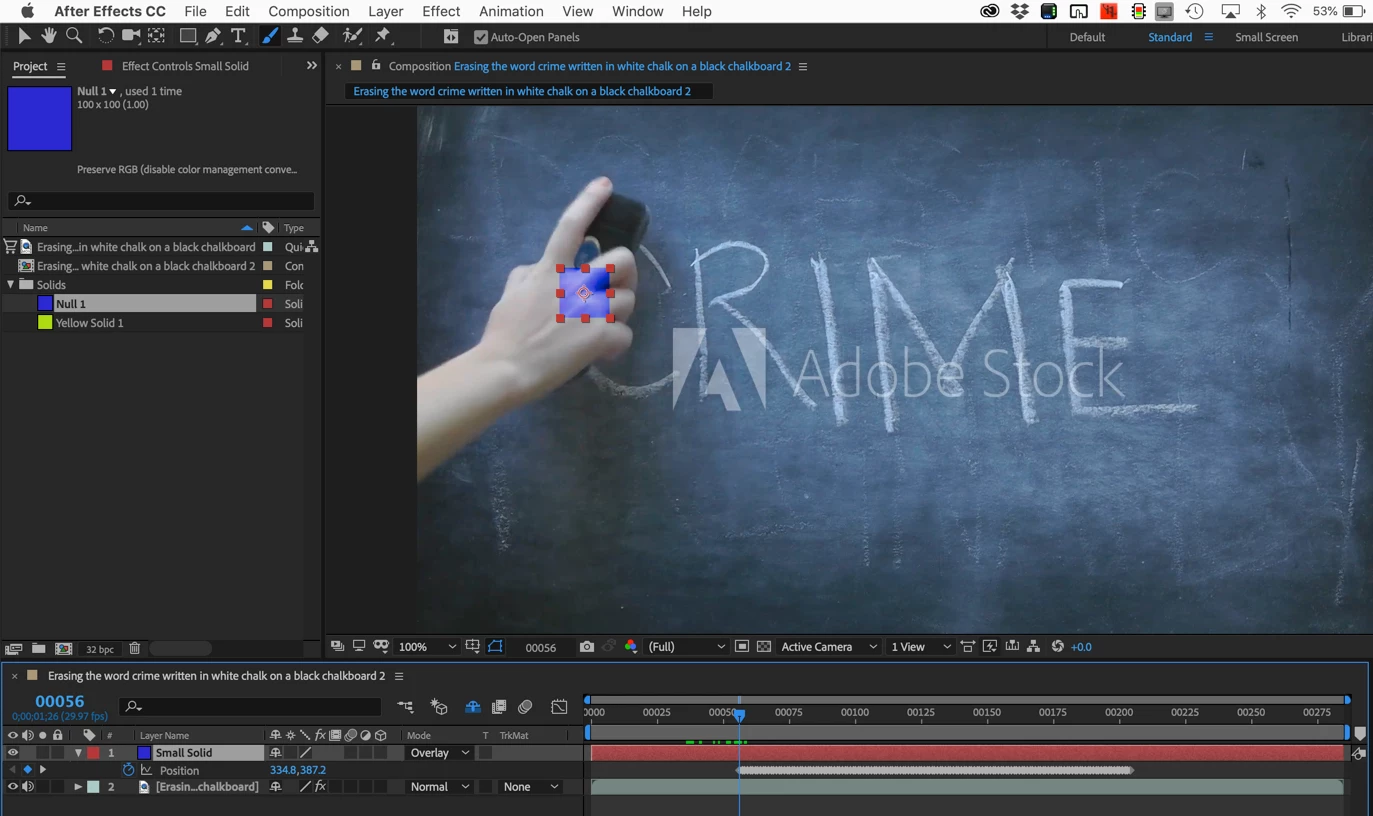
- When you have finished the track add a small solid (easier to see than a null) to the composition about 100 X 100 pixels, select the solid as the Target for the tracker and click apply. The solid should snap into position. I like to use blend modes so I can see through the solid and make sure that the track is good. I didn't have to adjust any of the position keyframes. The track was good enough for this job. Your comp should look something like this:
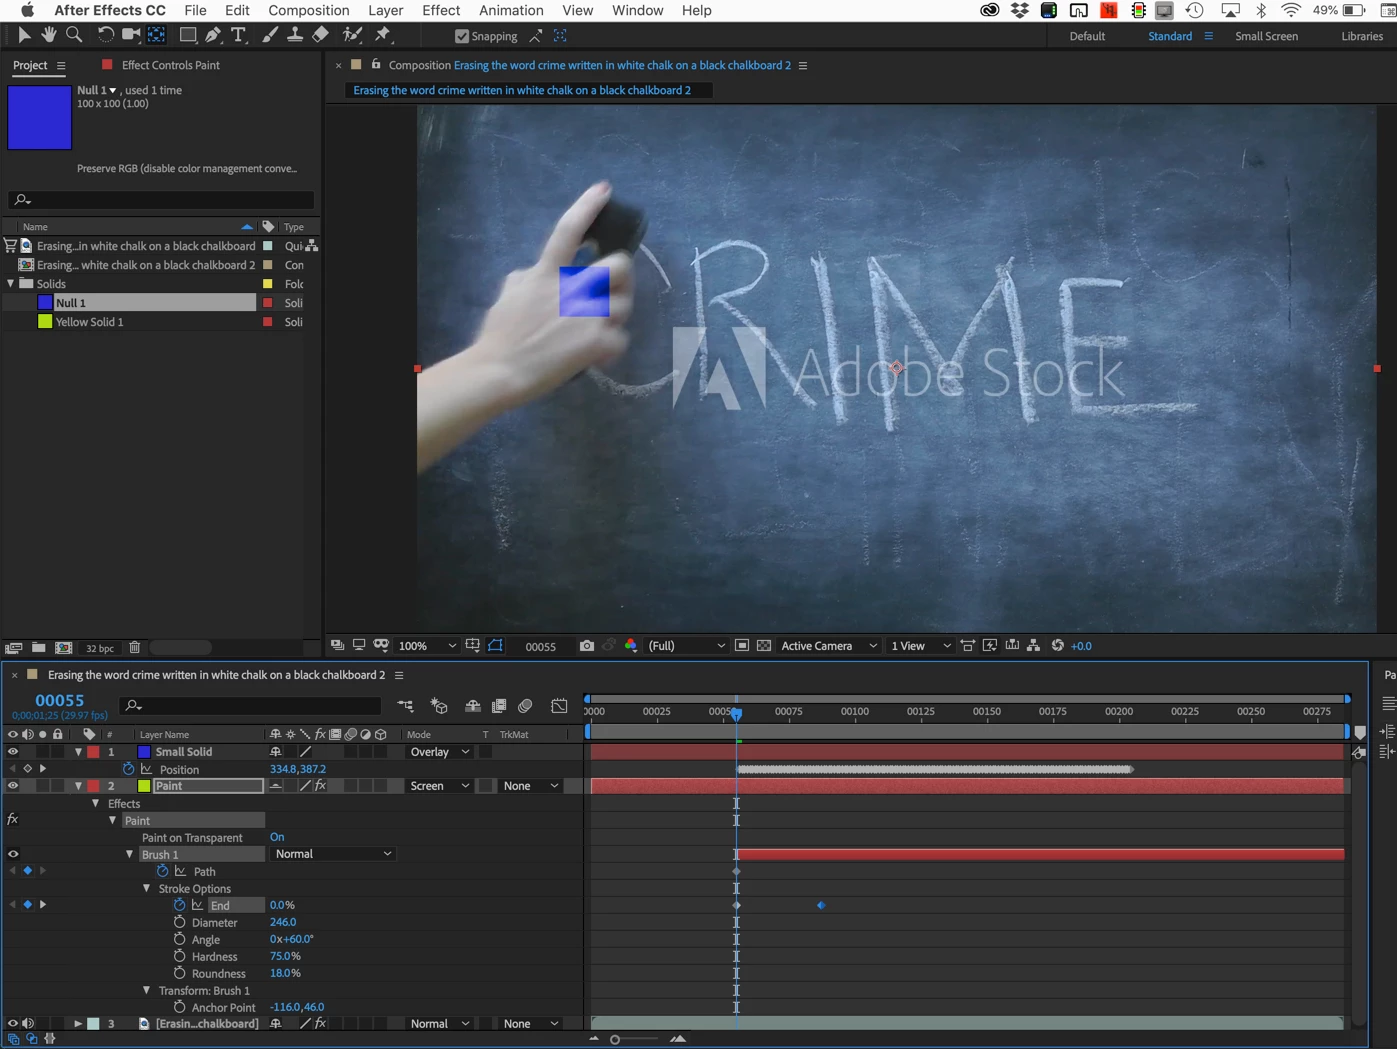
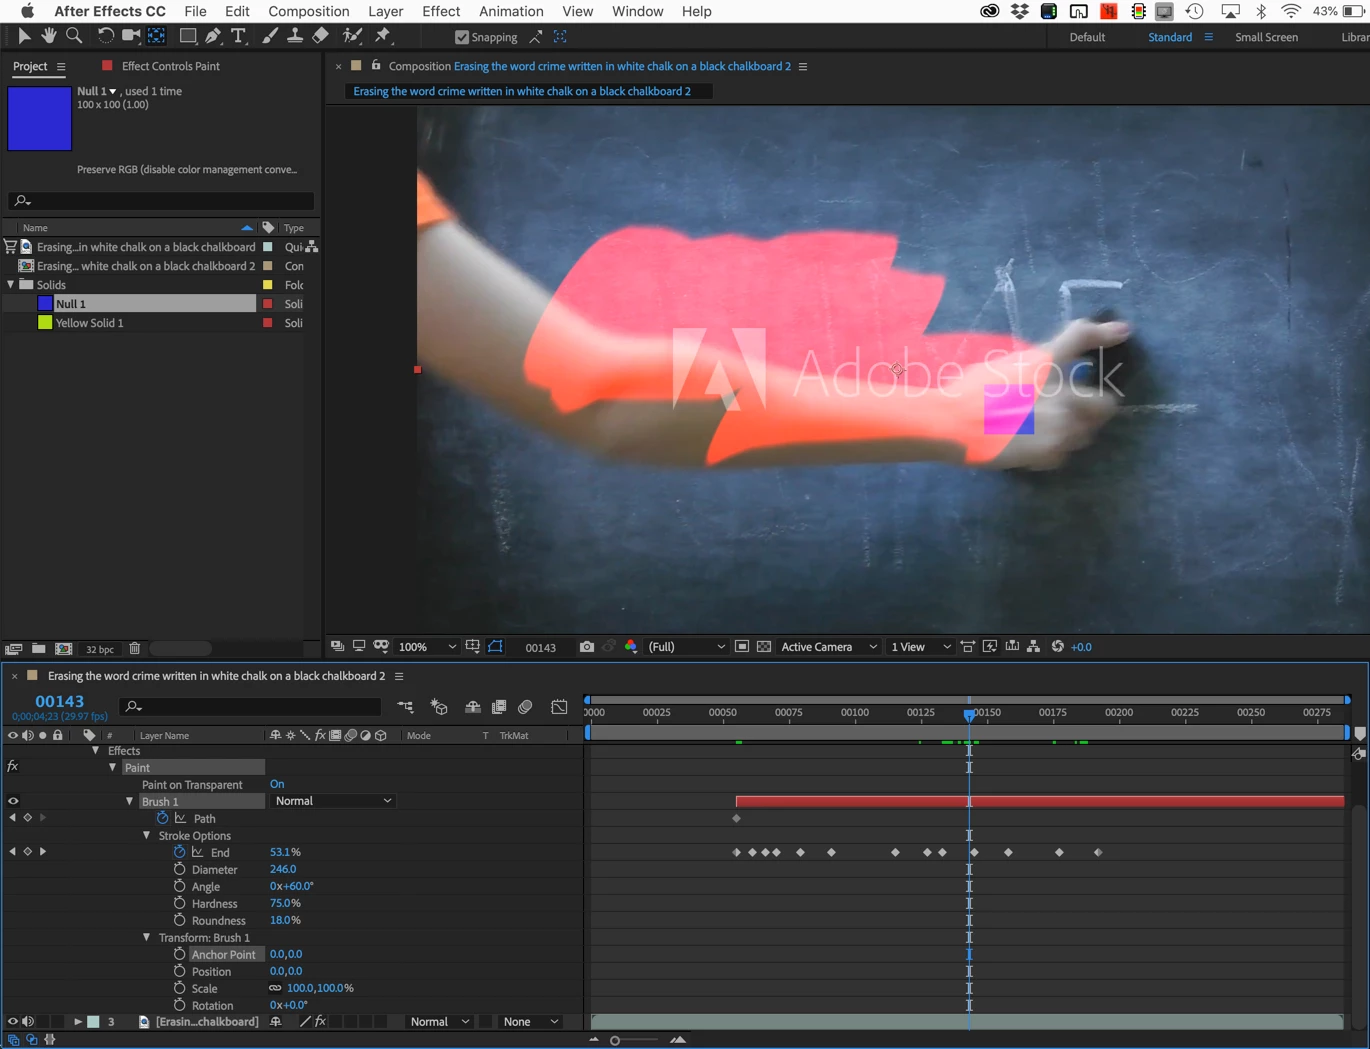
- Add a new comp-sized solid to the timeline (Ctrl/Cmnd + y), change to the Paint workspace, select the paint tool (Ctrl/Cmnd + b), make sure the mode is set to write on and draw a short path on the solid layer anywhere
- Reveal all modified properties in the Paint layer, spin down Paint to reveal Paint on Transparent and turn that on and you'll see something like this:
- Drag the last keyframe for Paint>Brush 1>Stroke Options>End so it lines up with the last position keyframe for the small solid
- Here comes the magic. Select the Small Solid Position property and make sure all of the keyframes are highlighted, copy (Ctrl/Cmnd + c), then select the Brush 1 Path property making sure it is highlighted and Paste (Ctrl/Cmnd + v). You can now move down the CTI to the end of the track and see the entire stroke.
- The stroke will probably be out of position quite a bit. Look for the Transform Brush 1>Position property and reset it to zero.
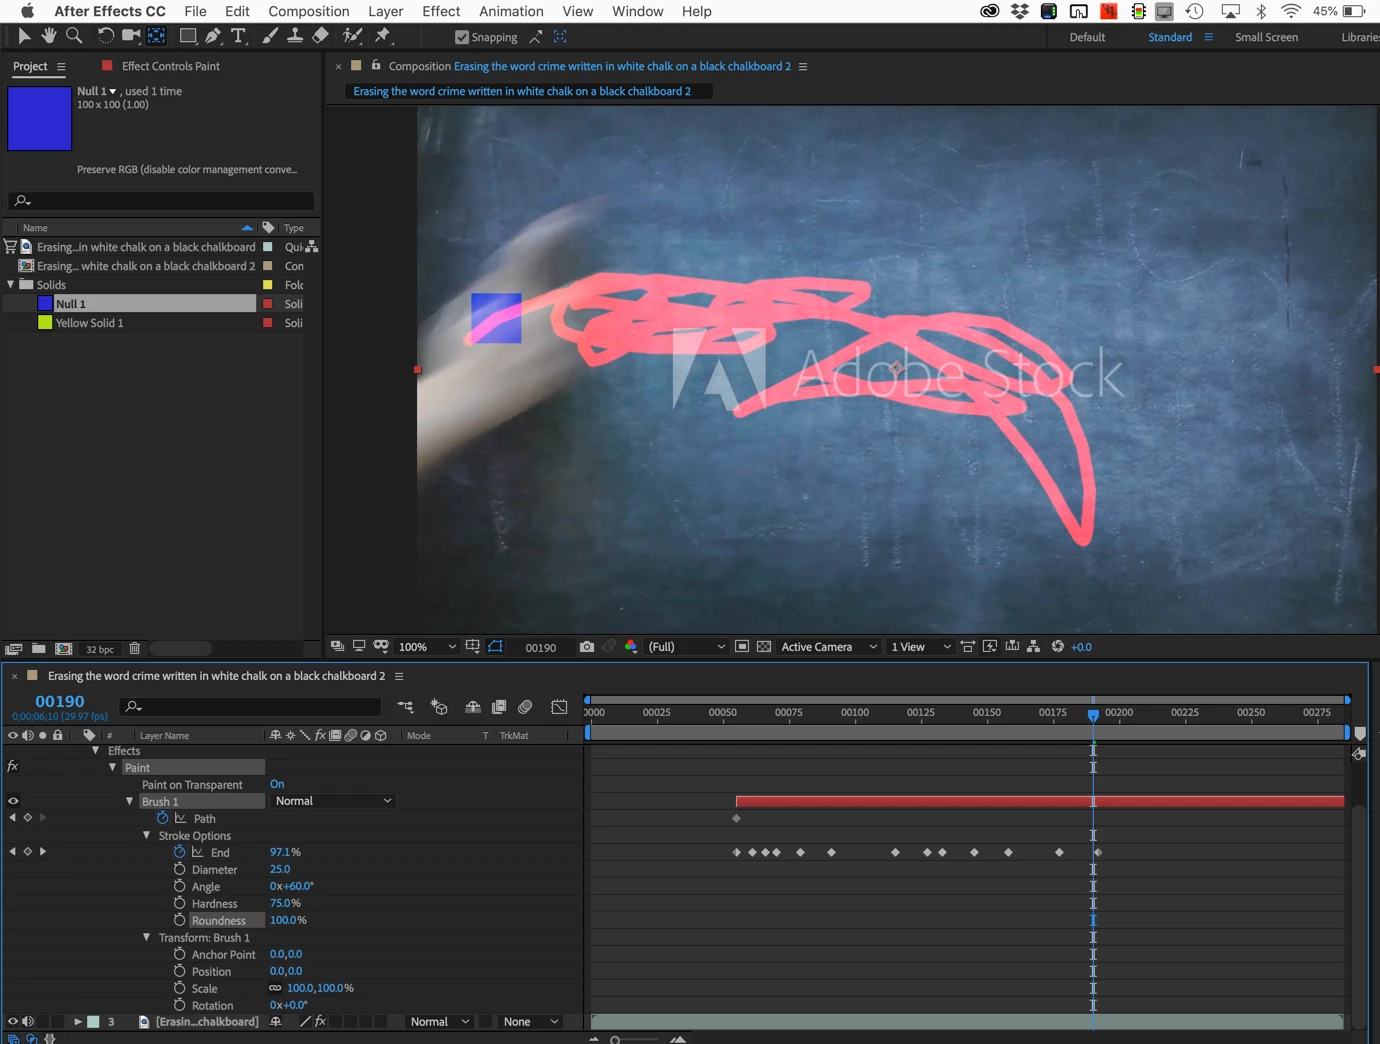
- You will adjust the size, roundness and rotation of the brush later, for now just leave it round. You will have to adjust the timing by modifying the end value in several places. The easiest technique is to move to a point where the action changes direction and then click and drag the End value until the brush lines up with the position of the Small Solid. It took me about 3 or 4 minutes to make the timing adjustments to get the paint stroke in sync with the hand. To make it easier to track the hand you can temporarily add a simple expression to the Start property that subtracts about .2 from the End value so you have a moving point. Once you have the timing fixed you can disable the expression and move to the next step. The expression looks like this:
effect("Paint").stroke("Brush 1").strokeOption.end - .2 - After disabling or deleting the expression your comp will look something like this:
- When the timing has been adjusted all that is left is to adjust the diameter, roundness, and angle of the brush to make sure it is big enough to approximately cover the moving eraser. A few tweaks to the brush anchor point may be needed to get things to line up properly. As you can tell I usually use a blend mode for the paint layer so I can see through it also because it makes ajustments easier to make. When you are done you'll end up with something like this:
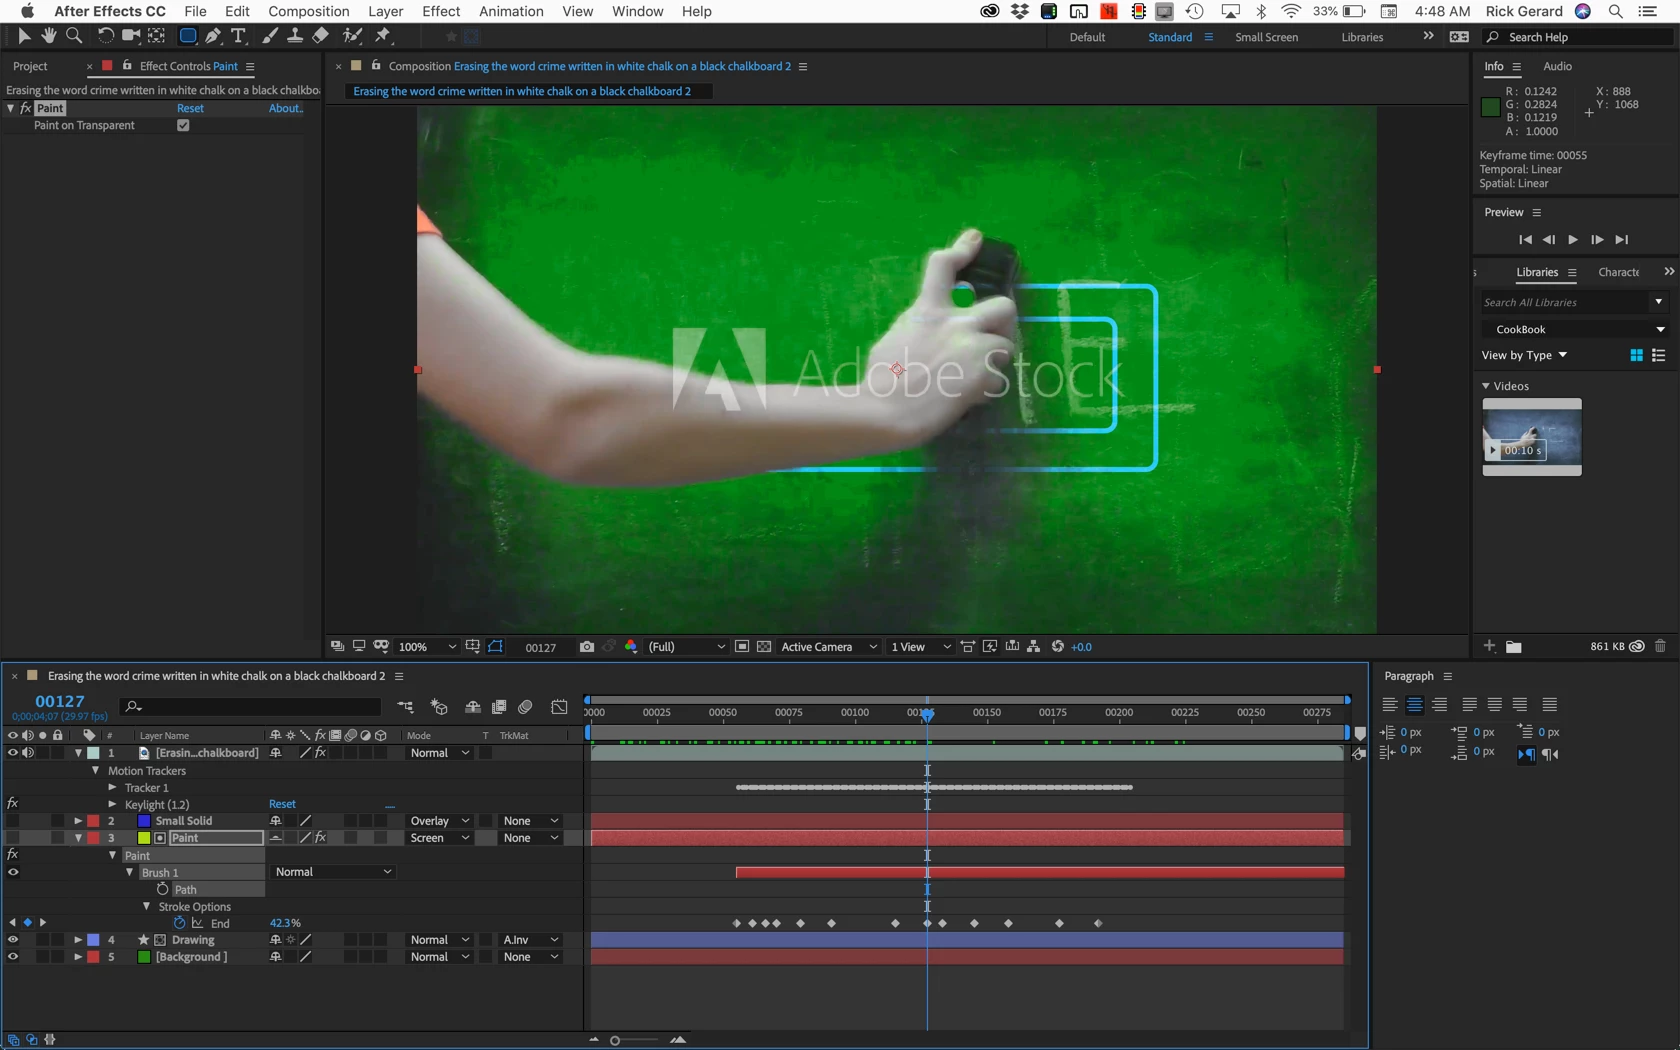
- The last steps for your project would be to add a background layer for the chalkboard, add the line drawing you want to erase, move the Paint layer above the drawing and make it an Alpha Inverted Track Matte for the drawing. You can test that and see that the paint layer erases the drawing and leaves the background. The last step is to put the original footage on top, apply Keylight and remove the original chalkboard. Your final comp would look something like this:
You'll find the sample comp here. Dropbox - Paint On Mask.aep I might turn this into a video tutorial. It worked out fairly well. This sample comp needs a fair amount of cleanup to make it perfect but it should point you in the right direction. You could practice cleaning it up a little before you takled your own project.
Note: Your browser may add a .txt extension to the AEP file when it is downloaded. If it does just delete it and the project should open for you.