MDLA Films
Participating Frequently
March 1, 2020
Question

Day for starry Night Sky replacement.

  • March 1, 2020
  • 2 replies
  • 1791 views

Hi all, I'm a film student just now learning after effects. I've never used it before it before so please bear with me.


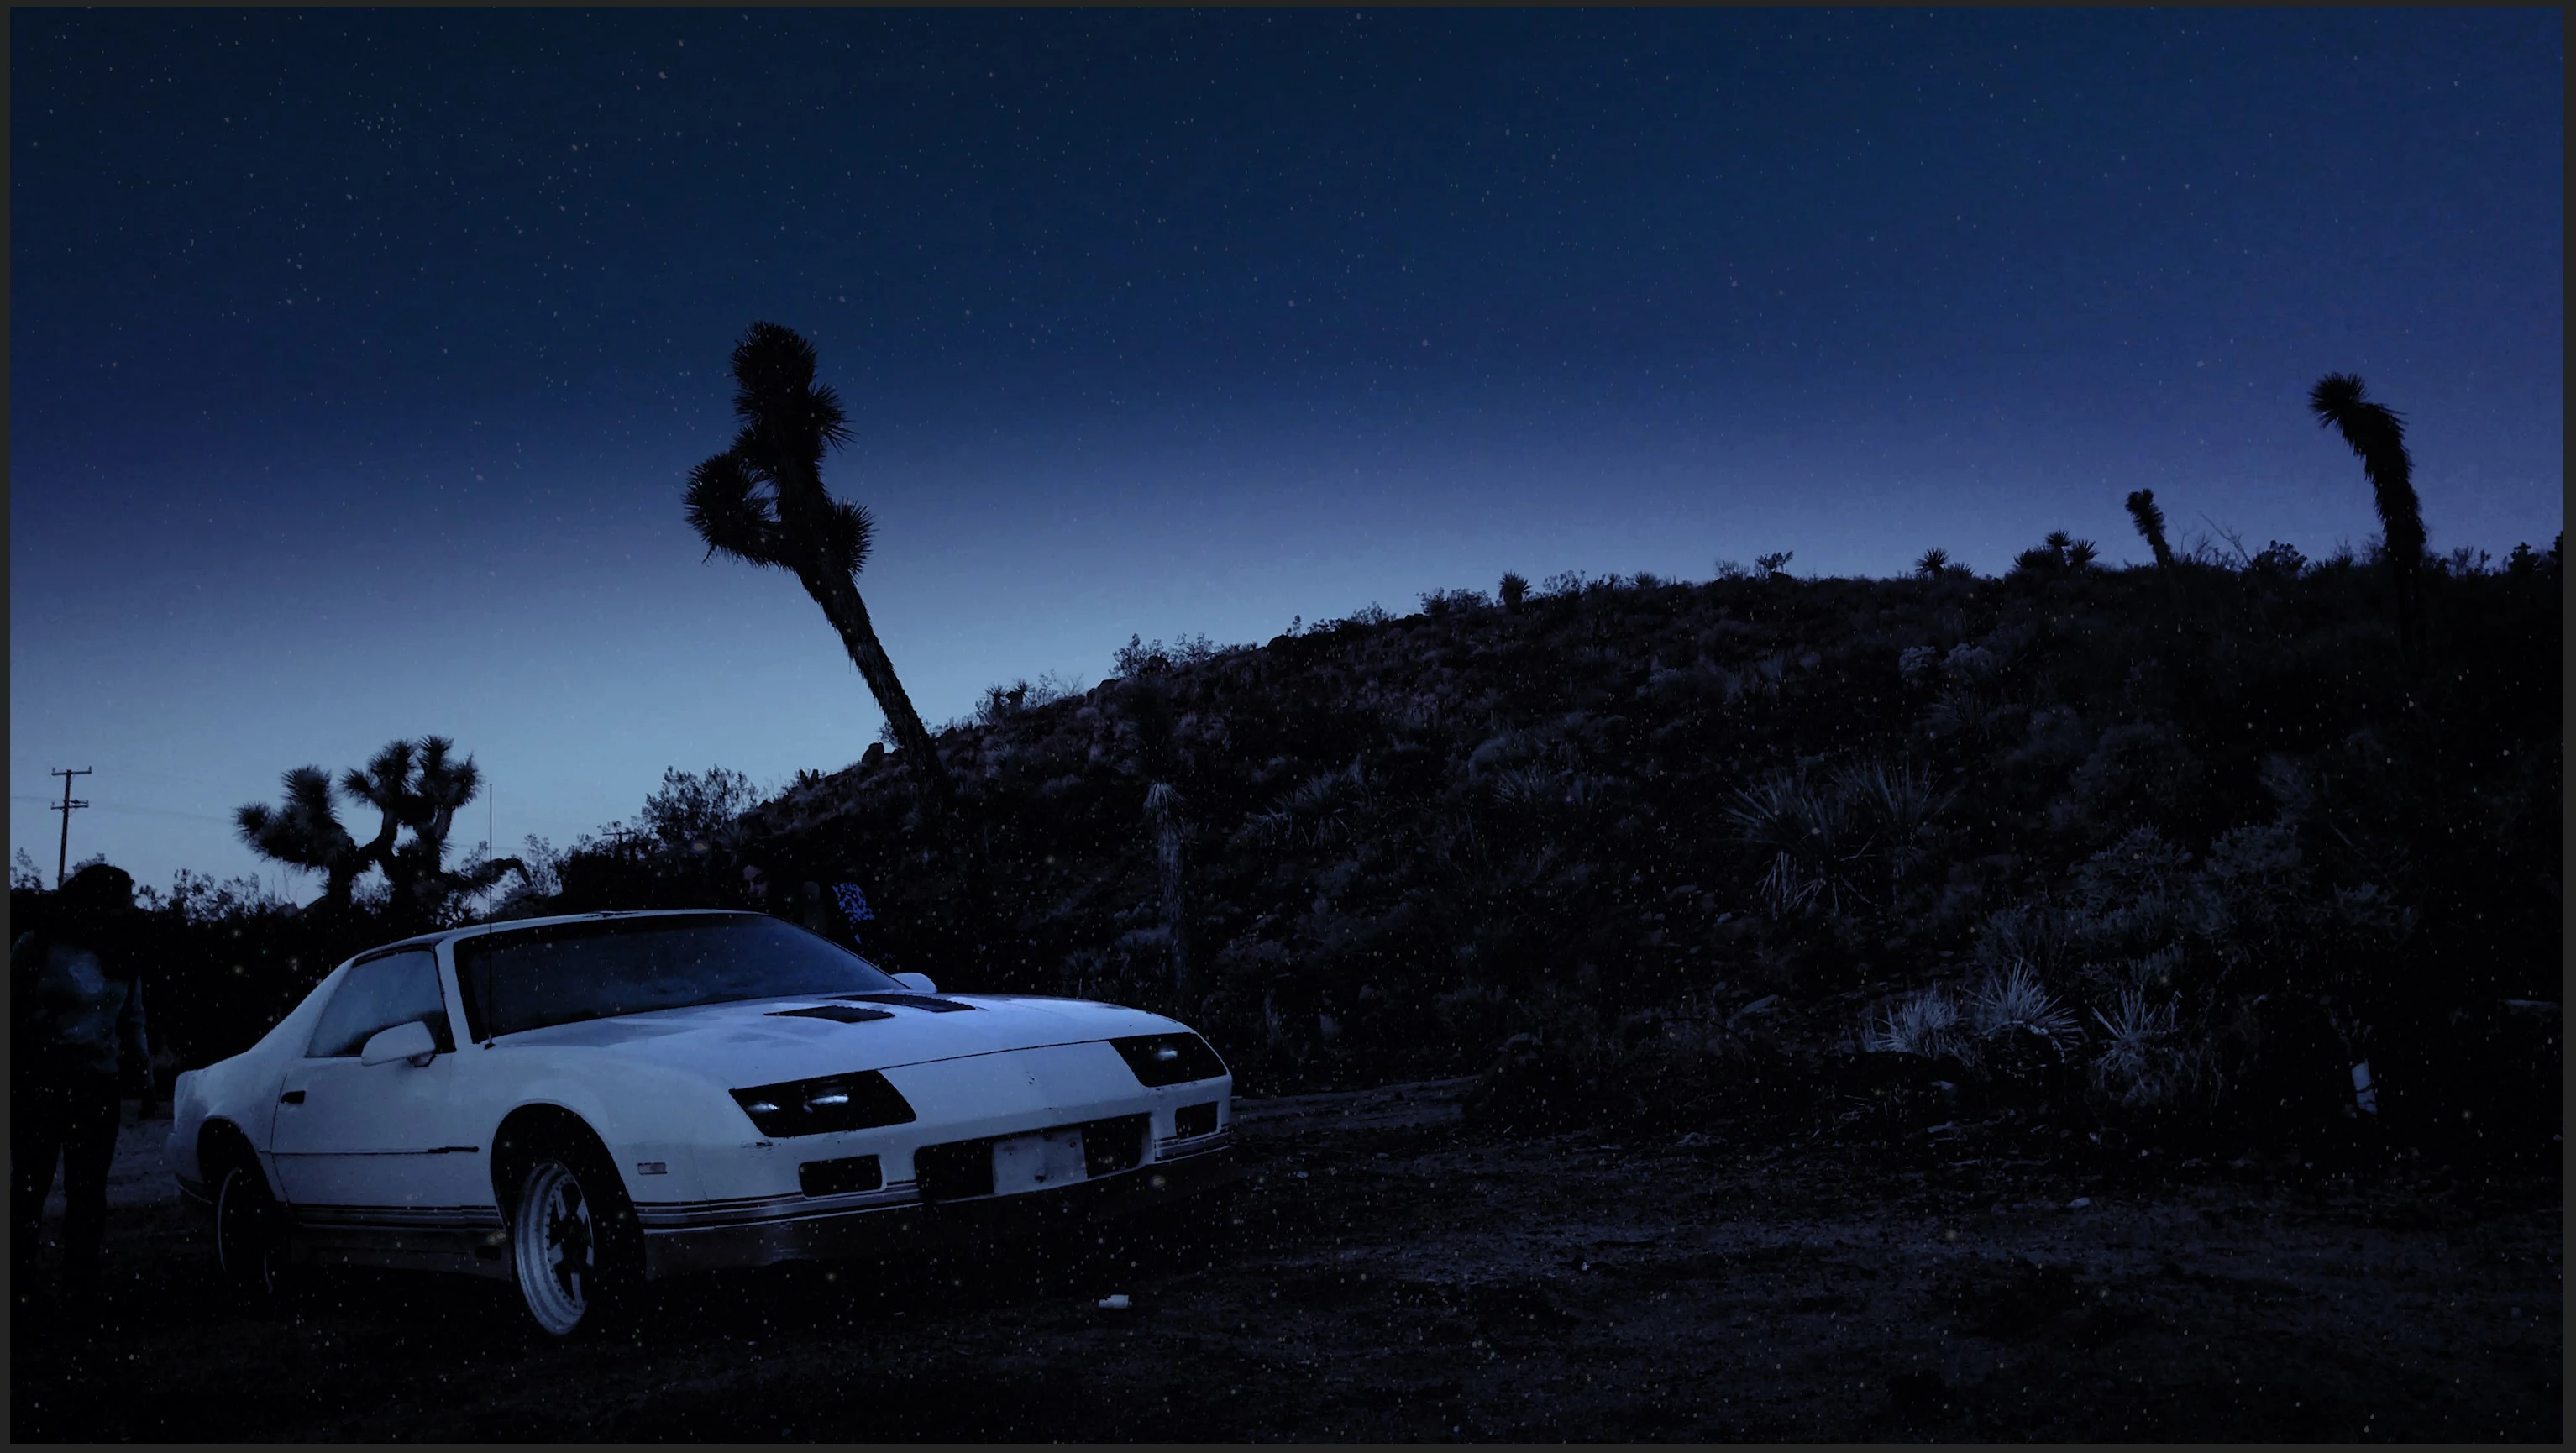
I have 3 shots in a short film shot in the desert of Joshua tree that were shot in the early morning and need to be made into night. I understand now how to track the shot and have the starry night sky we created in AE track with it, however I don't quite understand how to make if fade nicely as if the stars are just starting to shine thru the night sky. The effect we want is this:


As you can see there is just a sprinkling of stars thru the sky as it starts to darken, this is from Premiere.

As you can see in the shot the sky is starting to darken and the stars are starting to come out, this isn't a static shot however and we have to track the sky  to it using after effects, but I can't find a way to make it fade to look this natural, so far what I've got is this:


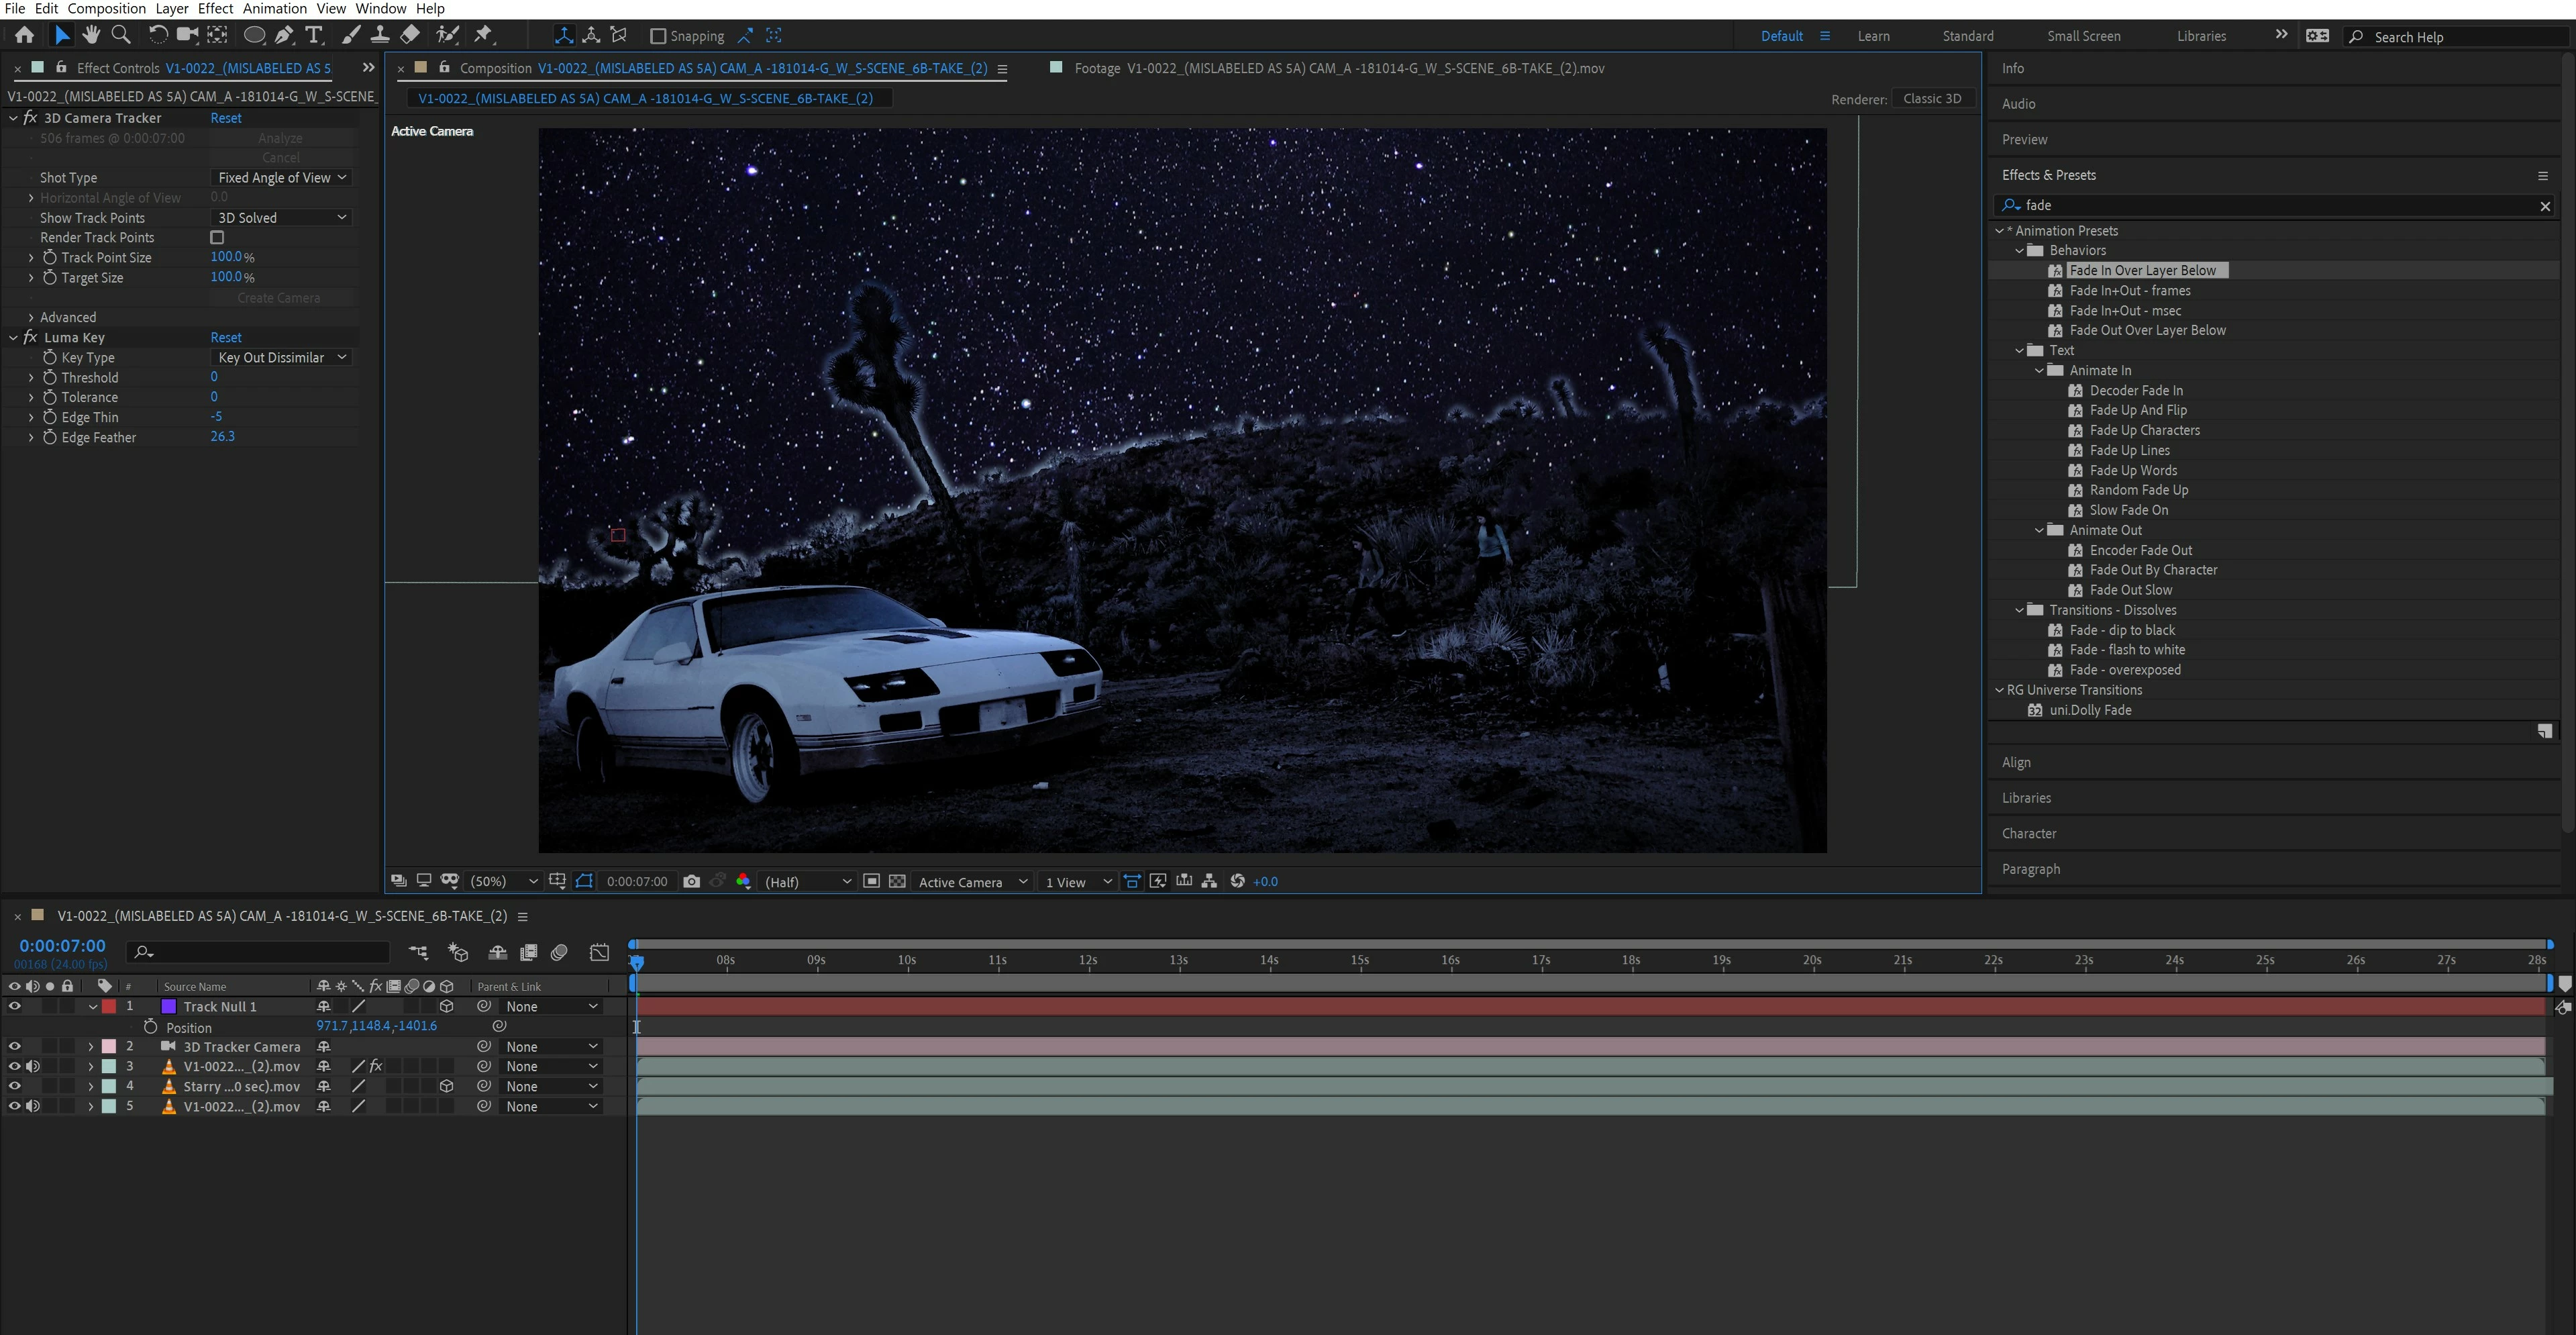
Could someone help us figure out how to match it to our intended look? We're all new to AE but eager to learn.

This topic has been closed for replies.

2 replies

Community Expert
March 2, 2020

It would really help to see the original shot. You need to do a lot of work on the skyline matte. I see you have used camera tracking but that isn't going to really help with the sky because it is so far from the foreground elements. 


The first step is to generate some kind of a matte to knock out the sky. The second step is to create a big enough star field to cover any camera movement. There will be a parallax shift between the foreground elements like the Joshua trees so stars will seem to move in relation to the trees as the camera moves, but Camera Tracking is not going to give you a surface that is far enough behind the plane of the trees to do you any good. The best option may be to set up a good procedural matte to knock out the sky from a copy of the original footage, then combine that with a gradient layer to fade the stars out as they approach the horizon and put that arrangement above the color corrected day for night footage.


If the camera move is not perfectly smooth you may have to motion stabilize the footage, add in the starfield that has been masked, animate the position of the stars a bit to give the parallax shift, then put the motion back in the scene using a null, parenting, and a couple of expressions.


If I could see the original footage I could give you a better idea of how to pull this off. The biggest problem I see with your screenshots is the lack of a decent matte to remove the sky and a gradient to fade out the stars. You need to create a nested comp (pre-comp) like this to use as a luma track matte for the star layer. 

The first thing I did was draw a couple of masks on the footage layer so I could use Keylight to make the horizon transparent. Then I added a black solid below the footage to fill in black below the horizon and copied the bigger mask, the brown one with the add mode to the black solid and changed it to subtract. Then below the whole thing, I added a gradient shape layer to give me a black to white gradient above the horizon. 


This comp can be nested in the original comp and used as a Luma track matte for the star layer. That comp would look like this:

I just used a NASA photo of the Milky Way.  The last step would be to animate the position of the Milky Way layer to give you the parallax shift and movement you need. I can't tell you the most efficient way to do that without seeing the original footage, but, once again, I don't think camera tracking is the right tool for that. That composite would look a lot better if the foreground was not covered with your original starfield.


MDLA Films
Participating Frequently
March 3, 2020

Ok, this is a bit above my head still but I'm going to do my best to keep up.


I am uploading a 4K res version of the uncolor corrected clip but my connection is slow so I'll post it up here asap. In the mean time here are three screen shots of the uncorrected footage that show the progression of the camera

1. Shot starts here:


This is midway thru the clip.


And the last frame of the clip is this:


We have already created a "Starry night" that has shimmering stars in AE, we learned that from a video tutorial. I know we went out of order, typically this is done before color, unfortunately the student assigned to AE dropped the class and didn't do the work before our colorist did theirs.


Is there a way to be walked thru this a little? I'm a little intimidated by AE as I haven't taken a class in it yet so I'm still trying to figure out what does what. Sorry if that's a problem. I really appreciate all your help so far. I'll post the video with the 4K uncorrected footage as soon as it's done uploading.

Community Expert
March 3, 2020

If you are new to AE spend a couple of hours here: Learn AE. That is a link to the official Adobe User Guide and tutorials. That will give you the basics.


To create the track matte duplicate this composition. I've shown you absolutely everything I did:

Then put the track matte on top of the main comp timeline, add your starfield just below the track matte and set the matte to Luma Matte, then add the color corrected footage at the bottom and animate the movement of the starfield layer's position go give some movement that matches the camera movement. Nothing to it.

Kyle Hamrick
Community Expert
Community Expert
March 1, 2020

You need to apply some feathering or a gradient matte to your star element (or to the cutaway of your footage) to create that falloff that you're looking for, and if that nice gradiated color isn't present in your footage, you'll need to recreate that as well. There are a couple different ways to do this, which will probably all end up with similar-looking results. 

Assuming the sky color gradient exists in the footage, can add a mask (heavily feathered) to the stars layer itself, and just lay that on top of the footage. If the stars layer doesn't already have transparency (where the stars aren't), you could use the Add or Lighten blending mode to composite the stars on top of your footage. Adjust the layer's Opacity and your mask feathering until you get the desired look.

If there are objects like the tree that extend beyond the "barrier" you're creating here, you could handle those on a case-by-case basis, using a strategy similar to what you've tried above. Duplicate your footage layer, trim to the range where that object is visible, extract it using effects, and then add it back (above the stars) using the Multiply blending mode, which will help any light-colored edges disappear. The stars will then be sandwiched in between the original footage (below) and anything that needs to overlap them (above).

If the original footage doesn't have that nice gradient in the sky, you'll need to create that using a similar strategy. Create a Solid comp-sized shape layer in the dark blue color you're after, then use a heavily-feathered mask and blending modes to get the look you're after. You could also do something similar using color correction effects, on a masked Adjustment Layer, or using the effect compositing options on a layer mask.

You could achieve something very similar using a black/white gradient as a matte layer for the elements above, but that may introduce some extra complexity you may not be looking for here. If you're finding the masks aren't a good solution because of the movement of the shot, mattes may be the better choice here. Without seeing the shot itself, it's difficult to make a good recommendation on that.

Let us know if you need additional explanation on these. Good luck!

MDLA Films
Participating Frequently
March 3, 2020

I replied to Rick_Gerard below but I'd appreciate any input you might have, I'm new to AE, primarily edit on Premiere and I've got a bit of a learning curve here but it's realy interesting the things you can do in AE. Feel free to reply to the post below if you've got any advice or tips.


Thank you!

Kyle Hamrick
Community Expert
Community Expert
March 3, 2020

Between our two posts, the steps are laid out very clearly, but I understand that only helps so much if you don't fully grasp what we're talking about yet. I'm inclined to agree with Rick that familiarizing yourself with the basics of AE is probably your best strategy here. 

That said, with the exception of the motion tracking, you could do all the compositing we've described directly in Premiere. (Technically, you could do the motion tracking in there as well, but manually, and it is likely to be painful.) If you're already comfortable with Premiere, you might see what you can accomplish in there via color correction and some basic masking. You could either push the shot into AE for the motion tracking, or at least that might help familiarize you with the concepts of what we're describing here.