Participating Frequently
January 23, 2024
Answered

How can I control the end position of two moving objects with one controller?

  • January 23, 2024
  • 1 reply
  • 309 views

I have one text box surrounded by two shape layers that look like brackets. The brackets are key framed to move from the center outward, revealing the text inside. I would like to create one controller, to adjust the end position of both brackets, so that I can change out the text at times and quickly reposition the brackets. I am having trouble with this, considering the brackets move in opposite directions. I don't need them to reposition automatically based on the text, but that would be an added bonus if there is an option for that as well.

This topic has been closed for replies.
Correct answer Rick Gerard

Use one slider control. Subtract the value from the X position value on the left bracket and add the X value to the bracket on the right. 


If you have center-justified text, you can use sourceRectAtTime.width/2 to give you a center starting point for the text layer, then add some padding. 


You can also use a simple sourceRectAtTime expression on the Text layer's anchor point to perfectly center the anchor point on the text layer's x value and leave the baseline (y value) alone so defenders won't make the text layer move up and down.  


Add a Controls Null and two sliders to the null. Rename the sliders "Width Slider" and "Padding."


The expressions are pretty simple. Here's how I would set up the comp. Start with the Anchor Point on the text layer and add this expression to put the Anchor Point in the center of the text layer.


box = sourceRectAtTime();
x = box.width/2 + box.left;
y = box.height/2 + box.top;
[x, y]


Then, you add your bracket layers (shape layers) and put them below the text layer. Add these expressions to Transform/Anchor Point and Transform/Position;


// both bracket layers Transform/Anchor Point
box = sourceRectAtTime();
x = box.width/2 + box.left;
y = box.top + box.height/2;
[x, y]

// Right bracket Transform/Position;
txt = thisComp.layer(index - 1);
box = txt.sourceRectAtTime();
pos = txt.position;   
ctrl = thisComp.layer("Controller").effect("Width Slider")("Slider")/100;
pad = thisComp.layer("Controller").effect("Padding")("Slider") * ctrl;
mov = box.width/2 * ctrl;
x = pos[0] + mov + pad;
[x,  pos[1]]

// Left bracket transform/position
txt = thisComp.layer(index - 2);
box = txt.sourceRectAtTime();
pos = txt.position;   
ctrl = thisComp.layer("Controller").effect("Width Slider")("Slider")/100;
pad = thisComp.layer("Controller").effect("Padding")("Slider") * ctrl;
mov = box.width/2 * ctrl;
x = pos[0] - mov - pad;
[x,  pos[1]]


With the Width slider at zero, the brackets should be touching each other. Adjusting the Width slider will move the brackets to the left and right.


The last step is to add a Shape Layer Filled rectangle to the timeline at the bottom by double-clicking the Parametric Rectangle tool. Name it Text Matte. Add these expressions to the layer:


// Contents/Rectangle 1/Rectangle Path 1/Size
txt = thisComp.layer("Your text layer");
box = txt.sourceRectAtTime();
ctrl = thisComp.layer("Controller").effect("Width Slider")("Slider")/100;
w = box.width * ctrl;
h = box.height;
[w * 1.05, h * 1.25];

// Transform/Position
thisComp.layer("Your text layer").position;


You should get a rectangle that is the same size as the text layer. I added a half percent to the width and twenty-five percent to the height of the Rectangle Path 1/Size to give it a little padding. Set the Text Matte layer as an Alpha Track Matte for the text layer. 


You should get something like this:
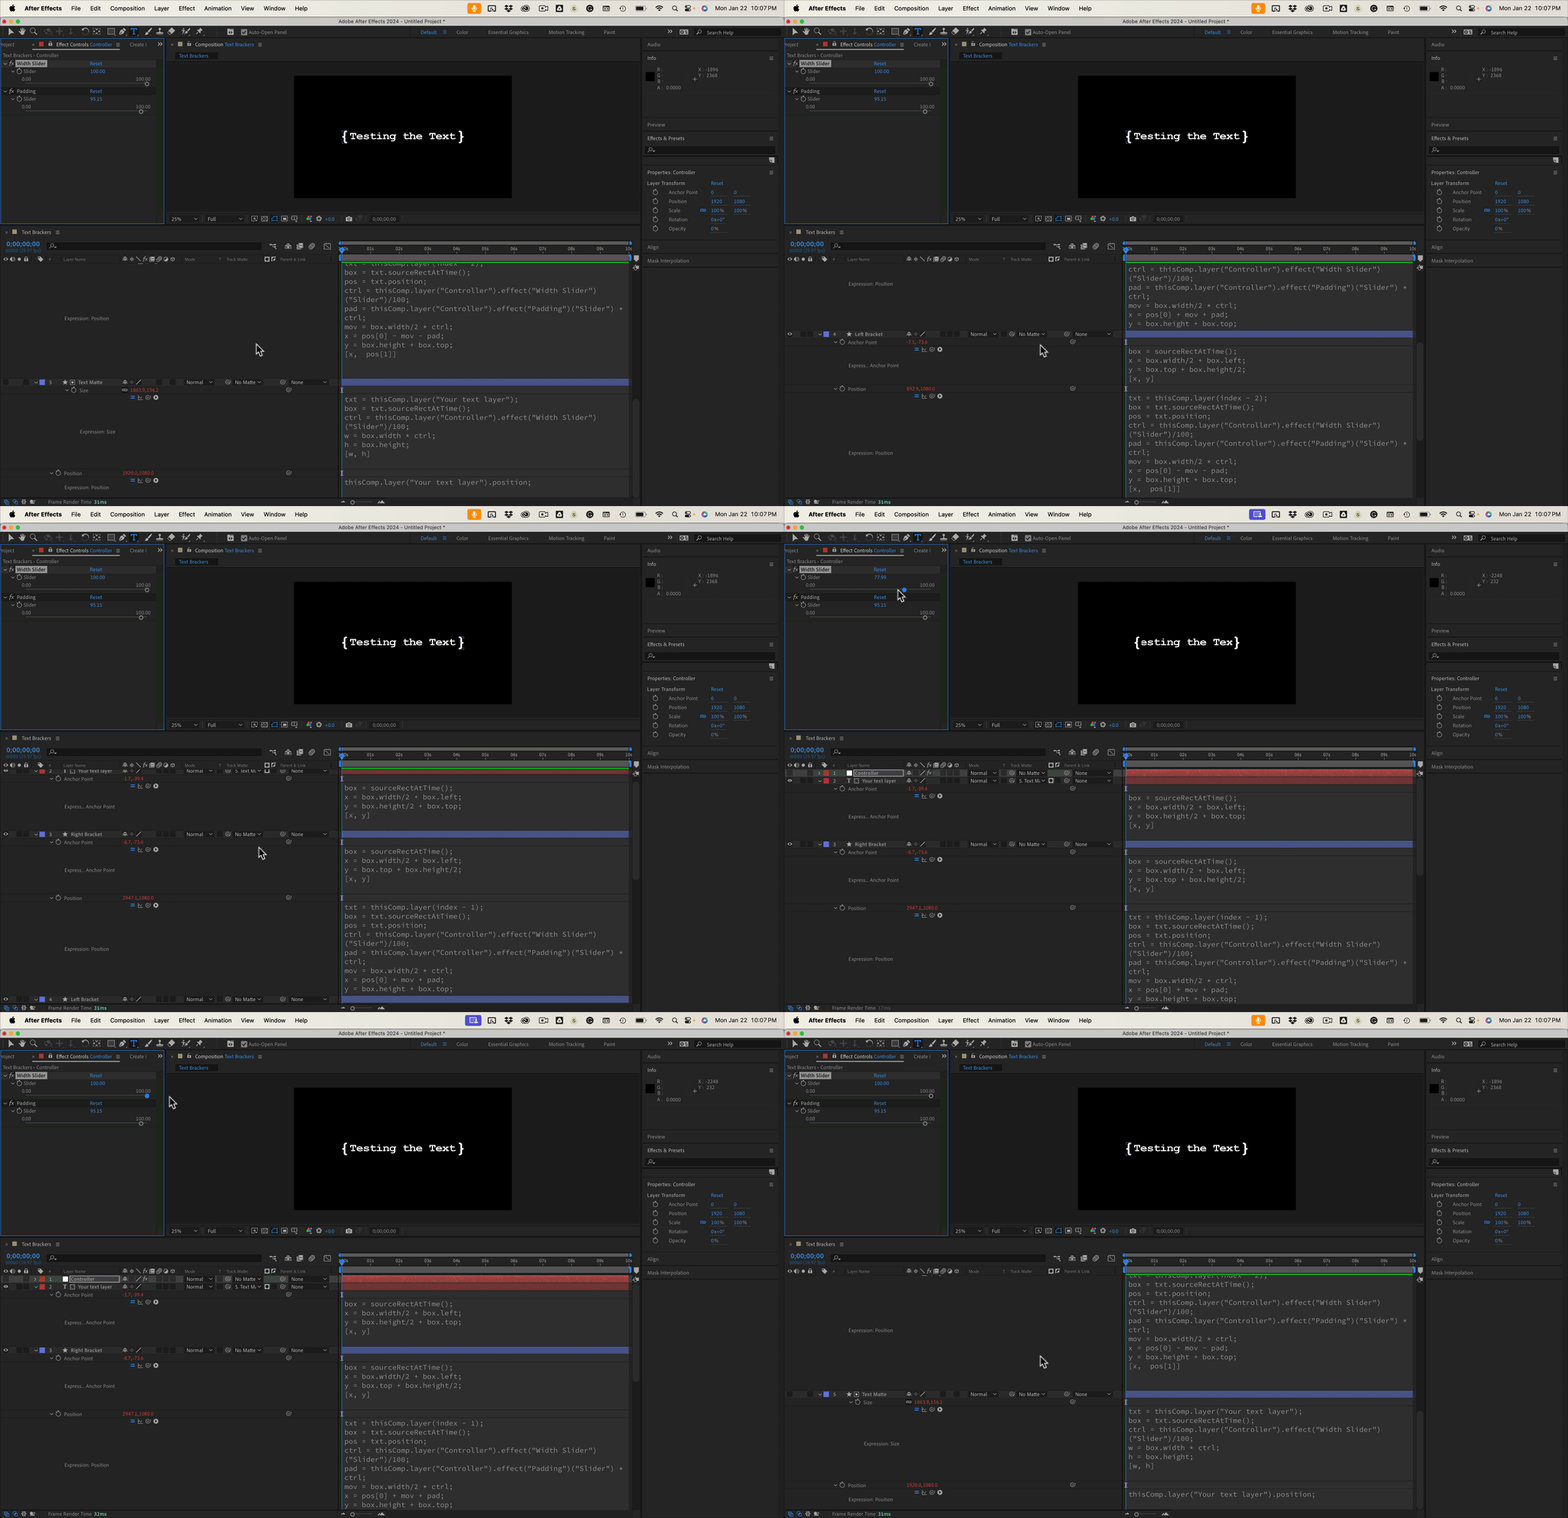
I've included an AE 2023 file for you to look at. This should get you started. 

1 reply

Rick GerardCommunity ExpertCorrect answer
Community Expert
January 23, 2024

Use one slider control. Subtract the value from the X position value on the left bracket and add the X value to the bracket on the right. 


If you have center-justified text, you can use sourceRectAtTime.width/2 to give you a center starting point for the text layer, then add some padding. 


You can also use a simple sourceRectAtTime expression on the Text layer's anchor point to perfectly center the anchor point on the text layer's x value and leave the baseline (y value) alone so defenders won't make the text layer move up and down.  


Add a Controls Null and two sliders to the null. Rename the sliders "Width Slider" and "Padding."


The expressions are pretty simple. Here's how I would set up the comp. Start with the Anchor Point on the text layer and add this expression to put the Anchor Point in the center of the text layer.


box = sourceRectAtTime();
x = box.width/2 + box.left;
y = box.height/2 + box.top;
[x, y]


Then, you add your bracket layers (shape layers) and put them below the text layer. Add these expressions to Transform/Anchor Point and Transform/Position;


// both bracket layers Transform/Anchor Point
box = sourceRectAtTime();
x = box.width/2 + box.left;
y = box.top + box.height/2;
[x, y]

// Right bracket Transform/Position;
txt = thisComp.layer(index - 1);
box = txt.sourceRectAtTime();
pos = txt.position;   
ctrl = thisComp.layer("Controller").effect("Width Slider")("Slider")/100;
pad = thisComp.layer("Controller").effect("Padding")("Slider") * ctrl;
mov = box.width/2 * ctrl;
x = pos[0] + mov + pad;
[x,  pos[1]]

// Left bracket transform/position
txt = thisComp.layer(index - 2);
box = txt.sourceRectAtTime();
pos = txt.position;   
ctrl = thisComp.layer("Controller").effect("Width Slider")("Slider")/100;
pad = thisComp.layer("Controller").effect("Padding")("Slider") * ctrl;
mov = box.width/2 * ctrl;
x = pos[0] - mov - pad;
[x,  pos[1]]


With the Width slider at zero, the brackets should be touching each other. Adjusting the Width slider will move the brackets to the left and right.


The last step is to add a Shape Layer Filled rectangle to the timeline at the bottom by double-clicking the Parametric Rectangle tool. Name it Text Matte. Add these expressions to the layer:


// Contents/Rectangle 1/Rectangle Path 1/Size
txt = thisComp.layer("Your text layer");
box = txt.sourceRectAtTime();
ctrl = thisComp.layer("Controller").effect("Width Slider")("Slider")/100;
w = box.width * ctrl;
h = box.height;
[w * 1.05, h * 1.25];

// Transform/Position
thisComp.layer("Your text layer").position;


You should get a rectangle that is the same size as the text layer. I added a half percent to the width and twenty-five percent to the height of the Rectangle Path 1/Size to give it a little padding. Set the Text Matte layer as an Alpha Track Matte for the text layer. 


You should get something like this:

I've included an AE 2023 file for you to look at. This should get you started. 

Participating Frequently
January 23, 2024

Fantastic. Thank you so much for the help Rick. This worked perfectly. I appreciate it.
