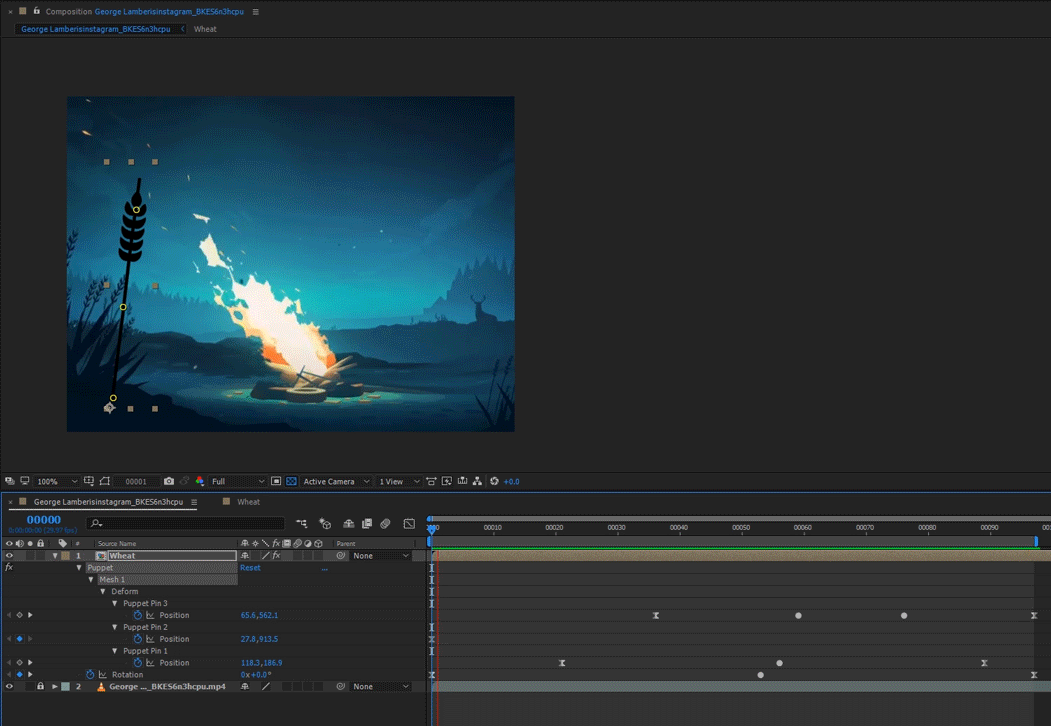
my approach would be going straight forward on this one. keyframes and puppet (the go-to tool for bending or flexiblitiy of pixels). this will probably give you the fastest results and the effect would look very good. how realsitic it will look is up to you knowing how to animate according to animation principles.
just place your wheat layer in your comp and use puppet to create realistic overshoot and undershoot animation. this is really more related to understanding the principles of animation (anticipation and follow through mostly). once you know that you can set your keyframes accordingly and either use keyframing of the path while also moving the wheat's head, or use puppet like in this example.
in the reference there is definitely a displacement map for the heat distortion (on top of the whole composite) and this can be done in many ways. one easy way is using the turbulent displace effect as an adjustment layer with a mask. if this is not realistic enough you could use the actual smoke that is composited in the scene or even generated particle simluation effect as a displacement map and using displacement map effect using that layer as a map.
here's a tutorial about a plugin but it also explains the idea of heat distortion:
Heat Distortion Plug-in Preview - YouTube
more about the puppet tool:
Animating with Puppet tools in After Effects
