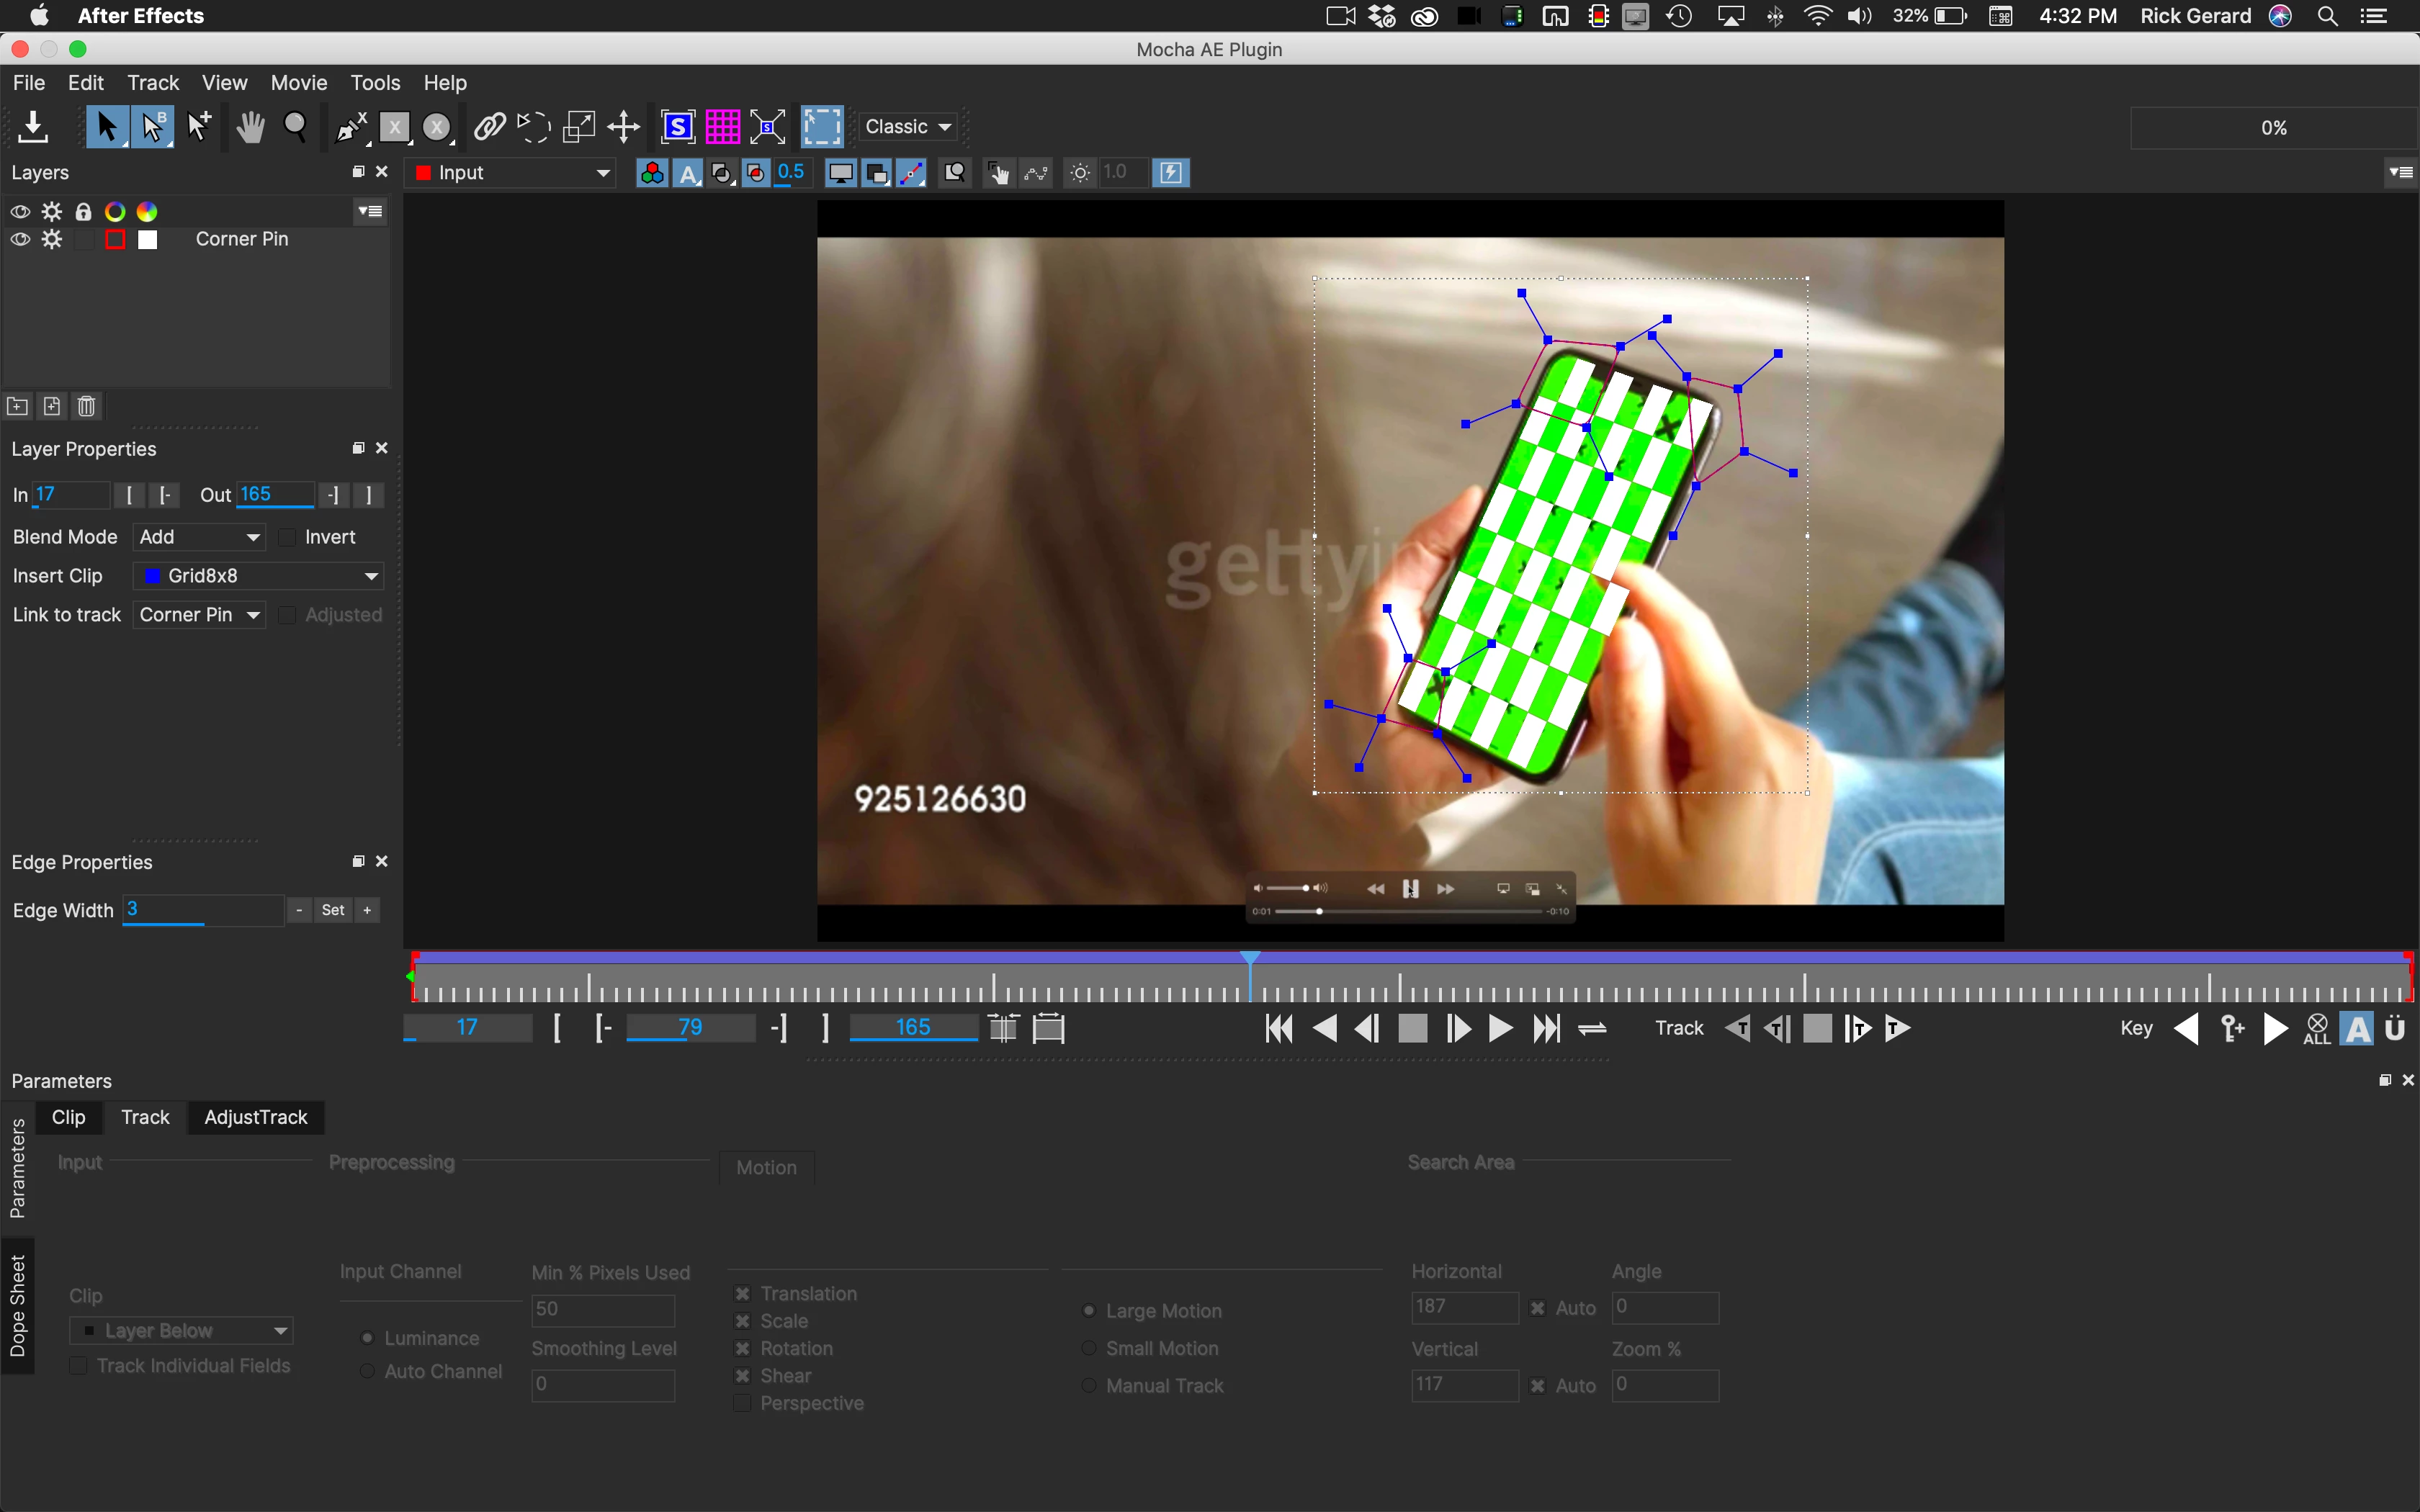
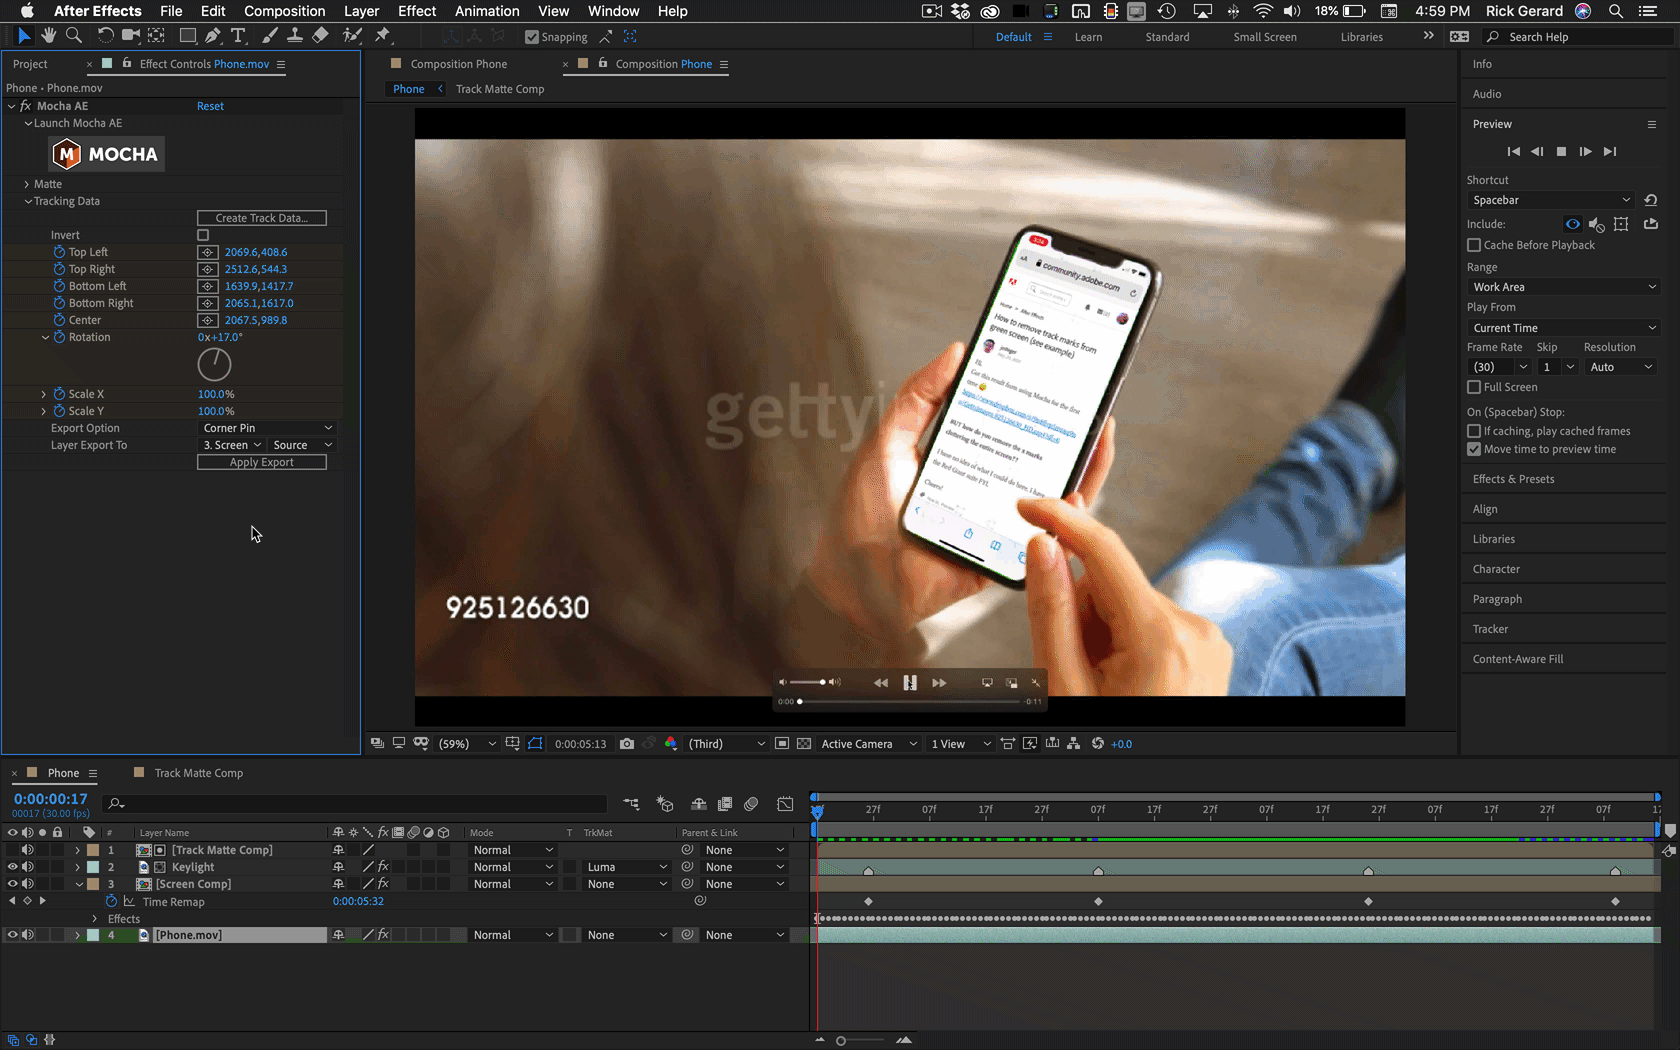
Rather than create a complete tutorial I took a few minutes to show one process for replacing the screen on a phone when there are obnoxious tracking markers on the phone. I assume you already know how to set up an efficient track in Mocha AE using multiple splines to eliminate errors caused by the moving fingers and verify the track by showing the surface, adding an image like the 8X8 grid, then saving the tracking data in the footage layer so it can be used later.
The next step is to look at the problem of the black tracking markers. Because they are black and there is not a lot of black in the fingers as they move over the tracking markers Extract from the Keying effects, plus some Gaussian blur plus the Black and White filter give us a good clean black and white screen that we can use as a luma matte to get rid of the black tracking marks.
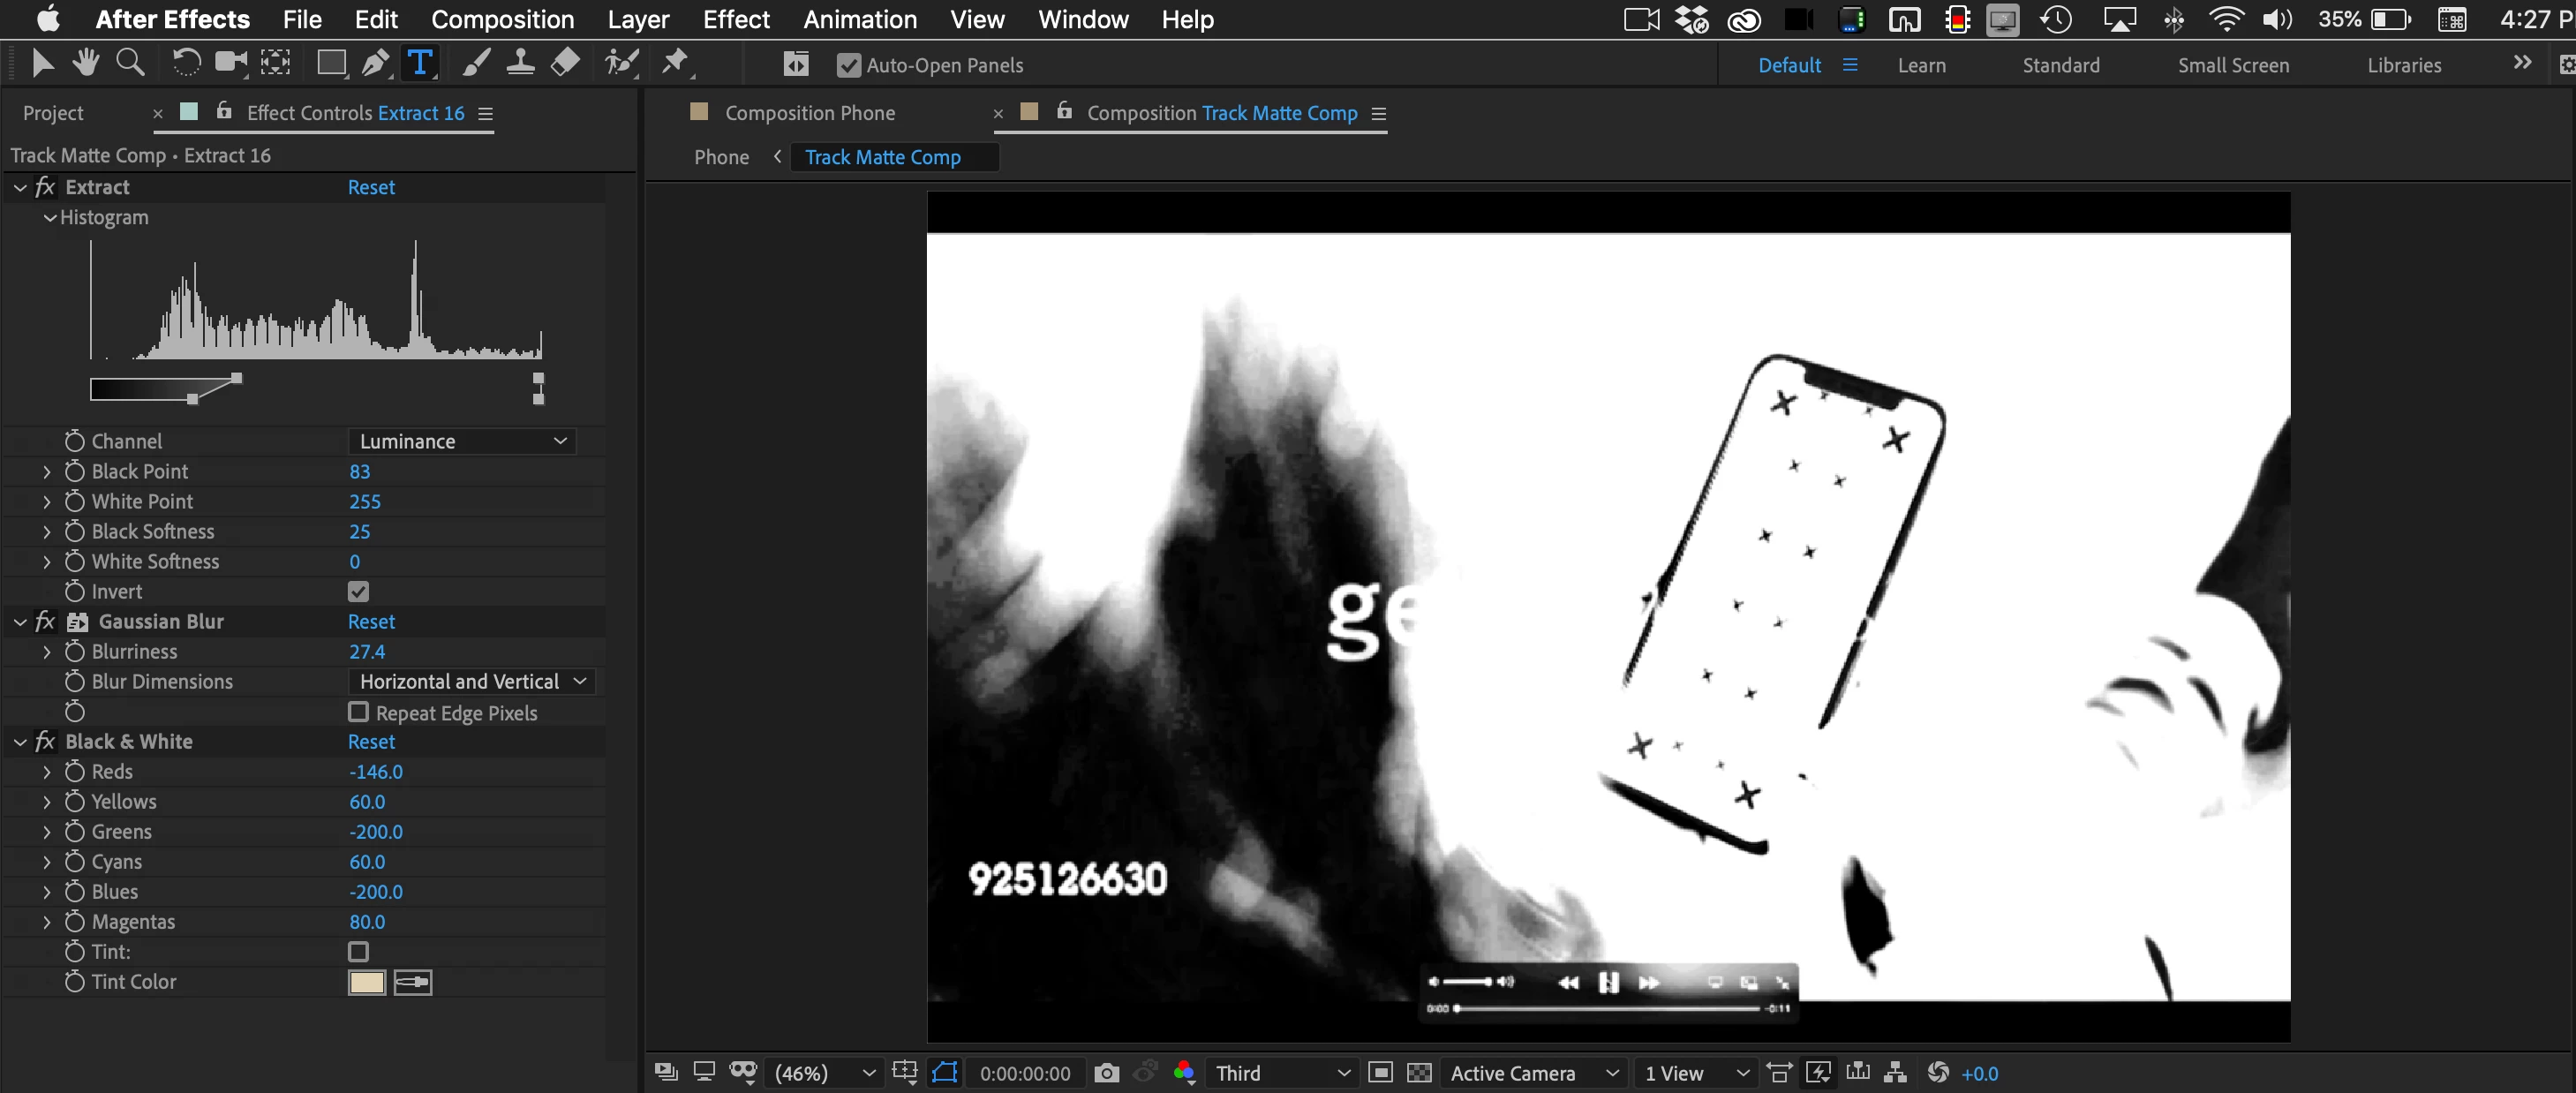
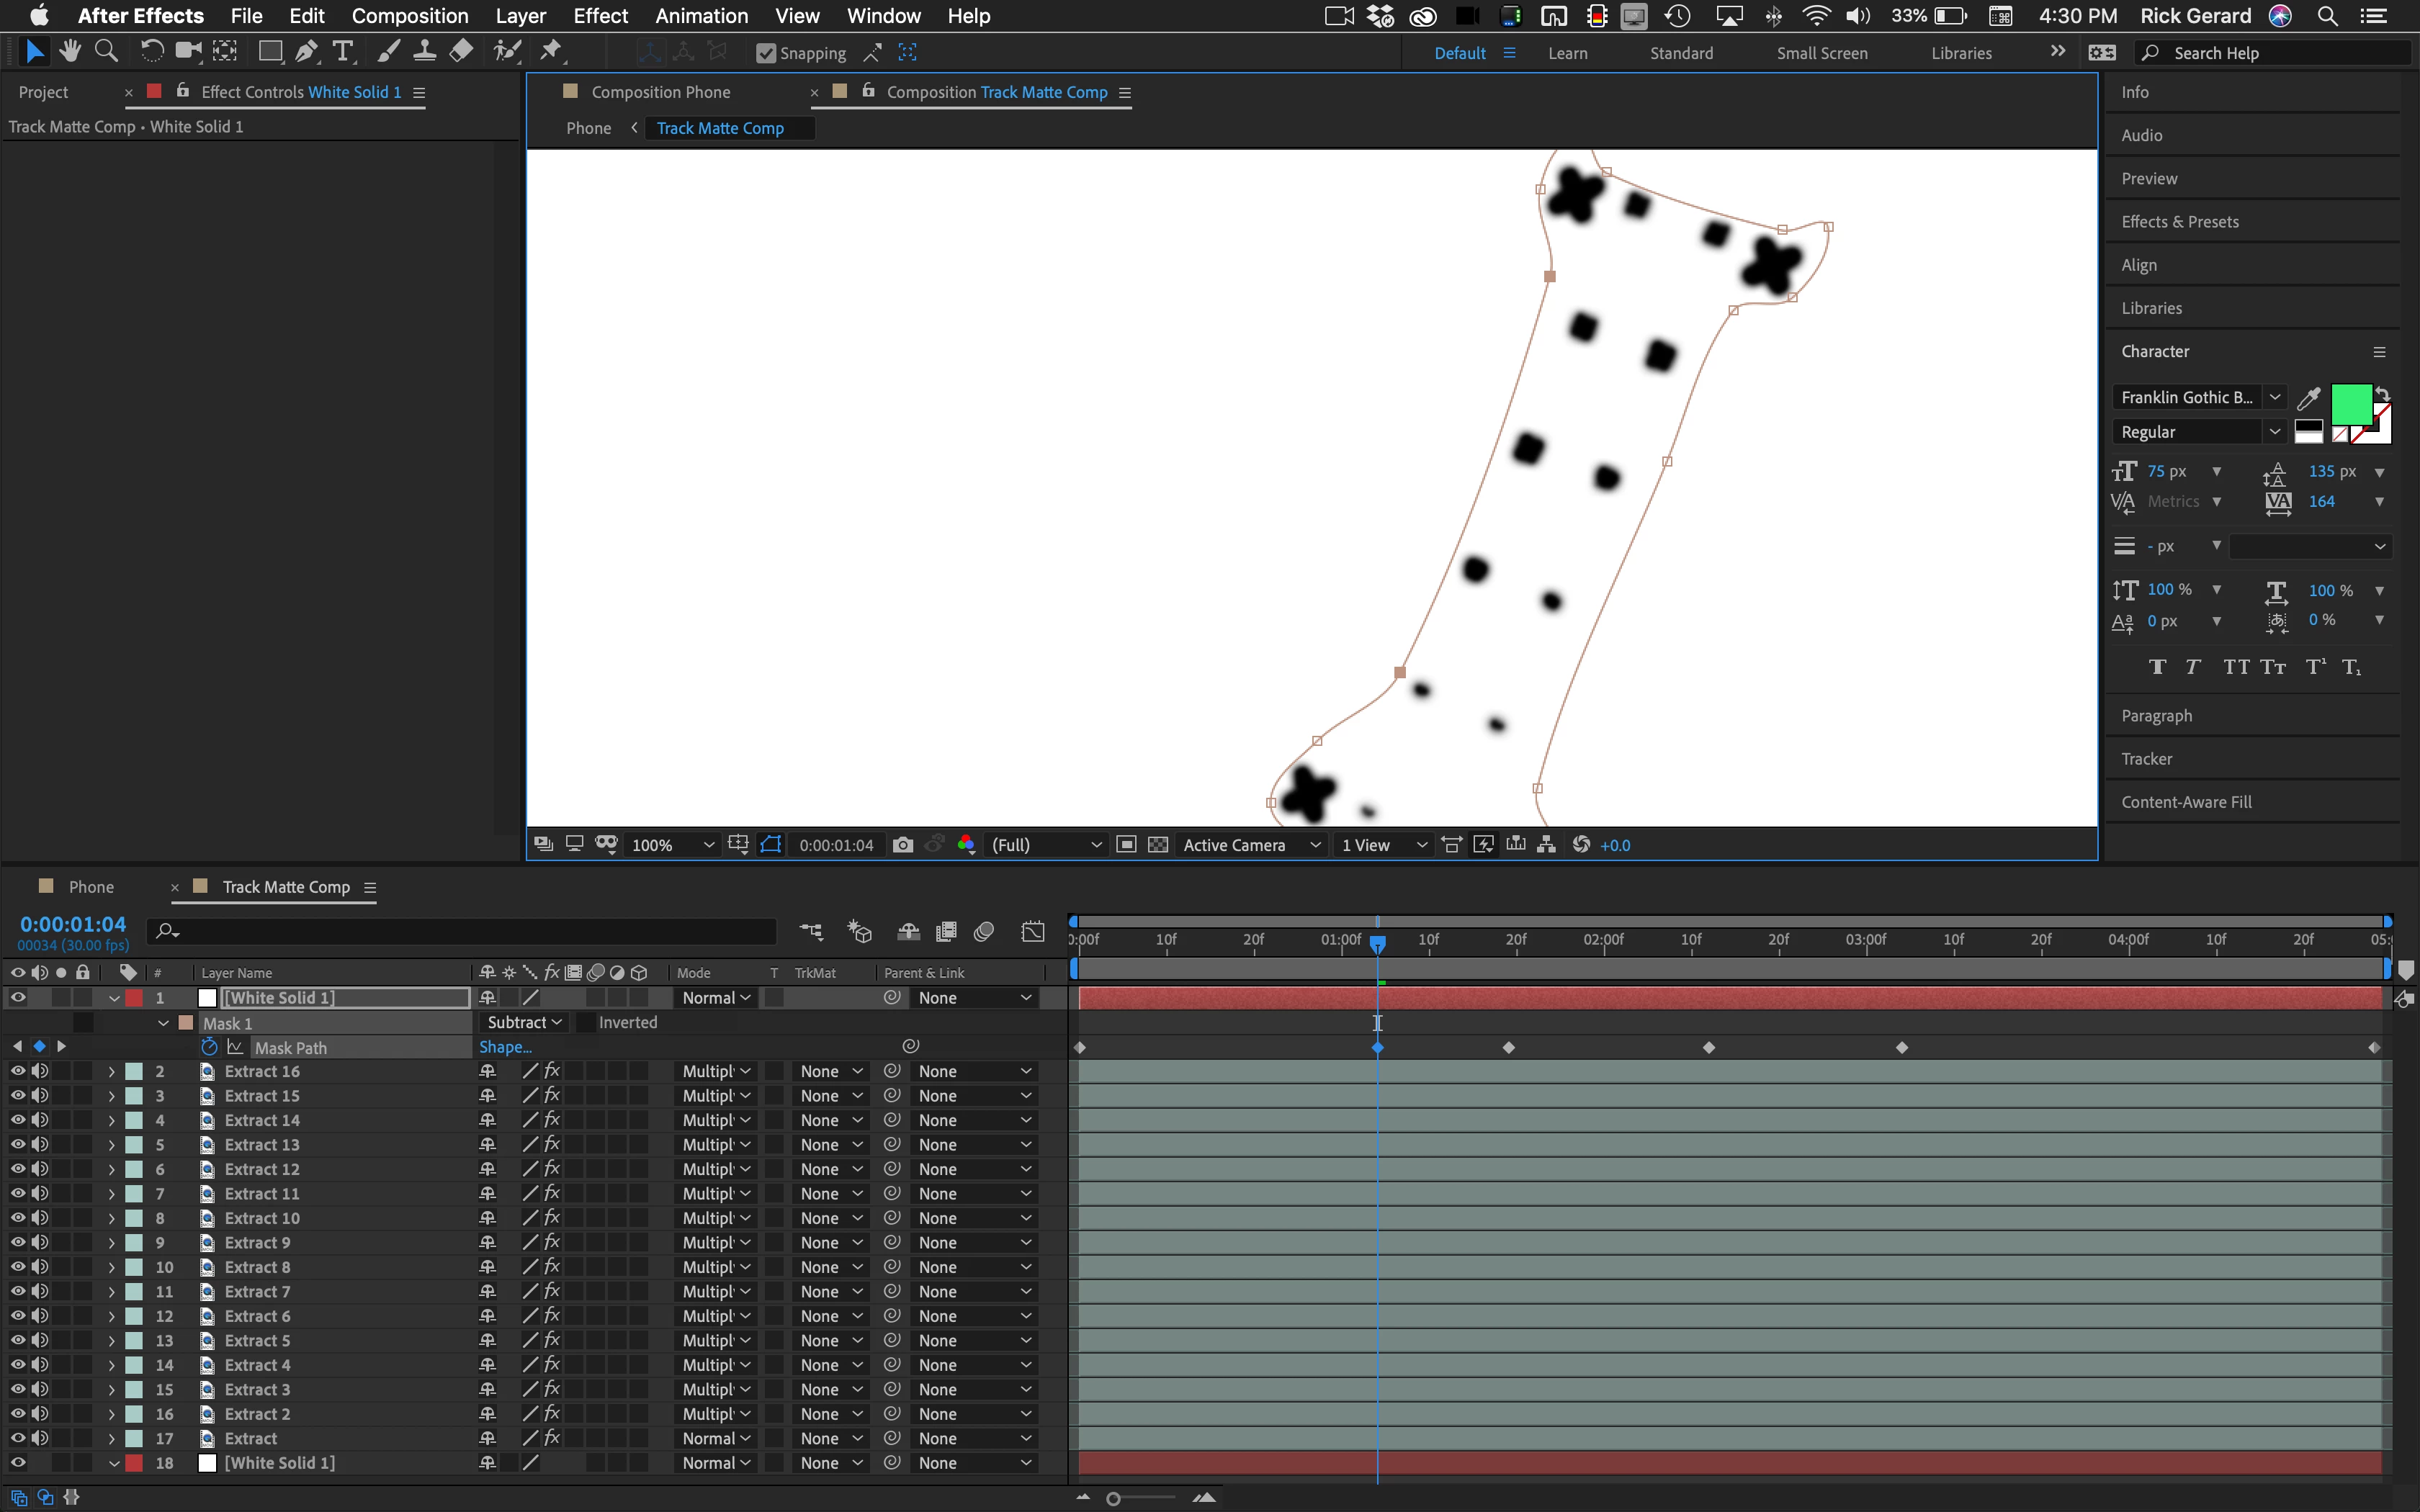
Duplicating the extract layer, setting the blend mode of the duplicates to Multiply, increasing the blur for each copy and adding a white solid with an animated mask above and a white solid below give us a clean black and white layer we can use as a luma matte with the ability to refine the edge by the number of copies and the amount of blur. For this low-quality footage, it took 17 copies to generate a good track matte for the markers.
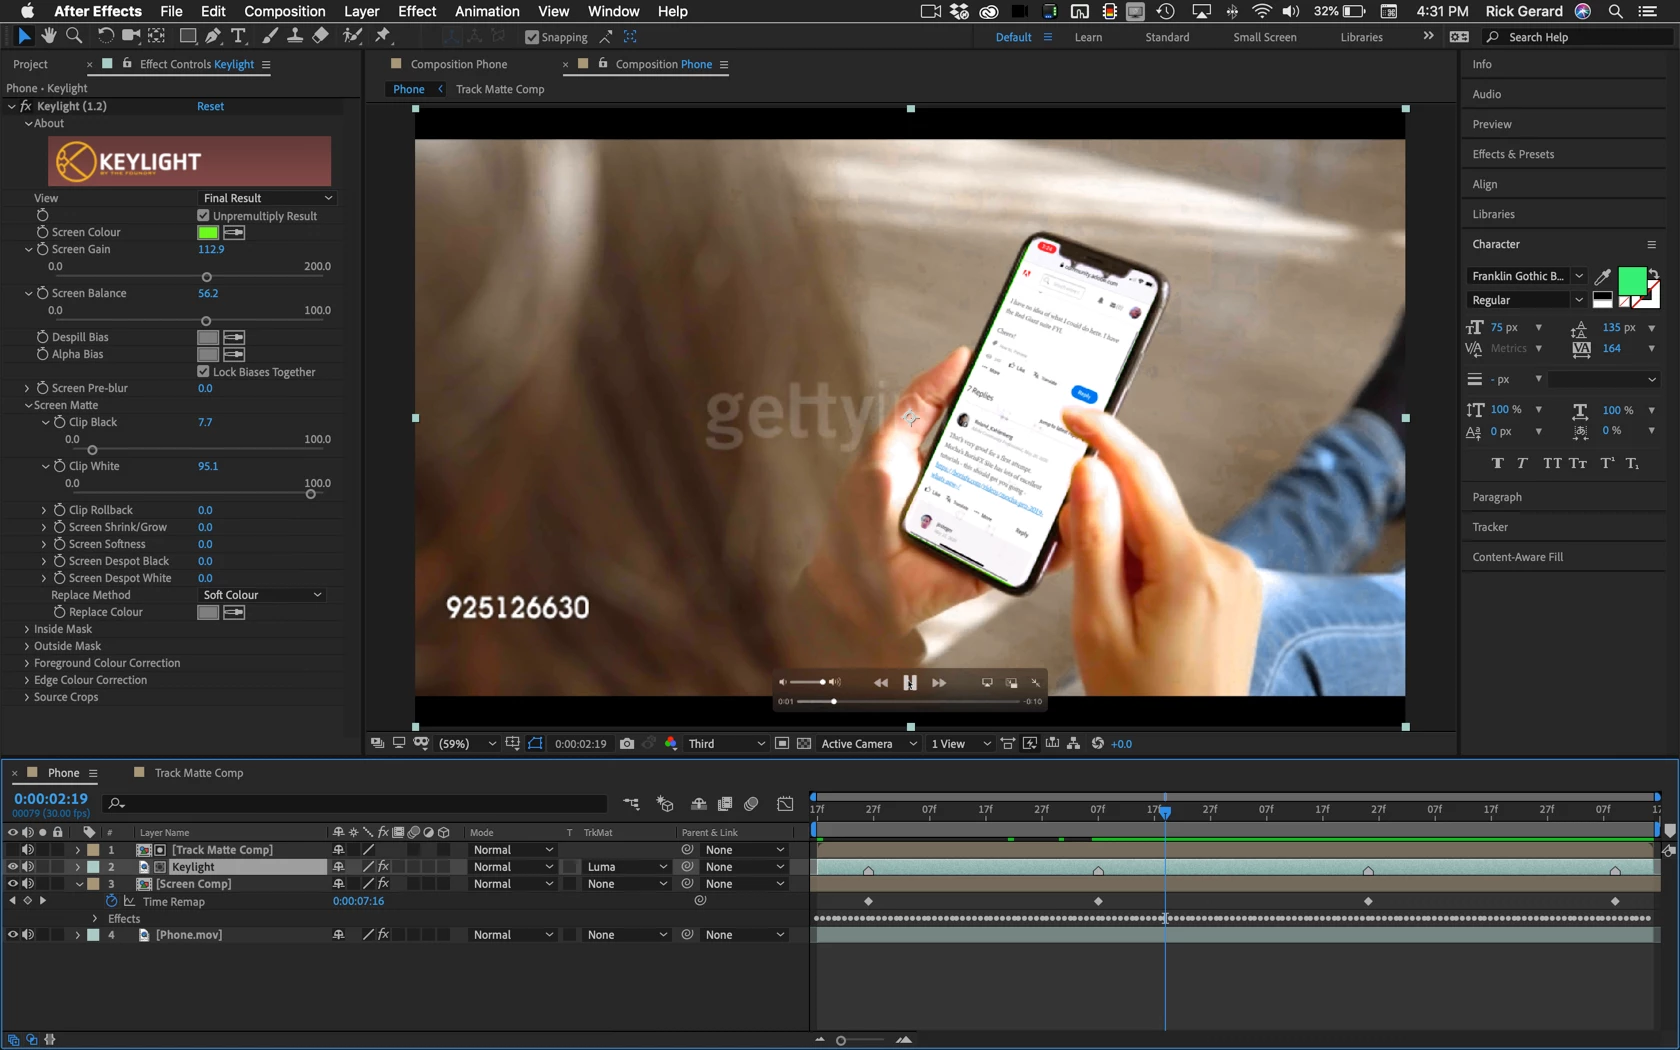
Drop that Track Matte comp into the Main comp above the footage you need to key and set it as a Luma Track Matte then fine-tuning Keylight removes the green and the black marks. In this comp, I only had to set 6 keyframes for the mask in the top white solid to get a really good matte.
The final composite includes the Track Matte, some markers that tell me when the screen should move, a few time remapping keyframes to fix timing errors, and the comp is now ready for the final color grading.
If there are tracking markers on footage on greenscreen footage it is almost always more efficient to try and figure out a procedural way to create a matte for those markers. In this case, Extract was the most efficient tool. If the shot was different you may have had to do some additional roto over the fingers or use different techniques for removing the track marks. I had to do one a few years ago where they put blue track markers on a green screen so 2 copies of Keylight with some outside masks did the trick. For screen replacements, I always prefer that the phone just has a medium to dark gray or colored screen. Then creating the track matte is the easiest part and you can pick up reflections from the screen to add realism. A very short animated gif that shows the first test render. Timing needs improvement but the whole project and writing the post took me only about 15 minutes. I did it while I was having lunch.
Did you notice that I put this thread on the screen?
