Participant
June 18, 2019
Answered

Morphing the letter a (i'm new to after effects please help)

  • June 18, 2019
  • 1 reply
  • 4482 views

Hi After Effects Community!

So I just started out using Ae for a uni project.

I was trying to morph the letter a from one font into another font.

I tried doing this by following this tutorial How to Morph TEXT in After Effects CC (Tutorial) - T026 - YouTube

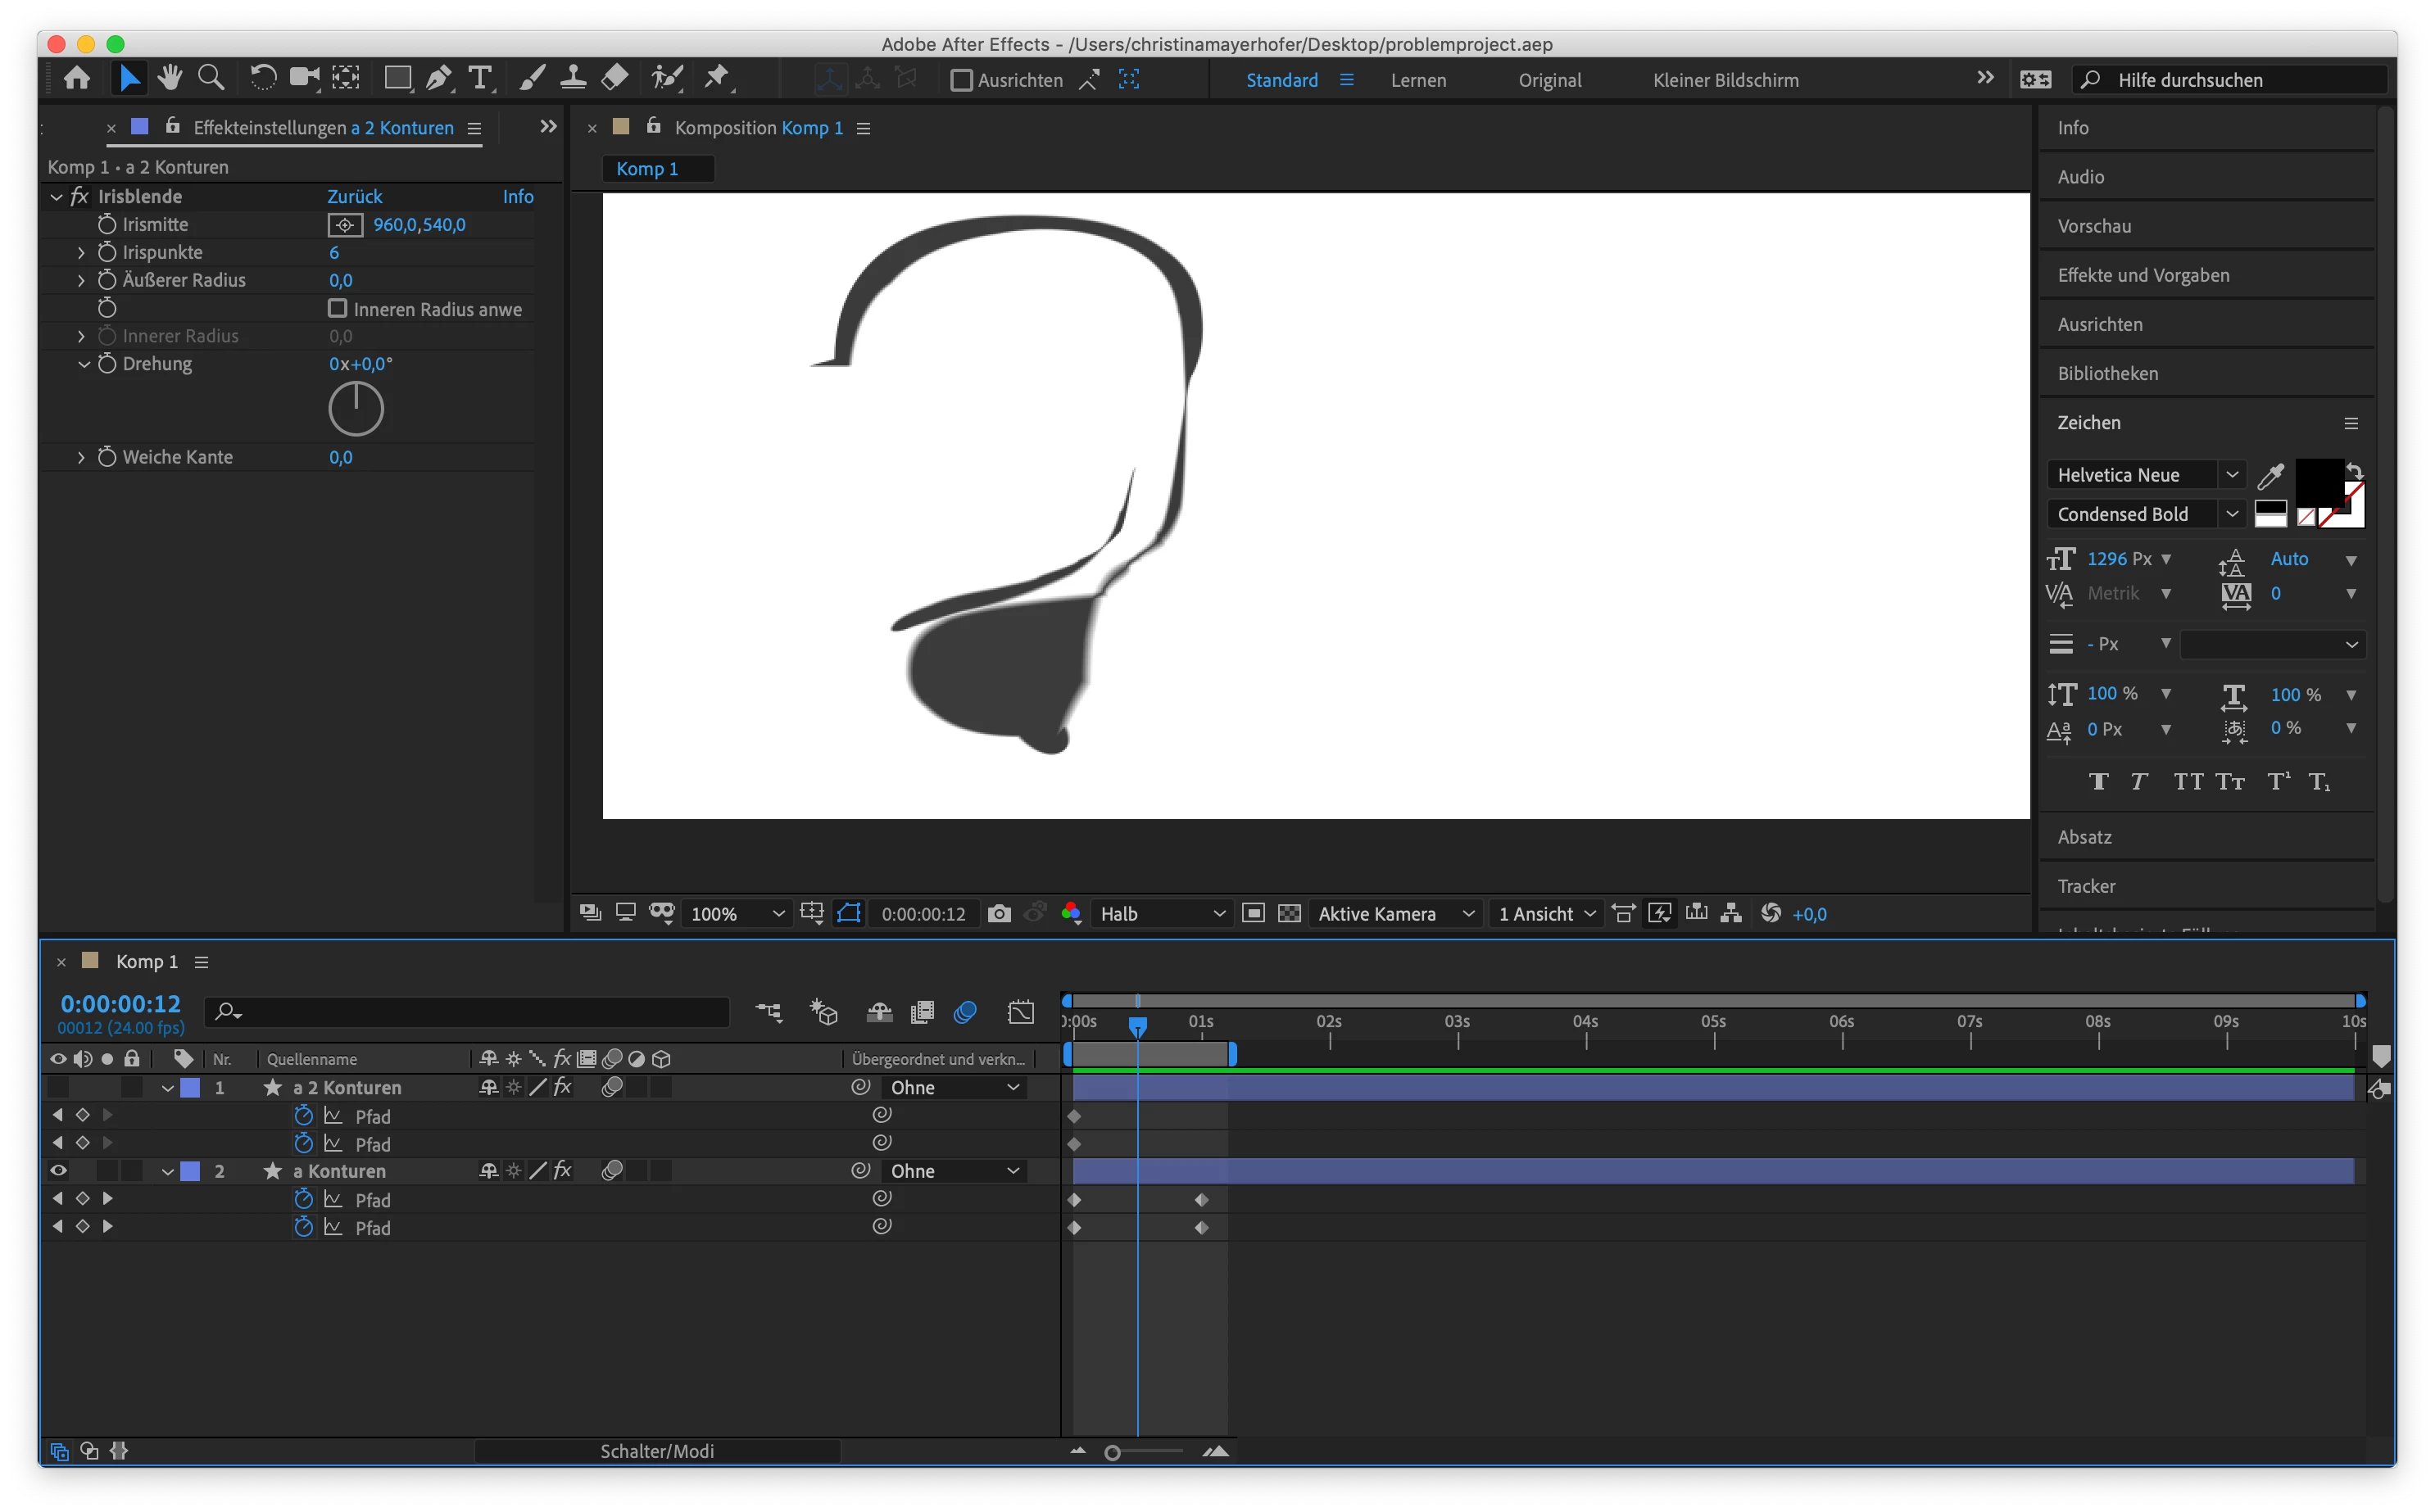
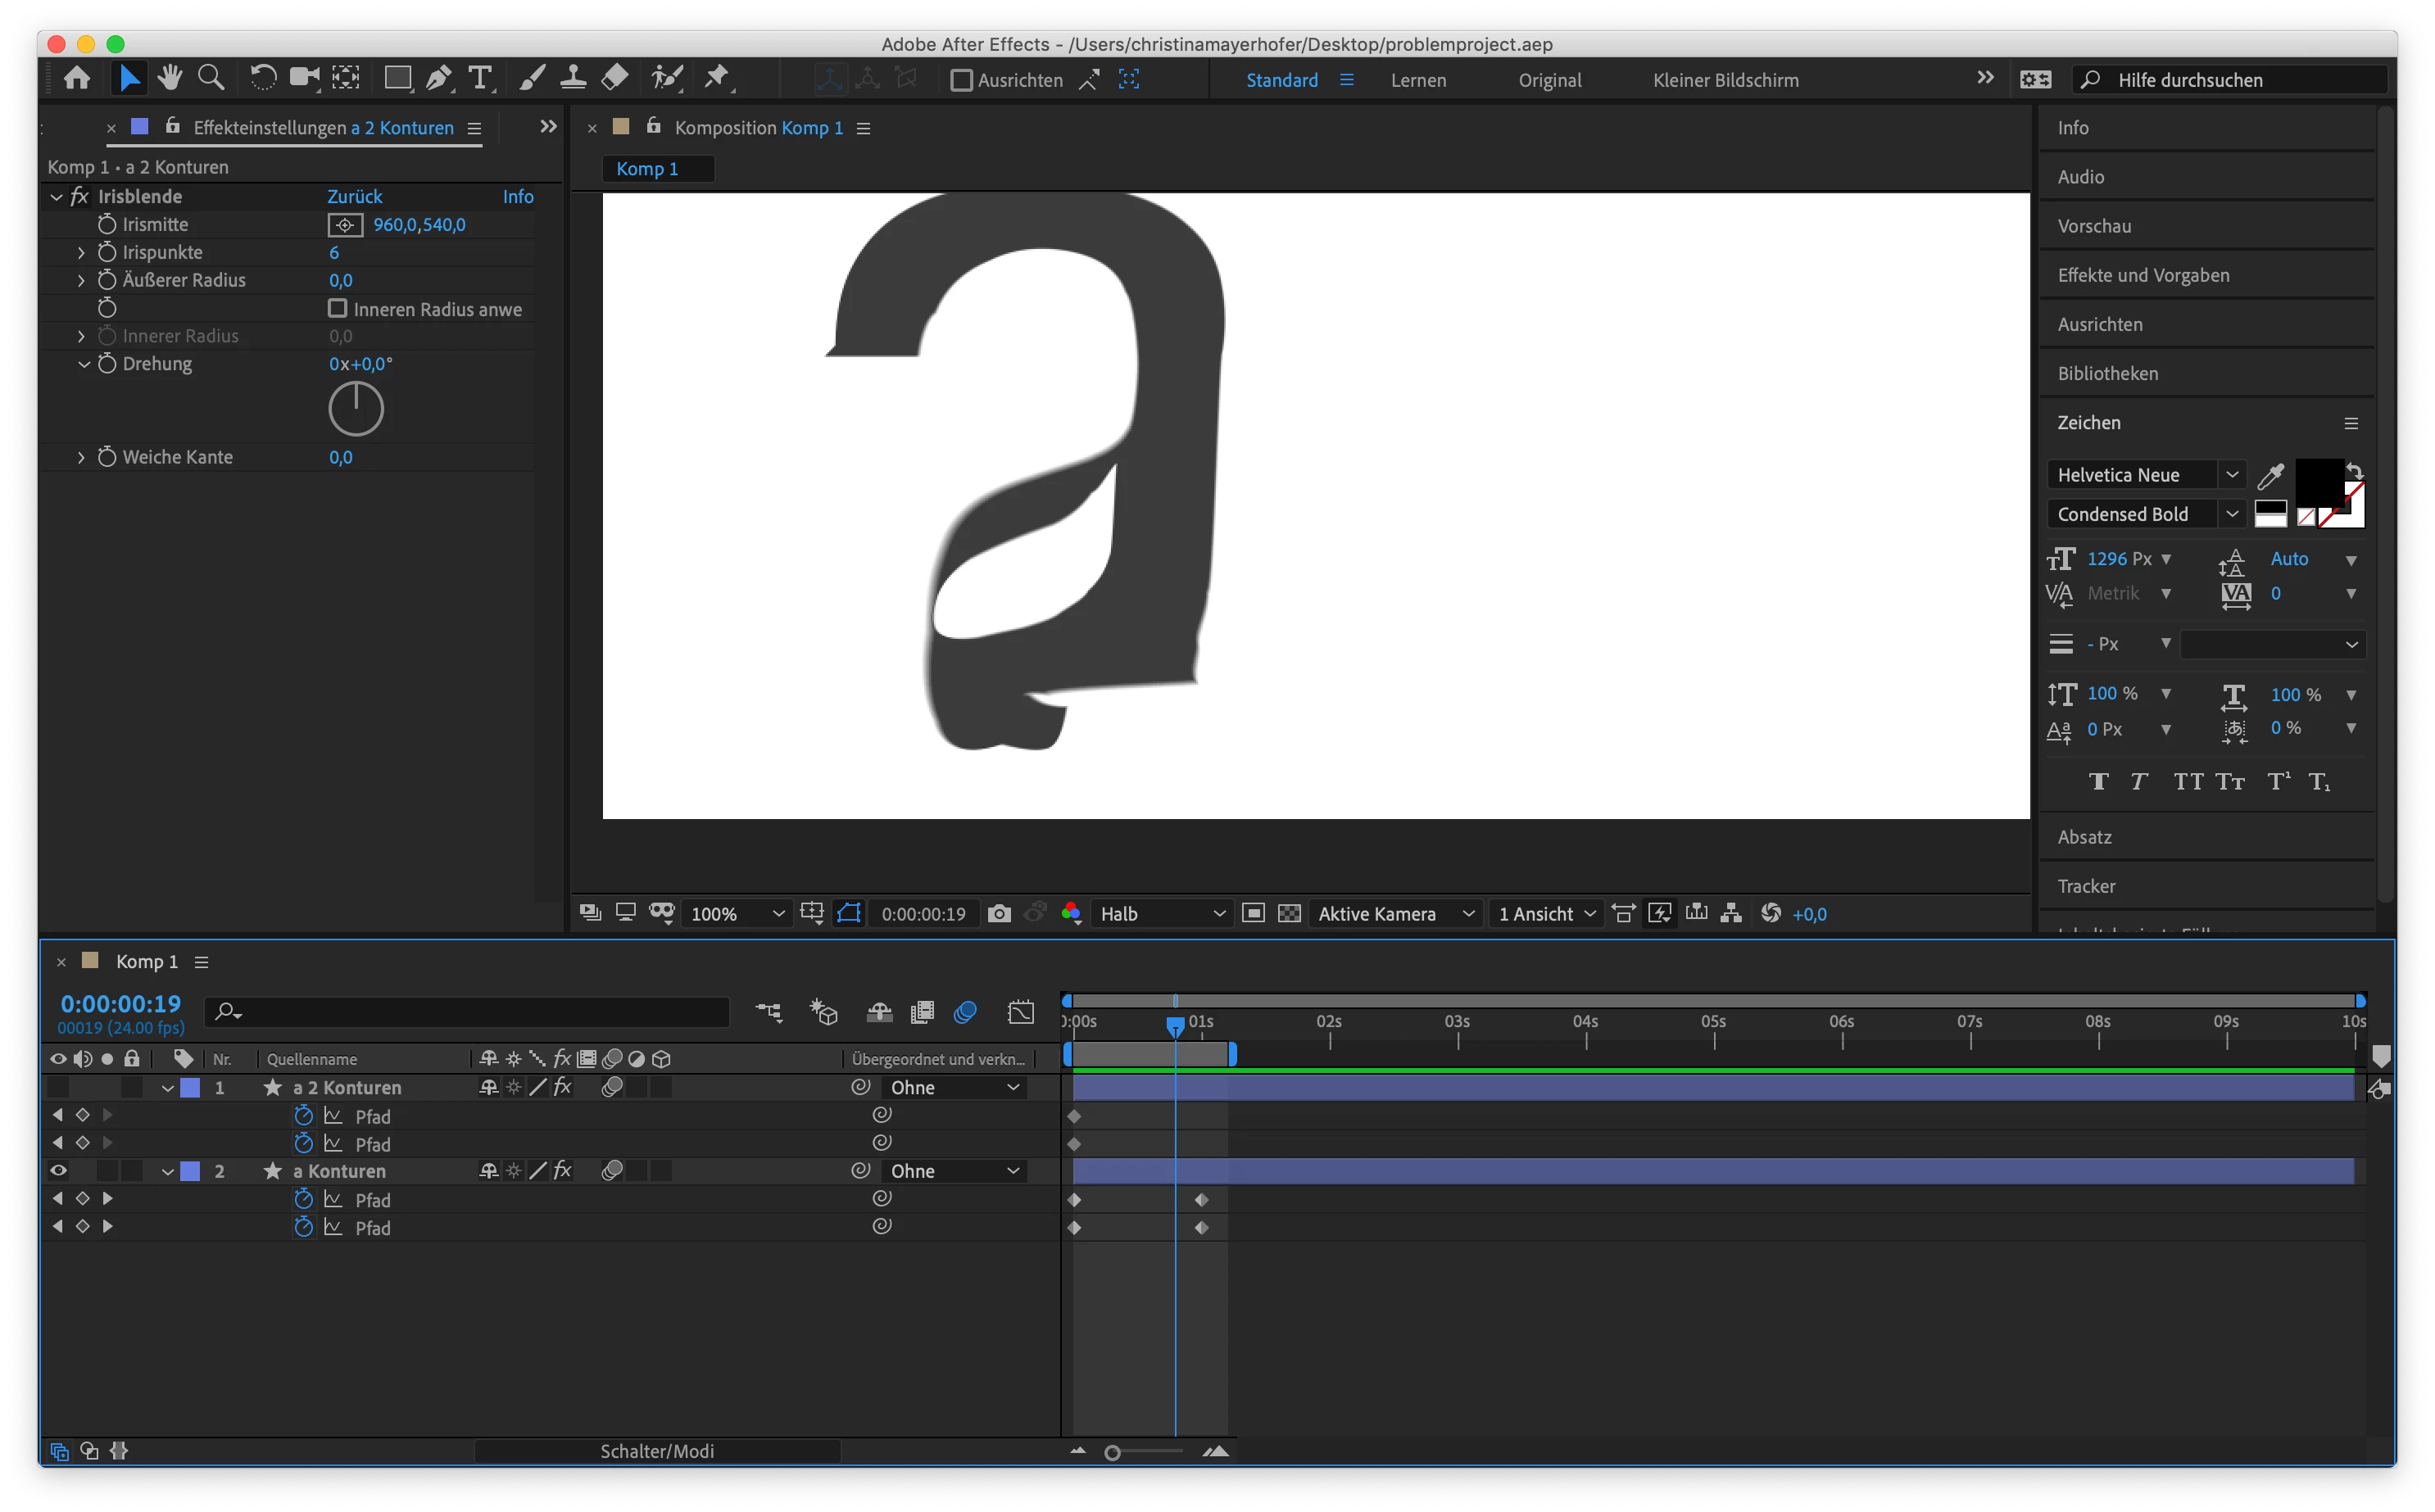
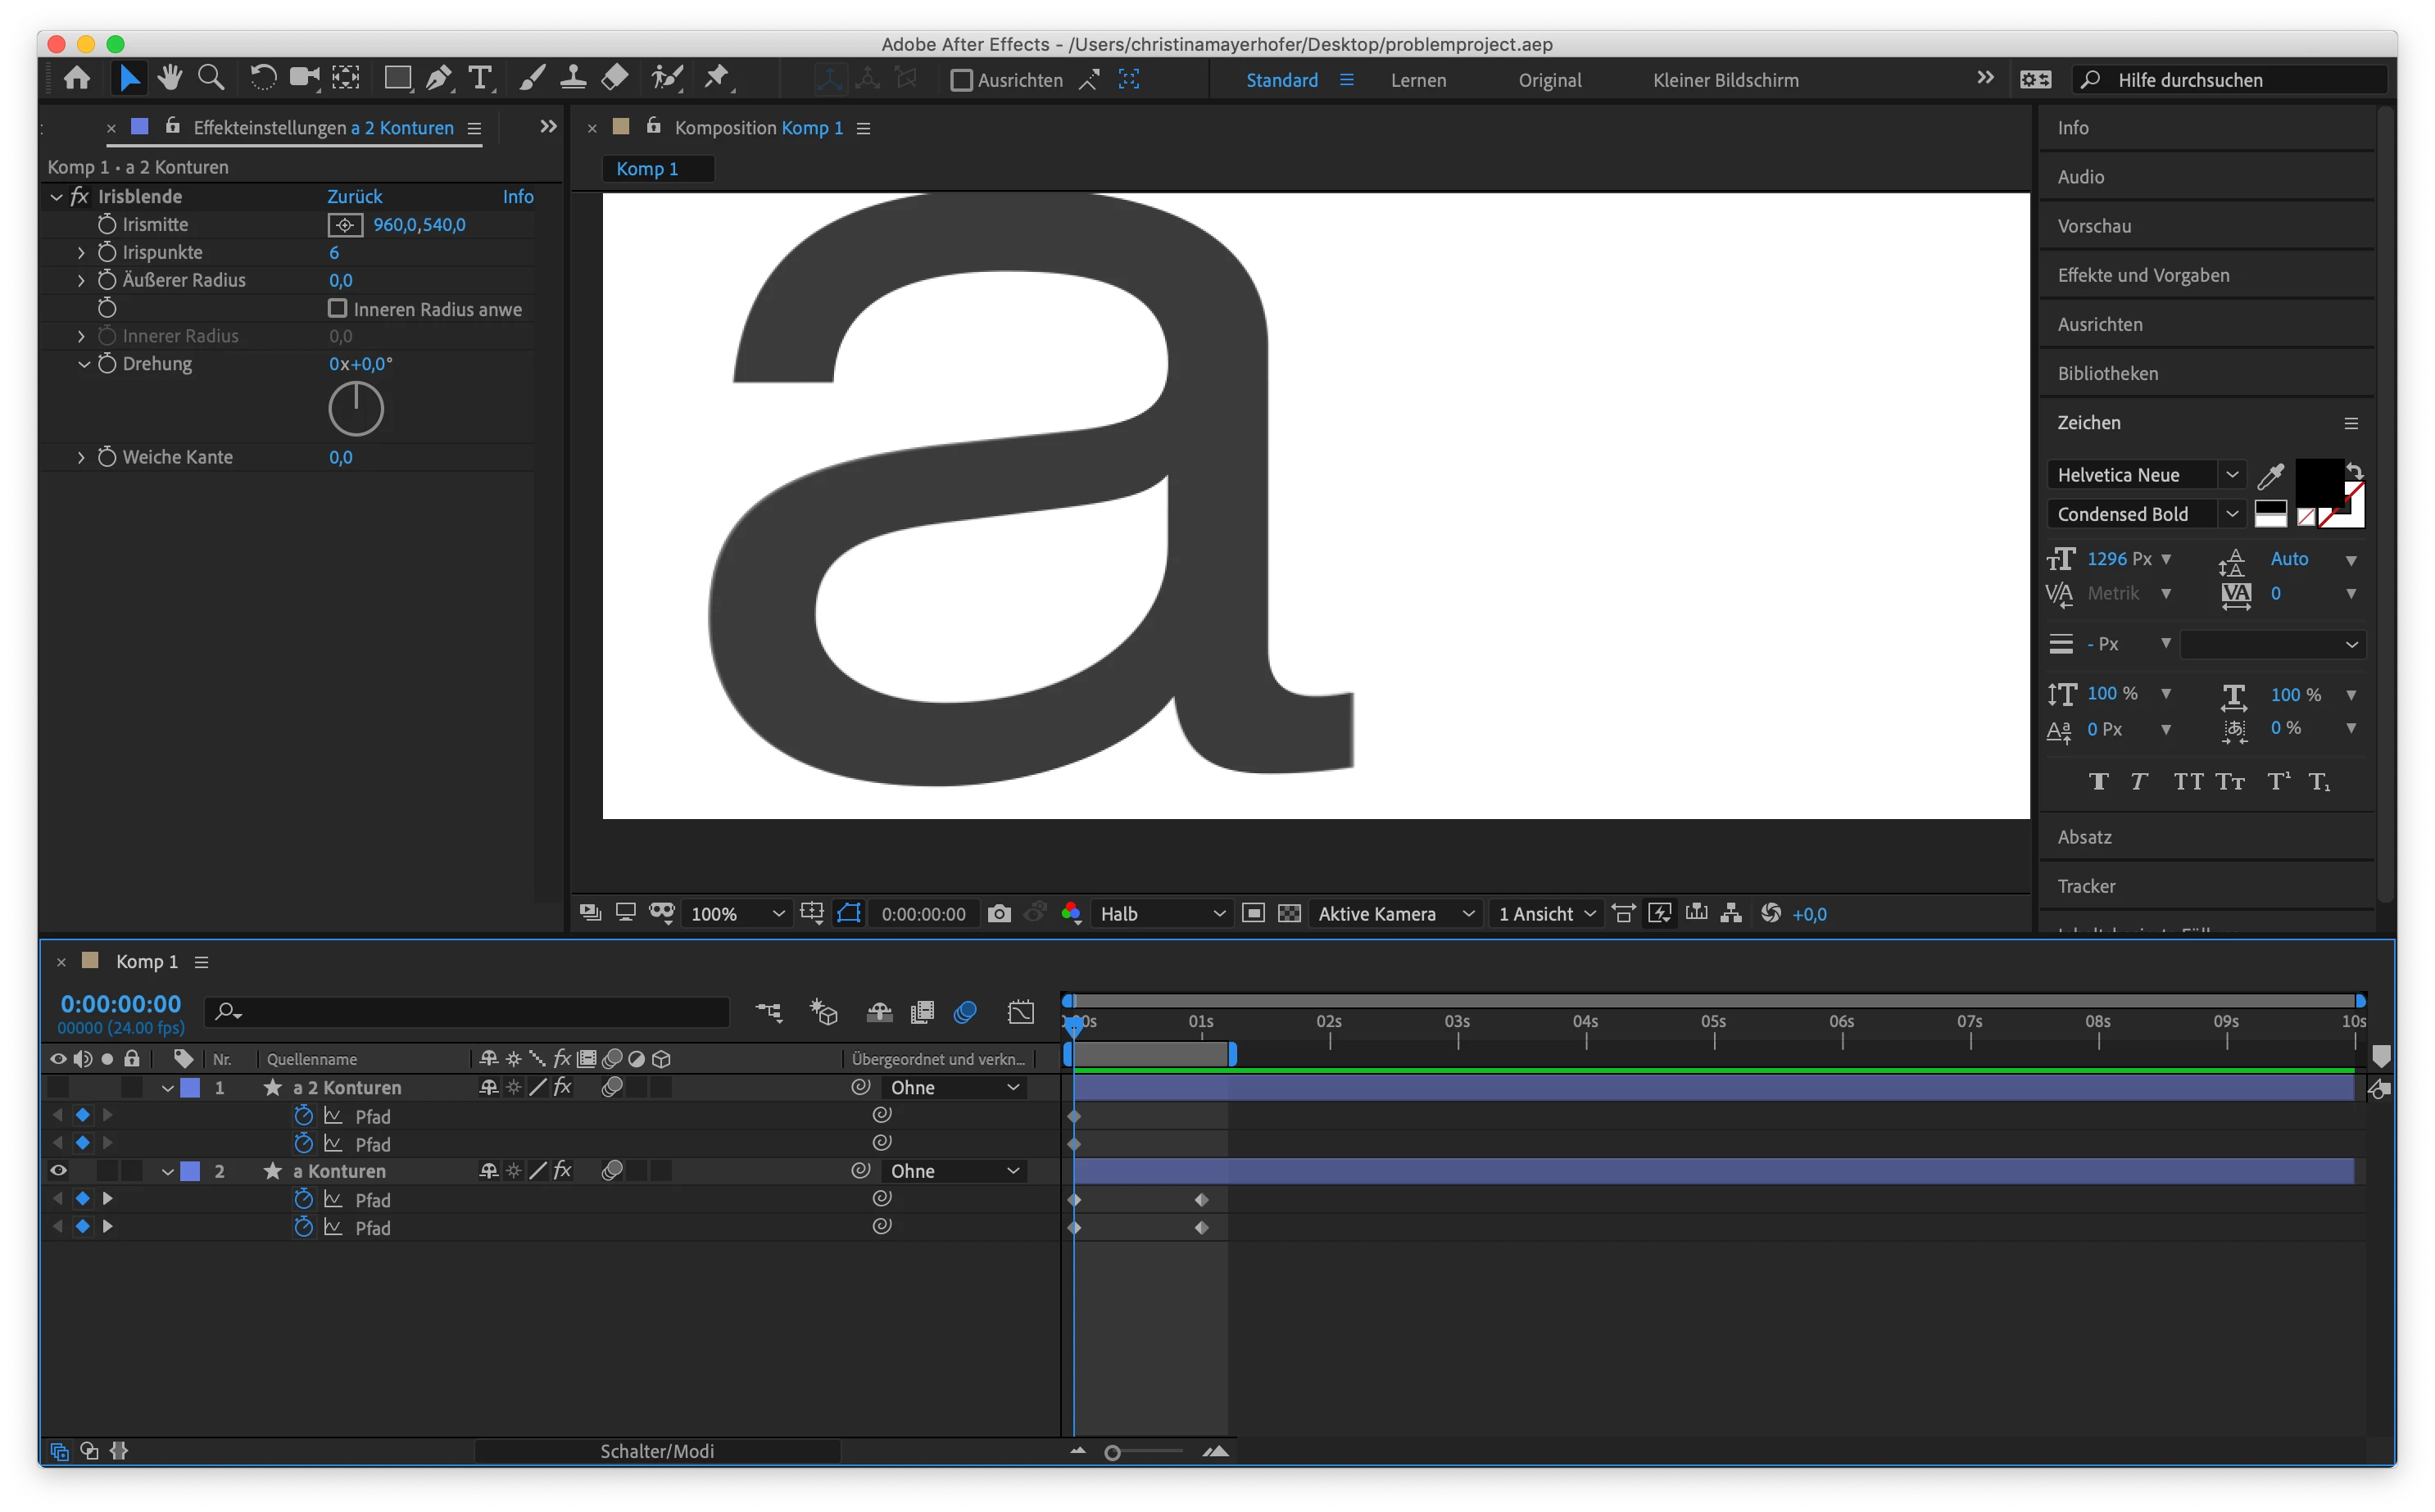
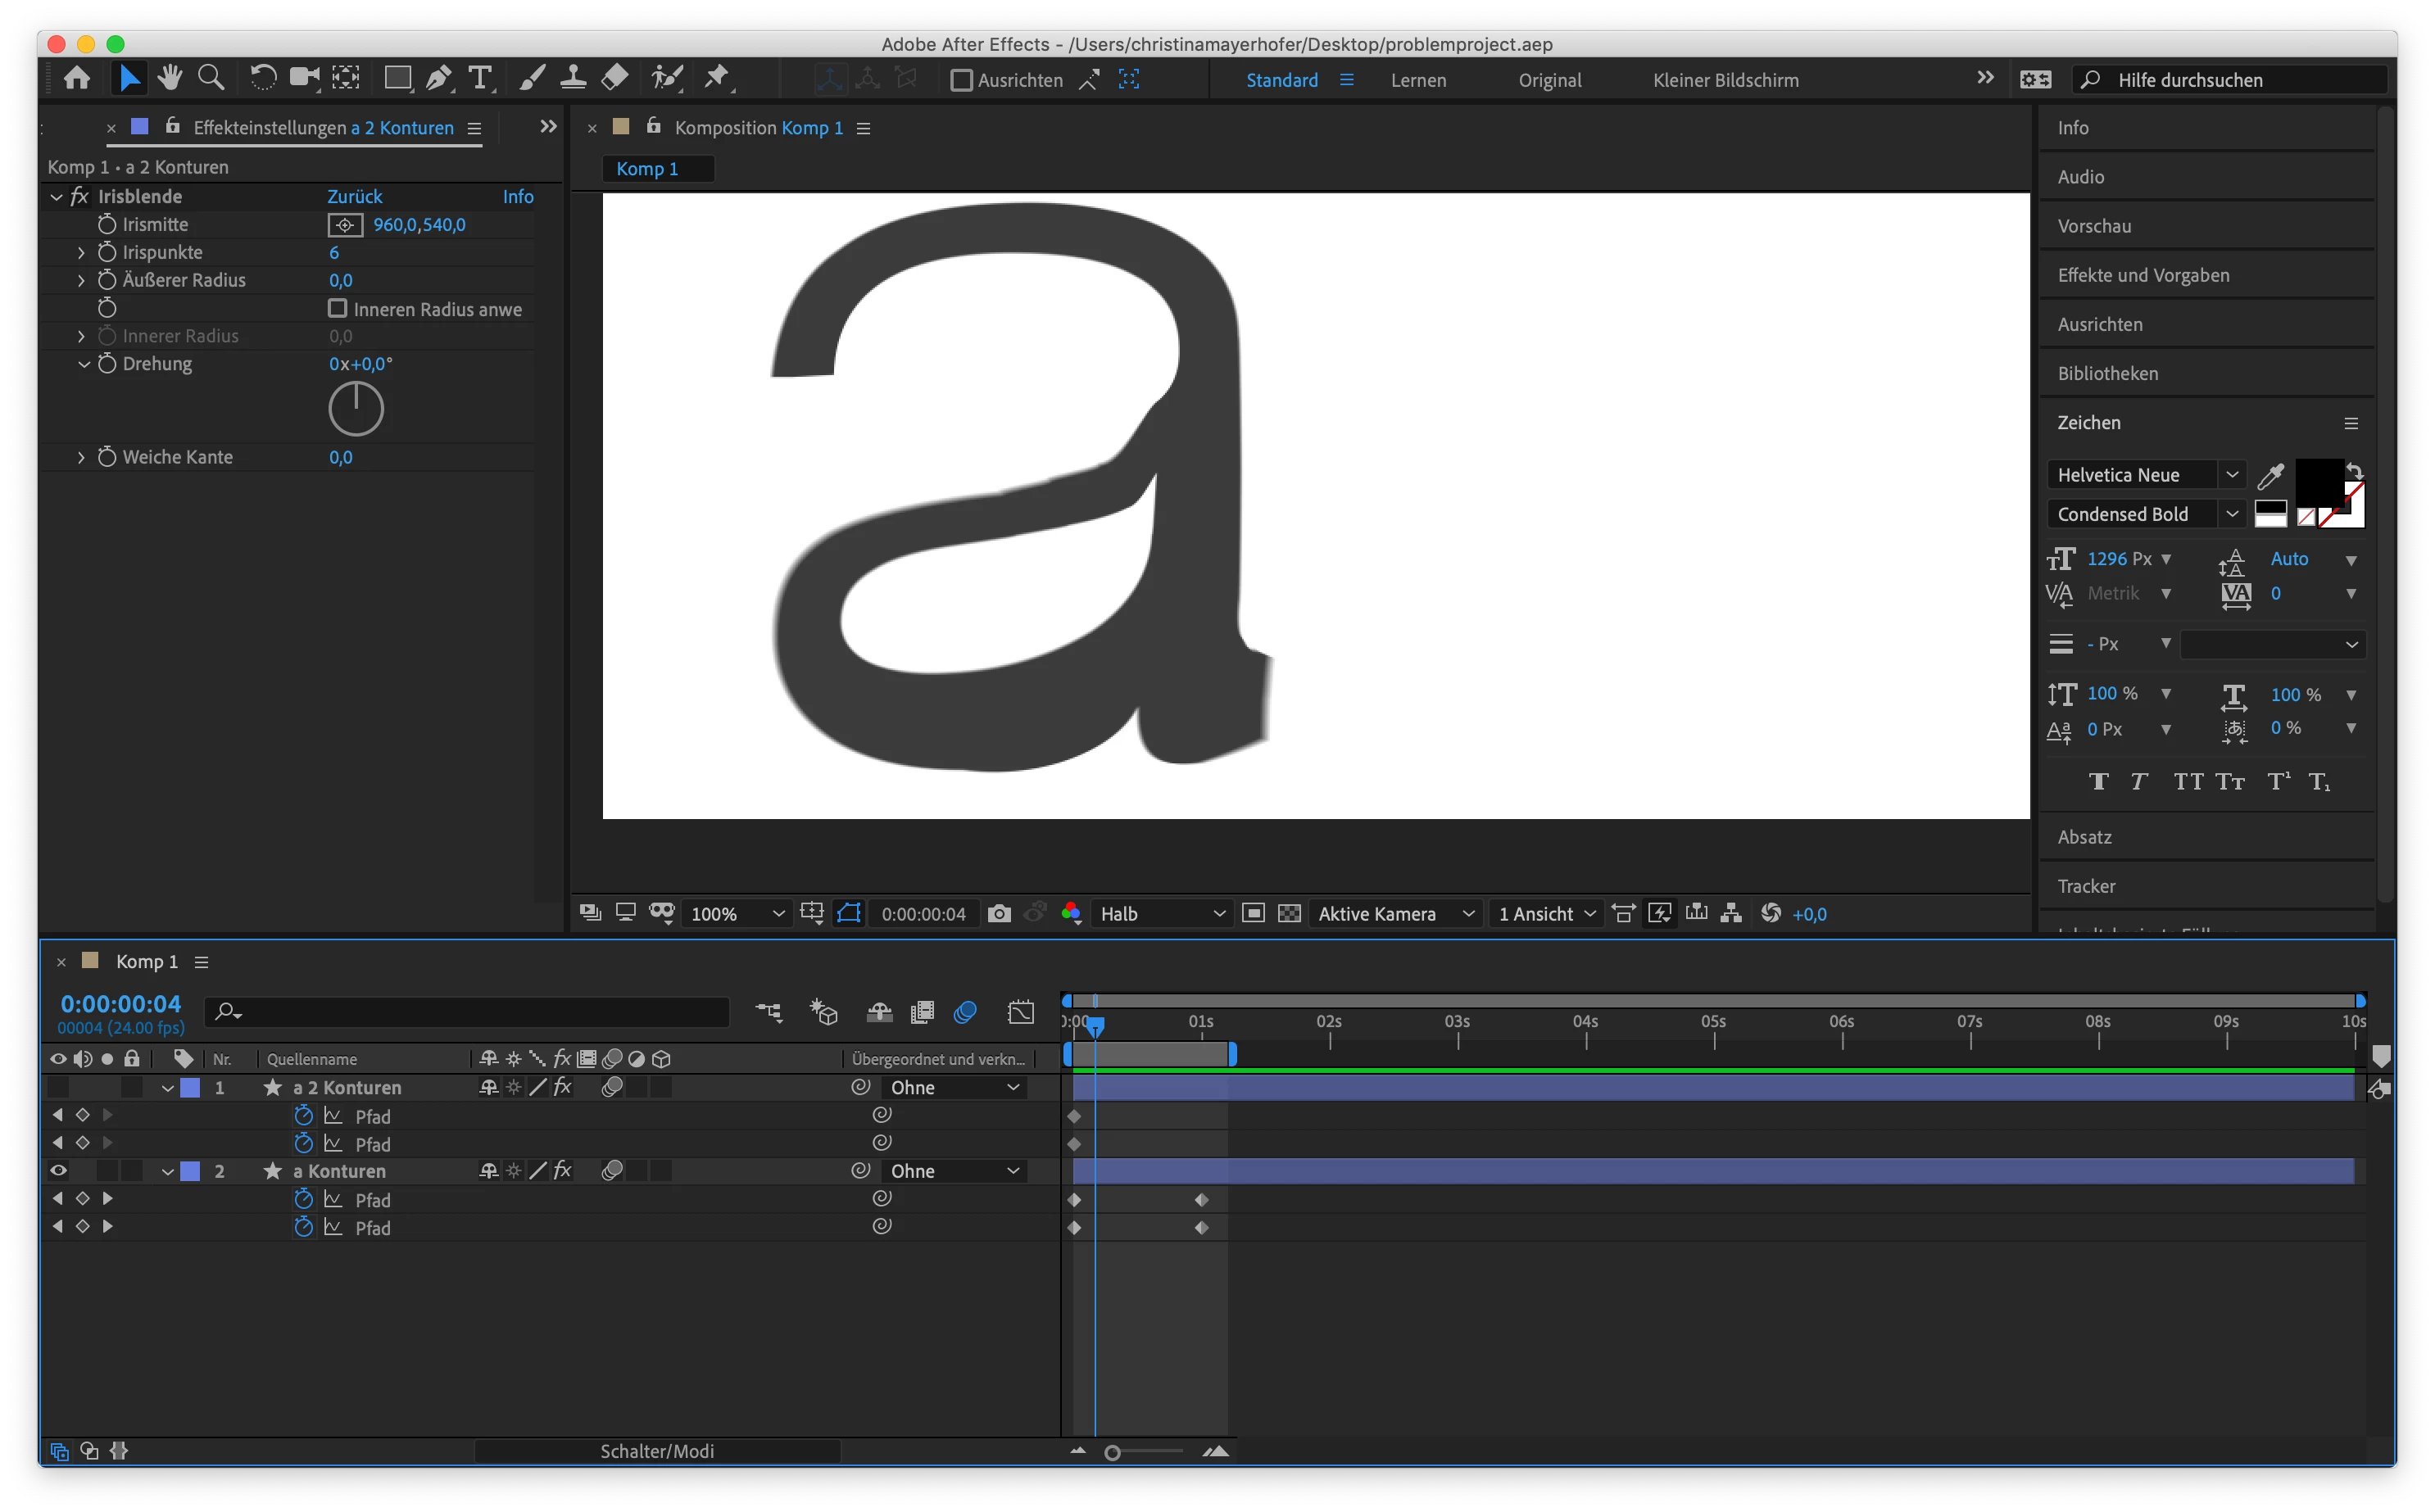
The problem I have now is that it doesnt morph the way I want it to.

So this is hard to explain but my main problem with this is that the right bottom part of the a seems to be moving to the left upper part throughout the animation, when I just want it to morph evenly, for example I just want the a to go down in size into the other a and for it not be so weird.

I hope i could get my point across!

Looking forward to your answers and thanks in advance!!!!

This topic has been closed for replies.
Correct answer Rick Gerard

First, that is a pretty crummy tutorial. There is no mention of the first vertex or an explanation of how vector paths move when animated which makes me think he doesn't understand how animating a path works. His work around is clumsy and unpredictable. You need to vet your trainers and make sure they know what they are talking about.

If it were my project I would create the two letters in Illustrator, convert both to outlines, set up a blend between both layers, decide how many frames I wanted to use for the transition, adjust the number of steps to match the number of steps, maybe even change the colors so that I could clearly see how the transition would look, then expand the blend, release to layers, import as a comp, trim the layers to 1 frame, sequence the layers, then set new in points and out points for the top and bottom layer and be done with it.

This:
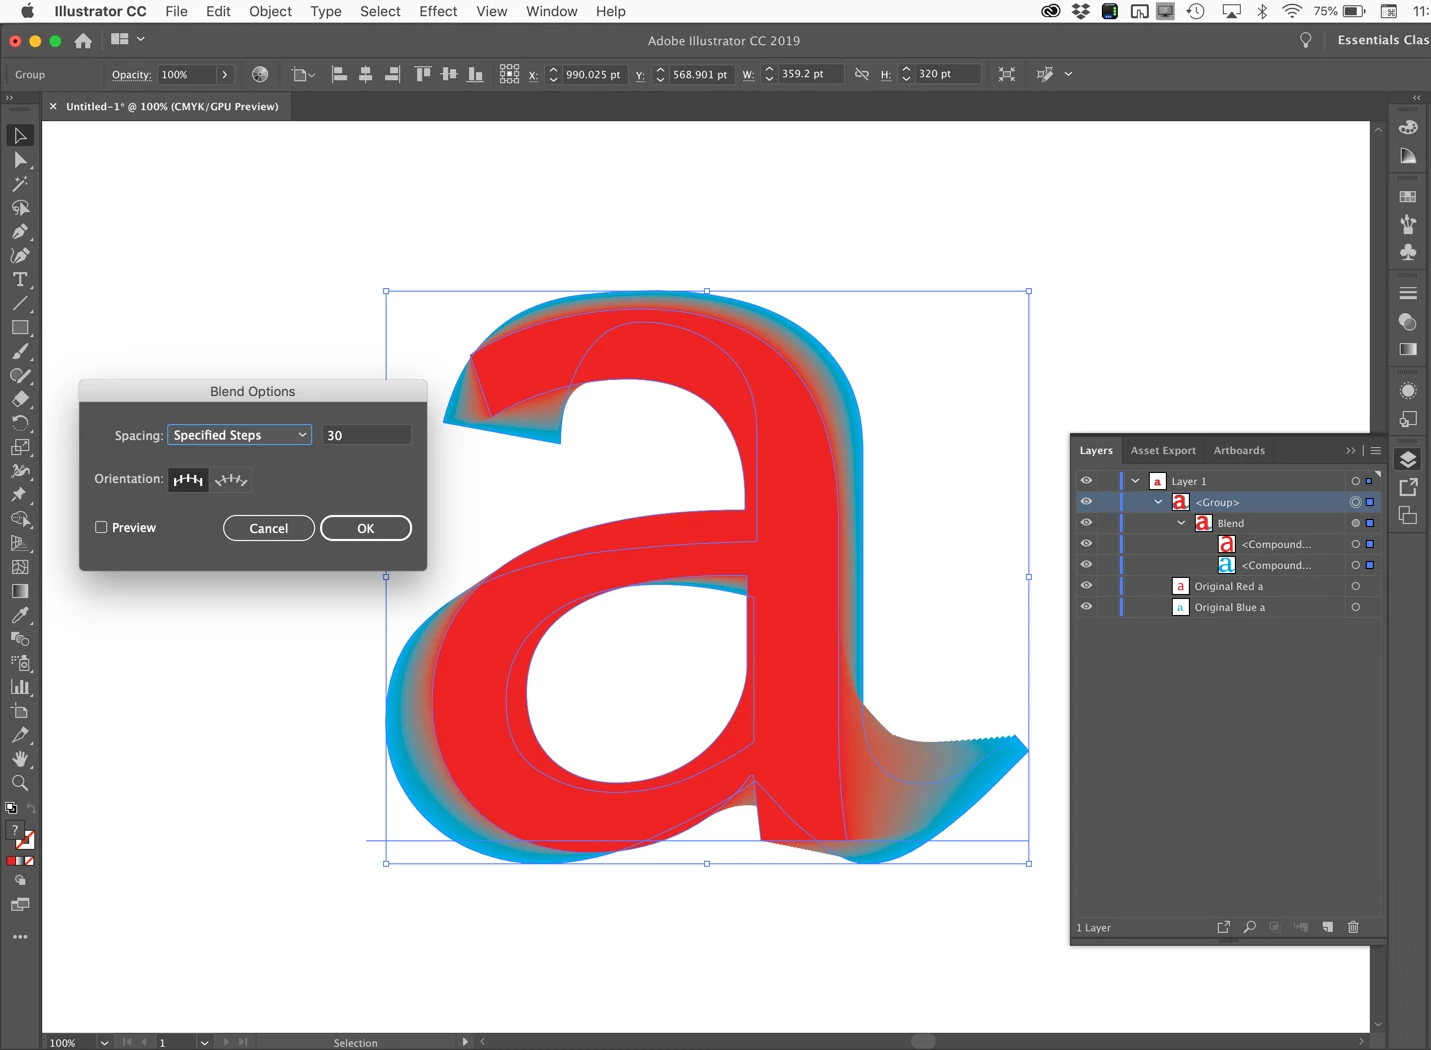
becomes this after expanding:
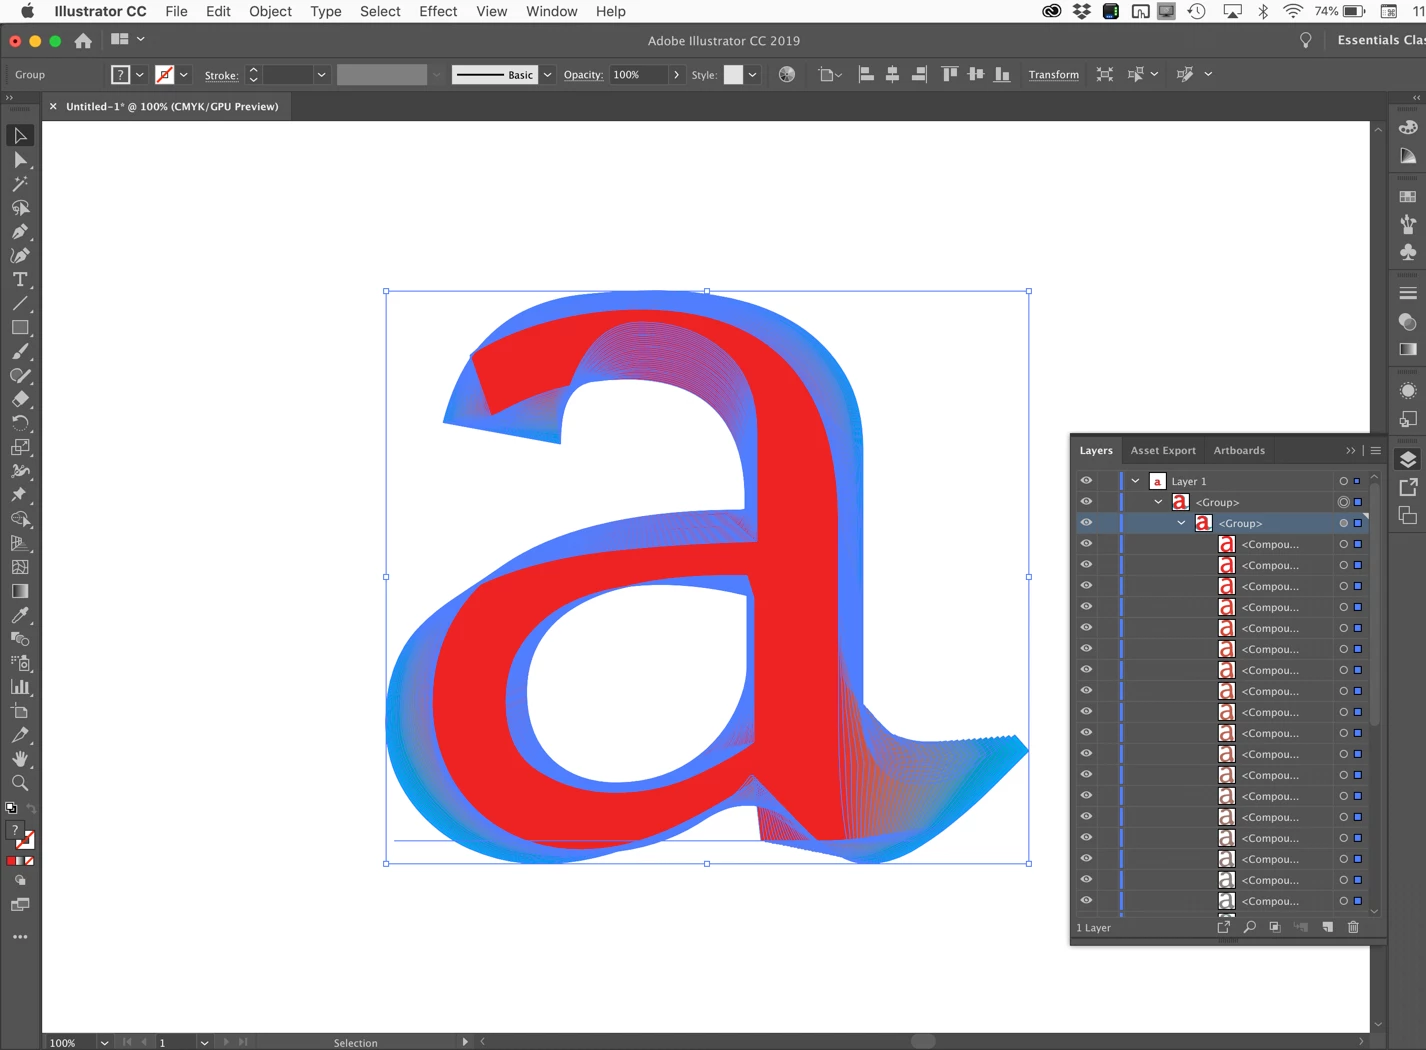
then you select the blend group and:
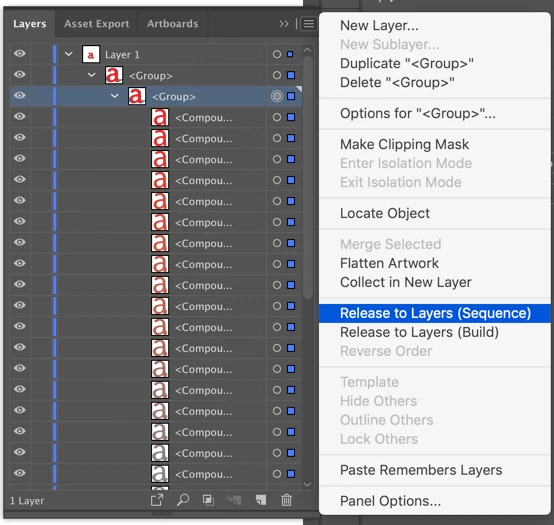
becomes this:
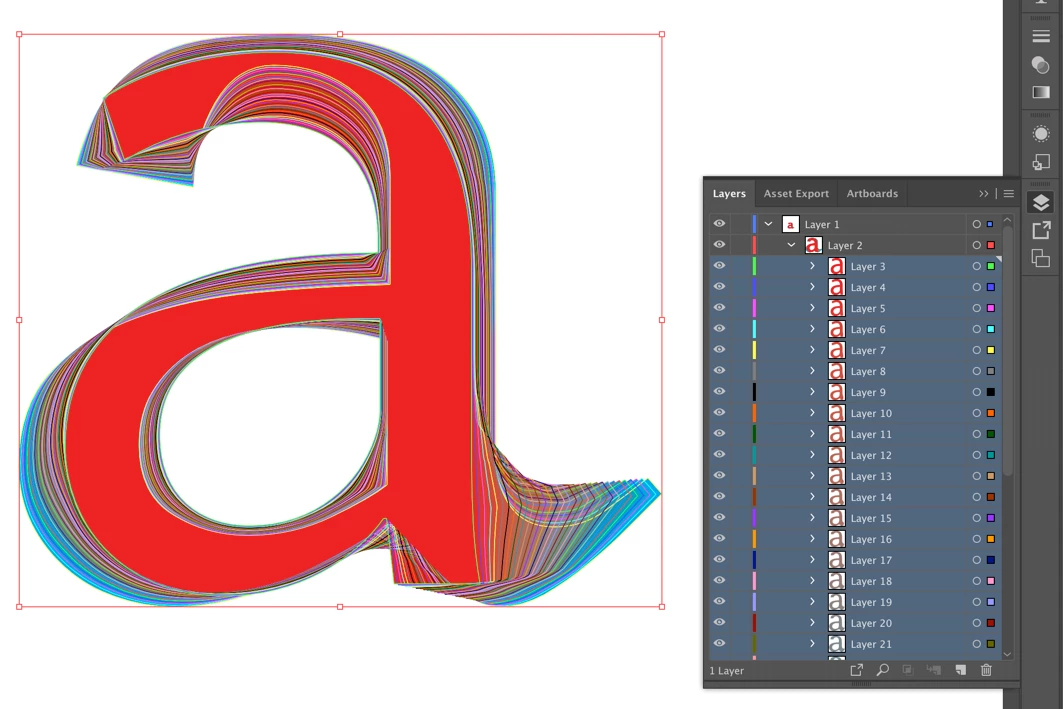
so you select all of the new layers and drag them above layer 1 to get this:
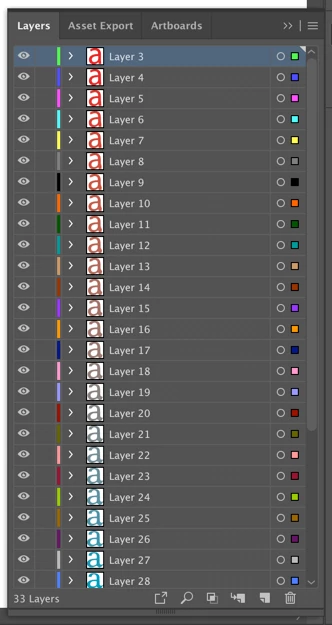
then you save, import as a comp and trim the layers and get this:
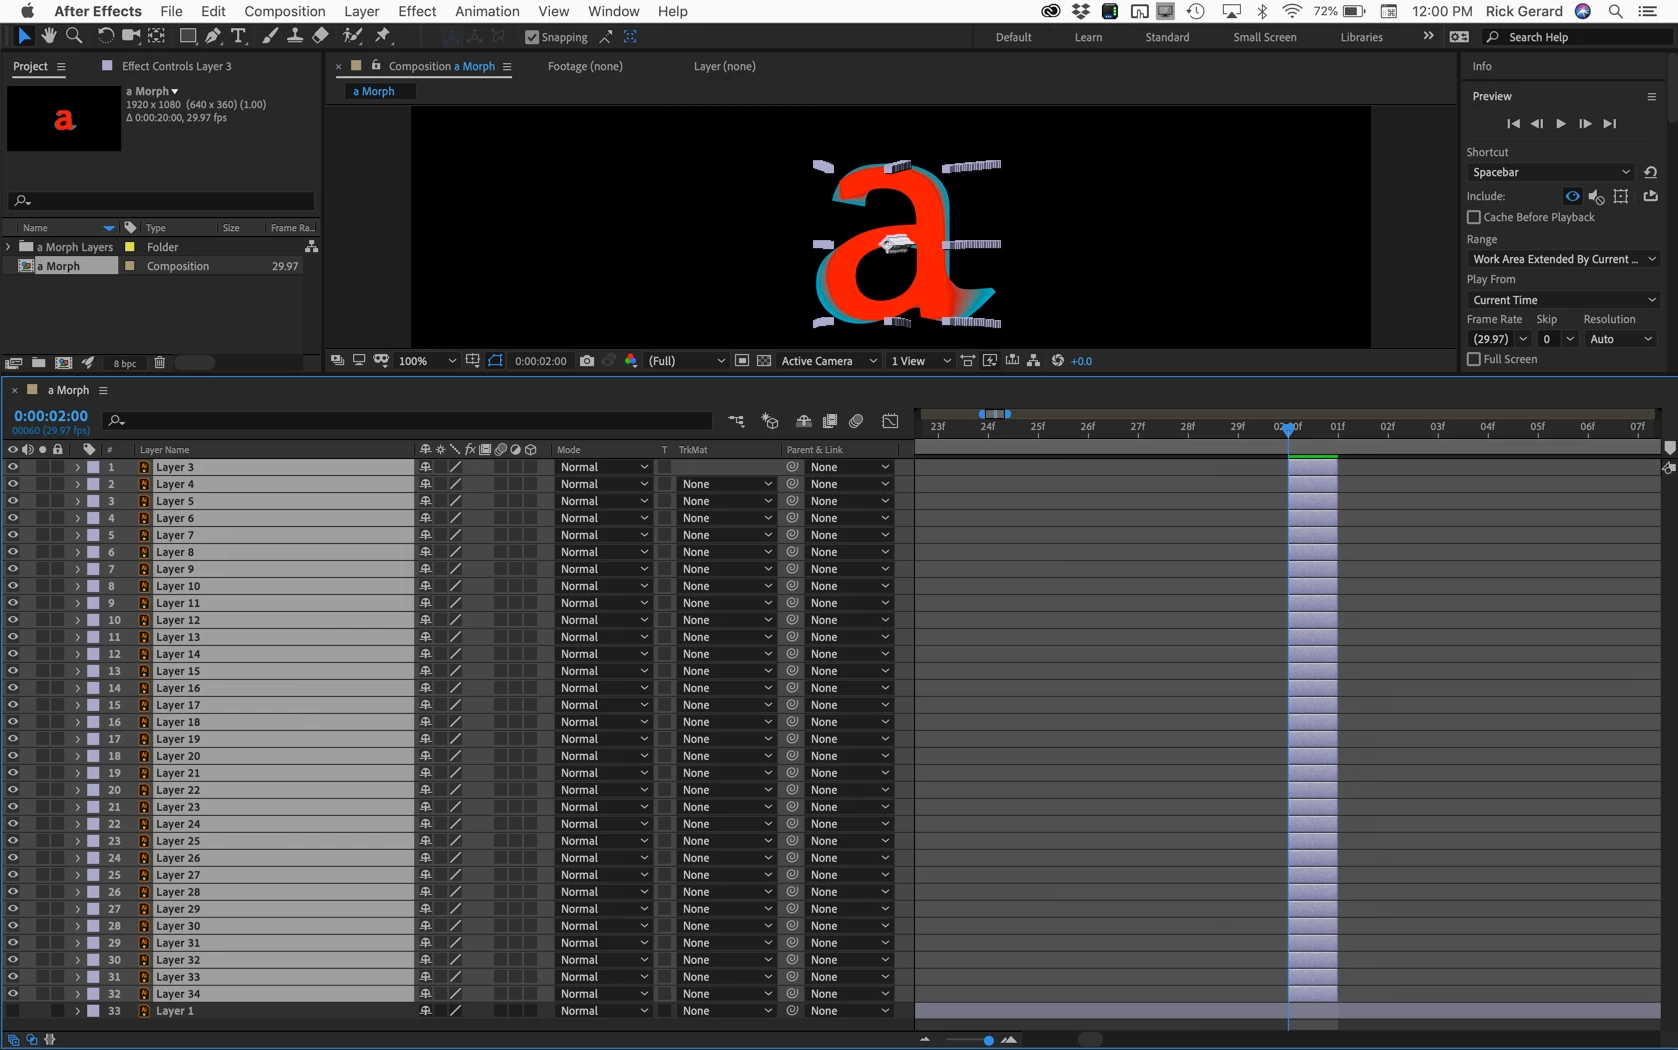
You extend the in point of the first and last layers, then sequence them to get this:
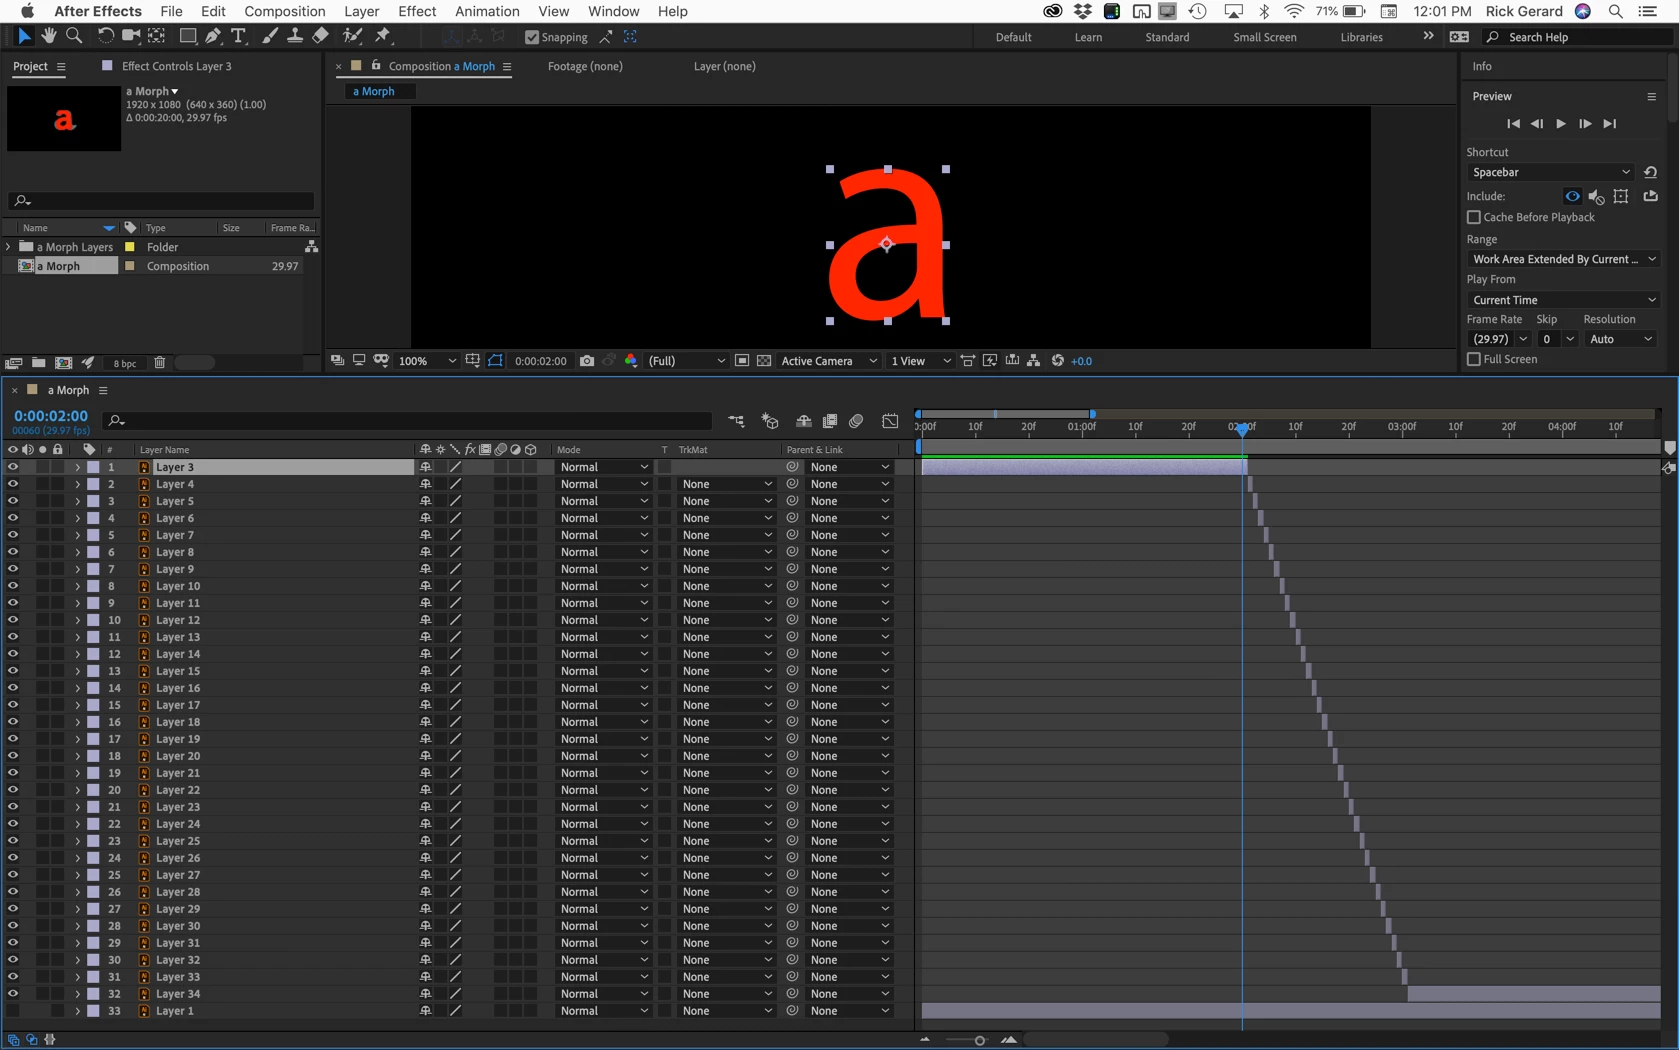
which turns into this:

And it takes about four or five minutes.

Or, you could take the original red and blue a, convert them to shape layers, then modify the paths match the nummber of points between this:
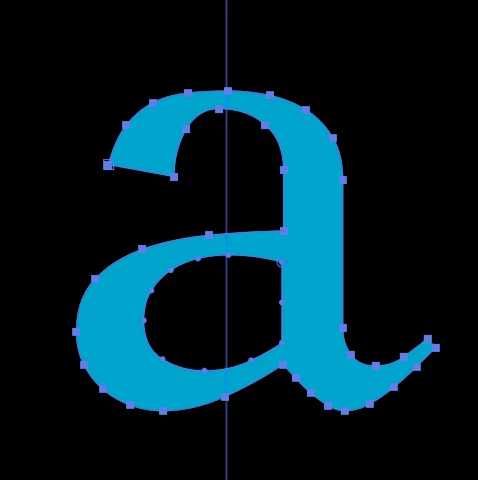
and this
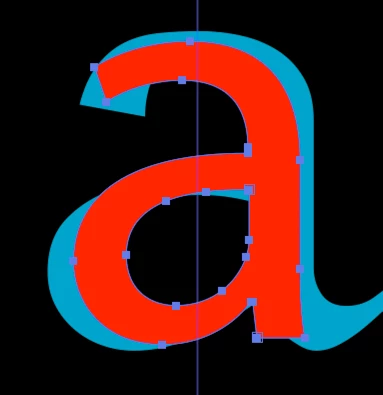
match the first vertex

think you are all prepared and end up with this on the first try:
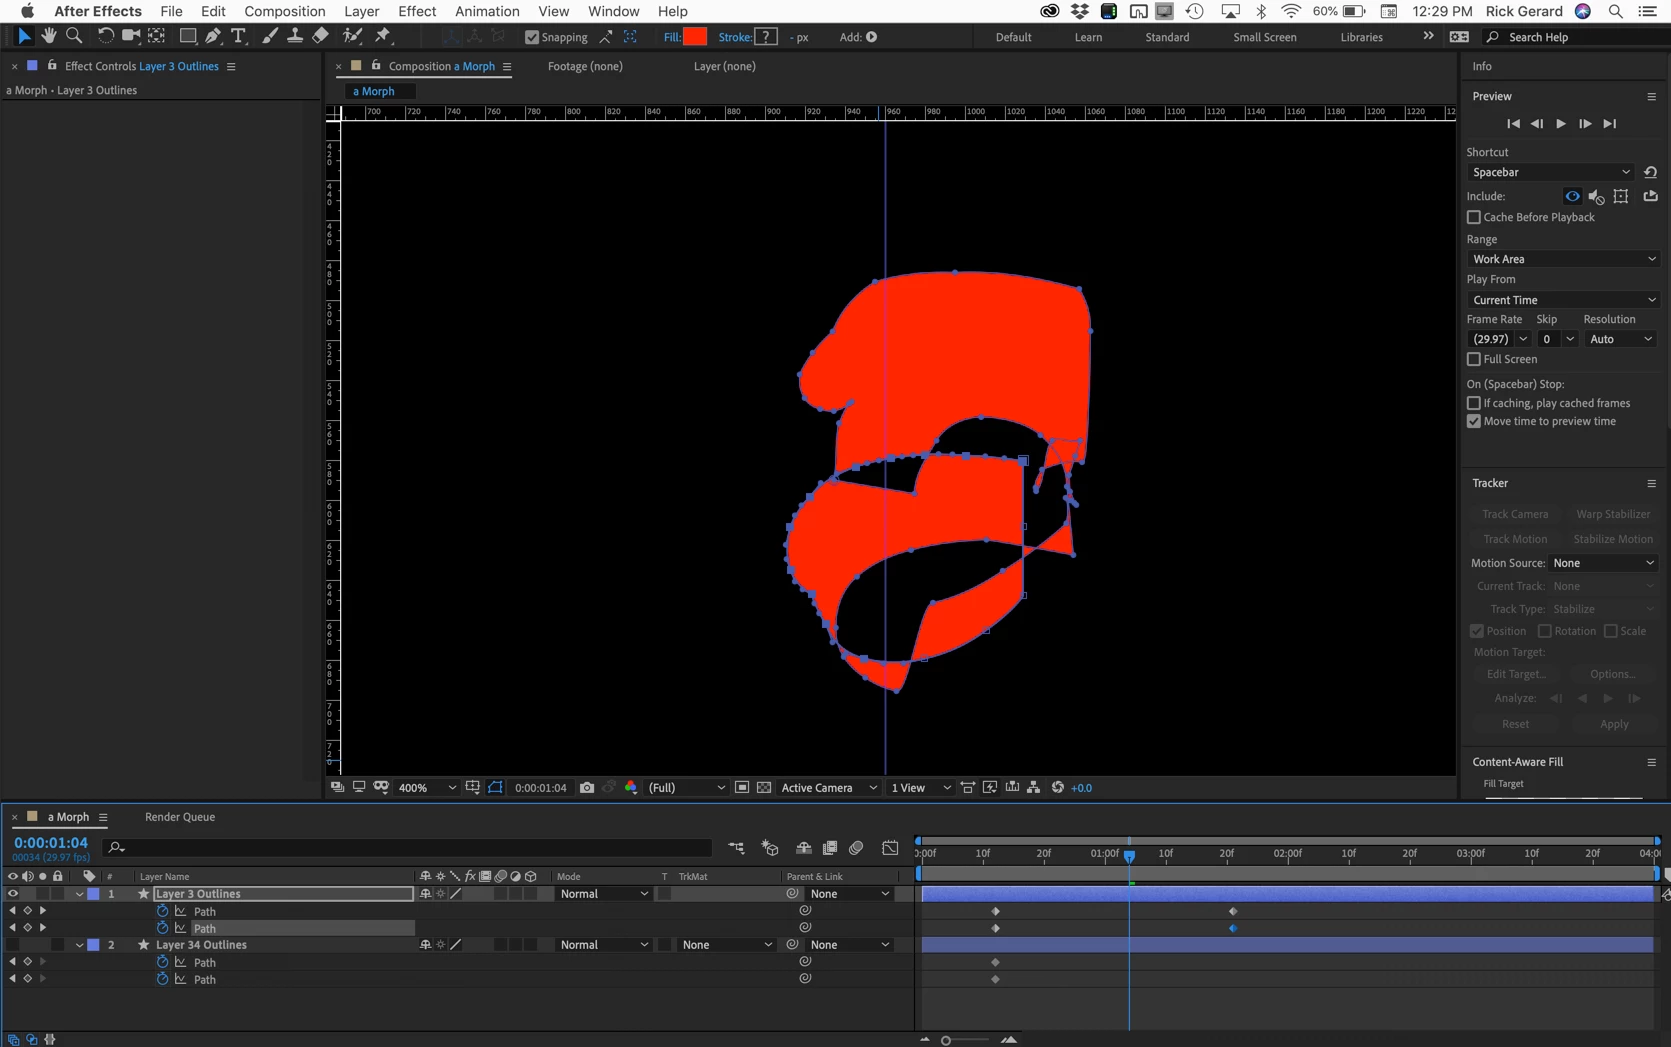
Animating a path can be a very useful technique but just trying to copy and paste paths from different fonts is going to be very problematic. You would have a better chance at morphing between the two fonts using the Reshape effect on two layers and using transparency to animate between the layers.

You will end up with a lot more control and spend far less time than trying to animate paths using the Illustrator to AE workflow.

If you must stick with animating paths then the first step is to make sure that the first vertex is in the same spot on both letters, then make sure that the letter you are going to animate has the same number of points in approximately the same position as the letter it is going to change into. Only then will you have any chance of the paths doing a smooth and believable morph into a new font.
1 reply

Rick GerardCommunity ExpertCorrect answer
Community Expert
June 18, 2019

First, that is a pretty crummy tutorial. There is no mention of the first vertex or an explanation of how vector paths move when animated which makes me think he doesn't understand how animating a path works. His work around is clumsy and unpredictable. You need to vet your trainers and make sure they know what they are talking about.

If it were my project I would create the two letters in Illustrator, convert both to outlines, set up a blend between both layers, decide how many frames I wanted to use for the transition, adjust the number of steps to match the number of steps, maybe even change the colors so that I could clearly see how the transition would look, then expand the blend, release to layers, import as a comp, trim the layers to 1 frame, sequence the layers, then set new in points and out points for the top and bottom layer and be done with it.

This:

becomes this after expanding:

then you select the blend group and:

becomes this:

so you select all of the new layers and drag them above layer 1 to get this:

then you save, import as a comp and trim the layers and get this:

You extend the in point of the first and last layers, then sequence them to get this:

which turns into this:

And it takes about four or five minutes.

Or, you could take the original red and blue a, convert them to shape layers, then modify the paths match the nummber of points between this:

and this

match the first vertex

think you are all prepared and end up with this on the first try:

Animating a path can be a very useful technique but just trying to copy and paste paths from different fonts is going to be very problematic. You would have a better chance at morphing between the two fonts using the Reshape effect on two layers and using transparency to animate between the layers.

You will end up with a lot more control and spend far less time than trying to animate paths using the Illustrator to AE workflow.

If you must stick with animating paths then the first step is to make sure that the first vertex is in the same spot on both letters, then make sure that the letter you are going to animate has the same number of points in approximately the same position as the letter it is going to change into. Only then will you have any chance of the paths doing a smooth and believable morph into a new font.