Hi again!
I've been trying to follow your tutorial, but I seem to be missing something.. Now the particles aren't showing at all. Here's a screenshot of it.

When you send a screenshot it is important to reveal the layers that are giving you problems. If we can not see what you have done to the layers giving you problems a screenshot is almost completely useless. Press the U key twice and post another screenshot.
I think you are asking for a way for the boundary of a mask to trigger a particle. That's possible but involves an expression that samples pixels and turns the emitter on and off.
I looked at the Particles with synthesia and that workflow doesn't make much sense to me either. The workflow is a lot more complex than it needs to be. The entire project could be simplified and there would be very little to do but just adjust the position of some sample layers. Here is my approach.
If I already had a layer generating the "piano roll" I would turn the particle emitter on and off by sampling the color of the piano roll and using an if statement to control the emitter.
You mentioned Particular so here's how the comp would be set up.
- name the Piano Roll layer "Piano Roll"
- I would add a narrow spotlight to the comp to use as an Emitter.
- To the Intensity of the spotlight I would add this expression:
target = thisComp.layer("Piano Roll");
sample = position;
point = [sample[0], sample[1]];
sw = target.sampleImage(point, radius = [.5, .5], postEffect = true, t = time)[1];
if (sw > .5) {100} else [0]; - tie the point of interest for the spotlight "Emitter" to the position with this expression:
p = transform.position;
[p[0], p[1]- 400, p[2]]] - Set up the emitter in Particular to use lights
- Position the first light over the farthest left stripe on the Piano Roll layer with Z position set to zero to keep things simple
- Duplicate the lights as many times as you need to sample all of the bars and adjust the X position of each light as needed
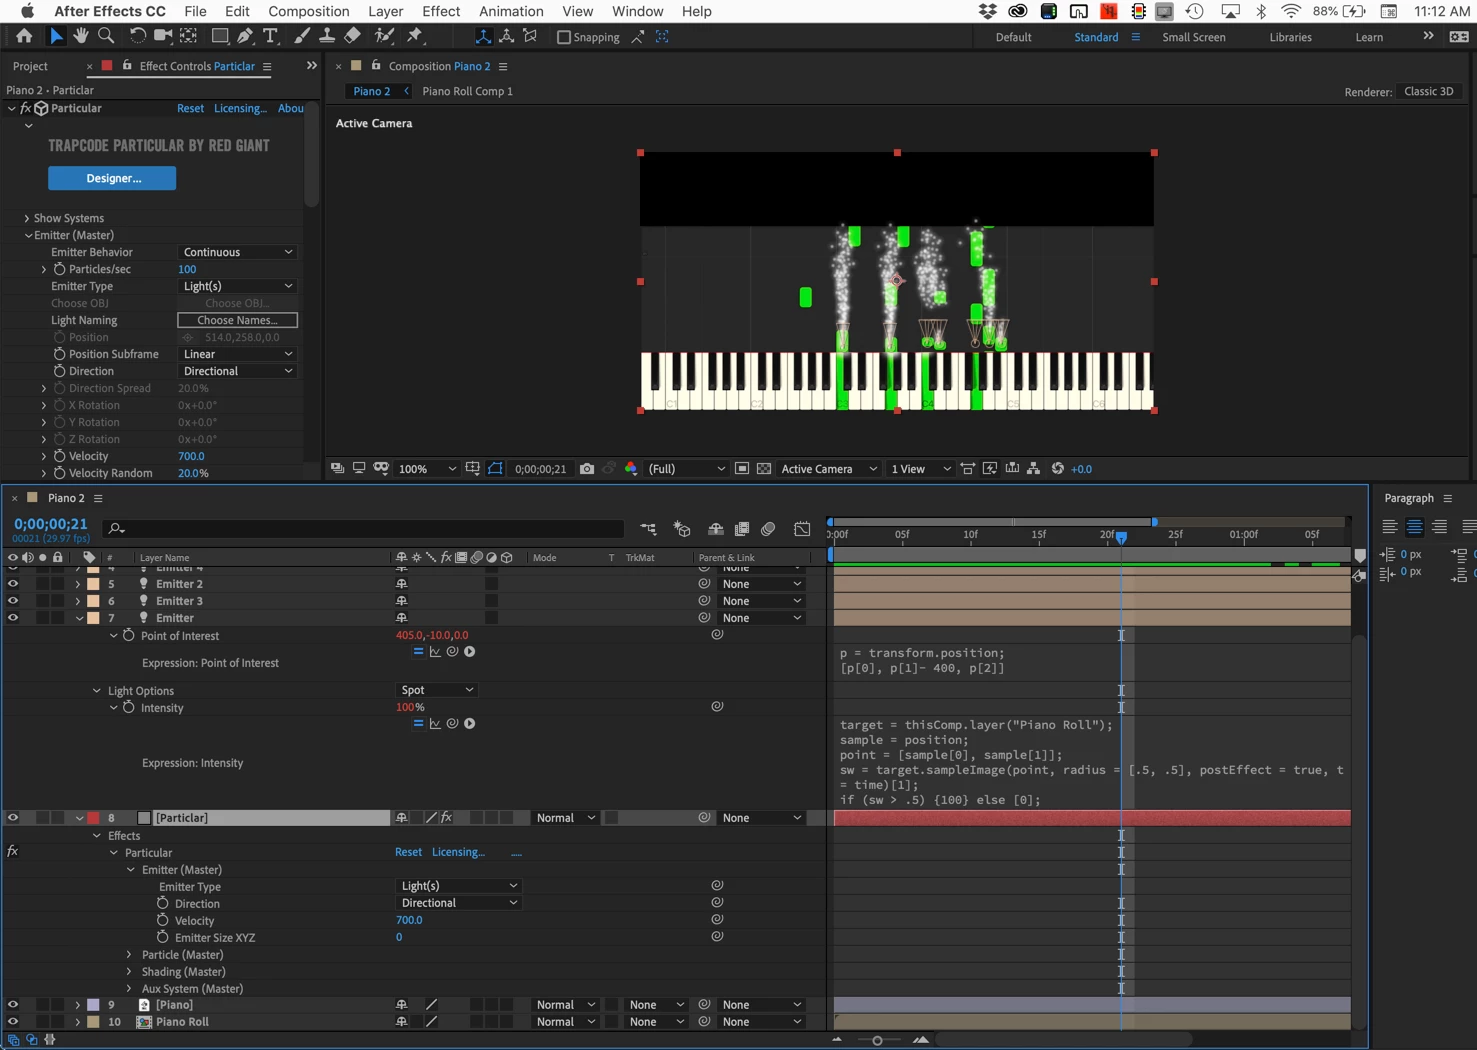
There you go. There's not much to making Particular start and stop a particle stream based on the color values of a sample layer. Here's a screenshot with most of the modified properties of the layers revealed. I just used a bit of your screenshot for the footage and got the piano roll to move by masking, animating position, and pre-composing.
Just in case you have problems here's the project and a CC 2014 version in case you are not using the latest version of AE:
PianoRoll.zip
Dropbox - PianoRoll (14.x).aep
If your browser adds a TXT extension to the AEP you can just delete it.
Making the keys light change color and turning on the glow lighting effect could be controlled with the same sample expression method.

