Most compositing and animation apps like After Effects make cuts (Alt/Option + ]) and position the CTI (Current time indicator) at the start of the current frame. Park the CTI on a frame and set an outpoint, and the frame you see will still be visible. This is a more efficient workflow because when animating, you want to see the last frame so you can match things up.
Create a 30-fps comp that is 10 seconds long. Move to the last frame. The Time Incidator will park the CTI at 0:00:09:29 so you can see the last frame, but the comp and the rendered footage will be exactly 10 seconds long. Got it?
If you enable Time-Remapping, the last keyframe will be at the end of the footage, one frame after the last frame of the footage, so that you can re-time every frame. If you go to the last frame of a pre-comp or the last frame of some footage and zoom in on the timeline, you will see that the last Time Remapping keyframe is one frame past the CTI, so the last frame will still be visible when you change the timing by dragging the keyframe around. This sometimes confuses people when they try to add loopOut() to a time-remapped sequence and end up with a black frame. If you want to loop a time-remapped layer, you need to set a keyframe at the start of the last frame, then delete the automatically generated last frame at the end of the footage so the blank frame will not be repeated.
A video editing app, like Premiere Pro, cuts at the end of the frame (Ctrl/Cmnd + k or just press w). The CTI still parks at the start of a frame, but it is more efficient to show the first frame of the next clip in a sequence when you edit instead of showing the last frame of the previous clip. That is the difference between a sequence, the movie you edit in an NLE, and the timeline you use in an animation or compositing app like After Effects. Effects and compositing apps are not designed to Edit sequences; they are designed to create shots, so it is more important to see the last frame than not to have any idea what the last frame looks like
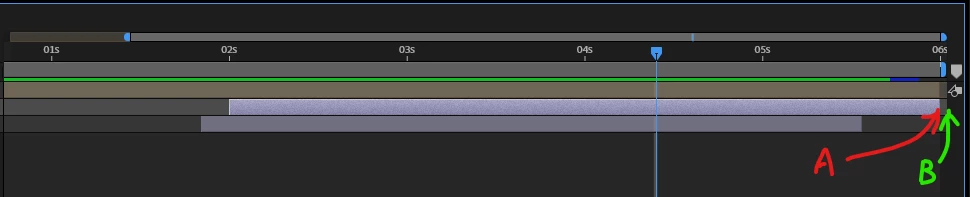
I hope that clears things up. There is no need to extend a layer past the end of the timeline, your "b" marker example, because it will not be rendered.