Participant
February 1, 2018
Answered

RAW Image Sequences with animated frame size

  • February 1, 2018
  • 1 reply
  • 1269 views

Hi!

I'm having trouble with image sequences with animated frame size/crop factor.

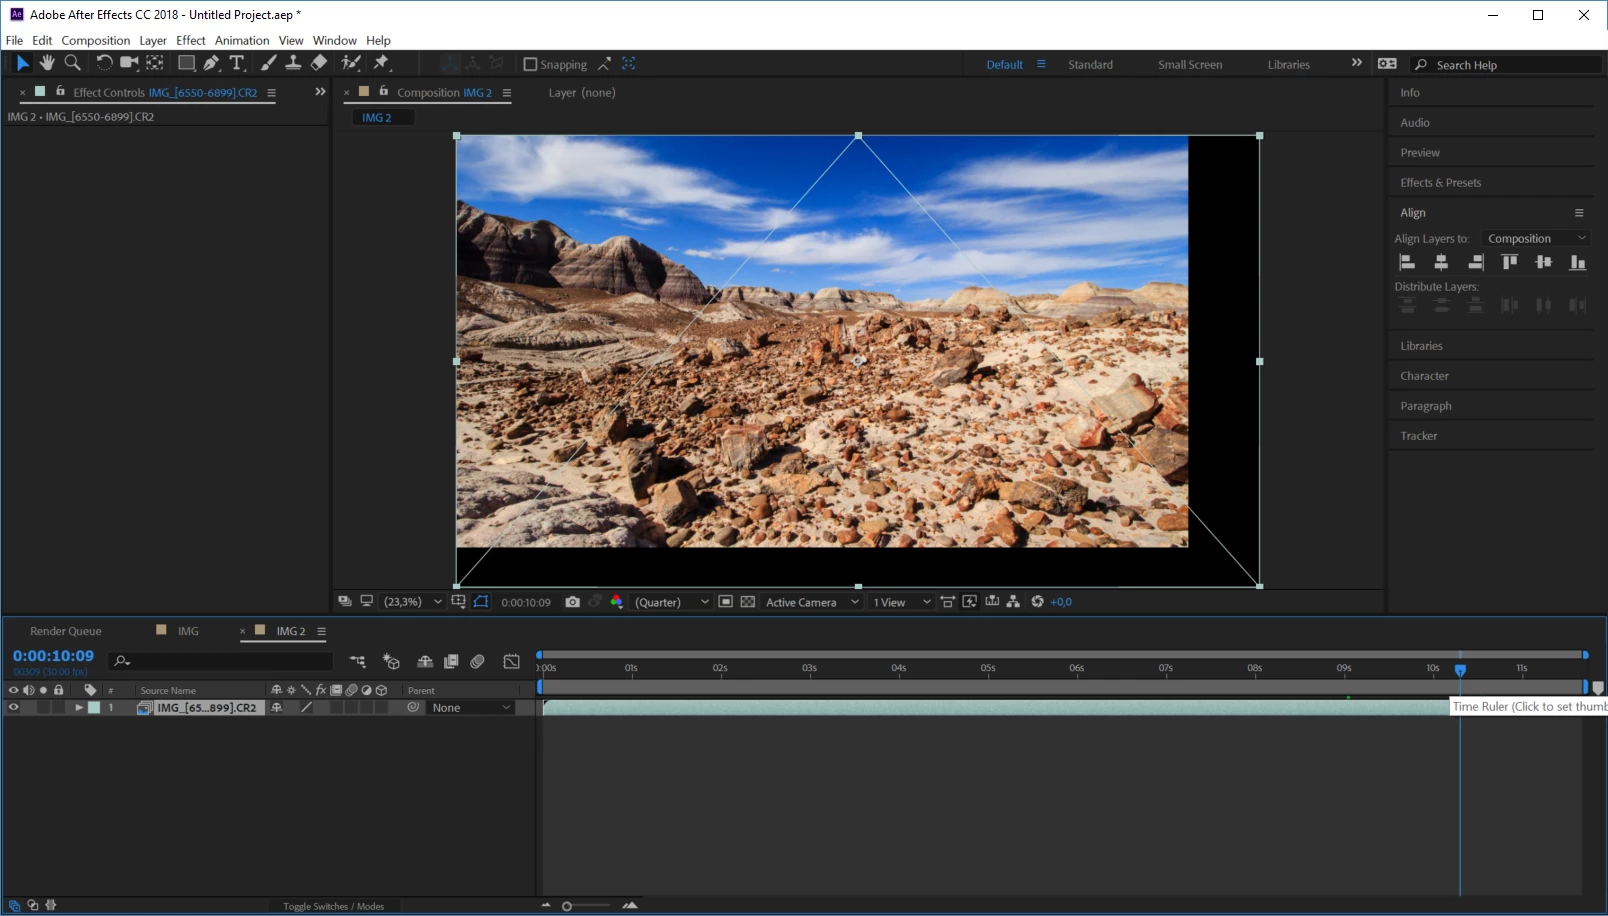
Import works fine, but on sequences where I've used Ken Burns style animation and changed the frame sizes (on the RAW files), After Effects will display a border on the right and bottom edges on the smaller frames. (See below)

Is there any way I could import those sequences and force them to "fill the frame" even if pixel sizes differs from frame to frame?

See image below for an example.

I now have about 80 000 high quality RAW images (about 250 timelapse sequences) which I intend to render directly from RAW to a lossless intermediate video format in 4k resolution before editing in Premiere Pro or similar.

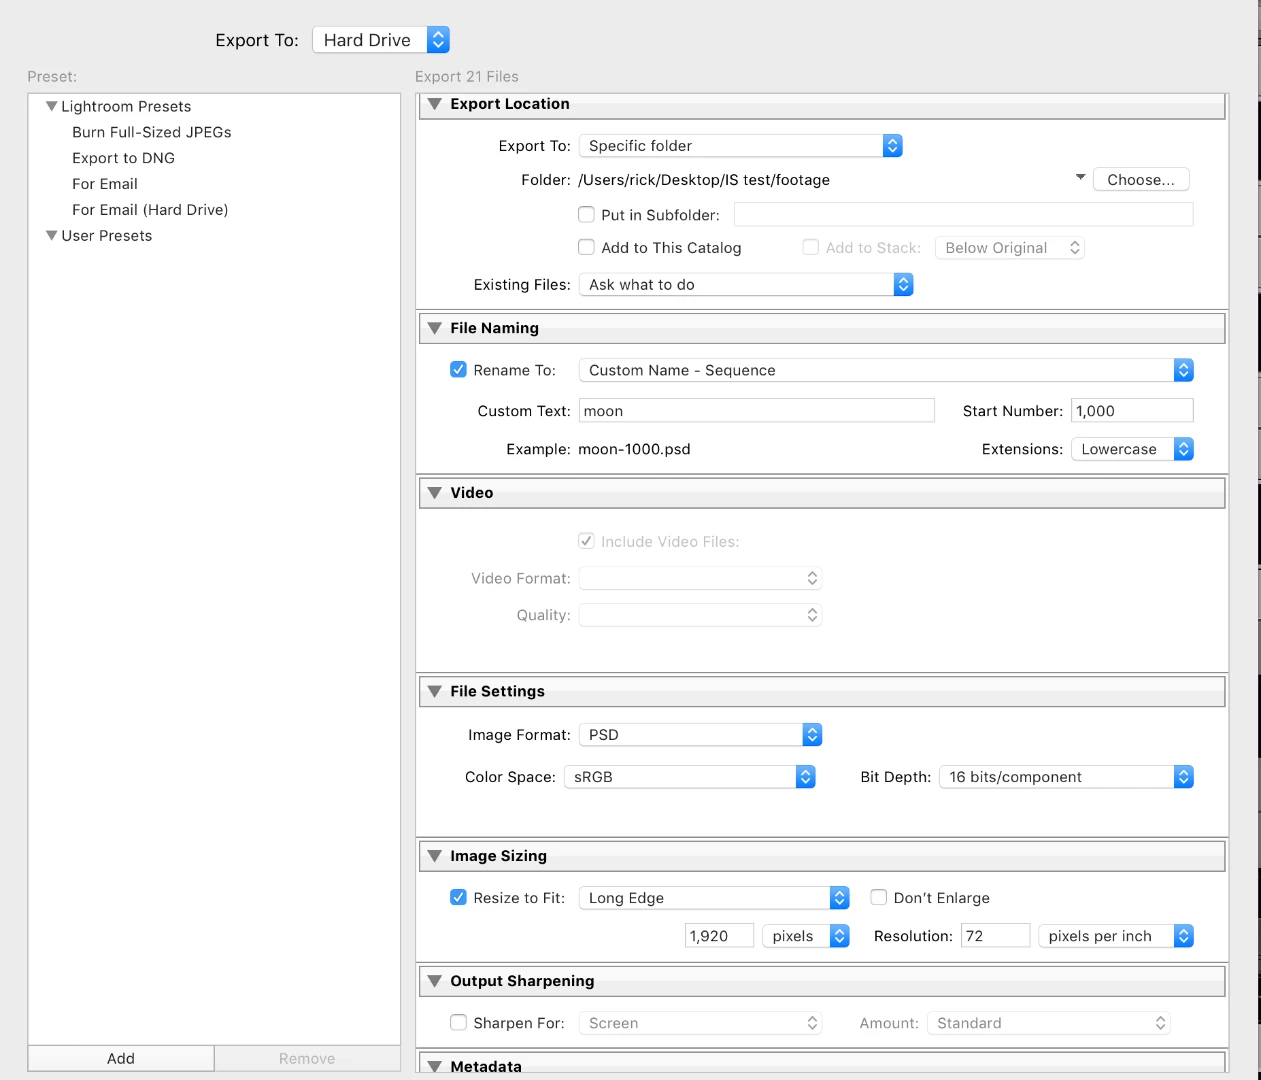
The only solution I see right now is to render frames to an intermediate format and then resize all frames to 4k BEFORE importing to After Effects.

But I also want to use Warp Stabilizer on some sequences, and all this rendering, resizing, re-rendering and stabilizing will degrade quality.

Having 2-3 different copies of the same images also eats up several TB of disk space, and making changes on the RAW images would force me to do a new loop of re-render, another resize, etc.. I really want to keep the source files as RAW sequences for maximum quality and minimum hassle..

Regards,

- Jørn, Trondheim, Norway

    This topic has been closed for replies.
    Correct answer Rick Gerard

    An image sequence takes the frame size from the first image in the sequence. Time-lapse sequences should al be the same size.

    The most efficient workflow for time-lapse sequences is to resize them using Lightroom to somewhere close to the frame size of your final video. I usually export a PSD sequence (DNG if I am going to AE)  to a separate folder. This is a one-time operation. Then the Image sequence is brought into AE if I need to do effects work on the shot that cannot be done in an NLE like Premiere Pro, If my purpose is to just make a movie I always just use Premiere Pro, put the image sequence in an appropriately sized sequence, color grade and render. It will take about 1/10 the time as doing the job in After Effects.

    Here are the settings I used to export a timelapse of the eclipse of the moon I shot Wednesday AM.

    900 48 MB stills resized to 1920 wide, imported into Premiere Pro as an image sequence, interpreted as 23.976 fps, created a sequence from the selection, opened up Lumetri and made a tweak or two, and rendered in less than 20 minutes. The same project in AE using the original RAW files for an HD comp would not have looked as good and probably would have taken three or four hours to render.

    If you want to do some moves on your large image sized timelapse then resizing may still help you. It all depends on the size of your original files. You want to be somewhere close to 100% scale somewhere in the comp for maximum image quality.

    I hope this helps. There is no automatic way to resize a bunch of different size images in AE so they are all 1440 pixels wide, but you can do that in Lightroom. There is no auto crop that is intelligent.

    1 reply

    Rick GerardCommunity ExpertCorrect answer
    Community Expert
    February 1, 2018

    An image sequence takes the frame size from the first image in the sequence. Time-lapse sequences should al be the same size.

    The most efficient workflow for time-lapse sequences is to resize them using Lightroom to somewhere close to the frame size of your final video. I usually export a PSD sequence (DNG if I am going to AE)  to a separate folder. This is a one-time operation. Then the Image sequence is brought into AE if I need to do effects work on the shot that cannot be done in an NLE like Premiere Pro, If my purpose is to just make a movie I always just use Premiere Pro, put the image sequence in an appropriately sized sequence, color grade and render. It will take about 1/10 the time as doing the job in After Effects.

    Here are the settings I used to export a timelapse of the eclipse of the moon I shot Wednesday AM.

    900 48 MB stills resized to 1920 wide, imported into Premiere Pro as an image sequence, interpreted as 23.976 fps, created a sequence from the selection, opened up Lumetri and made a tweak or two, and rendered in less than 20 minutes. The same project in AE using the original RAW files for an HD comp would not have looked as good and probably would have taken three or four hours to render.

    If you want to do some moves on your large image sized timelapse then resizing may still help you. It all depends on the size of your original files. You want to be somewhere close to 100% scale somewhere in the comp for maximum image quality.

    I hope this helps. There is no automatic way to resize a bunch of different size images in AE so they are all 1440 pixels wide, but you can do that in Lightroom. There is no auto crop that is intelligent.