Participant
January 14, 2026
Answered

The "continuously rasterize" icon is causing the gradient colors to change in my 2d comp

  • January 14, 2026
  • 1 reply
  • 794 views

Hi, this is probably something simple that I'm missing but I can't figure it out. 


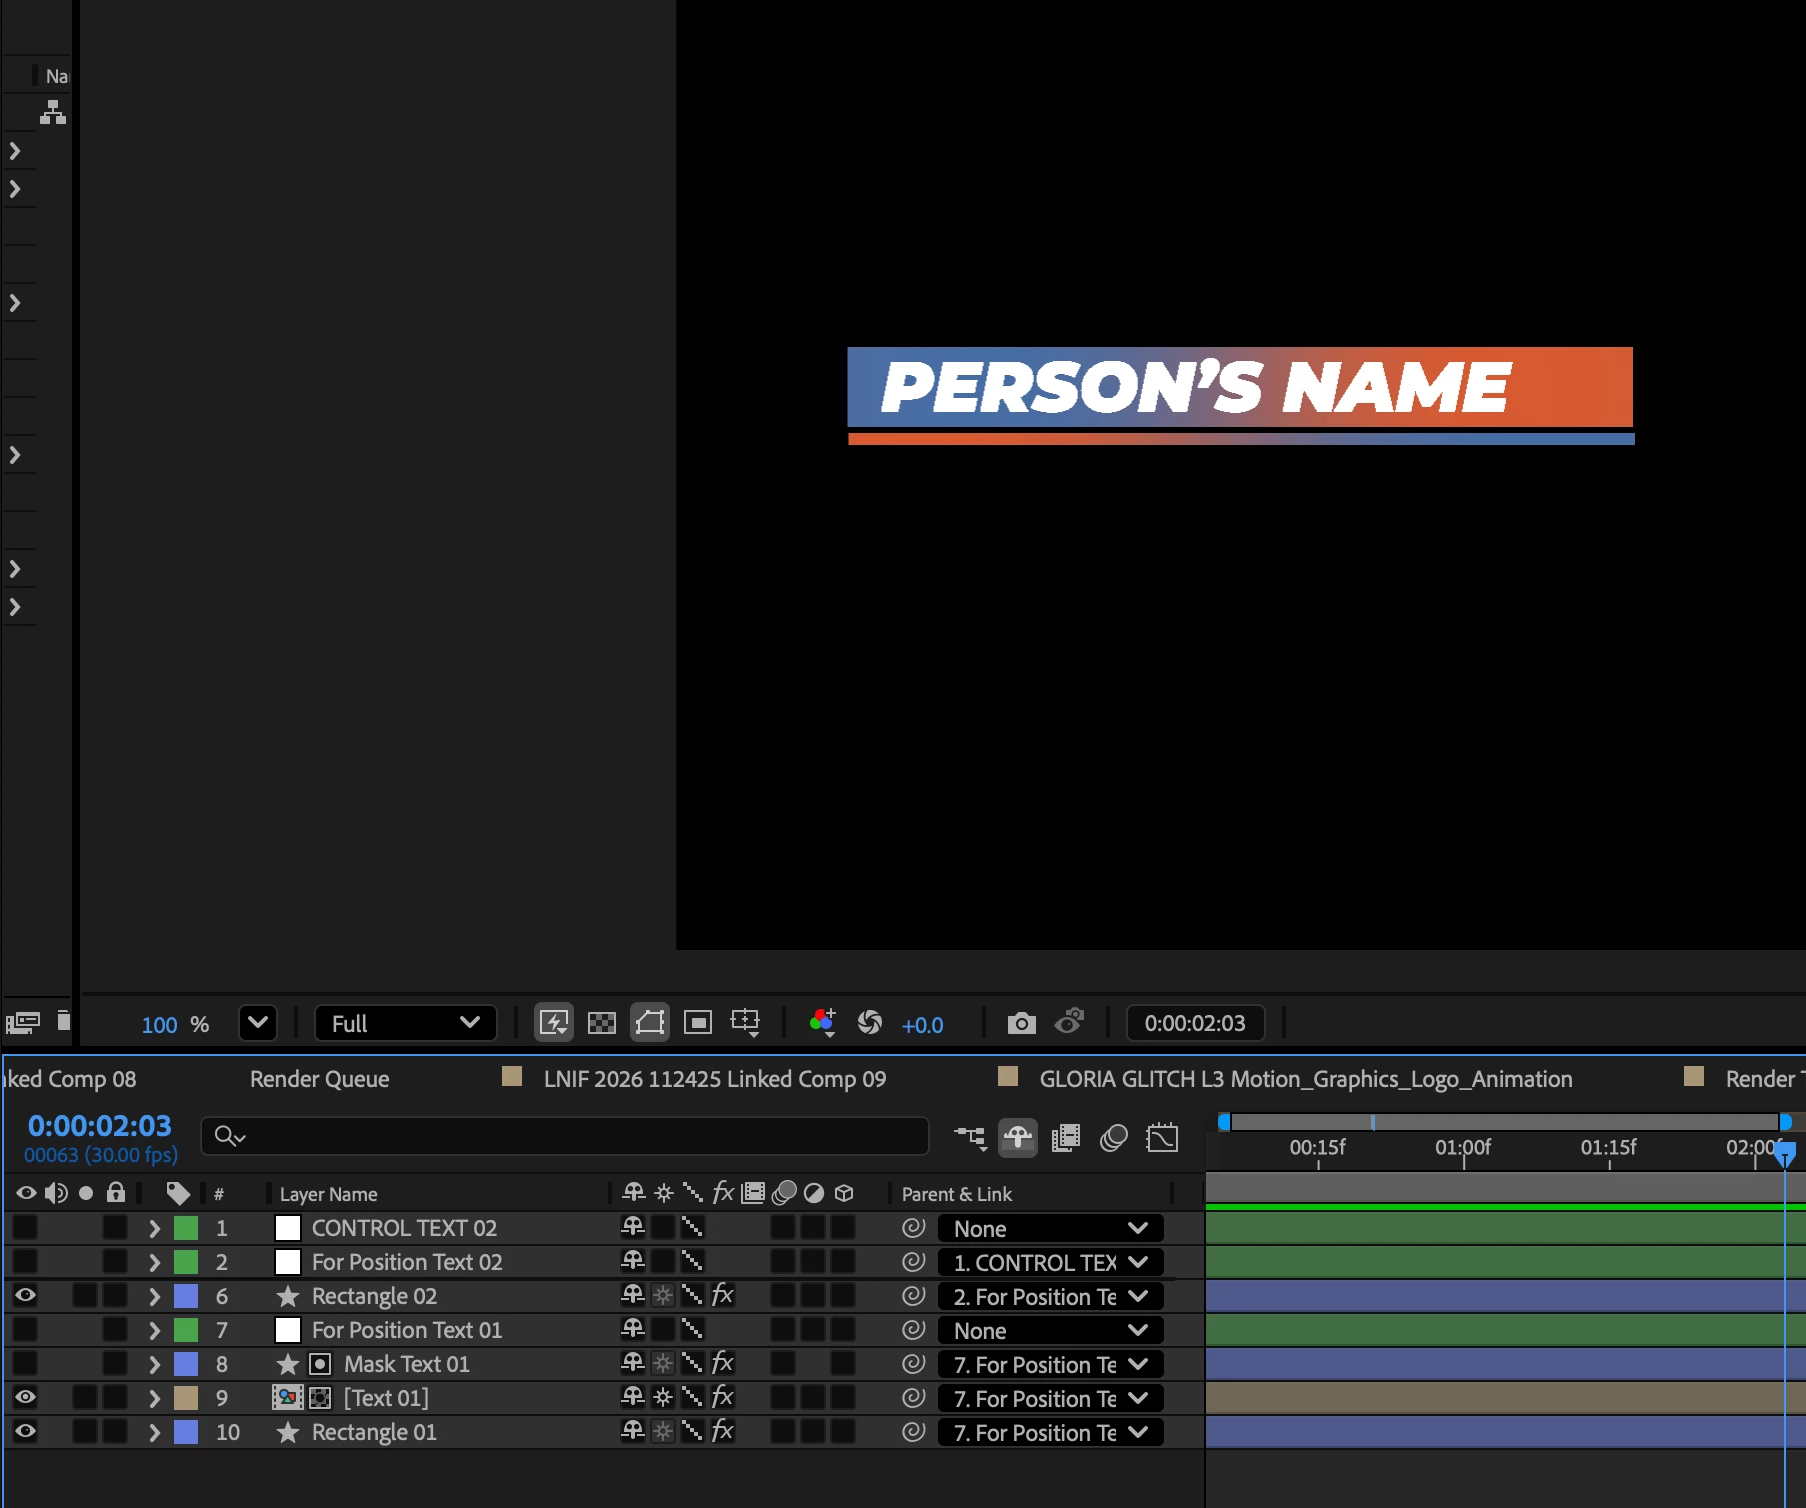
When I am in my pre-comp, my gradient works the way I want it to and the colors appear bright on both sides. The "Continuously rasterize" button is clicked on there but that doesn't seem to cause an issue: 

Screenshot 2026-01-13 at 8.46.36 PM.png


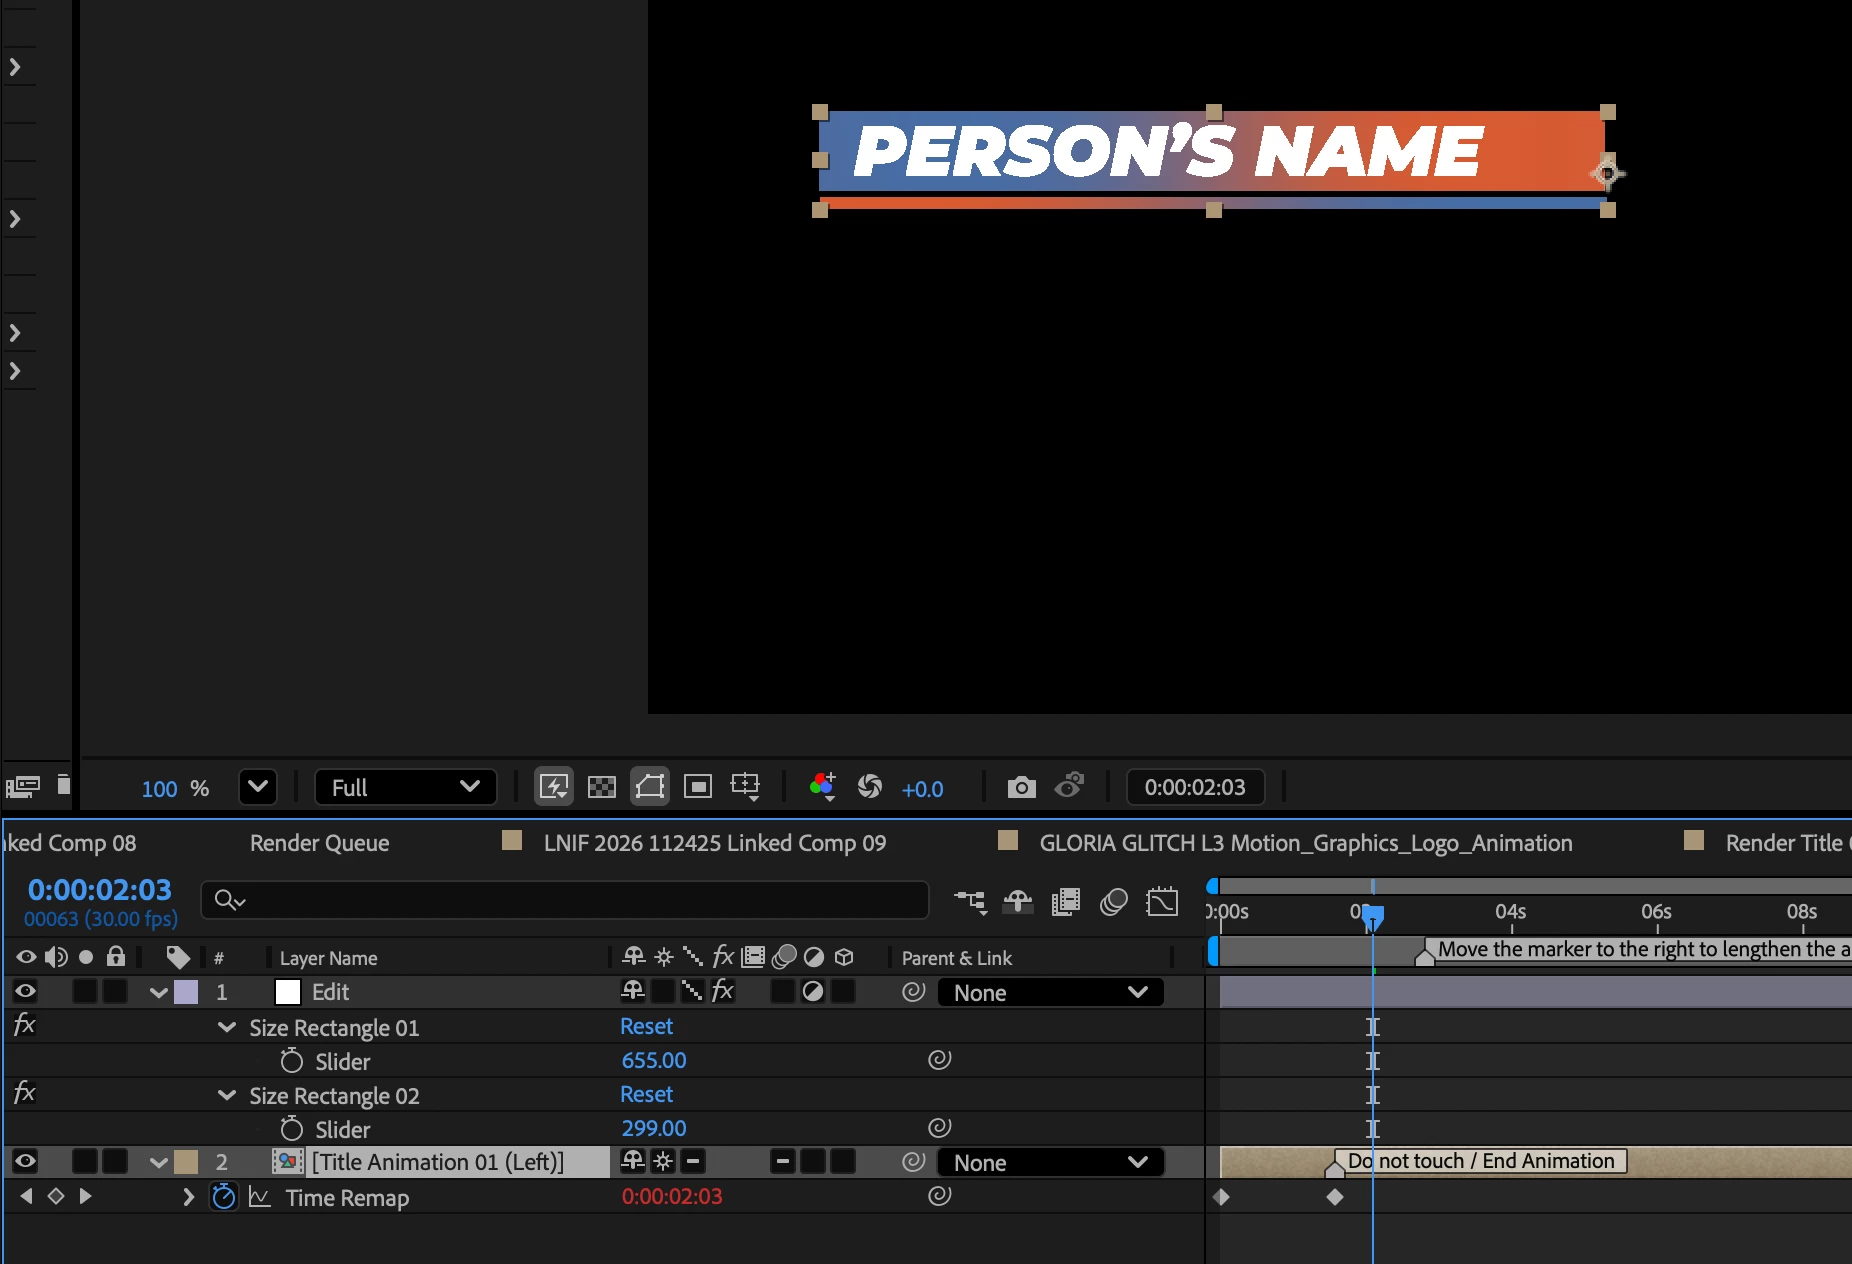
When I zoom out to the larger comp that holds that pre-comp, it's still not an issue. The colors show up as I'd like them to (again with the "continuously rasterize" option clicked on):

Screenshot 2026-01-13 at 8.46.43 PM.png


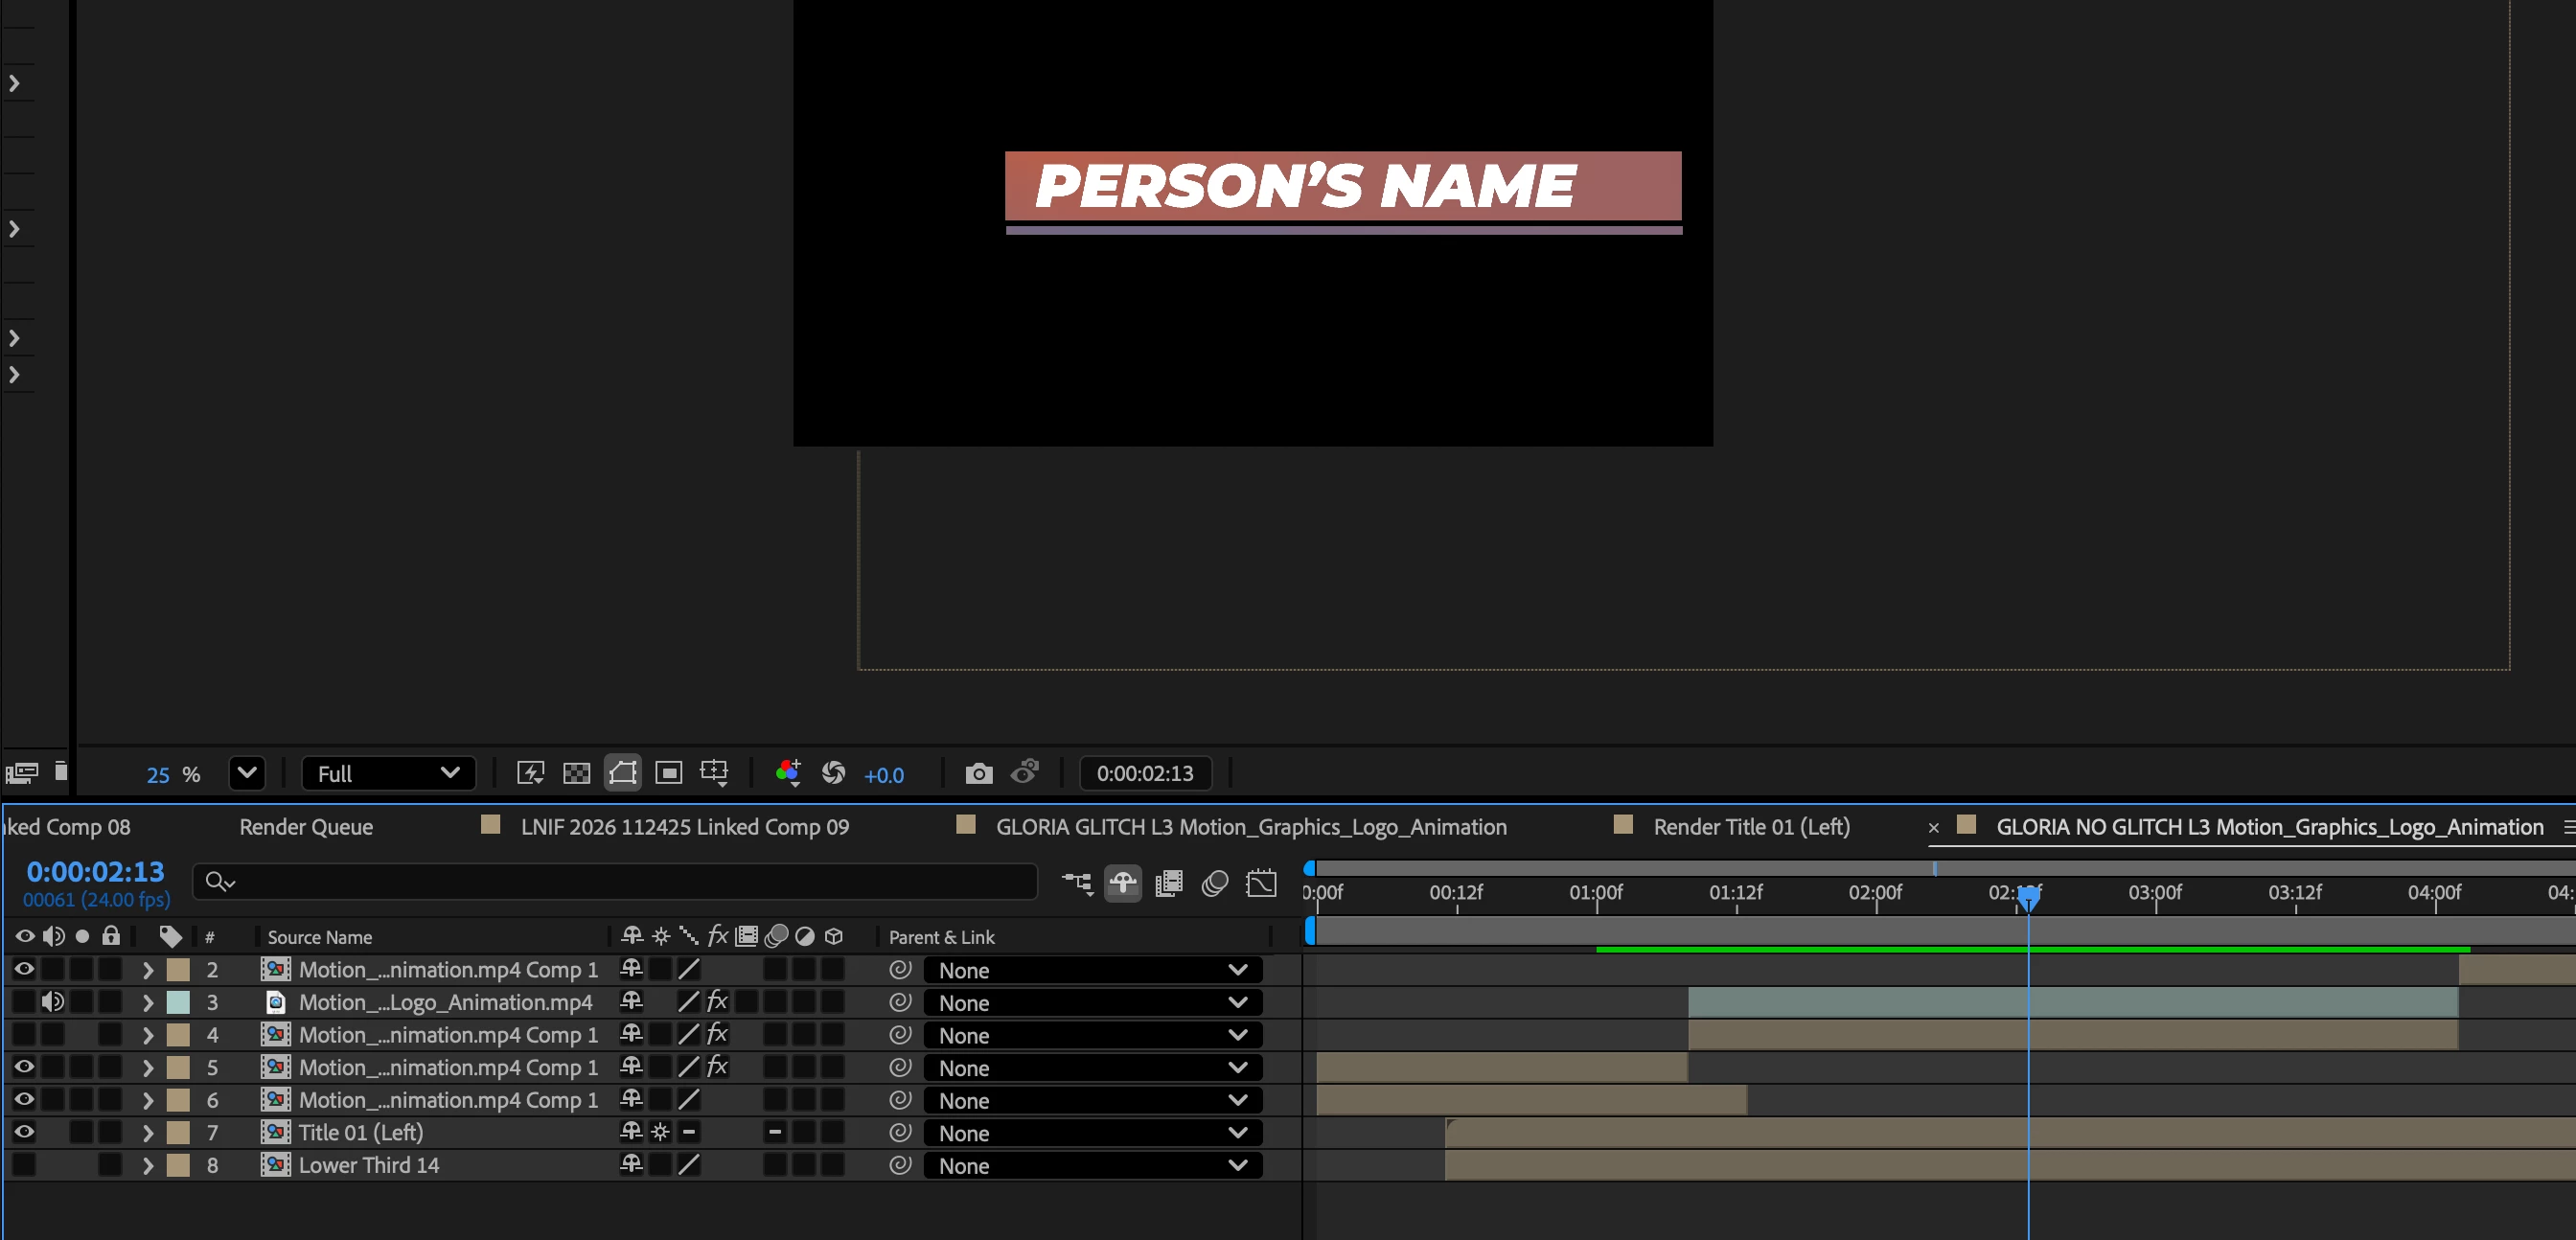
But when I zoom out to the main comp that holds those pre-comps, the colors are muted and different: 

Screenshot 2026-01-13 at 8.47.10 PM.png

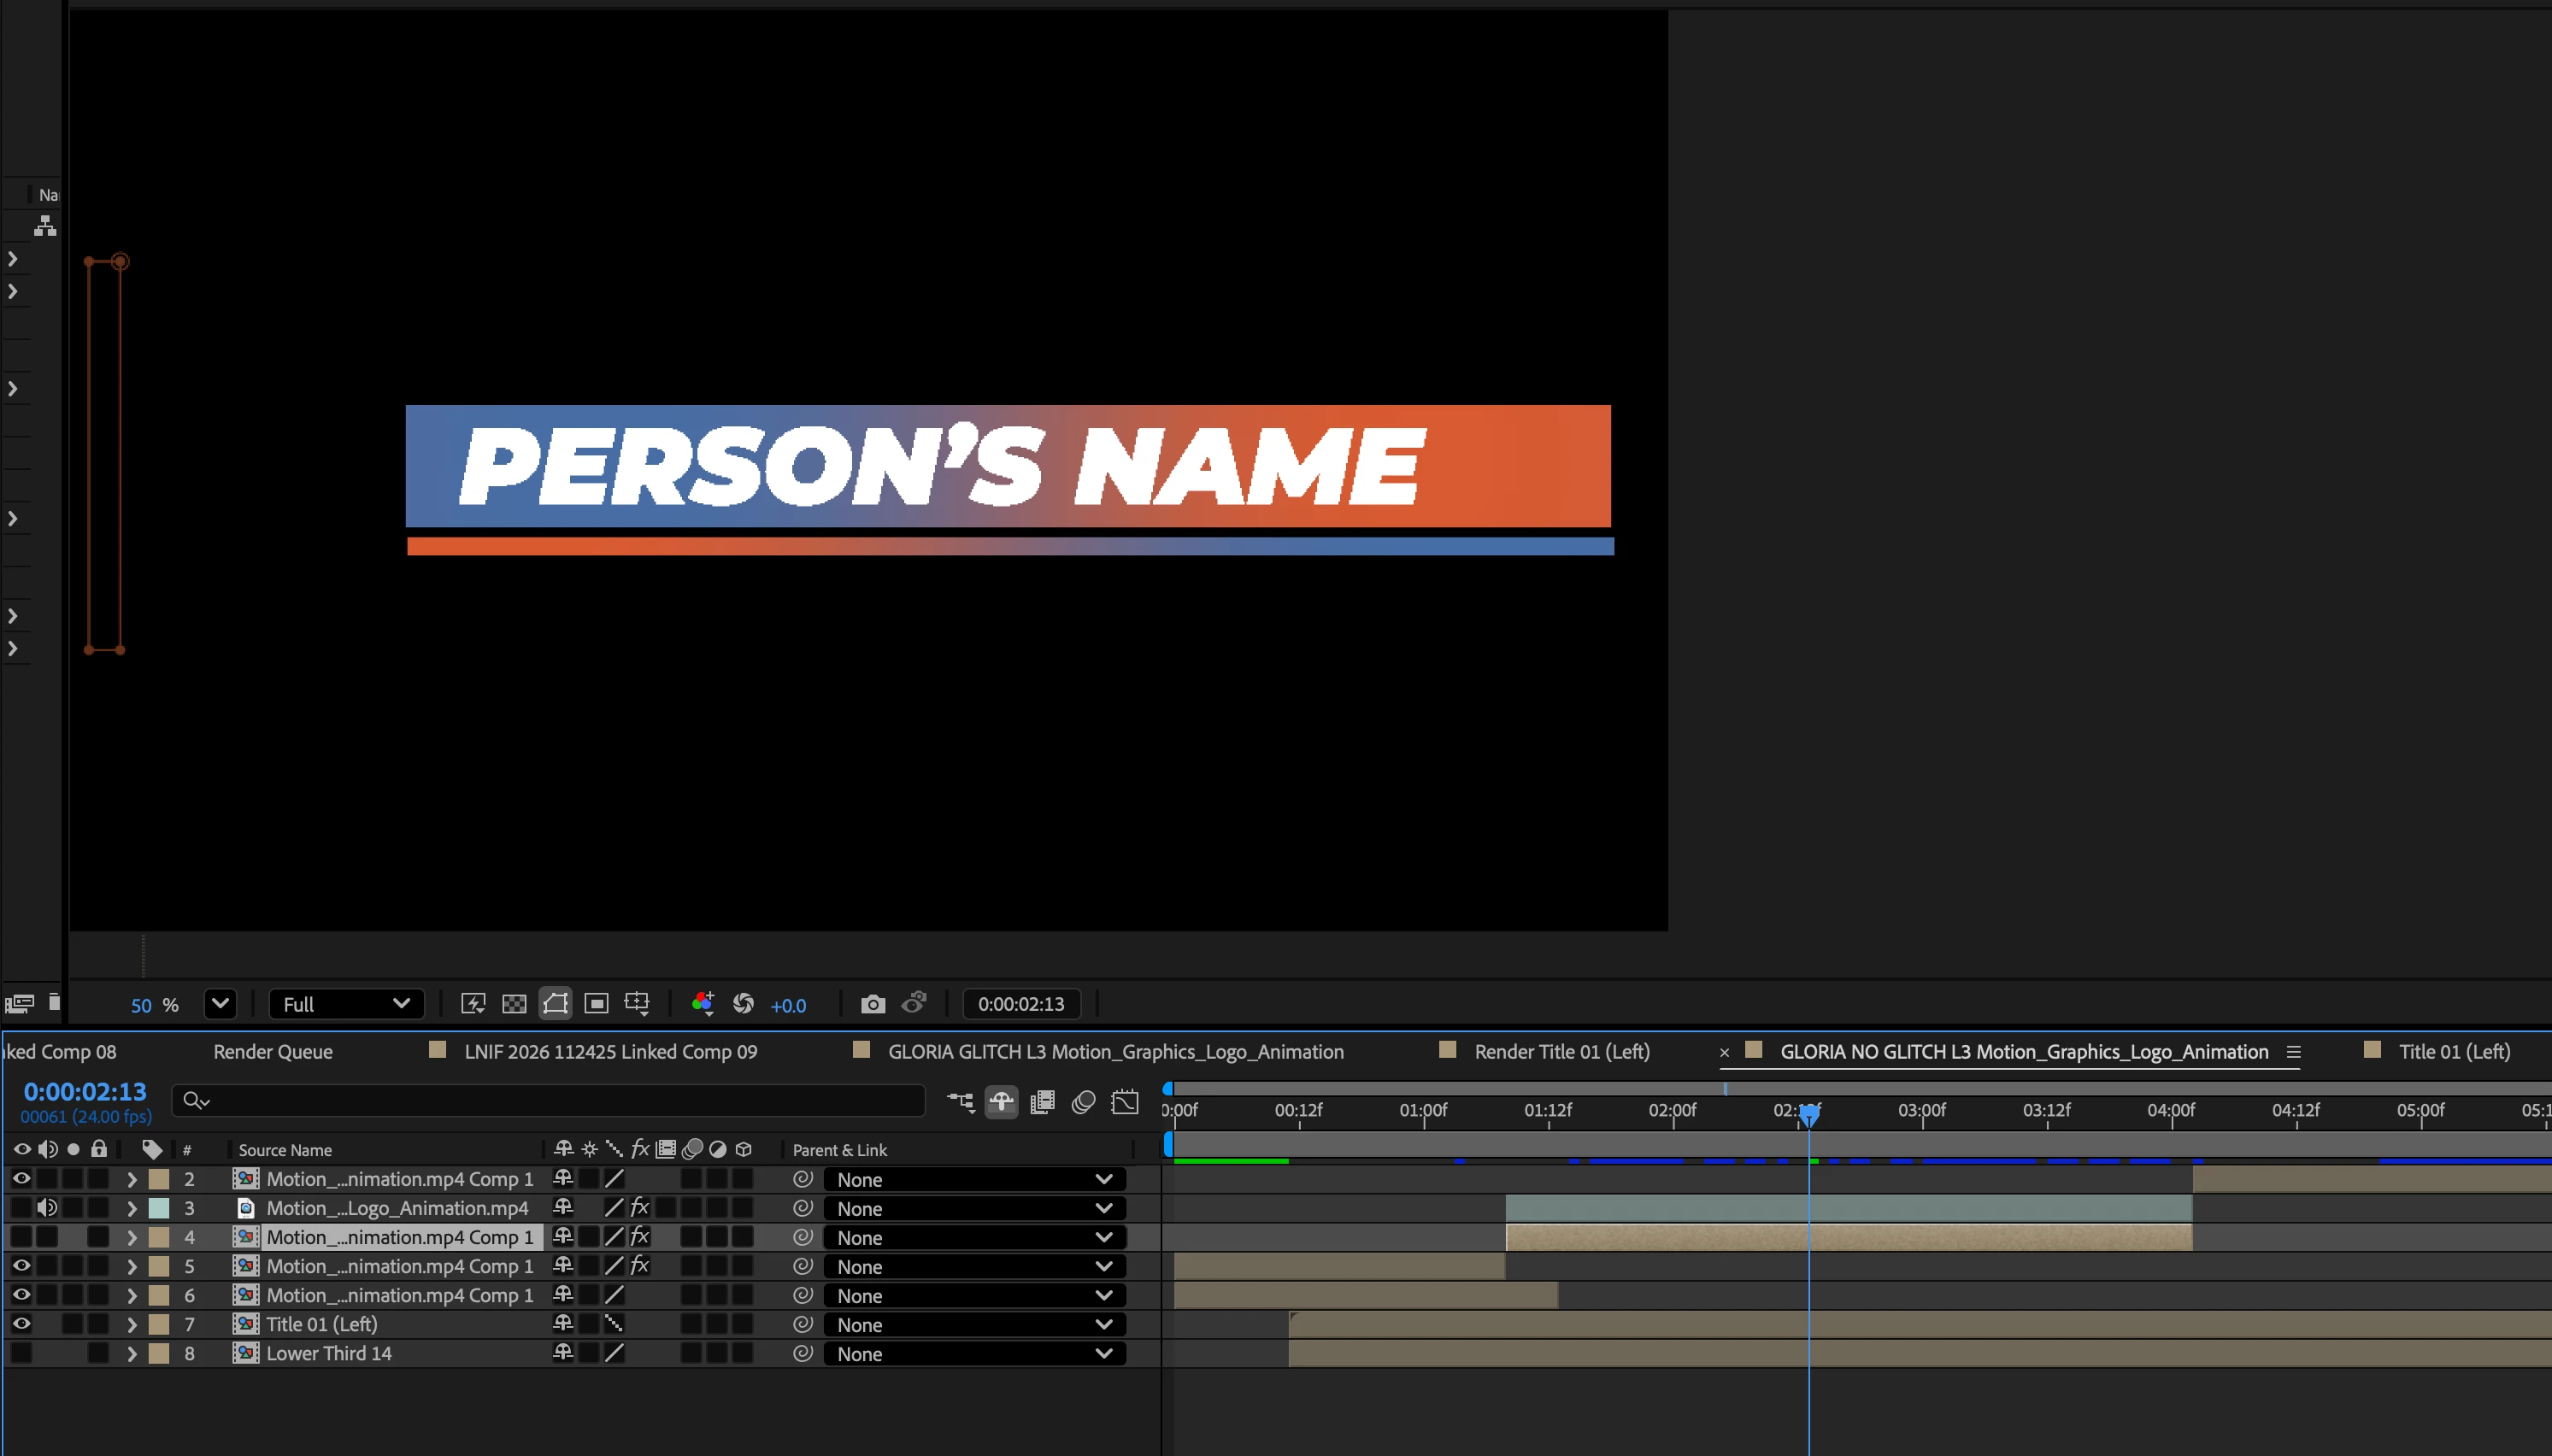
When I click off the "continuously rasterize" star button then they show up correctly but the lettering and shapes aren't nearly as sharp. 

Screenshot 2026-01-13 at 8.52.19 PM.png


Wondering if anyone has suggestions.


I'm using After Effects 25.6.4 (Build 3)

With a Macbook Pro (Apple M4 Pro chip), Sequoia 15.6.1 operating system.


Thanks in advance for any help! 

Correct answer David.Arbor

Hi @dan_relate ,


There are a few things going on here. First, to add some clarity to something that's somewhat confusing, the sun icon you're referring to is only Continuously Rasterize when it's on a footage layer containing vector data (like an Illustrator layer). It's visible but grayed out on Shape Layers because those are always vector layers.

When the same switch is flipped on a pre-comp, it's actually called "Collapse Transformations" and this feature essentially brings the entire contents of the pre-comp into your parent comp. A great way to understand this is if you setup a 3D scene with lots of depth, then you pre-comp it. Once it's a pre-comp, the whole scene becomes flat as a postcard when rotated in 3D space. However, if you enable Collapse Transformations, you're bringing the 3D scene into your main comp. Here's a great School of Motion article that explains these two features: https://www.schoolofmotion.com/blog/collapse-transformations-continuously-rasterize-after-effects


So unless you have a good reason to, you should try disabling Collapse Transformations on the pre-comps.

Regarding the jagged text: take a look at the switches to the right of your layer names. The ones with the dotted diagnoal line have been changed to Draft Quality. This setting used to be much more helpful for performance on older machines, but any modern machine should be able to handle your comp (based on the screenshots I'm seeing) with the quality set to Full. Just select all your layers and click one of the switches until they're all back to a solid line. This willl get rid of the jagged text.


After you remove those two factors, let me know if you're still having an issue with the gradient. Depending on how you created the gradient, this could fix the issue and the School of Motion article will shed light on why this is happening.


Thanks,
- David, After Effects Engineering Team

1 reply

David.Arbor
Community Manager
David.ArborCommunity ManagerCorrect answer
Community Manager
January 14, 2026

Hi @dan_relate ,


There are a few things going on here. First, to add some clarity to something that's somewhat confusing, the sun icon you're referring to is only Continuously Rasterize when it's on a footage layer containing vector data (like an Illustrator layer). It's visible but grayed out on Shape Layers because those are always vector layers.

When the same switch is flipped on a pre-comp, it's actually called "Collapse Transformations" and this feature essentially brings the entire contents of the pre-comp into your parent comp. A great way to understand this is if you setup a 3D scene with lots of depth, then you pre-comp it. Once it's a pre-comp, the whole scene becomes flat as a postcard when rotated in 3D space. However, if you enable Collapse Transformations, you're bringing the 3D scene into your main comp. Here's a great School of Motion article that explains these two features: https://www.schoolofmotion.com/blog/collapse-transformations-continuously-rasterize-after-effects


So unless you have a good reason to, you should try disabling Collapse Transformations on the pre-comps.

Regarding the jagged text: take a look at the switches to the right of your layer names. The ones with the dotted diagnoal line have been changed to Draft Quality. This setting used to be much more helpful for performance on older machines, but any modern machine should be able to handle your comp (based on the screenshots I'm seeing) with the quality set to Full. Just select all your layers and click one of the switches until they're all back to a solid line. This willl get rid of the jagged text.


After you remove those two factors, let me know if you're still having an issue with the gradient. Depending on how you created the gradient, this could fix the issue and the School of Motion article will shed light on why this is happening.


Thanks,
- David, After Effects Engineering Team

Participant
January 14, 2026

@David.Arbor thank you so much for taking the time to write such a detailed response. This helps so much! Might be a little bit before I can sit down and test this but I'm confident this should fix everything. Thank you!

Participant
January 15, 2026

@David.Arbor Thanks again for your help. I disabled the collapse transformations and set the quality to full (as opposed to draft quality). It helped remove the jagged lines and made it look better overall, but the text still seemed a bit blurry. Part of the problem is that I'm using a template and the template may not be organized the best way so I adjusted it so the problem was no longer there. Either way, this is all good stuff to know. Thank you for your help!