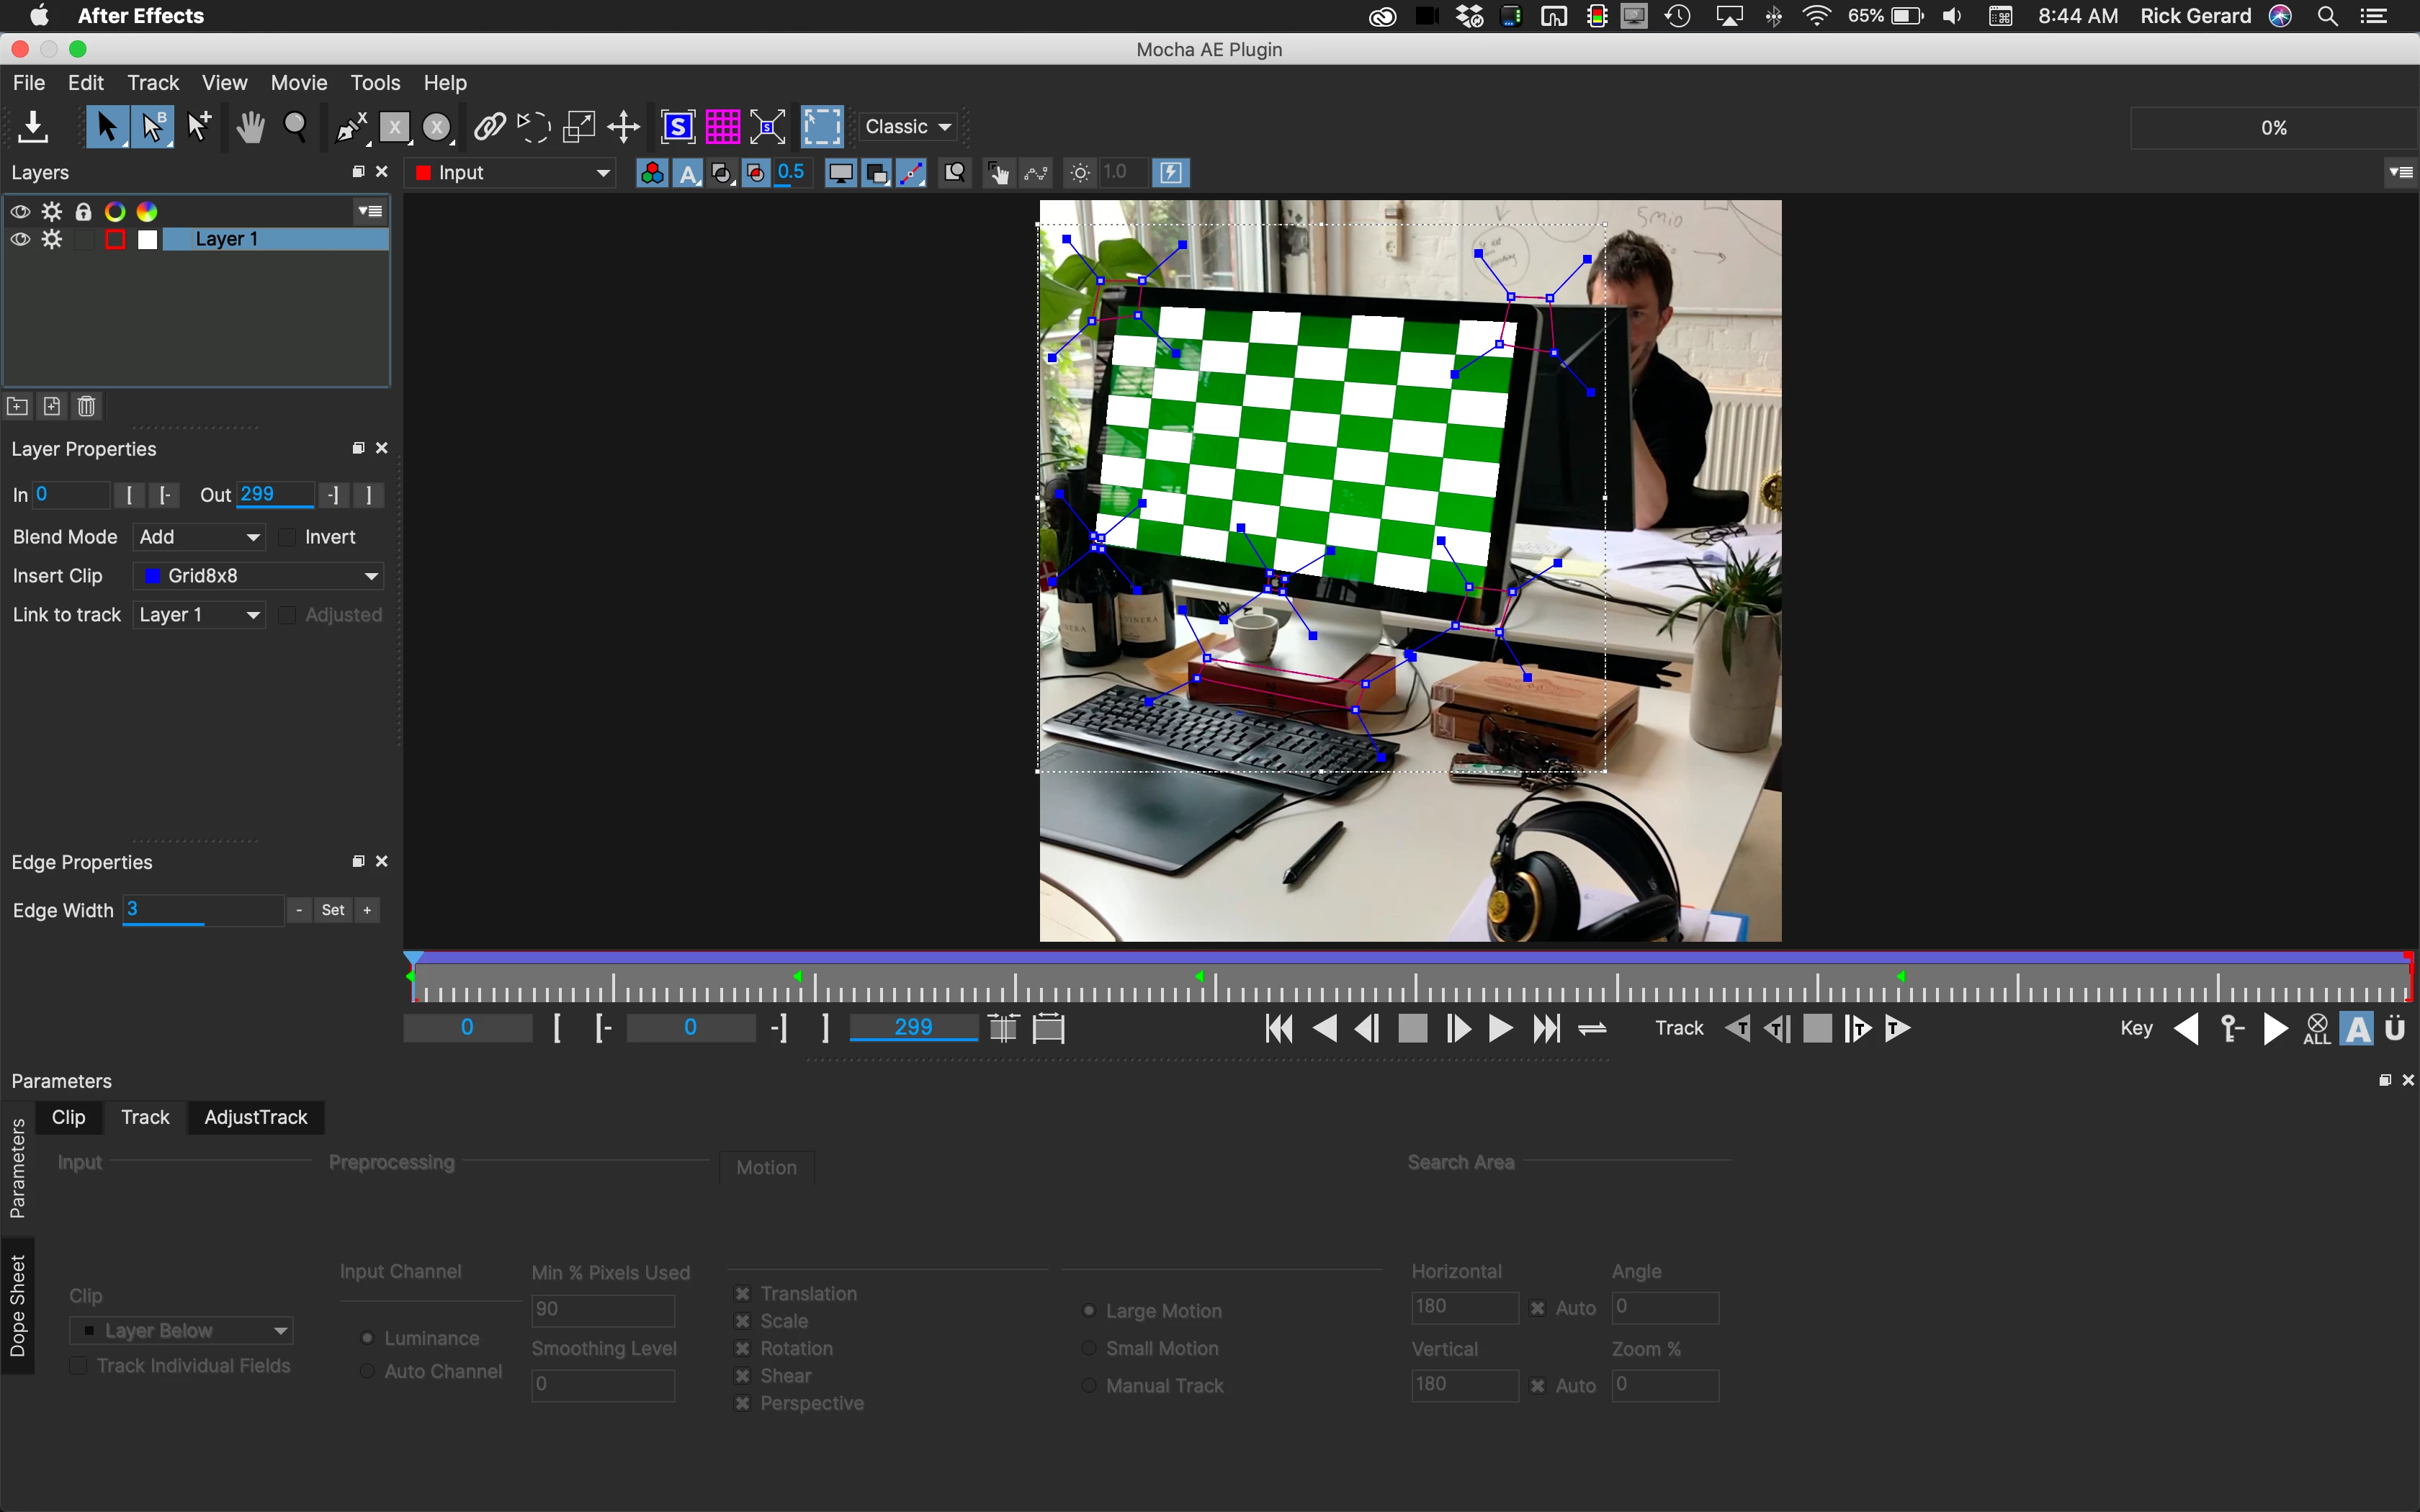
Take a close look at the screenshot from Mocha. I added a spline around the Apple logo at the bottom of the screen, another very small spline in the bottom left corner, and a spline where the base and the box are because they are on the same plane as the screen. I set the number of pixels to 90º and checked perspective (not shown because I'm in the adjust track panel) then I still had to set a few keyframes to keep the corners aligned.
After I got a good track I Added a gray solid that I would turn into an adjustment layer and a screenshot of this forum thread. The screenshot was scaled to fit the comp and pre-composed. The corner pin data was added to Mocha from Layer 1 then applied to the Gray Solid and the pre-composed screenshot. The gray solid was pre-composed and turned into an adjustment layer. Black and White was added to remove the green color from the screen and curves added. The replacement screen was set to Overlay, then Curves on the adjustment layer was adjusted to set screen brightness and control the amount of reflections. I ended up with this:
I would give you the project file but I want you to learn how to use mocha properly. I always set the screen to a medium gray when I'm shooting this kind of work because it is easier to deal with the reflections and if you have color reflections on the screen they are easier to blend into the shot. The rendered file looks pretty good. Because of the keyframing, I had to do in Mocha this project took just a little longer. I would also probably trim that shot. It is pretty long for the kind of movies I usually make.


