Stephen, i did not try this. It is too complicated for me - more so when you tell me before it might not work.
I just tested and It works in CC2019 on Windows… Although the script would need adjustment for nicer GUI colours!
It is not too complicated, copy the following 194 lines of source code and paste into a plain text editor like TextEdit.app or Notepad.exe, and save the file with a .jsx extension rather than .txt:
// https://stackoverflow.com/questions/47797219/edit-script-for-editing-metadata-in-adobe-bridge-how-should-i-put-key-words
#target bridge
if( BridgeTalk.appName == "bridge" ) {
keyReplace = MenuElement.create("command", "Add-Replace-Remove Keyword", "at the end of tools");
}
keyReplace.onSelect = function () {
mainReplaceKeyword();
}
function mainReplaceKeyword(){
if(app.version.substr(0,app.version.indexOf('.'))==1){
alert("Sorry You Need CS3 or CS4 to run this script!");
return;
}
var dlg =
"dialog{text:'Script Interface',bounds:[100,100,500,310],"+
"panel0:Panel{bounds:[10,10,390,200] , text:'' ,properties:{borderStyle:'etched',su1PanelCoordinates:true},"+
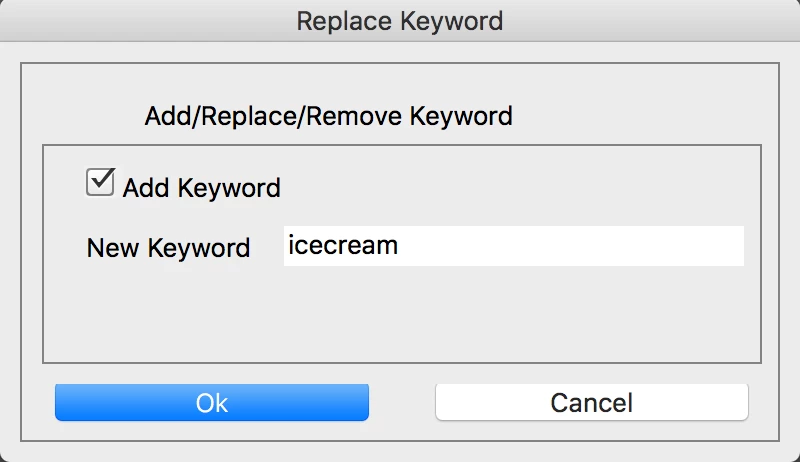
"title:StaticText{bounds:[60,10,350,40] , text:'Add/Replace/Remove Keyword' ,properties:{scrolling:undefined,multiline:undefined}},"+
"panel1:Panel{bounds:[10,40,370,150] , text:'' ,properties:{borderStyle:'etched',su1PanelCoordinates:true},"+
"addKey:Checkbox{bounds:[20,10,160,31] , text:'Add Keyword' },"+
"statictext1:StaticText{bounds:[20,40,119,60] , text:'Replace' ,properties:{scrolling:undefined,multiline:undefined}},"+
"From:EditText{bounds:[120,40,350,60] , text:'' ,properties:{multiline:false,noecho:false,readonly:false}},"+
"statictext2:StaticText{bounds:[20,80,90,97] , text:'With' ,properties:{scrolling:undefined,multiline:undefined}},"+
"To:EditText{bounds:[120,80,350,100] , text:'' ,properties:{multiline:false,noecho:false,readonly:false}}},"+
"button0:Button{bounds:[10,160,180,181] , text:'Ok' },"+
"button1:Button{bounds:[200,160,370,181] , text:'Cancel' }}};";
var win = new Window(dlg,"Replace Keyword");
win.center();
win.panel0.title.graphics.font = ScriptUI.newFont("Times","BOLDITALIC",20);
g = win.graphics;
b=win.panel0.title.graphics;
var myBrush = g.newBrush(g.BrushType.SOLID_COLOR, [0.99, 0.99, 0.20, 1]);
g.backgroundColor = myBrush;
var myPen =b.newPen (g.PenType.SOLID_COLOR, [0.00, 0.00, 0.99, 1],lineWidth=1);
var myPen2 =b.newPen (g.PenType.SOLID_COLOR, [0.99, 0.00, 0.00, 1],lineWidth=1);
g.foregroundColor = myPen;
b.foregroundColor = myPen2;
win.panel0.panel1.From.active=true;
win.panel0.panel1.addKey.onClick = function() {
if(win.panel0.panel1.addKey.value) {
win.panel0.panel1.statictext1.text = "New Keyword";
win.panel0.panel1.From.active=true;
win.panel0.panel1.statictext2.visible=false;
win.panel0.panel1.To.visible=false;
}
if(!win.panel0.panel1.addKey.value) {
win.panel0.panel1.statictext1.text = "Replace";
win.panel0.panel1.statictext2.visible=true;
win.panel0.panel1.To.visible=true;
win.panel0.panel1.From.active=true;
}
}
win.center();
var done = false;
while (!done) {
var x = win.show();
if (x == 0 || x == 2) {
win.canceled = true;
done = true;
} else if (x == 1) {
done = true;
var result = valiDate();
if(result != true) {
alert(result);
return;
}else{
var Replace = win.panel0.panel1.From.text;
var With = win.panel0.panel1.To.text;
var addKey = win.panel0.panel1.addKey.value;
processKeyword(Replace,With,addKey);
}
}
}
function valiDate(){
if(win.panel0.panel1.From.text =='') return "No Keyword Entered!";
return true;
}
function processKeyword(Replace,Witha,ddKey){
try{
loadXMPScript();
}catch(e){
alert("Can not load XMPScript\r" + e.message);
}
var items = app.document.selections;
for (var i = 0; i < items.length; i++){
var file=new Thumbnail(items[i]);
try{
var xmpFile = new XMPFile(file.path, XMPConst.UNKNOWN,XMPConst.OPEN_FOR_UPDATE);
}catch(e){
alert("Problem opening xmp for update:-\r" + file.path +"\r" +e.message);
return;
}
try{
var xmp = xmpFile.getXMP();
}catch(e){
alert("Problem opening xmp data:-\r" + e.message);
return;
}
try{
var tmpCount = xmp.countArrayItems(XMPConst.NS_DC, "subject");
}catch(e){
alert("Cannot get count \r" + e.message);
}
if(addKey){
xmp.appendArrayItem(XMPConst.NS_DC, "subject", Replace, 0,XMPConst.ARRAY_IS_ORDERED);
}
if(tmpCount >0 && !addKey){
for (var a =0;a<tmpCount;a++){
var Keyword = xmp.getArrayItem(XMPConst.NS_DC,'subject', a+1);
if(Keyword == Replace && With == '') {
xmp.deleteArrayItem(XMPConst.NS_DC,'subject', a+1);
}
if(Keyword == Replace && With != ''){
xmp.setArrayItem(XMPConst.NS_DC,'subject', a+1,With);
}
}
}
if (xmpFile.canPutXMP(xmp)) {
xmpFile.putXMP(xmp);
}else{
alert(e.message);
}
xmpFile.closeFile(XMPConst.CLOSE_UPDATE_SAFELY);
}
unloadXMPScript();
}
}
function loadXMPScript()
{
var results = new XMPLibMsg("XMPScript Library already loaded", 0, false);
if (!ExternalObject.AdobeXMPScript)
{
try
{
ExternalObject.AdobeXMPScript = new ExternalObject('lib:AdobeXMPScript');
results.message = "XMPScript Library loaded";
}
catch (e)
{
alert("Could not load AdobeXMPScript \r" + e.message);
results.message = "ERROR Loading AdobeXMPScript: " + e;
results.line = e.line;
results.error = true;
}
}
return results;
}
function unloadXMPScript()
{
var results = new XMPLibMsg("XMPScript Library not loaded", 0, false);
if( ExternalObject.AdobeXMPScript )
{
try
{
ExternalObject.AdobeXMPScript.unload();
ExternalObject.AdobeXMPScript = undefined;
results.message = "XMPScript Library successfully unloaded";
}
catch (e)
{
results.message = "ERROR unloading AdobeXMPScript: " + e;
results.line = e.line;
results.error = true;
}
}
return results;
}
function XMPLibMsg (inMessage, inLine, inError)
{
this.message = inMessage;
this.line = inLine;
this.error = inError;
}
Then:
- Open Adobe Bridge, then open Bridge’s preferences dialog
- Under Startup Scripts - click the "Reveal My Startup Scripts" button
- Copy/Paste or drag-n-drop your .jsx script files into the folder/directory
- Quit and restart Bridge and answer "Yes" to enable the script.
The script will be available under the Tools menu as "Add-Replace-Remove Keyword”.