Participant
March 1, 2026
Question

Re-rigging puppet on new laptop

  • March 1, 2026
  • 1 reply
  • 10 views

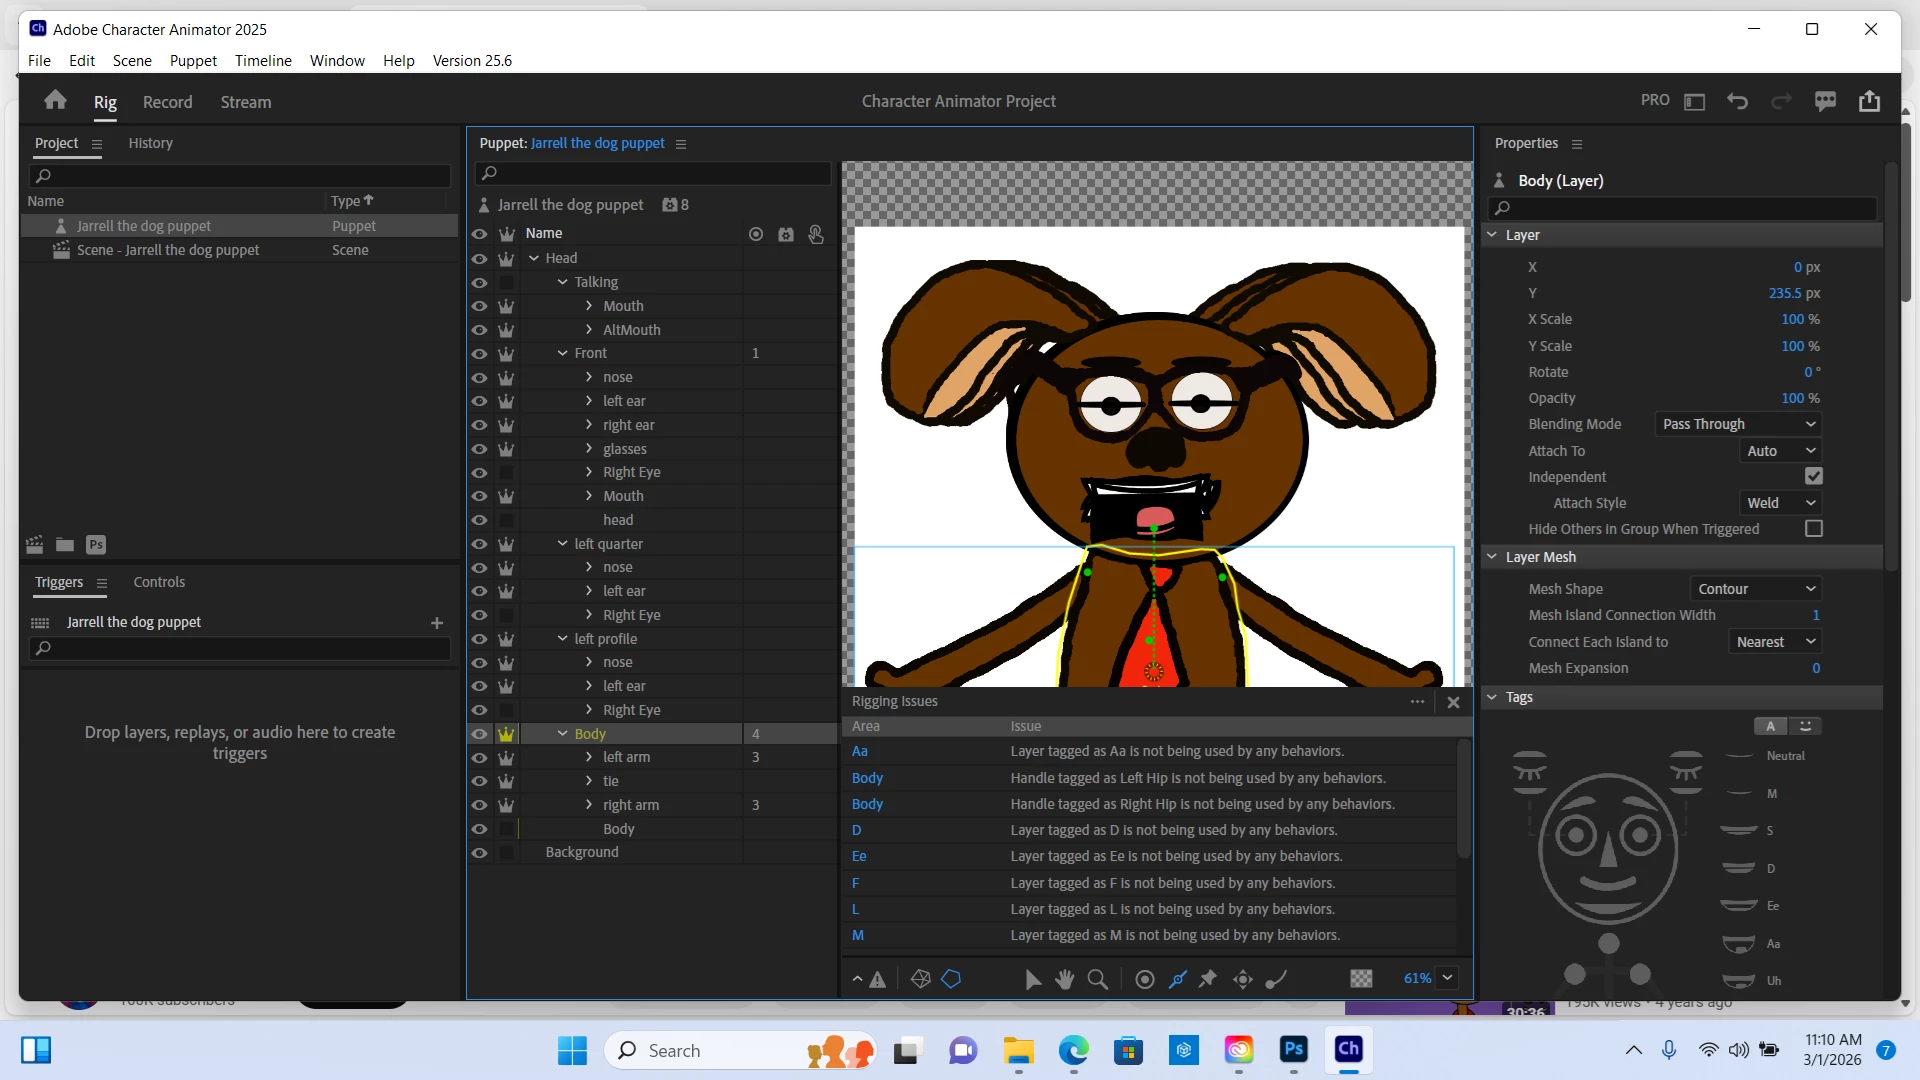
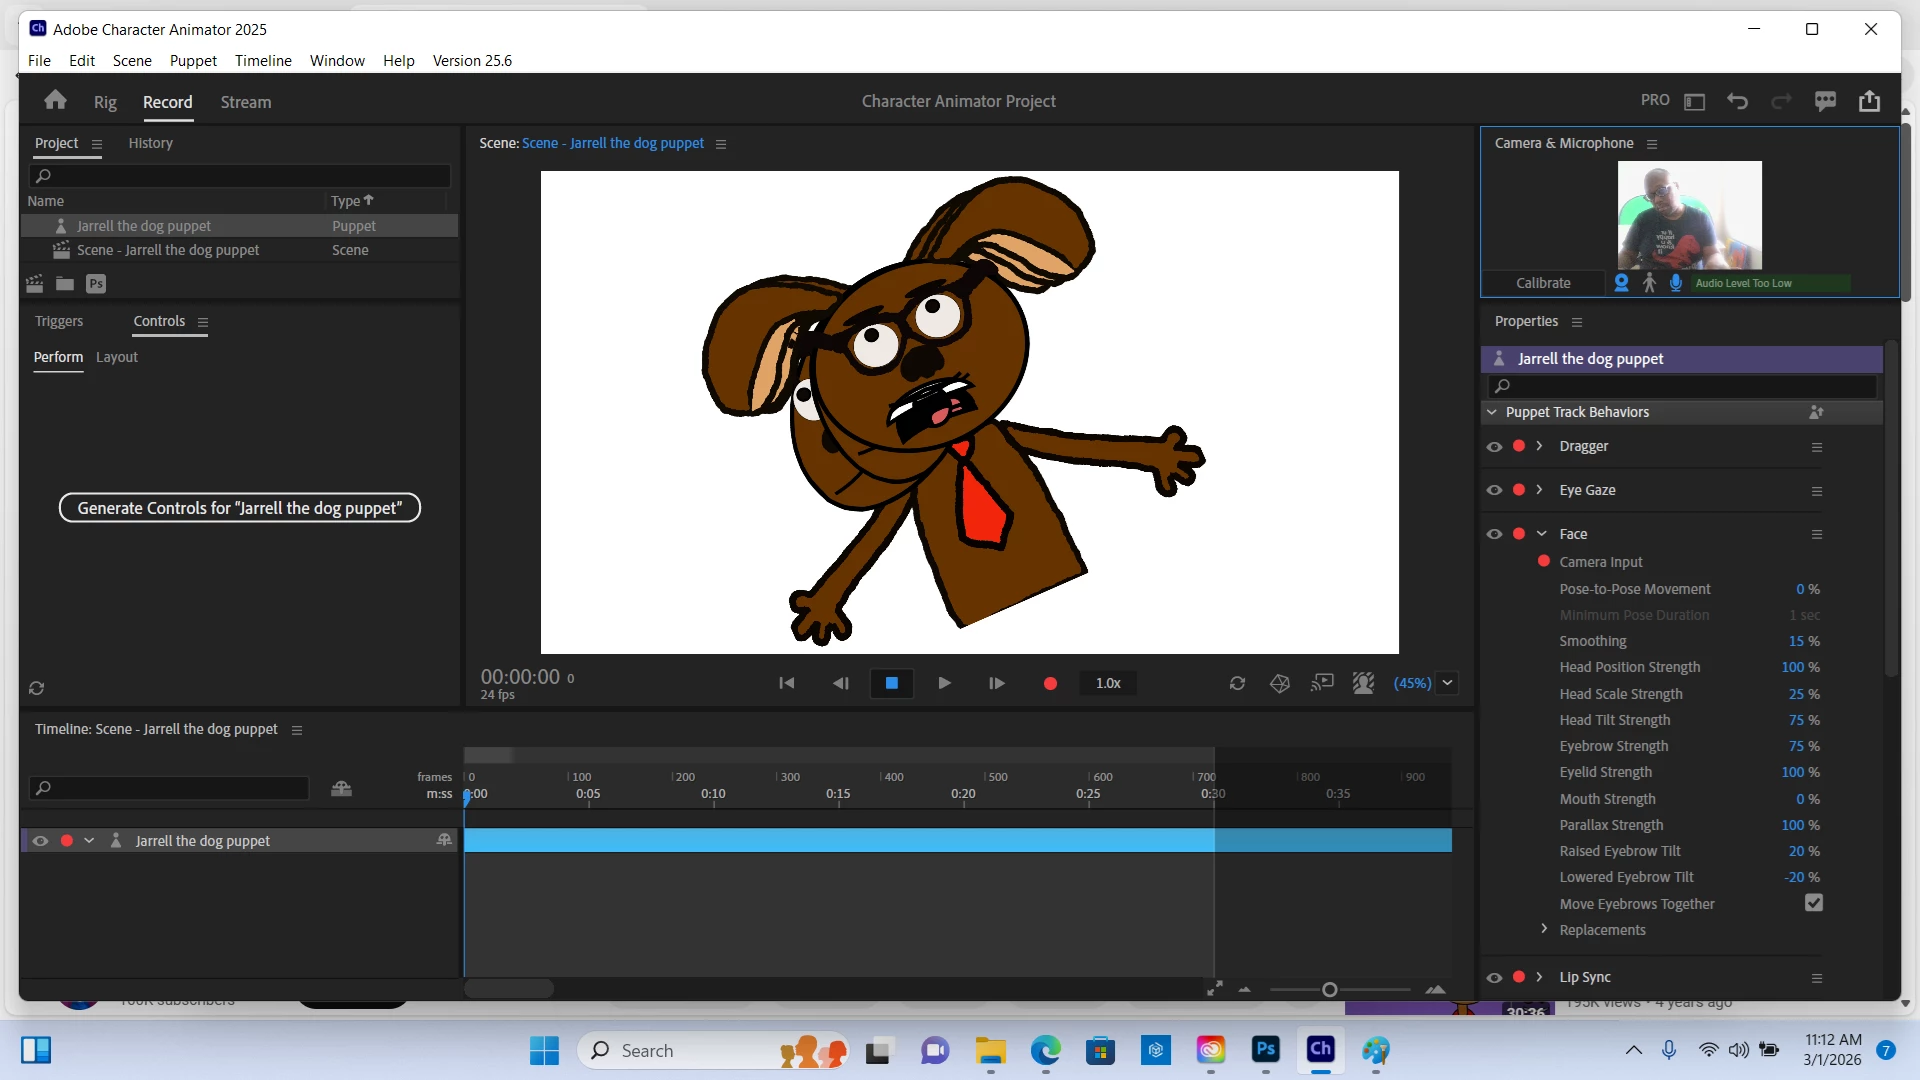
I tried my puppet to a new laptop for Character Animator. While all the layer settings, including the different layers for head turning, are correctly labeled in Photoshop, (see first picture) when I import to CA, it’s a complete mess in the Scene. (See second picture). I assume the solution is to re-rig everything but I’m not sure how to do it. I fixed the arms so far to be draggable and bend correctly. However I’m not sure how to fix the mouth and head movements. Can someone please walk me through how to get everything back to look like the third picture I’ve attached?


    1 reply

    TheOriginalGC
    Community Expert
    Community Expert
    March 2, 2026

    Was your puppet created in Adobe Photoshop or was it created in a different program and exported as a PSD? I’m not sure why, but Character Animator has problems interpreting files that are created in other programs, like Procreate. If that is the case, all you need to do is load and save the file in Photoshop before importing it into Character Animator. 

    Looking at the first image, I see a few issues that might be causing confusion in the program. The head and body should be at the same layer level in the hierarchy. Your puppet has the body as a sub-layer of the head (and it has an additional body sublayer - I’m not sure what the purpose of that is).  Inside the head, each “view” for head-turning must contain all of the parts, including the mouth. The “talking” layer in your puppet is not one of the multiple head views that the head-turner behavior is expecting and it is likely that is causing the program to fail. Take a look at this screengrab of the Stardust puppet:

    Inside the head are the frontal, left quarter, left profile layers and so on for the puppet. The head-turner behavior is choosing only one of those views and hiding all of the others, making it necessary to have each view contain all of the parts for the head and face - the program is ignoring all of the others. Each view needs to be a complete head. The same goes for the mouth sets. As with the head and its multiple views, your layer hierarchy for mouth sets should be an overall layer called “mouth” with sublayers with all of the visemes for each mouth set that you are using. When one mouth set is active, the other one is hidden and ignored.

    It should also be noted that the head and body turner behavior must be added to the puppet for it to work properly. To do this, choose the layer that you want to add the behavior to (in this case, it would be the head) and move your cursor to the middle of the three columns to the right of that layer. You will see a “+” symbol.  Click on it to open the behaviors menu and select “Head & Body Turner.” (see below). The alternate mouth parts are swap sets. Swap sets don’t need the addition of a behavior, but they are also set up in those columns to the right of the layer name, in this case, the third column. To set up a swap set, choose the layer that contains all of the sublayers (for instance, the layer that you have labeled as “talking”) and click on the third column to the right to designate all of the layers inside that layer as “swap sets.” As with the head turner, the program will show only one of the available sets and ignore the rest.

    You might be thinking, “that’s a lot of layers!” Like I said, the program is choosing one of the sets to show depending on what view it interprets based on what input it gets from the camera. It might be easier to start out with one set (one head, one mouth) and get that working, before you tackle more. After all, each additional view will be the same set of layers as the original and should be easier to add.