I'm glad all that was helpful. And again, you just came across an important issue you need to address as you design your ads. Though you may not have realized it. But before we get into that, you should never worry anything about bleed settings unless you have specific needs to design your ad to print past the edge of your publication page.If you're not doing that, you can ignore any bleed settings.
You always want to put everything in your ad so the whole thing fits inside the space you've allotted for that given ad. And from personal experience training others, you're probably not doing that.
Borders and print advertising can be a deceptively tricky thing. Because when you put that 1-point border around your ad with InDesign, the border will fall outside your ad space, unless you change the rules for how InDesign draws those ad borders.
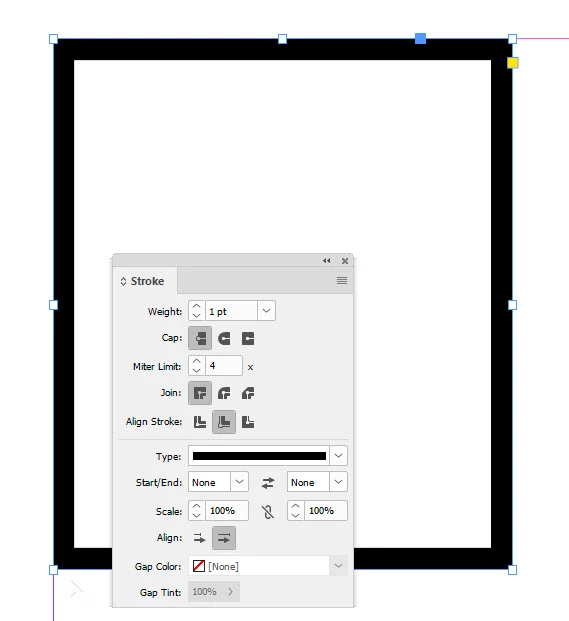
By default, that 1-point border you set around the edge of each ad is bigger than the space you allotted for your ad. It doesn't seem like much, but like the illustration below, your default setting for that border hangs outside the space you've assigned for your ad.

Now to illustrate this, I had to zoom up the InDesign page to 1600% to clearly illustrate that the line you draw hangs half-inside and half-outside the border. Your ad is now just one point wider, and one point taller, than the size you've specified.
That seems like nothing. Until you put four or five ads side-by side and notice that the gaps between them are uneven and none of them line up with the columns of text above the ad line. And if you're, say, placing ads all the way up a broadsheet newspaper page, now the ad on top doesn't fit because as you stacked eight or ten ads up the page, there's not quite enough space for the ad that goes on top and you've now got to fudge with the ads up and down the page to get things to line up.
 To make sure such miseries don't creep into your publication, You should:
- Shut down any files you have open within InDesign. But don't shut down the program. Any time you change settings within InDesign without any files open, you're changing default settings for all future files you create with InDesign.
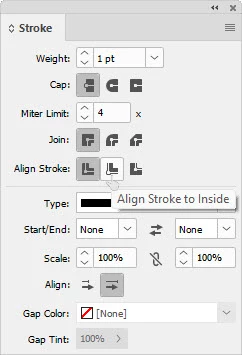
- With InDesign open and no files open, get the Stroke panel. If it's not already available, open it with the Window>Stroke menu command.
- Go to the Align Stroke: buttons and change the setting from the default left button, Align Stroke to Center, to the center button, Align Stroke to Inside as shown at right. This will make sure that every border you create from that point will sit completely inside the space you've allotted for your ad.
So from this point forward, the border will always fit inside the frame you create to contain your ad. Like the example shown below.
This will save you from rude surprises and ugly fixes while you're trying to get all your ads to fit in your publication at deadline like you think they should. That's the good news. The bad news is, now you need to go through all the ads you've already created, click on the borders and use the Align Stroke to Inside button in your Stroke panel to tuck all those borders back inside where they belong.
So for the whole TL;DR thing, the short story is don't worry about bleed settings unless you need them. And if you haven't changed your stroke settings to make sure your borders actually fit inside your ads, do it now before it comes back to bite you. I've probably had to fix this for the large majority of publications I've worked with, and they've been amazed at the little miseries this simple fix has eliminated.
Thanks for bringing up some interesting questions and issues to address before you got too deep into doing your magazine. Hopefully this will save you from heartache down the line. And if you have any problems, don't hesitate to come back here and sound the alarm. There are lots of smart people around here who may be able to lend a hand.
Good luck with your new publication,
Randy

