I agree with Derek's suggestions.
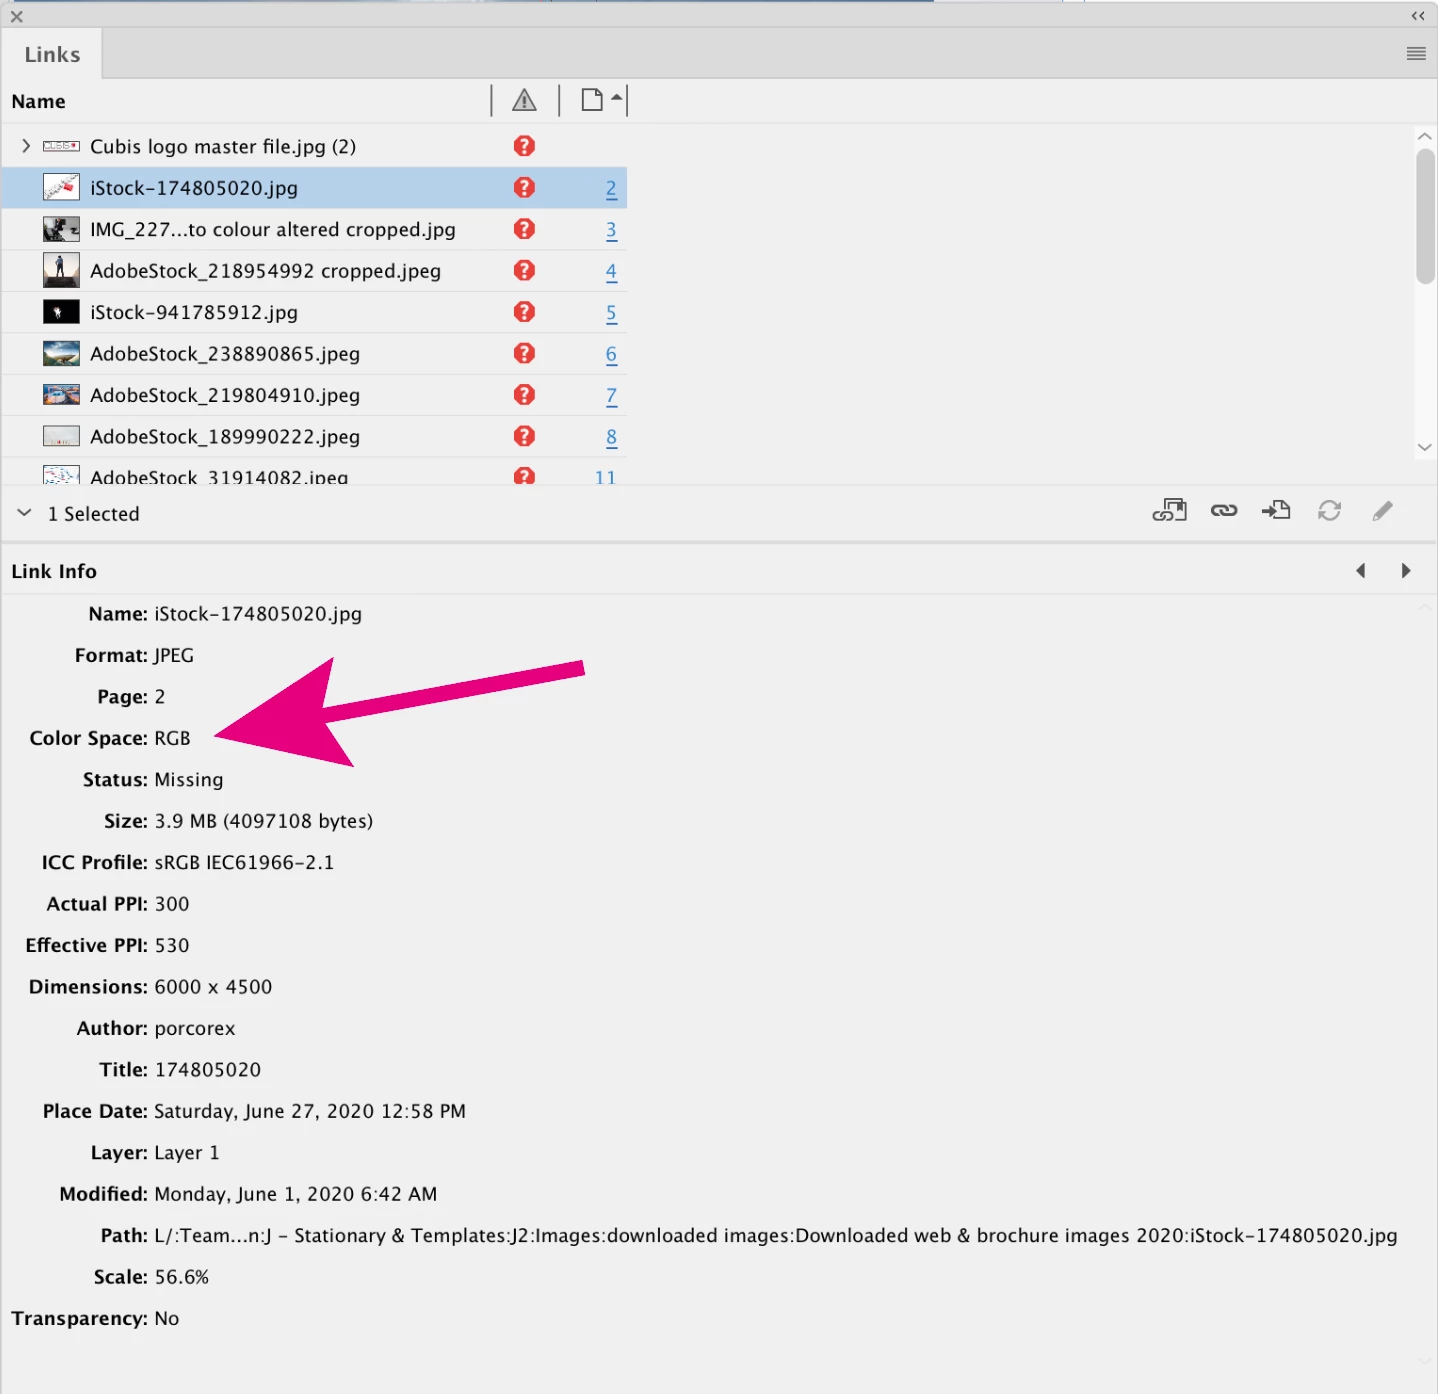
If you check your links panel, you will see all of your placed links are currently RGB (which is typical for stock images) and most are high res, as shown by the effective PPI.
In addition, I would like to point out a few other minor issues with your file that your printer might (and should) point out to you;
The Cubis logo on page 1 is 172 ppi and RGB, the type and rule really should be live type or vector, and the gray type should probably be a tint of black only. Since you have a 4C build of Cubis Red in your swatches panel, I assume this is the desired value. There is a chance your RGB jpg logo will not output to exactly the desired red, so I suggest you use a copy of the higher res version of the logo from page 15, convert it to CMYK in Photoshop and adjust the color to match Cubis Red. Same advice for all other color-critical reds.
The bleed needs to be fixed on the right side of pages 5, 7 & 9
The spine butt needs to be fixed on pages 5 & 13
The logo on the bottom right of page 15 is getting cut off.
Do you want to add an image to the blank white board on page 3?
Page 14, send the image to the back.
I'm not judging here, I've worked in prepress for so many years (until recently) it's hard not to see these things.
Here is a link to a vector version of your logo:
https://www.dropbox.com/s/9863e2flqolt5q7/Cubis_Logo%20Vector.pdf?dl=0