Inspiring
September 3, 2018
Answered

How do I crop out the bleed area during save/export?

  • September 3, 2018
  • 1 reply
  • 597 views

Kinda new to InDesign, but intimately familiar with Photoshop/Dreamweaver.

Currently, I have a 9" x 6" document open in InDesign.

The document has .125" bleed all around (so while the document is 9x6, the canvas is actually 9.25" x 6.25")

A background image fills the full 9.25 x 6.25 area, but was designed to be clipped off at the edges.

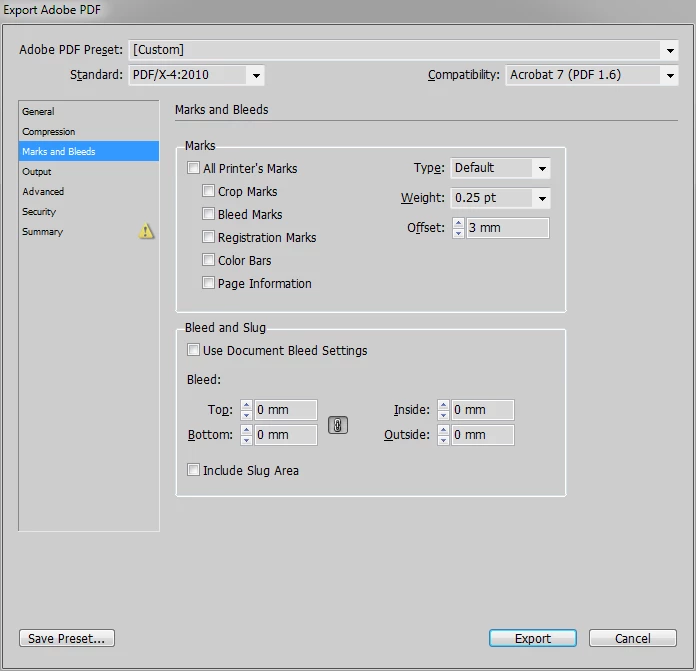
When I export my document as PDF, the default behavior is for the additional bleed area to be included.

How do I tell InDesign to leave it out, and export at 9x6, without destructively cropping the document?

Do I need to set crop marks?

Thanks!

(I am working from a document that was designed for print, hence the bleed... but I'm now exporting a digital/online version of it.)

    This topic has been closed for replies.
    Correct answer winterm

    Just uncheck everything here, ensure bleed is set to zero, and InDesign will ignore bleed when exporting PDF.

    1 reply

    winterm
    wintermCorrect answer
    Legend
    September 3, 2018

    Just uncheck everything here, ensure bleed is set to zero, and InDesign will ignore bleed when exporting PDF.

    Under S.Author
    Inspiring
    September 3, 2018

    So if I understand correctly, by specifying the bleed in the document settings dialog, I was actually ADDING the bleed. And setting all 4 sides to 0 mm results in ID ignoring all image data that exceeds the document limits during export.

    Haven't tried it yet, but makes sense. Thanks!

    winterm
    Legend
    September 3, 2018

    Yes, that's it how it works.