
Participant
Nov 17, 2026 8:13 PM UTC
Answered

How to make the resolution of my images clearer and a lot less pixelated on my Indesign Document?

Hi, I’m kind of stuck in the mud a bit here, my previous tutor (who had been working with Adobe software for years now, and was practically a master with it) had recently retired. So I’m very desperate, here in the middle of the night here haha.


Most of my images on Indesign are incredibly pixelated and overall have a very poor resolution to them, I don’t know how to fix this issue, but I have tried the following:
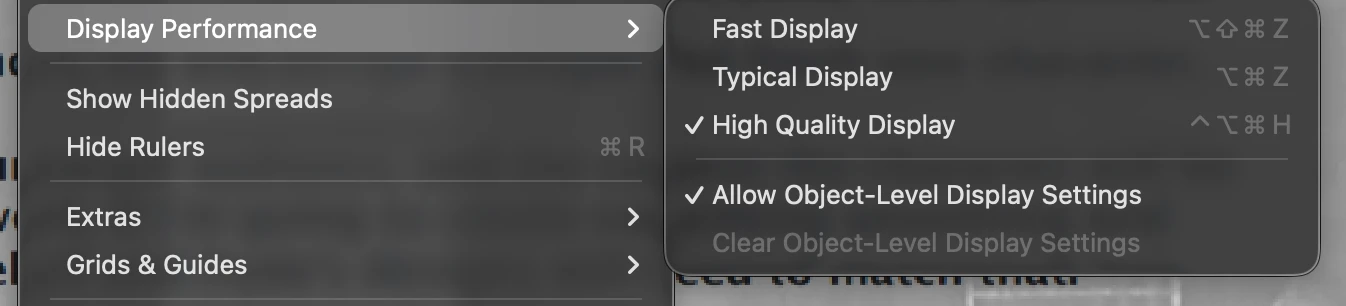
My display performance is at the Highest Quality Display, but that hasn’t fixed things.

I exported my Document into a PDF, thinking it was just another display issue on Indesign, but the images are still poor and pixelated, even in a PDF.



I have checked all the links for my images, and have no linking error or issues, and have No errors overall in my document, so it is not a link issue with the images. I have no copy and pasted images, nearly all of my images are screenshots from my Mac laptop and there has NOT been an issue an issue with quality with screenshots in the last couple of years of using Indesign until now.
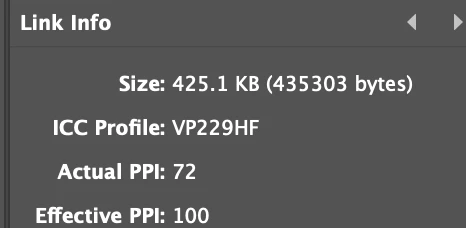


Looking at the link info, I think nearly all of the pixelated images have a PPI of 72, which does explain the issue I feel, and looking online, people suggest to rescale and downsize my images..but this is for my university course, where they expect the images used to be large and in good quality; especially if they contain text inside them. Which nearly all of my images do. 


I feel like it is worth mentioning a few things as well too:
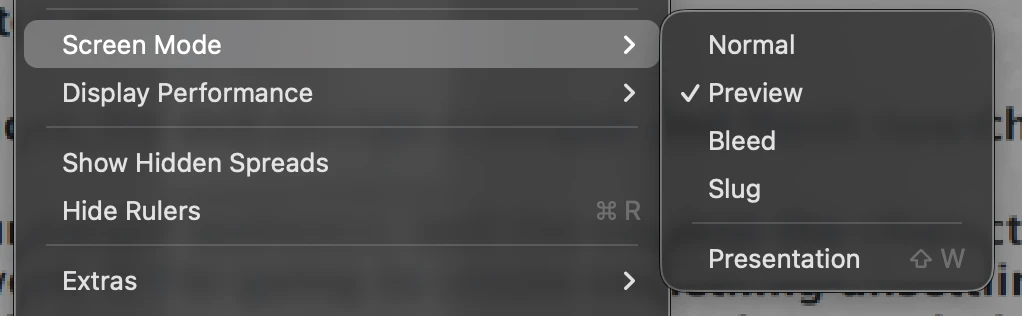
I usually have my Screen mode on Preview.
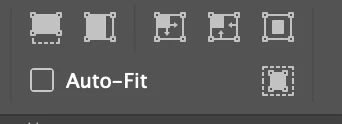
I have the Auto-Fit option for my images OFF. Before it was changed, you could only change the size of your images in: Object>Transform>Scale (or at least that’s how I was taught.) And could crop parts of your image just by moving the end points of your images, but now it was changed and clicking off Auto-Fit I found was the only way to revert it back to the original way. (Turning Auto-Fit back on changed nothing I found.)


Finally, I am on the 2027 version of Indesign now, but even in the 2026 version I was still having the same issue regarding the quality and resolution of my images. I never had this issue before until now, and I don’t know what to do. I’m kind of at a lost and I am really desperate here because I still have a lot more things I have to add to my Document. 


Please help!! Thank you in advance! :D

    CORCTON34033231
    CORCTON34033231Correct answer
    Community Expert
    Nov 18, 2026 12:05 AM UTC

    Hi thea_kent,


    You have already found the key clue: your screenshot shows Actual PPI 72 and Effective PPI 100. Effective PPI is the number that matters — it is the resolution at the size the image is actually placed on the page. That is also why the PDF is still pixelated: this is not just a screen preview problem, and Display Performance > High Quality Display only changes the on-screen preview.


    For crisp print, aim for around 300 Effective PPI at the placed size. At 100 Effective PPI, an image placed large will look soft/pixelated in print and in a PDF.


    InDesign cannot add detail that is not in the source file, so the fix is to start with more pixels, or place the image smaller:


    - Check the Links panel as you resize: making the image smaller raises its Effective PPI. For example, placing it at half its current width would roughly double the Effective PPI.

    - For screenshots, capture them with more pixels: make the source window/content as large as possible on screen before capturing, and on a Retina Mac capture at the higher pixel density. Avoid enlarging a 72 PPI screenshot to fill a large frame.

    - For text-heavy screenshots, if the source is a web page or an app that can print/export to PDF, place that PDF instead — its text stays vector and sharp. Otherwise, retyping short text directly in InDesign will be much sharper than a screenshot of it.


    So in short: 72 PPI screenshots are fine at a small size, but they will not stay sharp when placed large. You need a higher-pixel source for the large size, or a smaller placed size.

    3 replies

    Participating Frequently
    Nov 18, 2026 12:01 PM UTC

    The main issue seems to be the original image resolution. Setting Display Performance to High Quality won't improve the actual quality of low-resolution images. Check the Effective PPI in the Links panel and try using higher-resolution screenshots or original images. For documents containing text, exporting screenshots as PDFs or using vector graphics can give much sharper results.

    Translate
    thea_kentAuthor
    Participant
    Nov 18, 2026 11:56 AM UTC

    Hi CORCTON34033231,


    I have tested and tried out what you have suggested and it works great, thank you so much for your help! I really appreciate it :D


    Translate
    CORCTON34033231
    Community Expert
    CORCTON34033231Community ExpertCorrect answer
    Community Expert
    Nov 18, 2026 12:05 AM UTC

    Hi thea_kent,


    You have already found the key clue: your screenshot shows Actual PPI 72 and Effective PPI 100. Effective PPI is the number that matters — it is the resolution at the size the image is actually placed on the page. That is also why the PDF is still pixelated: this is not just a screen preview problem, and Display Performance > High Quality Display only changes the on-screen preview.


    For crisp print, aim for around 300 Effective PPI at the placed size. At 100 Effective PPI, an image placed large will look soft/pixelated in print and in a PDF.


    InDesign cannot add detail that is not in the source file, so the fix is to start with more pixels, or place the image smaller:


    - Check the Links panel as you resize: making the image smaller raises its Effective PPI. For example, placing it at half its current width would roughly double the Effective PPI.

    - For screenshots, capture them with more pixels: make the source window/content as large as possible on screen before capturing, and on a Retina Mac capture at the higher pixel density. Avoid enlarging a 72 PPI screenshot to fill a large frame.

    - For text-heavy screenshots, if the source is a web page or an app that can print/export to PDF, place that PDF instead — its text stays vector and sharp. Otherwise, retyping short text directly in InDesign will be much sharper than a screenshot of it.


    So in short: 72 PPI screenshots are fine at a small size, but they will not stay sharp when placed large. You need a higher-pixel source for the large size, or a smaller placed size.

    Translate