Participant
December 9, 2018
Question

InDesign CC 2019 with Adobe Fonts problem

  • December 9, 2018
  • 3 replies
  • 1699 views

Hello!

On Windows 10 Home 64 bit...

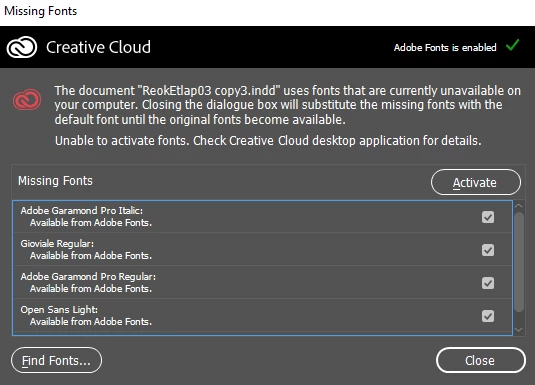
...when opening up a document, InDesign CC 2019 pops up the "Missing fonts" warning dialogue, telling me that Adobe Fonts used in the document are not activated. When I click "activate" it starts to do something:

but after a while shows an error message:

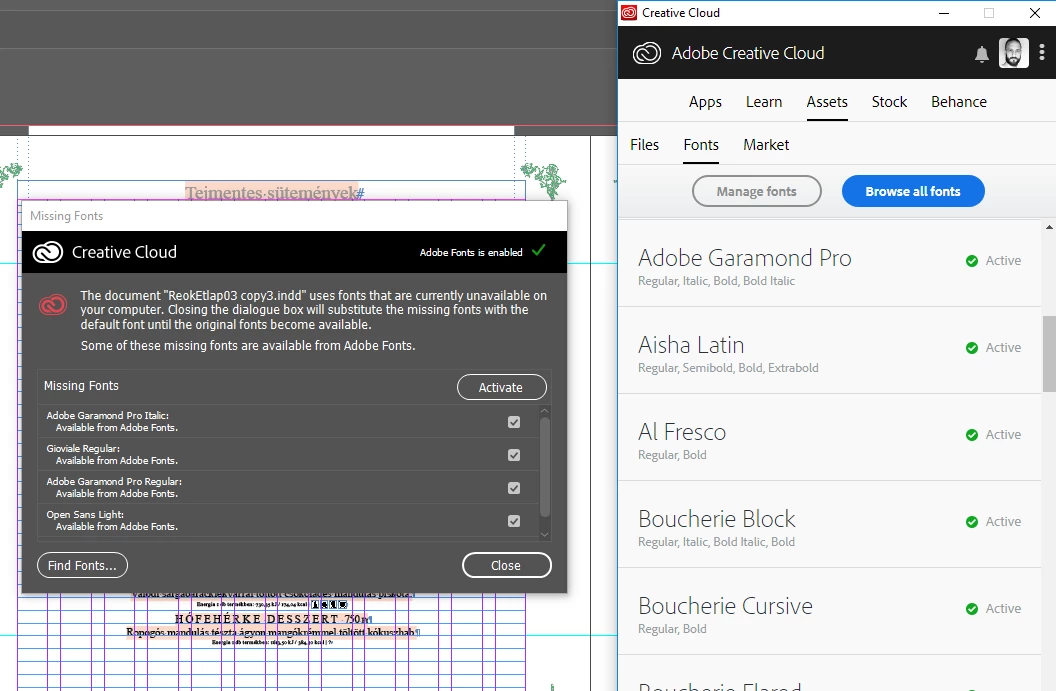
So I check the CC Desktop app which shows no errors, but InDesign still thinks that those fonts used in the document are not activated.

Then I start messing around with CC Desktop app preferences, turning "Enable Adobe Fonts" on and off

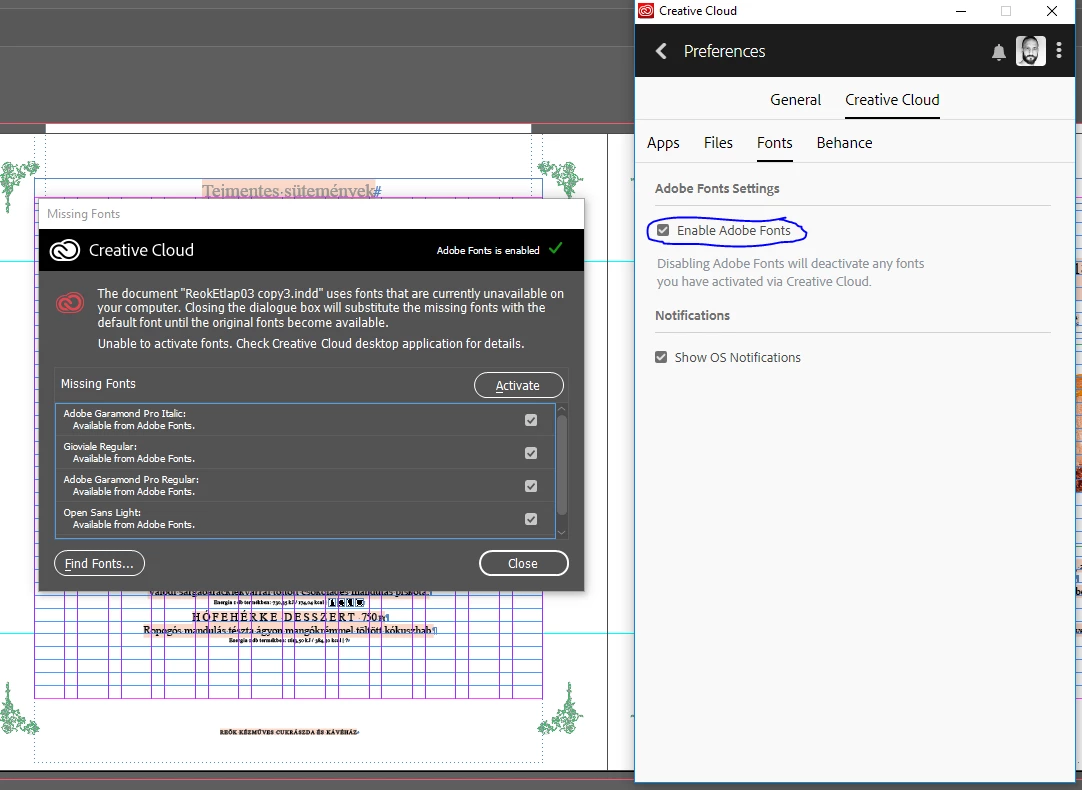
and after a few clicks it solves the problem so I can continue working on my Id file. The funny thing is that sometimes turning it off solves the problem:

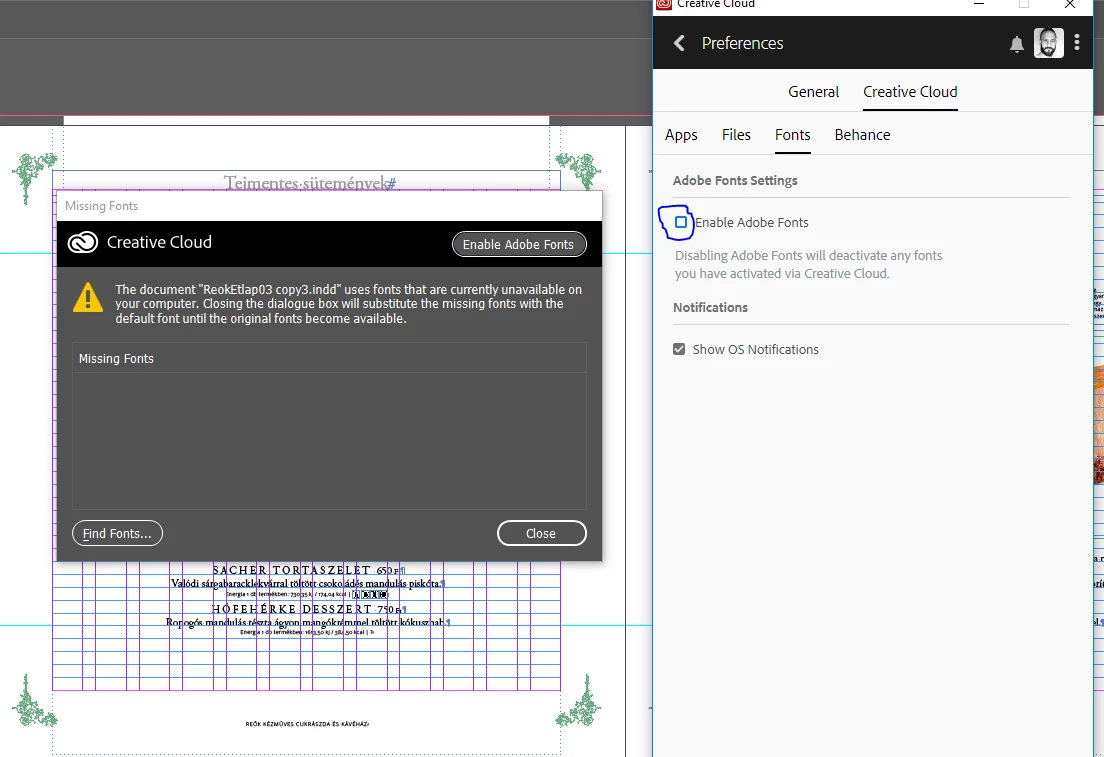
Once I close off InDesign and start it up, the whole process starts over again.

Does anybody know what is going on?

    This topic has been closed for replies.

    3 replies

    nyirotAuthor
    Participant
    December 17, 2018

    Ok, same problem again.

    I just started up InDesign by opening up an .indd from Bridge, right after Windows started up.

    It looks like I need  to give a little time for the systeme before I start working in order to make InDesign and Adobe Fonts cooperate. It explains why InDesign showed me error message when it was among the auto start apps. Because it started up too soon!

    Hope it helps for those sufffer from the same problem.

    Participant
    May 14, 2020

    This is a problem that is easy to solve...Hence, here are the steps.


    STEP 1:

    1.  You've opened Adobe Indesign CC (even the newest version 15.0.2) Meaning everything is updated...

    2.  The Fonts are all messed up, and you get a dialog box from "Creative Cloud" informing you of "Missing Fonts"

    3.  Your upset...Calm down!  Your portfolio is not messed up!

    4.  Close the document...and close the Indesign CC program "all together" completely.


    STEP 2:

    1.  Open "Adobe Creative Cloud" (Meaning even if your Indesign CC is upgraded)

    2.  With Adobe Creative Cloud open...Look at the "top right corner" of "Adobe Creative Cloud".

    3.  You should see the little "Cloud icon" function (second icon to the right) 

    4.  You will see there is a "syncing error"

    5.  Click on the "Cloud icon"   

    6.  There are two function on the "bottom right corner" of the "Cloud icon".

    7.  Click the far right function to resynce the cloud of missing fonts...

    8.  The "Cloud Storage" will "Upgrade"

    9.  Open Indesign CC again and your document.  The fonts should be back to normal!


    All is well, 


    Virgo1 Out.

    Hoped this helped.  

    Suffering is Optional


    nyirotAuthor
    Participant
    December 14, 2018

    I realized that the above mentiond problem exsisted since InDesign was in the Startup folder of Windows 10, among those apps start up automaticly with the systeme.

    I removed it.

    Since then InDesign works perfectly.

    Thank you all for the suggestions!

    Steve Werner
    Community Expert
    Community Expert
    December 9, 2018

    Have you updated InDesign CC 2019 (14.0) to the update 14.0.1? It fixes many problems with the new Adobe Fonts interface.

    nyirotAuthor
    Participant
    December 9, 2018

    Thank you, but yes, I've updated.

    Steve Werner
    Community Expert
    Community Expert
    December 9, 2018

    The support staff for Adobe Fonts (formerly Typekit) is probably the best place to turn to then. Here's where their forum is located. I'd suggest posting your question here:

    Adobe Fonts (formerly Typekit)