orlati.federica@gmail.com
Participant
January 21, 2024
Answered

Indesign flowing table borders

  • January 21, 2024
  • 3 replies
  • 617 views

Hi,

I have a document made by someone else with a flowing table. 
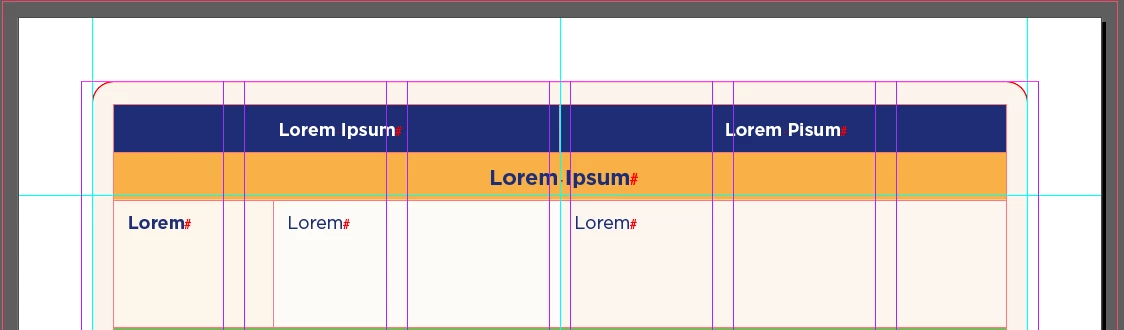
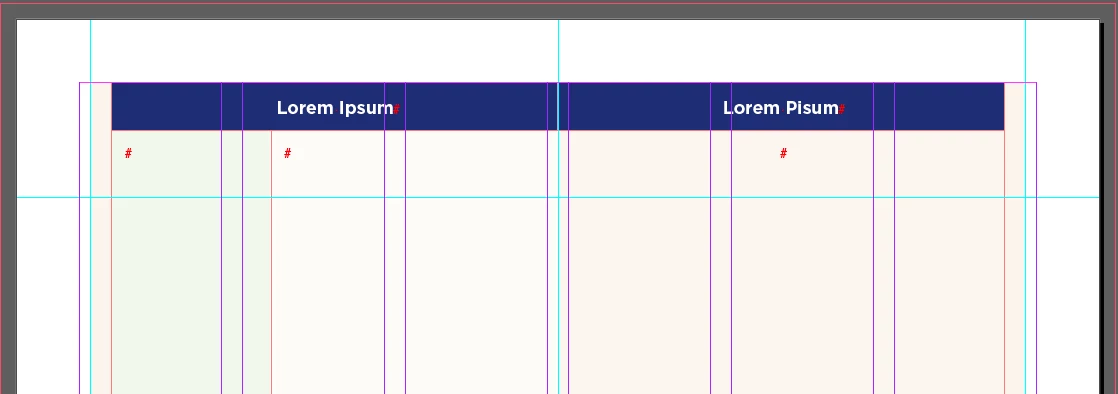
It looks like the table has a "border"  but when I flow the table on other page the border does not appear and for the life of me I cannot find the setting anywhere to add it! The beige border appears on the sides as you can see, but not on the top. What am I missing? Where do I find this setting?

Thank you for the help!

This topic has been closed for replies.
Correct answer Barb Binder

Hi @orlati.federica@gmail.com:


I think the orange row is a table row that is merged the width of the entire table. Click on Lorem Ipsum, and then choose Table > Select Row. Once selected, you can follow Bevi's instruction to convert it to a header row, assuming that is what you want to do. 


As for the original question about the border: your table is split across two threaded frames but the frame on the second spread doesn't have the frame insets or rounded corners defined yet. See demo, below.


~Barb


3 replies

Robert at ID-Tasker
Legend
January 21, 2024

You mean the rounded corners? 


It's a property of the TextFrame the Table is in - not the Table itself. 


And @Barb Binder already nicely explained hot to achieve it - they only thing I would add - do it as an ObjectStyle so you can quickly assign it to other TextFrames.


Barb Binder
Community Expert
Barb BinderCommunity ExpertCorrect answer
Community Expert
January 21, 2024

Hi @orlati.federica@gmail.com:


I think the orange row is a table row that is merged the width of the entire table. Click on Lorem Ipsum, and then choose Table > Select Row. Once selected, you can follow Bevi's instruction to convert it to a header row, assuming that is what you want to do. 


As for the original question about the border: your table is split across two threaded frames but the frame on the second spread doesn't have the frame insets or rounded corners defined yet. See demo, below.


~Barb


~Barb at Rocky Mountain Training
Bevi Chagnon - PubCom.com
Legend
January 21, 2024

When a table reflows onto successive pages (or columns or text frames), only those table rows that are set as Header rows that "Repeat" will be visible on the succesive pages.


So, go back to page 1 where the table starts and you can see both rows, the one shaded in dark blue and the other shaded in gold/orange.

  • Select both rows together (or individually and do these steps twice),
  • Right-click, and choose Convert to Header Rows.
  • Then, with the rows still selected, Right-click and select Table Options.
  • On the right-most tab Headers and Footers, choose Repeat Header Once per Frame (or one of the other options that fits your design).


Hope this helps!


|    Bevi Chagnon   |  Designer, Trainer, & Technologist for Accessible Documents ||    PubCom |    Classes & Books for Accessible InDesign, PDFs & MS Office |
orlati.federica@gmail.com
Participant
January 21, 2024

Thank you,
But the gold/orange bit is not a row, I cannot select it.
I've done this with the blue row, which is a header row and automatically reappears on the next page, but the beige bit at the top is not a row so it is not selectable.
How can I solve this if it's not a row? It's sort of like a table border but when I go into table setup I can see there's no table border (see attached screenshot), so I have no idea where I can insert that beige border in the next table.