Participant
December 21, 2017
Answered

Make "highlighted" font transparent

  • December 21, 2017
  • 2 replies
  • 1400 views

Hey

Have searched and searched online for the answer to this question but having no luck - hoping someone can help!

  • I have a template I want to use across multiple design pieces so everything is consistent - its basically text with a background made using paragraph rules so it shrinks/expands depending on how much is written.
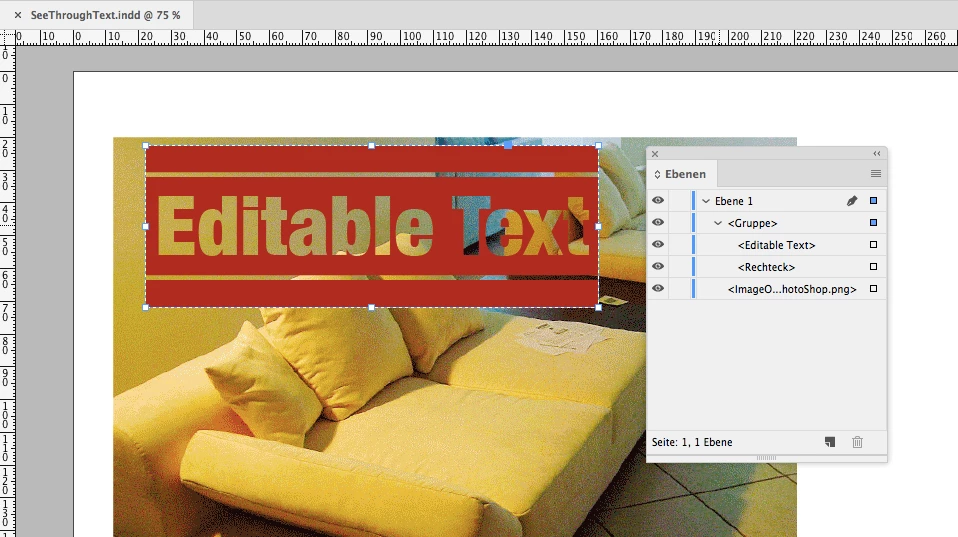
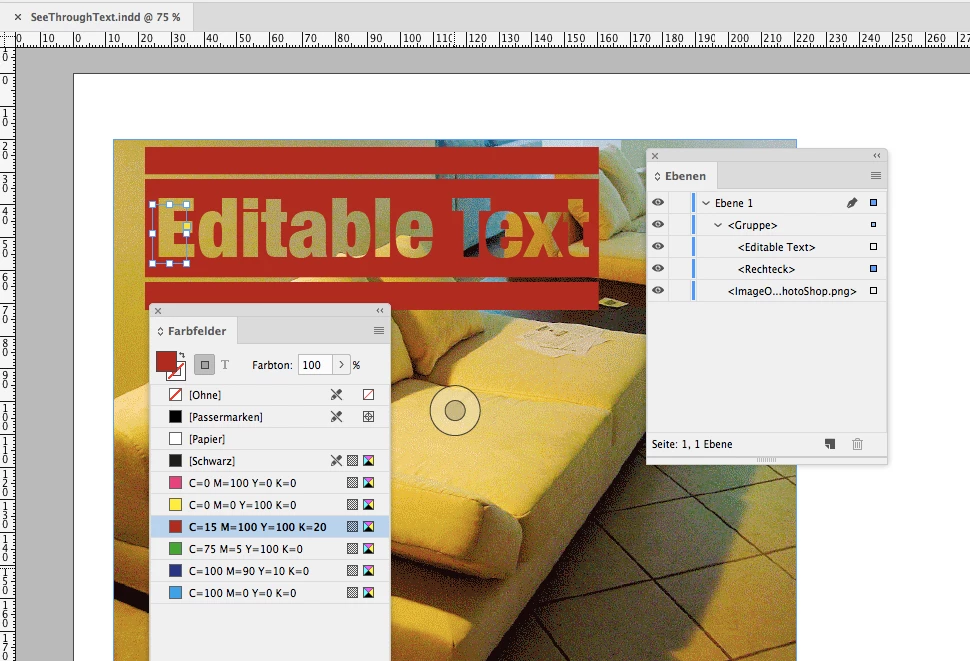
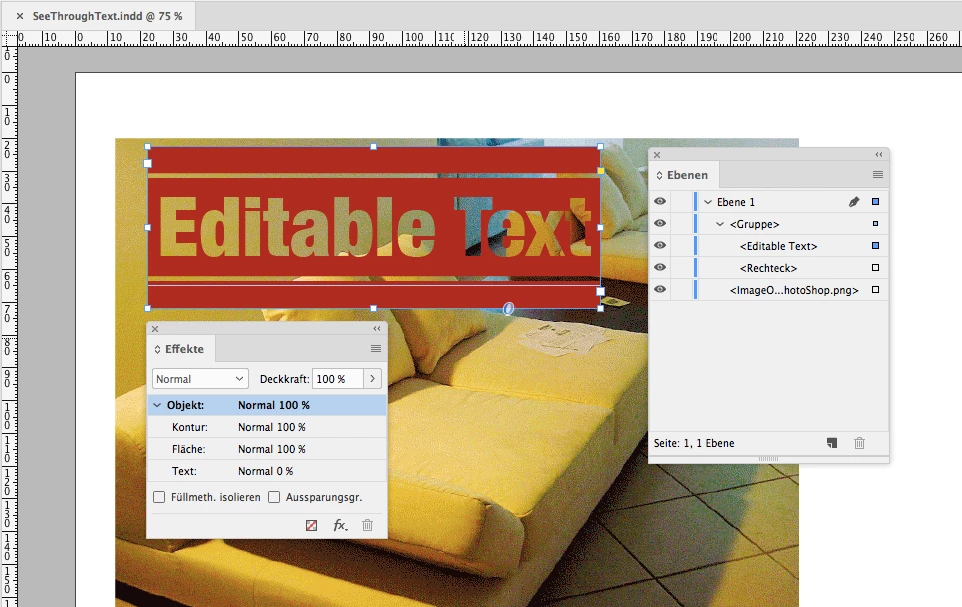
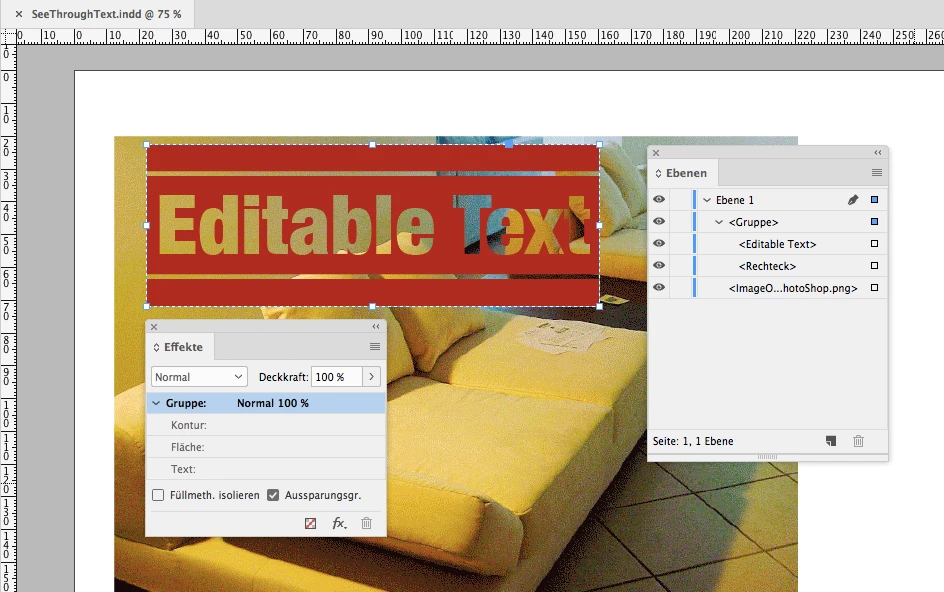
  • I need to be able to make the black font in this image transparent, so that the pink background and line in the middle remain and I can overlay it on an image which you will be able to see through it.
  • I then need to be able to select the box with text that you can see through as if it's an object and move it to a position it on another image

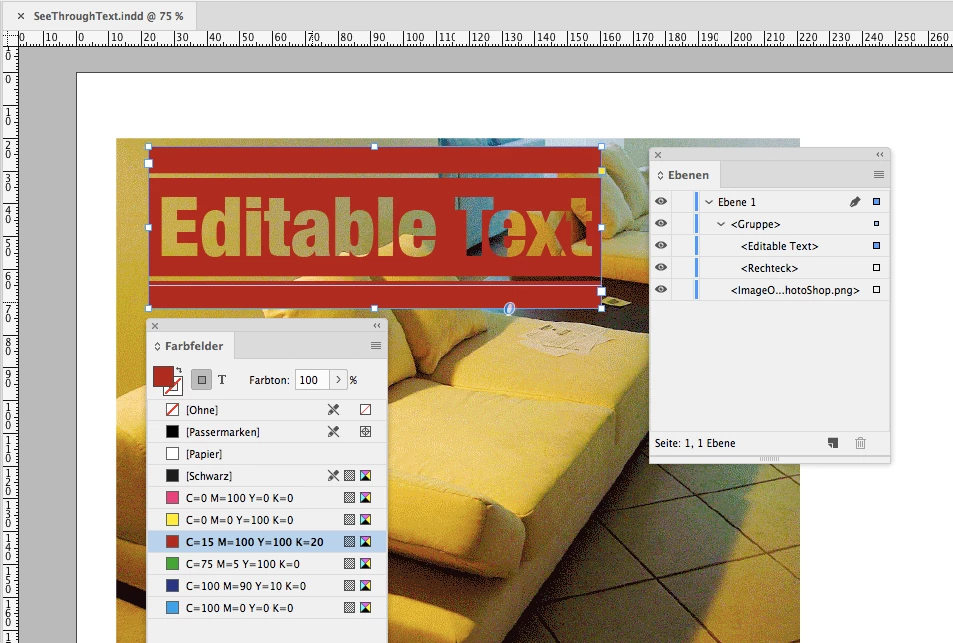
I'm sure there's a really obvious solution to this, but i'm not getting anywhere - have tried converting to outlines and making the fill transparent but it doesn't work with the paragraph rules background, it either makes that transparent too or just makes the font transparent so all you are left with is a pink box.

Any help will be HUGELY appreciated, i'm losing the will to live.

P.S I don't want to go down the route of having to use and resize a background box each time. Multiple people will be using this file for a number of different things so it needs to be consistent and resizing background boxes is not the answer.

    This topic has been closed for replies.
    Correct answer Laubender

    Hi,

    did you see into the trick I linked to below that is using a transparency effect on text and the knockout group feature?

    https://indesignsecrets.com/creating-see-through-text.php

    It's not doable in just one object.
    You'll need a group with at least two objects.

    E.g. 1 rectangle and 1 text frame.

    The rectangle can be of any size—it can be way smaller than the text frame—and is only there to do a group object.

    It does not matter much. What's important is the text frame object. There all the features are in.

    First let me present the result:

    Then let us skin the group of objects.

    As you can see from my Layers panel above one group is selected; <Gruppe> in my German InDesign.

    This group contains a text frame <Editable Text> and a small rectangle <Rechteck>.

    The png image stacked below is not part of the group.

    Here the rectangle selected:

    Next in the group is the text frame, that is autogrowing with the text from left to right:

    Important: The text frame is filled with that red color.

    The text has a rule below and above. You could do that also with the new feature paragraph border in CC 2018.

    But rule below and rule above is basically all you need.

    Why is the text (plus both rules) transparent?

    Because an effect is applied to the text frame:
    All text in that text frame should be of 0 opacity.

    And why does the background shine through?

    Because another feature of the effects panel is applied to the whole group:

    Knockout Group

    That's it.

    Text is editable and the text frame will grow or shrink in width if you edit text.

    The trick here: Use the fill of the text frame to get the red color.

    Regards,
    Uwe

    2 replies

    LaubenderCommunity ExpertCorrect answer
    Community Expert
    December 21, 2017

    Hi,

    did you see into the trick I linked to below that is using a transparency effect on text and the knockout group feature?

    https://indesignsecrets.com/creating-see-through-text.php

    It's not doable in just one object.
    You'll need a group with at least two objects.

    E.g. 1 rectangle and 1 text frame.

    The rectangle can be of any size—it can be way smaller than the text frame—and is only there to do a group object.

    It does not matter much. What's important is the text frame object. There all the features are in.

    First let me present the result:

    Then let us skin the group of objects.

    As you can see from my Layers panel above one group is selected; <Gruppe> in my German InDesign.

    This group contains a text frame <Editable Text> and a small rectangle <Rechteck>.

    The png image stacked below is not part of the group.

    Here the rectangle selected:

    Next in the group is the text frame, that is autogrowing with the text from left to right:

    Important: The text frame is filled with that red color.

    The text has a rule below and above. You could do that also with the new feature paragraph border in CC 2018.

    But rule below and rule above is basically all you need.

    Why is the text (plus both rules) transparent?

    Because an effect is applied to the text frame:
    All text in that text frame should be of 0 opacity.

    And why does the background shine through?

    Because another feature of the effects panel is applied to the whole group:

    Knockout Group

    That's it.

    Text is editable and the text frame will grow or shrink in width if you edit text.

    The trick here: Use the fill of the text frame to get the red color.

    Regards,
    Uwe

    Community Expert
    December 21, 2017

    To get one thing straight:

    The little rectangle in the group needs no fill at all.

    Important is the fill of the text frame and its feature to autogrow.

    Here two screenshots showing the text frame options.

    Autogrow from left to right:

    Text centered—"Zentrieren" in my German InDesign—to the frame plus a little offset at the bottom to get the optical center right:

    FWIW:

    I said: "You'll need a group with at least two objects."
    Technically we could work also with a group of one single object and still maintain all the features of the text and the text frame. But this requires some extra steps where a multistate object is involved on the way (or scripting) to get rid of the rectangle and still have a group:

    Regards,
    Uwe

    // EDITED

    Community Expert
    December 21, 2017

    And still another thing:

    I used rule above and rule below to create the transparent gaps in the text frame.

    So in your use case you'd do a text frame with less height than I did.

    One limitation: That whole thing is working on all text in a text frame.
    If you need editable text without that effect before the text with that effect you'll need two text frames stacked upon each other:

    One text frame with an applied text wrap showing no effect and one with the effect. Both should be set to autogrow.

    Regards,
    Uwe

    Bill Silbert
    Community Expert
    Community Expert
    December 21, 2017

    I suspect that this may be something that has to be scripted if it is possible at all since paragraph rules are set to take on the transparency settings of the text that they are a part of. Check out the InDesign scripting forum at: InDesign Scripting .