Participant
January 5, 2021
Answered

Placing text inside an existing speech balloon

  • January 5, 2021
  • 1 reply
  • 483 views

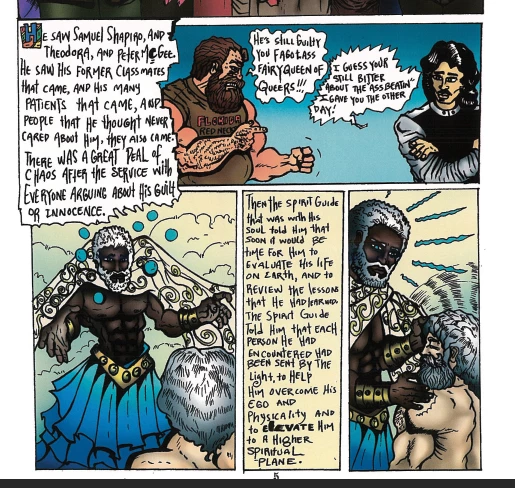
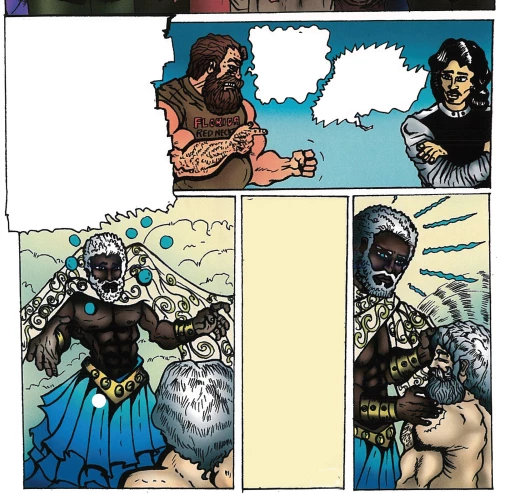
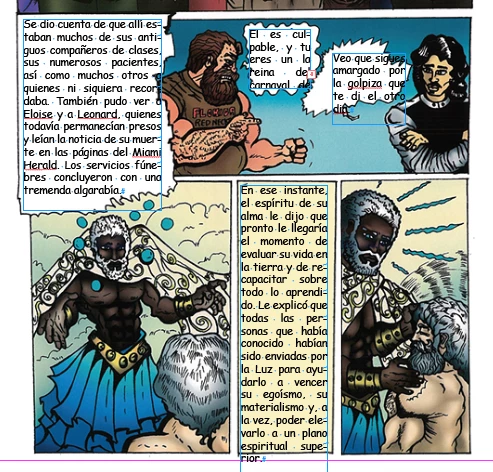
I'm translating a comic book from english to spanish, and I have to replace the existing text in the ballons with a newone. Does anyone know how to automatically fill the space with text, without creating a shape? Below you'll find images to show it better. The first one is the original version, the second is after been cleaned in Photoshop, and the third one is the spanish translation without formatting, inside the ballon. I appretiate in advance any idea to do this faster than the traditional method.


This topic has been closed for replies.
Correct answer tacoeater

Hello export to kindle,


There isn't really a automated approach that would produced good results each and every time.

Your best bet is to modifiy your text boxes using your Pen tool (found on the tool bar).


If you want to try and automated this is how I would do it.

  1. Select the image, then go to Object > Clipping Path > Options
  2. Go to the drop down and select Detect edges, then modifiy the Threshold till you get a desired result.
  3. Have 'Include Inside Edges ticked, then press ok.
  4. Go to Windows > Text Wrap to have the Text Wrap palette open.
  5. Have image selected and then select the 3 option up the top "Wrap around object shape" Should look like a circle with lines wrapped around it. Feel free to put some Offset on it so it doesn't touch the edges.
  6. Put your text boxes over the top.


If you don't want boxes to wrap.

  1. Select the text box
  2. Right click and go top Text Frame Options
  3. Tick 'Ignore Text Wrap'

1 reply

tacoeaterCorrect answer
Participating Frequently
January 5, 2021

Hello export to kindle,


There isn't really a automated approach that would produced good results each and every time.

Your best bet is to modifiy your text boxes using your Pen tool (found on the tool bar).


If you want to try and automated this is how I would do it.

  1. Select the image, then go to Object > Clipping Path > Options
  2. Go to the drop down and select Detect edges, then modifiy the Threshold till you get a desired result.
  3. Have 'Include Inside Edges ticked, then press ok.
  4. Go to Windows > Text Wrap to have the Text Wrap palette open.
  5. Have image selected and then select the 3 option up the top "Wrap around object shape" Should look like a circle with lines wrapped around it. Feel free to put some Offset on it so it doesn't touch the edges.
  6. Put your text boxes over the top.


If you don't want boxes to wrap.

  1. Select the text box
  2. Right click and go top Text Frame Options
  3. Tick 'Ignore Text Wrap'