Fritz Hansen
Inspiring
October 11, 2019
Answered

Text wrap adds extra space

  • October 11, 2019
  • 6 replies
  • 6351 views

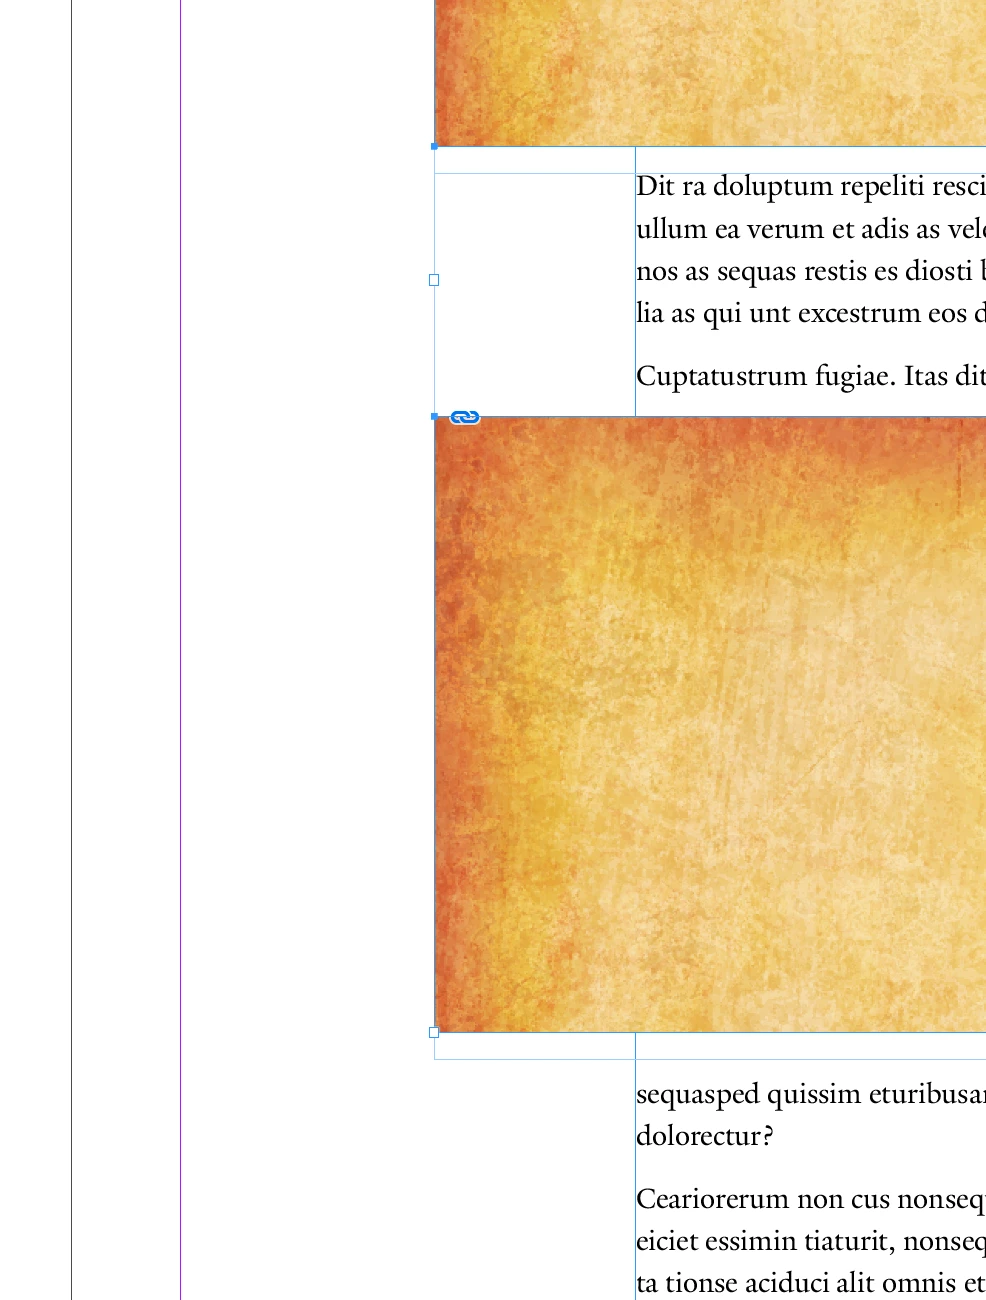
Why does text wrap work when the graphic frame that TW is applied to is at the top margin, but there is additional space added when the graphic frame is further down the page? It doesn't appear to be related to leading or space after a paragraph. In the image below, the bottom graphic frame is within a paragraph, but the same thing happens when a frame is between paragraphs. And sometimes moving the graphic frame DOWN brings the text UP, but not to the top of the defined text wrap. 


    Correct answer Tatanka194

    Hello, I had the exact same problem and couldn't find any help. But then like magic the simplest thing worked!

    Go to Edit > Preferences >Compositions > Text Wrap - and here uncheck "Skip by Leading". 

    6 replies

    Tatanka194Correct answer
    Participant
    July 23, 2024

    Hello, I had the exact same problem and couldn't find any help. But then like magic the simplest thing worked!

    Go to Edit > Preferences >Compositions > Text Wrap - and here uncheck "Skip by Leading". 

    Participating Frequently
    September 11, 2024

    Thank you Tatanka, this fixed the issue for me!

    Community Expert
    October 14, 2019

    Here’s an alternative approach that works if you’re using a baseline grid…


    With the text aligned to a baseline grid (in the example shown I’m using an increment of 12 points), measure the distance from the grid ruling to the cap height (or ascender height) of the line below. It is this "extra space" which is the cause of the issue.


    Start out with the height of your text wrap object as a multiple of the grid ruling (96 pts in the example) and then add this amount (4.145 pts in the example shown) to the height of text wrap object. (Note that if you have you have Auto Fit turned on, the content will refit to the new frame dimensions.)


    Set the text wrap offset below value to 0.


    This will ensure that the spacing above and below the text wrap object is optically even.


    When moving the text wrap object make sure to snap its top edge to a baseline grid increment.


    Randy Hagan
    Community Expert
    Community Expert
    October 13, 2019

    Yes. That's mostly correct. But the part you've got to still wrap your head around is that the text wrap does not affect the leading for the underlying text box. That's why you're getting the varying extra spaces, because your text wrap values do not affect the leading below. And subdivisions of space between the leading values with text wrap — even without baseline grid settings — will not determine where the next line of text will be placed in the underlying text frame. Your leading value always does. This is the root of your issue.


    That's why using a second text frame below your box/text wrap will work better for you. Because it will move copy fit on the top of the text frame, but not how any line of type will line up below that top line.


    Please excuse the bolds and italics. I'm not trying to be pedantic. I also mean no disrespect. But I do want to emphasize the factors at the root of your issue, and what you need to do to get past them.


    Hope this helps,


    Randy

    Fritz Hansen
    Inspiring
    October 13, 2019
    The bold and italic are good. Helps me see what you're emphasizing. So the text wrap on the graphic frame pushes the text—including the leading—down below the graphic frame. My confusion has been why it does that when the graphic frame is below the top of the text frame, but it doesn't do that when the graphic frame is at the top of the text frame. And I think I understand now that leading doesn't really exist at the top of a text frame, so the text wrap just pushes down the text at the top of the ascenders (or however the baseline settings are for the text frame). Does that sound about right?
    Randy Hagan
    Community Expert
    Community Expert
    October 13, 2019
    You've got it! I know this isn't an easy thing to wrap your head around. It's counter-intuitive — which in my hillbilly ways is just a high-falutin' way of saying it doesn't make a lick of sense. To be precise, it pushes down above the leading value, so the text moves down no matter how it's aligned within the leading slug. But yeah, you've grasped the concept. You're all good!
    Randy Hagan
    Community Expert
    Community Expert
    October 13, 2019

    No, what you're describing exactly demonstrates my point.


    You can see that the text jumps down in 14-point increments when you move the box. If you move the box down, say, 2 points, it reduces the space two points. But if you move it down another pica (12 points) the text jumps down another line and you have the big space between your text wrap and the line all over again. As I explained in the last post, even though you see empty, varying spaces between the box/text wrap and the line, the text frame below is still divided into 14-point increments, based on your text value.


    Try this experiment:


    Go to the Text Wrap panel, and reduce the values of your Bottom: text wrap in 1-point increments. You'll see that the text doesn't move up until you bump it up enough to bring the line up an entire line. That's because the space to the top of the type isn't determined by the text wrap, it's determined by the leading value of your text frame. Now increase the bottom text wrap value in one-point increments. when you fill in all the extra space with the bottom text wrap value for more than one line, it'll jump down an entire line and give you a big gap again.


    The best way for you to get consistent "space" between the box/text wrap and the underlying text frame is to brake the column into two text frames. One above, which ends at the top of the box/text wrap and one below, which starts below the box/text frame. Then you can adjust the top of the text frame below the box/text wrap to line up at the very edge of your bottom text wrap value.


    Trust me on this, if you set your text frames up like I suggested above, you'll get the result you're looking for.


    This'll work. Honest.


    Randy

    Fritz Hansen
    Inspiring
    October 13, 2019
    So the text wrap doesn't apply to the leading of the actual type within the text box, but to the leading setting for the text BOX? So if my type is not set to align to a baseline grid based on the leading of the text box, the text wrap setting will still affect the leading set for the underlying text box? I always assumed it related to the actual text within the text box.
    Randy Hagan
    Community Expert
    Community Expert
    October 12, 2019

    It has to do with the leading values set into your copy block.


    Take 40 lines set on 15 points leading. That creates a copy block eight and a third inches deep in your text frame. Now put a three and a half-inch box over the top of it, and set a text wrap of a quarter-inch all around, for a net vertical space of 4 inches taken out of your eight and a third inch deep copy block.


    You don't see 40 lines of type anymore, because the text wrap function has either forced the lines you don't see into overset, or if you've threaded text into multiple text frames, moves it into the next text frame. But InDesign still sees 40 lines worth of space in that text frame. And when you place that box with the text wrap, or move it around over the text frame, the text moves into the next available line of leading space within the text frame. That's where the ugly, uneven gaps come into play.


    OK, now that we've identified the problem, how do we fix it? There are two ways:


    1. Carefully move the box with the text wrap along the copy block until it gives you an even amount of space above and below the box. Or ...
    2. Adjust the depth of the lower text wrap value to line up with the space you would like to see between the box and the underlying copy block within your text frame.


    The choice I'd make is dependent on the context of my InDesign layout. For example, if the box doesn't cover all the perfectly lined-up copy blocks in the columns of my thread of text frames, adjusting the text wrap value for the bottom of my box will likely mess up the alignment with the columns of text not affected by the box with the text wrap. In that case, I'd either move the box until I get the text alignment I'm looking for or adjust both the top and bottom values to give me the line alignment I'm looking for.


    Hope this helps,


    Randy

    Fritz Hansen
    Inspiring
    October 13, 2019

    Thanks Randy. If I understand what you're saying, I don't think it describes my situation. In the example (screenshot that I included) the type is 10 on 14. The graphic box has 9 points of wrap applied to the bottom edge, with the "jump object" wrap applied. 


    There seems to be an additional 9 points after the text wrap. I can nudge the box lower on the page, but at some point—at about that extra 9 points, the next line of text jumps an additional line, making an even larger space below the graphic box. See below. I can't nudge it down to just the 9 points of text wrap. I thought maybe it had to do with the baseline settings for the text box. Changing those settings changes how the wrap on the graphic frame affects the lines of text, but none of those changes makes the text line up with the 9 points of text wrap.


    Legend
    October 11, 2019


    This is probably related to the Align to Baseline settings in the paragraph panel.

    Fritz Hansen
    Inspiring
    October 11, 2019
    I wish it were that simple. That alignment is not selected.