Inspiring
May 7, 2026
Answered

AI mask screwing up image color for some reason with the last update

  • May 7, 2026
  • 7 replies
  • 269 views

Why is the AI removal in lightroom classic now screwing up the color across the entire photo when clicking remove now?  This is only just now happening after I just updated to the most recent update.

Before it worked just perfectly fine, removed and replaced things without ruining the image color.  

Now it changes the entire image.  This is unusable now and I can’t find any new option or reason it would do this.

To update…...it appears to screw up any background masks that are created.  regardless if turning them off or not before doing removal. 

This is 100% a bug, because I’ve removed things using this exact same process the last time I used this before the update and it does not bug the mask.   It for some reason is baking color into the background mask that does not exist, making it Extremely cold temperature.

I tried doing a brand new background mask after the removal, and it is getting a completely different result of the first one before it was messed up with the removal.   Almost like it needs 20x the strength on each setting to match it.

Clone stamp is doing the exact same issue.

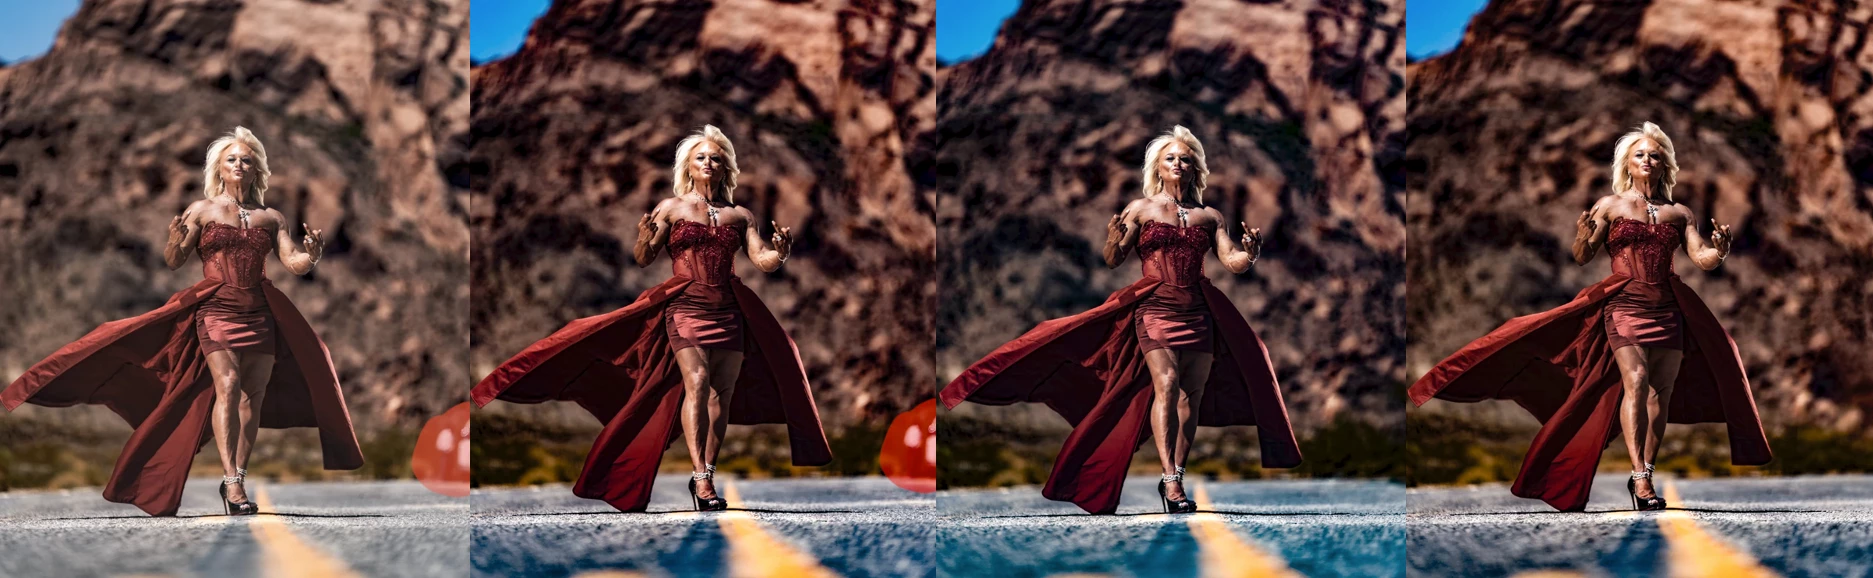
can see here is where I started.   and then what it does after removal or clone stamp or heal brush.


    Correct answer daleducatte

    @Sameer K That’s an interesting question -- so I tried to come up with some testing to see what would happen. 


    The first image in my screenshot shows the original with no Develop settings applied to it at all.


    The second one shows the results of setting Dehaze to +100 and no other Develop settings applied.


    The third image shows what happens when I apply a Remove selection with Dehaze already set to +100, after which I copied the Remove selection with Copy Settings so I could use the same selection again. I then reset the third image back to the original (so Dehaze got set back to zero and the Remove got removed). This test is out of order based on the link you provided.


    For the fourth image, I did the Remove first, then cranked Dehaze to +100. This test follows the recommended order of Develop operations. 


    To my eye, the fourth image (following the recommended order) has colors and tones that are much closer to the original (the first image). On the other hand, they’re different from the second image with only Dehaze applied -- though I suppose the image content is different, so Dehaze has recalculated its effects and that might be an expected result. 


    7 replies

    Community Expert
    May 10, 2026

    Ah now I can get it to happen. The mask needs to have dehaze applied!


    Here with a mask with dehaze before remove:

    Ands here after the remove:

    The blue in the road changes and the rocks in the background after doing the remove and updating the AI mask. Clearly a bug!

    Participating Frequently
    May 11, 2026

    Excellent, thanks! I was actually writing a reply at the same time you were doing more testing -- my reply is to your earlier test -- but we got to the same place. Dehaze apparently is the common denominator -- whether it’s set in Develop settings or on a mask -- and a variation of the problem can be seen (as the OP noted) with Clone, Heal, and Remove without AI. If, for example, you make a similar selection with Clone, then move the Source around the image -- the road colors and colors in other parts of the image will change depending on where you land with the Source. 

    Community Expert
    May 10, 2026

     So i tried the same thing as ​@daleducatte but I can’t get my machine to do this. I took the first screenshot. Aplied -85 blacks, +32 dehaze, +40 texture. Created a background mask (which masked everything but the person) and gave that some negative exposure and stuff. This is what it looks like:

    Then I removed a section on the right:

    And on the bottom:


    There is no color change whatsoever. So not sure what is going on here. I am on a M1 Max  32GB running Tahoe 26.4.1 . Lightroom Classic 15.3

    Participating Frequently
    May 11, 2026

    Thanks for giving this another try. Your results are actually starting to show what we’ve been talking about. I took your first two photos and set them side-by-side, and drew boxes around two sections in the before-Remove version. For the selection at the top, the rock shows less saturation after your Remove; for the selection at the bottom, the road color has shifted toward a deeper blue.


    If you use a higher Dehaze value, the effect should be more pronounced. I only set Dehaze (to +100) in my tests (no Texture or Black settings), and didn’t use any masks. Also, it seems the Remove selection needs to have both the road and the rock wall in it to trigger the effect, so I’m not surprised that your second attempt (with Remove on the bottom left) didn’t produce it.


    Community Expert
    May 11, 2026

    Ah indeed. Yeah I definitely didn’t try as extreme settings of positive dehaze as that as the effect is so ugly in general. I am starting to think in playing with it that this is a result of the way dehaze works. It estimates an overall color from the area you apply it to and basically deconvolves the effect of a haze of that tint on the image. It is very well possible that the remove significantly affects this calculation and because of the extreme dehaze settings that the impact of the dehaze on the image changes upon the remove area. So there is a chance that the adobe engineers will say that this is expected.

    Participating Frequently
    May 9, 2026

    I have seen this problem occasionally, but always had trouble reproducing it or even nailing down the circumstances when it occurs. It did seem more likely to happen when a Remove selection extended to the edges of an image AND that selection included sharply contrasting color ranges -- and I'd work around it by changing the Remove selection or breaking up the section I wanted to affect into several smaller selections.


    I downloaded your first image to see if I could reproduce it even with a JPG copy of your original. Of course I don't have any of your masks or other develop settings -- but when I've seen the problem occur, it was always before I'd done any masking on my images anyway.


    I set Dehaze to +100 (anything about +30 or above works for this image), and didn't adjust any other Develop settings. I then made a Remove selection over yours, about twice the size, to include both the rock wall background and part of the road. As soon as Remove finished processing, the colors of the entire image became slightly desaturated. Deleting the Remove selection made it even more obvious, as the original color saturation was restored.


    Once I saw it happen, I could then reproduce it pretty consistently with your image if my Remove selection included both the rock and the road. For example, a Remove selection roughly the same height as yours starting from the left side of the image to the middle (or all the way to the right side) produced similar desaturation. The combination of Dehaze and the color ranges must have something to do with it: the wall colors are mostly blends of red and orange, and the road colors are at the opposite end, blends of blue, purple, and magenta. I tried the same tests with other Develop settings, but could only reproduce it with Dehaze.


    I don't have a solution to offer -- though you might work around it by excluding the road from your Remove selection. I mainly wanted to acknowledge that the problem does exist, I've had it happen too -- and your image provides an example where it can be reproduced consistently.

    Legend
    May 10, 2026

    @daleducatte 

    I tried what you did with the jpg.


    Neither Remove or Generative AI Remove made any difference to the colour, despite having +100 Dehaze to begin with.


    Without the RAW file and the OP’s Edits, there is little more I can say.


    Thai5C65Author
    Inspiring
    May 10, 2026

    Weird, are you also on a Mac?  Wonder if it is an Adobe/Windows bug

    Community Expert
    May 9, 2026

    Tried reproducing this with images with negative blacks and dehaze dialed in and a bunch of masks and I can’t get my machine to do this. Running LrC 15.3 on a M1 Max. Not sure what is going on on your machine. You might want to post more systems details and/or share an image and steps to reproduce. 

    Thai5C65Author
    Inspiring
    May 9, 2026

    Did you try adjusting them first so that it would be easier to see the change when using the removal tools?  Like over push it just to see, then using the masks, it should pop and do a massive shift after, unless it is a bug with Lightroom and Windows interaction.  I just tried my previous driver from this last March and still same issue.

    I actually am thinking it might be a reversed bug…...like it might not even be a removal tool bug but an actual blacks and Dehaze bug and the removal tool reveals it…...just a thought, because Dehaze usually always adds deeper and cooler color at the same time where we have to adjust the temp to correct it if we use it more than just a smidge.   But I noticed before it did this, that when I used it, it did no color shift at all, almost like it was just a contrast slider, usually would need to increase temp if pushing it harder, but I didn’t have to, but didn’t even think about it and then when using the removal tool, then bam, super blue….I’ve pushed the slider to around 30 or so before and some images they turn blueish and have to adjust, and others barely any color change, which I never batted an eye with because just depends on the color, this time I used it that far and there was no shift at all and then massive shift, still more than it normally would be, but regardless…..might be a bug with the dehaze itself or both removal tool and dehaze.

    Very odd now because coincidentally after doing these Adobe updates, it seems like issue after issue, because I JUST woke up, started computer, opened lightroom, adjusted some things on a new photo, went to another photo I had adjusted before bed to see if new changes look better and copy pasted onto it and it said I could not, wouldn’t let me do any copy paste on any photo……then it wouldn’t let me use the windows key anymore to see if restarting computer would make it work again, even though I just turned it on…..and even though I literally just used it to type light to bring up lightroom and open it.  Had to control shift del, restart…..and that fixed the copy bug it just gave me…….which is a whole nother topic, but annoying that multiple things start cascading down once one Adobe issue comes up, which seems to be the common case over the years with me.

    OS Name    Microsoft Windows 11 Home
    Version    10.0.26200 Build 26200
    Other OS Description     Not Available
    OS Manufacturer    Microsoft Corporation
    System Manufacturer    Micro-Star International Co., Ltd.
    System Model    MS-7D31
    System Type    x64-based PC
    System SKU    Default string
    Processor    12th Gen Intel(R) Core(TM) i9-12900K, 3200 Mhz, 16 Core(s), 24 Logical Processor(s)
    BIOS Version/Date    American Megatrends International, LLC. 1.M0, 7/31/2025
    SMBIOS Version    3.6
    Embedded Controller Version    255.255
    BIOS Mode    UEFI
    BaseBoard Manufacturer    Micro-Star International Co., Ltd.
    BaseBoard Product    MPG Z690 EDGE WIFI DDR4 (MS-7D31)
    BaseBoard Version    1.0
    Platform Role    Desktop
    Secure Boot State    On
    Locale    United States
    Hardware Abstraction Layer    Version = "10.0.26100.1"
    Time Zone    Pacific Daylight Time
    Installed Physical Memory (RAM)    128 GB
    Total Physical Memory    128 GB
    Available Physical Memory    108 GB
    Total Virtual Memory    136 GB
    Available Virtual Memory    114 GB


    Community Expert
    May 10, 2026

    Yes did massively overdone parameters on the masks indeed. I see no shift when doing a generative remove to the image. What lightroom version are you on?

    Thai5C65Author
    Inspiring
    May 8, 2026

    Hmmmm, so now I’m not sure how further back this issue started, because searches online point to all the way back to 14.3 or something, which I didn’t notice it throughout that, but I narrowed down a primary pusher of the temp change to the dehaze.   I’ve always used dehaze off and on, for different types of images depending the look I wanted vs using black levels, and this has never been an issue, but when not using it on the mask in this case, it brings it back to mostly normal, but still a slight color shift, but hardly noticeable, which makes me think it could have been happening for a while and not been fixed the entire time and just didn’t notice it.

    So for some reason, the AI removal is somehow changing how dehaze works and black levels too, since black levels get washed out after dehaze used.  Example, before ANY of the removal tools, AI or not, a black level of -6 to -28, requires -66+ to get a similar result after using any removal tool.  Regardless if doing remove before or after any settings being changed, completely raw or not.  Same result either way.

    This is extremely annoying when trying to maintain color consistency on images that need something removed or fixed vs others that don’t, because the black levels get messed up and the color temp gets messed up at the same time.

    Before yesterday, I’ve never, in 7 years, had to adjust any settings after using removal tools.  Was always the exact same color.

    I’ve tried disabling GPU, I’ve updated all drivers, which might be the only other thing I can think of right now causing it being a new driver messing things up….I have to test it and revert to previous.  I’ve changed back to Adobe 1998 from using ProPhoto RGB, purged cache, forced it to make a new helper and ircat or whatever those files are that store the AI information.  Tried multiple different version 15+, can’t revert back to 14 because how you guys do the catalogs.   Clicking the mostly useless yellow update mask thing that you guys added a few updates ago or so, does not do anything.  It only bakes in the bug.   Which I’m not sure what that toggle is even for, because ever since it was added, it has done absolutely nothing.  100% same result before and after clicking that to update.   Before you guys just auto update like normal and it still does the same now without even clicking that…..so it’s kinda weird it even exists, but I clicked it anyways and just like always, zero effect.   Not sure if maybe it is just supposed to bake in things to make processing easier or something?  That would make sense to me.

    I’ve tried using the removal tools, clicking reset settings and then control Z to undo to see if it would reset a color shift bug, but that didn’t work.   I don’t think that would ever work, but tried anyways.

    Don’t know what else I could try, other than it being fixed on the developer end.

    Thai5C65Author
    Inspiring
    May 8, 2026

    Nope, tried the older driver and removal tools are still changing how the settings work.  So I’m out of options now

    JohanElzenga
    Community Expert
    Community Expert
    May 8, 2026

    Most likely you need to update the AI mask. There should be a yellow circle in the upper right corner of the develop module right panel to tell you this. Click on it.

    -- Johan W. Elzenga
    Thai5C65Author
    Inspiring
    May 8, 2026

    This does not work, already tried it

    Thai5C65Author
    Inspiring
    May 8, 2026

    Apparently something got changed when I updated to the 15.3, because reverting to the older ones still has the issue now