Participant
January 26, 2025
Answered

Increasing exposure decreases color brightness

  • January 26, 2025
  • 3 replies
  • 451 views

Not sure this is a bug or whether I just misunderstand how color math works. I searched for a post about this but couldn't find anything. But that's probably because of my limited photography language. If there is already a post, I apologize - please just point me to it.


I have a picture that looks ok'ish the way it is currently but it's too dark.
(If it looks weird, it's a part of a jacket with the shoulder strap of a backpack. But I'm not comfortable posting the full picture.)

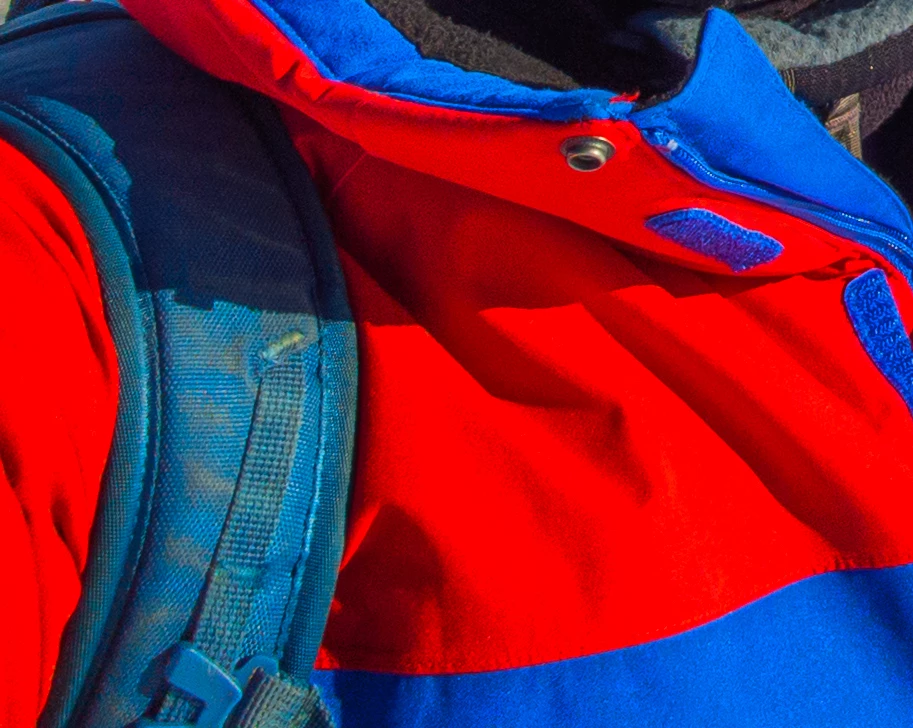
To fix the problem that the picture is too dark, I increase the exposure. But this makes the orange/red parts to go darker. On the blues you can see that the exposure was actually increased.

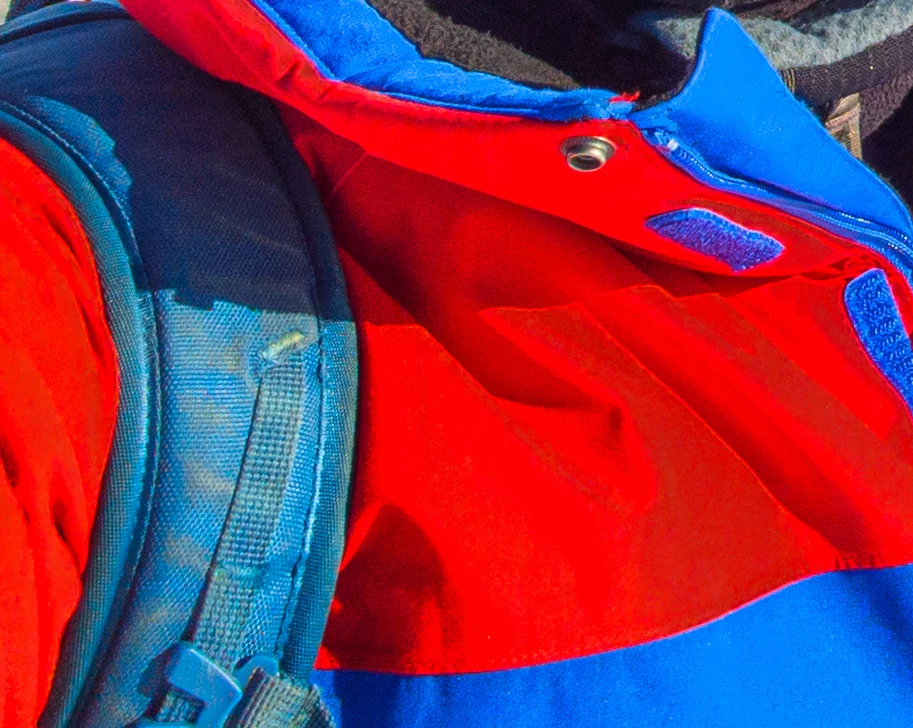
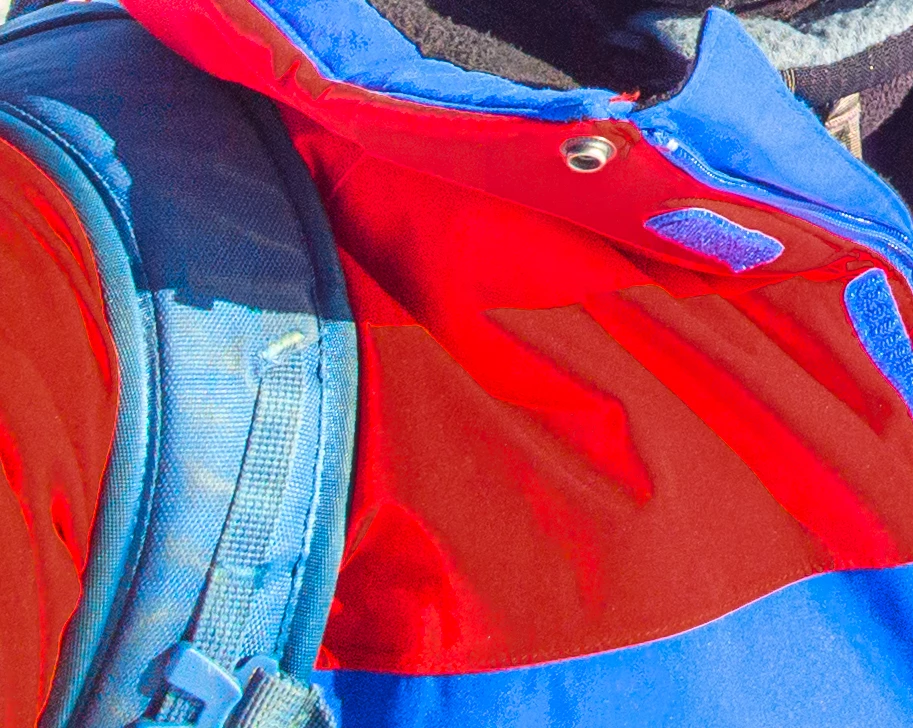
When I move the exposure even higher you can see that the shadow of the collar is becoming brighter than the part of the jacket that is actually in the sun. This seems wrong to me.

This isn't the first time I've seen this but here it's very noticable and easy to explain. And I think it has always been with reds.


This is a DNG raw picture from my phone. The issue is NOT present with the sidecar JPG file. But obviously I'd prefer using the raw file.


I'm willing to provide the picture for debugging/testing purposes through PM or email.


System

LRClassic 14.1.1
Camera Raw 17.1

Installation on SSD, Library on HD (~67k Images)

Windows 11 Home, 24H2

AMD Ryzen 5950X

NVidia RTX 3070 8GB (Driver 560.94)

64GB RAM


Camera

Front (selfie) camera of Pixel 8a

Correct answer Conrad_C

What raw profile is applied to the DNG image? (Camera Standard, Adobe Color, Landscape…)


Are the Develop module clipping indicator colors enabled (menu command View > Show Clipping), and if so, does it happen with the clipping indicator disabled? 


Is this inside a soft proof view (View > Soft Proofing > Show Proof)? If so, is a gamut clipping warning enabled (View > Soft Proofing > Destination Gamut Warning or Monitor Gamut Warning)? 

3 replies

Conrad_C
Community Expert
Conrad_CCommunity ExpertCorrect answer
Community Expert
January 27, 2025

What raw profile is applied to the DNG image? (Camera Standard, Adobe Color, Landscape…)


Are the Develop module clipping indicator colors enabled (menu command View > Show Clipping), and if so, does it happen with the clipping indicator disabled? 


Is this inside a soft proof view (View > Soft Proofing > Show Proof)? If so, is a gamut clipping warning enabled (View > Soft Proofing > Destination Gamut Warning or Monitor Gamut Warning)? 

gostefanAuthor
Participant
January 29, 2025

Hi Conrad


It's the "Google Pixel" Profile. It for sure has something to do with it. If I use any of the "Adobe ..." Profiles I don't get the issue. I guess I'll be using one of these then.


Just for completeness sake:

No, I don't clipping indicators turned on.

It wasn't in a soft proof view and with that the gamut warning is also disabled.


Thanks a lot for the help. I guess I just have to avoid the Google Pixel profile and I'll hopefully be good 🙂

gostefanAuthor
Participant
January 26, 2025

I have my highlights at -90 already and exposure is at about -1 to get the "correct" look of the first picture.

But you probably are right - after resetting all the edits, the image looks good and also lets me ramp up the exposure as expected (to some degree).

But even then at some point I get the same artifact (though less pronounced). To completely avoid that I'd have to increase the highlights and decrease the shadows (which would make the picture look hideous).


While googling I couldn't find any sources on the internet that explain to me when this issue comes up. Is there any (maybe mathematical) explanation of the underlying issue?

Ricky336
Community Expert
Community Expert
January 26, 2025

If you increase the exposure you need to decrease the highlights if needed, and here I think you should.

Also, you can use the 'curves' tool, in this case, red and blue to balance out the exposure.

Be aware that if you change the exposure, you also need to pay attention to the highlights and shadows.

Your sidecar JPG file has already done the post-processing in-house. If you use a raw file, then you have to do it yourself.

Spend some time learning about how to post-process raw files!