Lightroom AI Denoise – Funny UI Details – Your Take?
Hi, for those having real-life experience with Lightroom Classic AI Denoising:
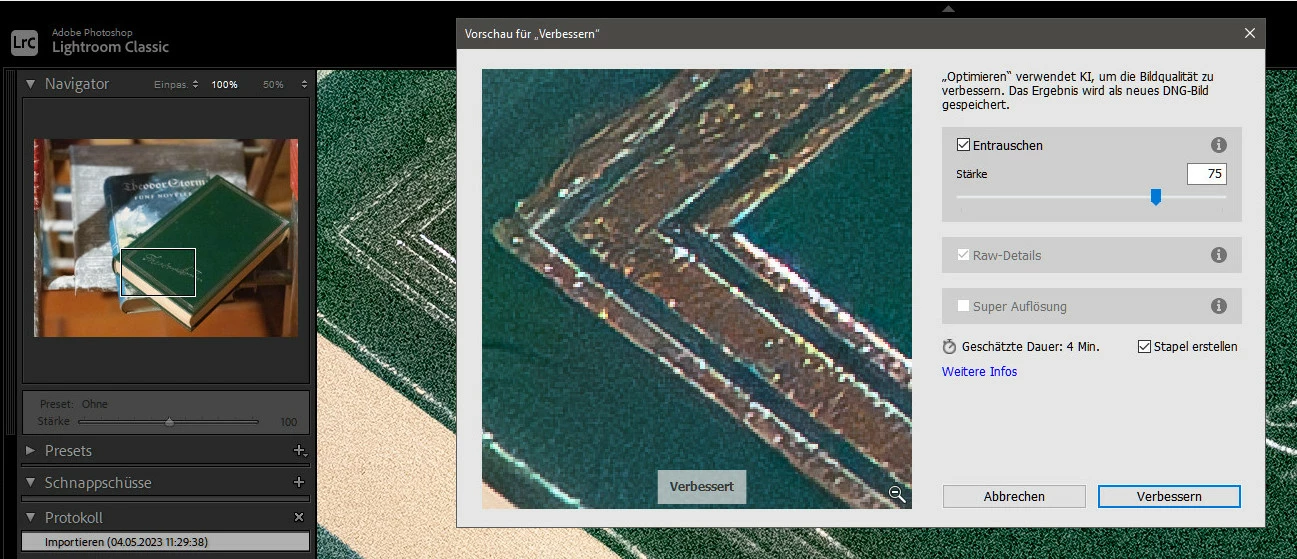
1) Zoom Level Preview Window
The preview window shows a zoom of around 240 percent – not 100 percent, as you might expect/demand (see 1st screenshot at bottom). When you set the main LR window to 100 percent zoom, the detail in the preview window is much larger (at around 240%). Thus the preview seems more soft and mushy. Same at your station? Which secret keyboard shortcut changes the zoom level?
2) GPU Usage
AI Denoising seems to block my whole Win 10 machine, even typing in Word is almost impossible while denoising. Looking at the Task Manager, the "GPU" column is at 100 percent, while "CPU" and "power consumption" are almost at bottom level (see screenshot). Normal? Same with you? Can that be improved maybe in the Nvidia Settings or with turning off GPU use in Lightroom? Interested if you actually tried.
3) Adding Keyword(s)
With an option in the LR Preferences (originally not activated), you can make LR add the keyword "Denoise" to the image. When I send such an image from LR to Photoshop, there are suddenly TWO keywords – "Denoise" and "Enhanced". Same with you?
4) New Star Symbol?
In some video tut I saw a new star symbol added to "enhanced/denoised" image thumbnails (like the symbols for geo-data, crop or adjustments). I don't see that symbol at my place. How about you?
5) Why TWO Shortcuts to Denoise "Headless"?
To skip the dialog box and apply the last settings immediately, in Win 10 i can click "Denoise"
- while holding the Alt/Option-key or
- while holding the Shift key.
Is there a difference between Alt/Option and Shift key when clicking "Denoise"? Are there both short keys usable also on the Mac?`
Thanks for all real life experience!