Gracehoper
Known Participant
August 1, 2017
Answered

Spot Removal: clone does not cover up a blemish

  • August 1, 2017
  • 3 replies
  • 1276 views

Hello,

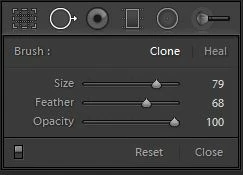
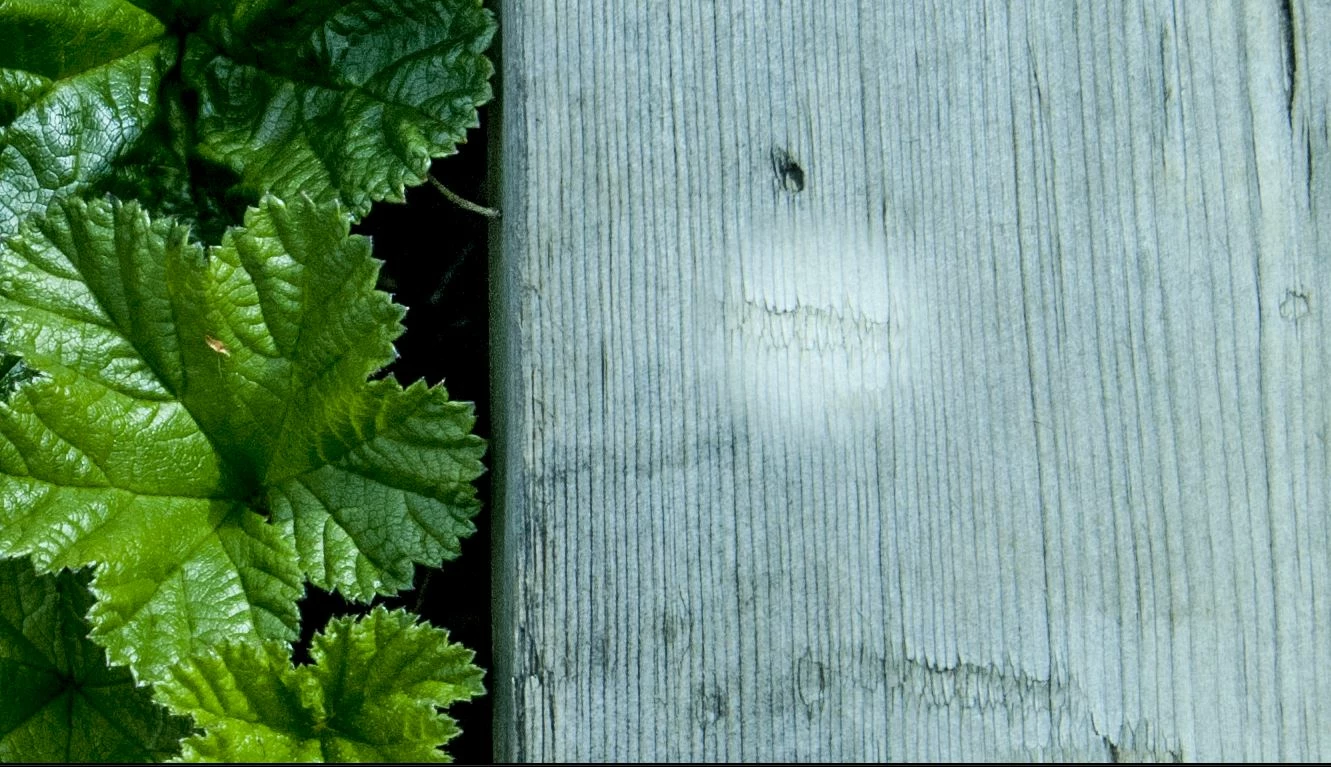
can anyone please help me with this? When I try to use Spot Removal (clone) to cover a small pale blemish it replaces the destination (blemish) with the source but without completely covering it. It leaves it as pale as before but with new content. I am new to Spot Removal -- is there something I am doing wrong?

I am using LR5 on Windows 7 Professional SP 1.

This topic has been closed for replies.
Correct answer Todd Shaner

  Open the Adjustment Brush and click on Reset at the bottom its panel. Next open the Radial Filter tool and click on its Reset. Now try the Spot Removal tool again.

What appears to be happening is that the Adjustment Brush and Radial Filter adjustments are applied AFTER the Spot Removal tool application. The cloned area has the Adjustment Brush and Radial Filter Applied on TOP instead to the original area BELOW.

I discovered a similar issue with the Transform panel application as described here:

Re: Using Spot removal tool on a straight line LR6

3 replies

donnab76285962
Participant
September 24, 2017

Spot Removal is not working at all.  I have hit reset, I have verified that the "turned off" switch is turned ON.  Nothing is happening.  My mask to erase steps (or negative mask) is not working either.   Can you help?????  It was working before.

Bob Somrak
Legend
August 1, 2017

The bright spot looks like you used the brush tool with + exposure.  When you clone the area with the spot tool it will also take on the brush adjustment.  Turn on the brush tool and see if there is an adjustment there and if so delete it.

M4 Pro Mac Mini. 48GB
Gracehoper
Known Participant
August 1, 2017

Thanks. Adjustment Brush tool was not set. And setting it at minus did not seem to affect this either .

(Note FWIW that the blemish is due to a drop of rain on the glass.)

Todd Shaner
Todd ShanerCorrect answer
Legend
August 1, 2017

  Open the Adjustment Brush and click on Reset at the bottom its panel. Next open the Radial Filter tool and click on its Reset. Now try the Spot Removal tool again.

What appears to be happening is that the Adjustment Brush and Radial Filter adjustments are applied AFTER the Spot Removal tool application. The cloned area has the Adjustment Brush and Radial Filter Applied on TOP instead to the original area BELOW.

I discovered a similar issue with the Transform panel application as described here:

Re: Using Spot removal tool on a straight line LR6

Todd Shaner
Legend
August 1, 2017

Try using a lower Feather setting and/or Heal mode. If that doesn't work please post a Fit view screenshot of the image with the Spot Removal tool showing.

Gracehoper
Known Participant
August 1, 2017

Thank you for your suggestion.

The problem persists even with less feathering. It seems as though the "brightness" of the pale timber affects the resulting clone (image 1), despite setting opacity to 100. To test that I sampled from the darker foliage into the pale area and it does appear that even the foliage turns paler at the destination (image 2), and even more so when cloned onto the blemish itself (image 3) though this is less marked.

The result is about the same when healing.

So far these behaviours are all happening to raw (.NEF) files. What is most odd is that the tool works fine when I edit a JPG file exported from the raw (image 4).

Image 1 -- editing a raw (.NEF) file

Image 2

Image 3

Image 4 works correctly on a JPG