Known Participant
August 21, 2023
Answered

Where did the Range Mask option go?

  • August 21, 2023
  • 3 replies
  • 2530 views

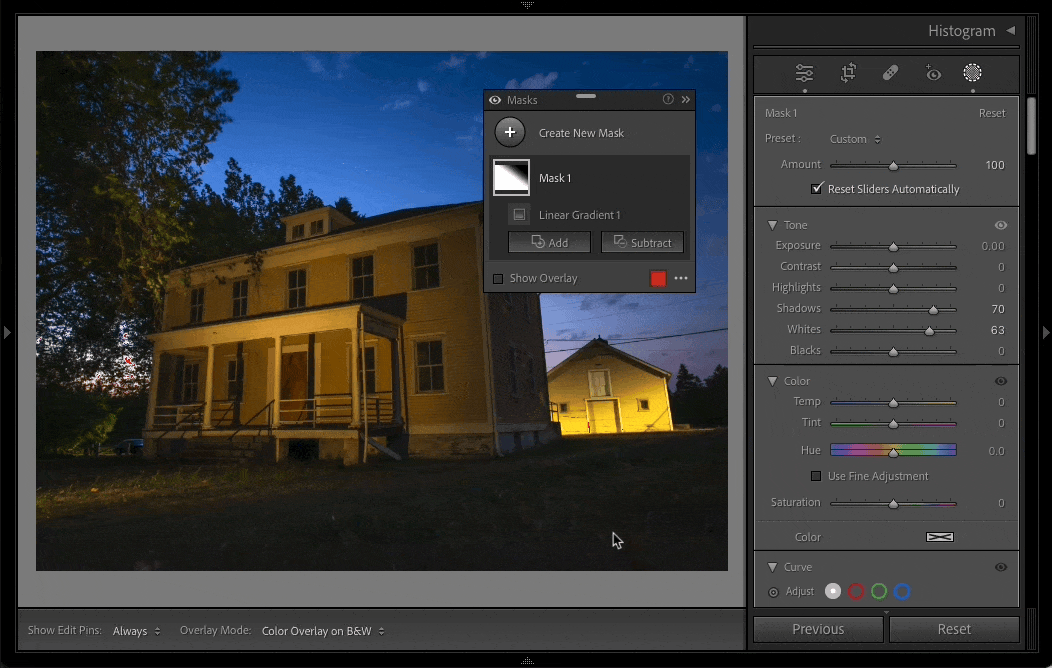
Hey where did the Range Mask option go, where you could select, luminance, color or depth? It used to be at  the bottom of all the masking tools. I want to mask off the luminance of a linear gradient like this guys shows in his video: Fast forward to 11 minutes 30 seconds to see what I mean. https://www.youtube.com/watch?v=K61jUqy3mzM

Correct answer Conrad_C

Oh, OK, I misunderstood. It sounds like what you are looking for is the Intersect option. What is shown in the demo below:

1. Starting from a linear gradient mask already applied…

2. Click the … menu for the existing mask component, and choose Intersect Mask With > Luminance Range.

3. Set up the Luminance Range mask, dragging across tones in the image that are within the range you want.

4. When you preview the mask overlay by hovering over the mask, you see that the linear gradient mask is now constrained to the luminance range mask.


A shortcut is to hold down the Option key when the first mask is selected; that changes the Add/Subtract buttons to Intersect so that you can just click that instead of opening the two menus.

3 replies

Rob_Cullen
Community Expert
Community Expert
August 22, 2023

The video is an old version of LrC. It sounds like you want to "Intersect" a Luminance Range on a Gradient/Radial Mask-

1) Create your Gradient/Radial Mask

2) Click on the three dots icon [...] on the Gradient Mask layer

3) Choose [Intersect mask with]

4) Select [Luminance Range]

5) Adjust the Luminance slider for wanted range ( eg shadows) and expand feathering if wanted.

6) If there are unwanted areas of the image still being influenced by the mask- you can select the Gradient mask layer and click the [Subtract] button to brush away those unwanted areas.


Regards. My System: Windows-11, Lightroom-Classic 15.1.1, Photoshop 27.3.1, ACR 18.1.1, Lightroom 9.0, Lr-iOS 10.4.0, Bridge 16.0.2 .
Known Participant
August 23, 2023

Thanks for the detailed answer, it really helps.

Conrad_C
Community Expert
Community Expert
August 21, 2023

The video was posted 3 years ago, so it shows an older version of Lightroom Classic. In Lightroom Classic 12, Adobe added so many new mask types (mostly the extremely powerful AI masks) that they upgraded and redesigned everything about masking, and so the Range masks were moved to a new location within the improved Masks section.


To learn more about how masking works now, filter YouTube videos to show only those made in the last year or so.


Known Participant
August 22, 2023

yes, i know about how to click that but i want to apply it to an existing gradient mask, so what is applied to that mask only goes towards the luminocity range i chose.  If you click that video you will see what i mean. 

Fast forward to 11 minutes 30 seconds.

Conrad_C
Community Expert
Conrad_CCommunity ExpertCorrect answer
Community Expert
August 22, 2023

Oh, OK, I misunderstood. It sounds like what you are looking for is the Intersect option. What is shown in the demo below:

1. Starting from a linear gradient mask already applied…

2. Click the … menu for the existing mask component, and choose Intersect Mask With > Luminance Range.

3. Set up the Luminance Range mask, dragging across tones in the image that are within the range you want.

4. When you preview the mask overlay by hovering over the mask, you see that the linear gradient mask is now constrained to the luminance range mask.


A shortcut is to hold down the Option key when the first mask is selected; that changes the Add/Subtract buttons to Intersect so that you can just click that instead of opening the two menus.

dj_paige
Legend
August 21, 2023

You have to first click on the circular Masking icon underneath the Histogram (or press Shift-W). Then the masks are available.


Alternatively, you can call up a range mask with Shift-J or the luminance mask with Shift-Q