
Known Participant
Jul 18, 2024 8:17 PM UTC
Answered

Creating the dotted pattern for a thumbnail

Hello everyone

There's a thumbnail style that I want to replicate. It has a dotted pattern on the top left. Is there an easy way to achieve this effect? 
Please help

Thank you

This topic is closed to new replies. Start a new post to keep the conversation going.
Trevor.Dennis
Trevor.DennisCorrect answer
Community Expert
Oct 16, 2025 9:20 AM UTC

Blimey.  Did I actually say peeps were over complicating and then demonstrate a crazy long winded way to do this?


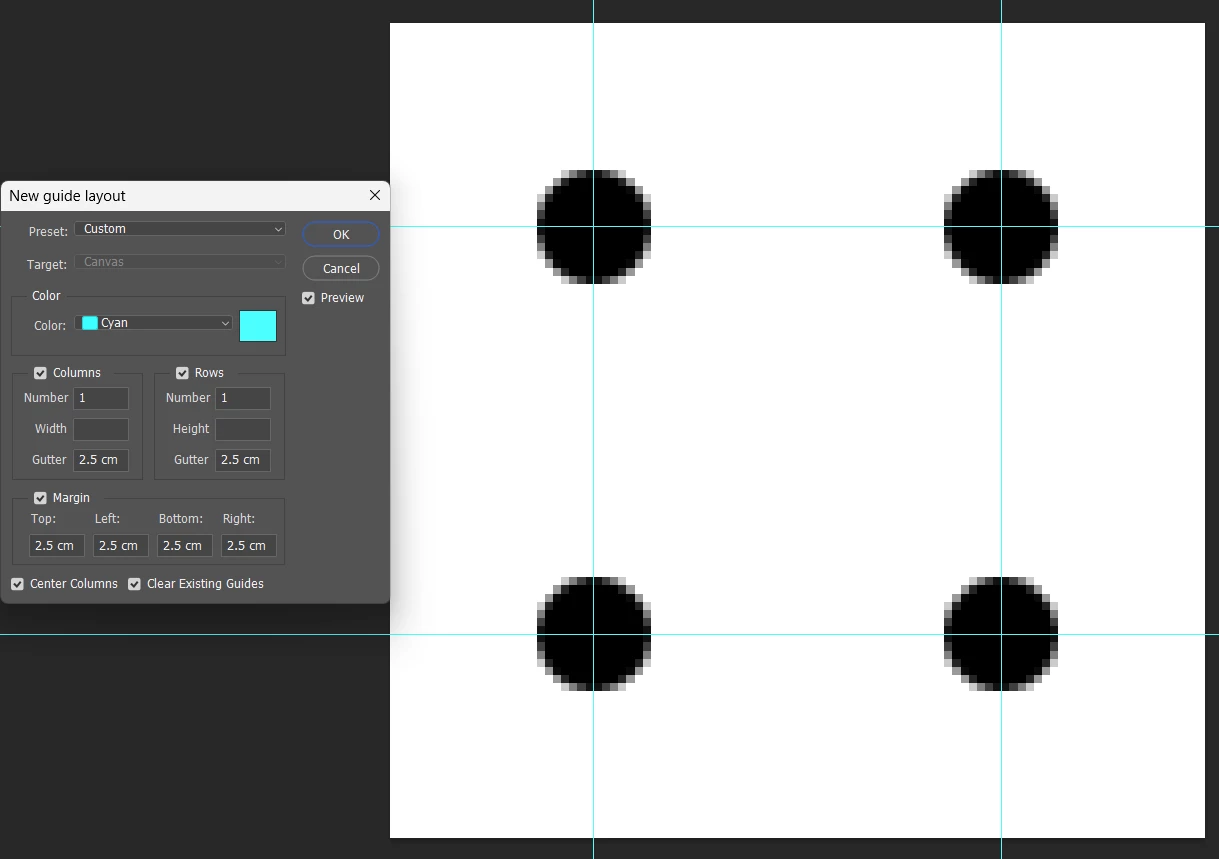
If you make a square document and create a Guide Layout with margins at 25%

and snap black dots to the guide intersects.

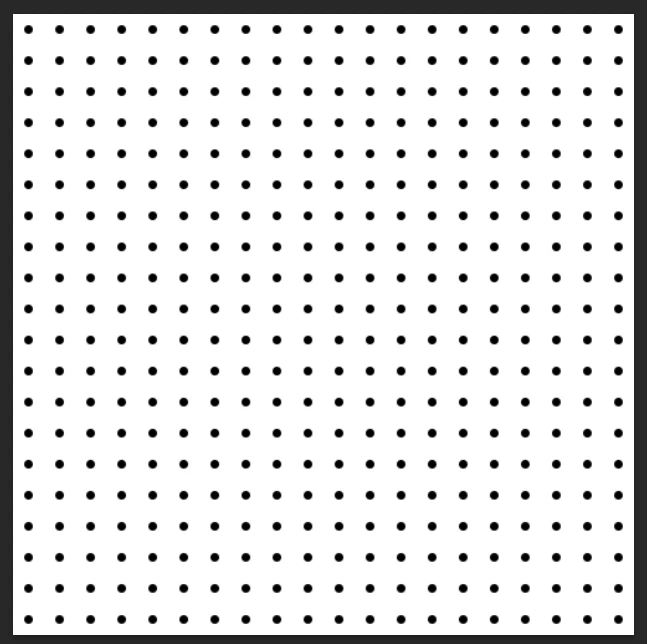
That creates a seamless pattern

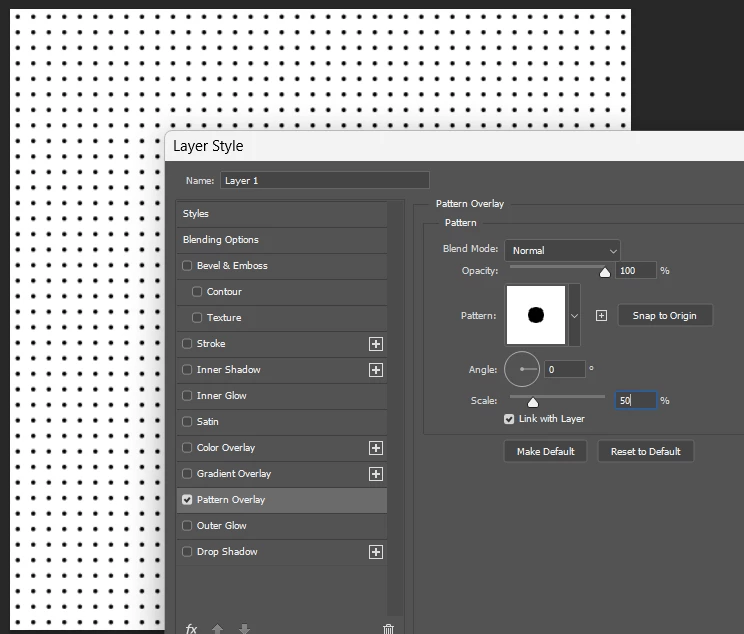
Apply it as a Layer Style if you want to scale it and apply nondestructively.

13 replies

lilly44
Participant
Feb 7, 2026 1:44 AM UTC

Yes, this effect is easy to recreate. You can add a dotted pattern using shape layers, pattern overlays, or custom brushes in tools like Photoshop, Illustrator, or Canva. Simply place the dot pattern in the top-left corner, adjust opacity and spacing, and blend it with the background for a clean thumbnail design.

Translate
Trevor.Dennis
Community Expert
Community Expert
Mar 31, 2025 9:24 AM UTC

I'm looking at the recent additions to this thread, and wondering if people are over complicating this, and even if that was not the case, they might be missing a chance to learn some basic tips and tricks about using Photoshop, which can be a lot of fun.


One way would be to build an array using Free Transform Step & Repeat.

Stamp down a single fully hard round brush on a new layer.

Copy the layer, and using the grid as a guide (Ctrl ') use Free Transform to move it to the next major grid intersection.

Now use Shift Ctrl Alt T which will repeat the last Free Transform making a new layer.

10 is a nice round number, so nudge the last one to be fully centred on the grid, and use Move > Align > Distribute to equally space the layers.

Merge those layers and repeat vertically to complete your array.


Step and repeat is super useful, and you'll think of all sorts of reasons to use it going forward. You could use it with an angle rather than linear offset to create numbers on a watch face, or the minute and hour marks.


Something else you could do is define it as a new Pattern.

Note that I still have the grid turned on, and an active selection exactly half wqay to the next major grid line.

This will result in the pattern being equally spaced.


A good way to use the patter, is with layer styles, because you can scale the pattern that way.

Layer styles need the layer to have content, but we can fix that latter, so just fill a new layer with a colour that will contrast the dot pattern.  I'll use red.

We don't want the red to show, so we get rid of that by setting fill opacity to zero.


Translate
Trevor.Dennis
Community Expert
Trevor.DennisCommunity ExpertCorrect answer
Community Expert
Oct 16, 2025 9:20 AM UTC

Blimey.  Did I actually say peeps were over complicating and then demonstrate a crazy long winded way to do this?


If you make a square document and create a Guide Layout with margins at 25%

and snap black dots to the guide intersects.

That creates a seamless pattern

Apply it as a Layer Style if you want to scale it and apply nondestructively.

Translate
Participant
Mar 31, 2025 4:15 AM UTC

Now it's easy to achive dotted pattern on your thumbnail. Just login to chatgpt and give a propt upload a picture and check the results boom !

Translate
Trevor.Dennis
Community Expert
Community Expert
Mar 31, 2025 4:21 AM UTC
quote

Now it's easy to achive dotted pattern on your thumbnail. Just login to chatgpt and give a prompt upload a picture and check the results boom !


By @Sila_Ehsan7981


One of thje most bizarre things I have seen on this forum was when a poster said they had asked ChatGPT to fix their Photoshop problem.  It apparently failed, so he came to us.  That felt totally weired.  

Translate
Participant
Feb 1, 2025 12:22 PM UTC

Thanks really helped me a lot.

Translate
melissapiccone
Community Expert
Community Expert
Nov 8, 2024 3:26 PM UTC

I would actually go into Illustrator, use one of the dot patterns built into the Illustrator Libraries, and drop it into PS - just another suggestion if you have access to Illustrator.

Translate
Melissa Piccone | Adobe Trainer | Online Courses Author | Fine Artist
Participant
Dec 2, 2024 9:40 AM UTC

Thanks @melissapiccone, it really helped me a lot.

Translate
Participant
Sep 19, 2024 4:31 PM UTC

Altohugh I have not done this in adobe tools but still it looks pretty easy and convenient to do it. Pretty sure you can do it in multiple ways.

Translate
c.pfaffenbichler
Community Expert
Community Expert
Jul 20, 2024 10:03 AM UTC

Once you created the element you can, depending on whether you created it as as Paths or pixels, create a Shape, Brush or Library Graphic that you can later on easily apply to multiple images, possibly via an Action or Script. 

Translate
Legend
Jul 18, 2024 8:40 PM UTC

There are lots of way to do this. I would probably use a dot pattern on a new layer, and then a mask to confine it to that shape. You can also use a shape layer with the triangle tool and fill it with a pattern.

Translate
Known Participant
Jul 18, 2024 8:27 PM UTC

 I was figuring out a workaround. But seemed to have hit a brick wall. What's the best way to remove the background while retaining the dots?

Translate
Conrad_C
Community Expert
Community Expert
Jul 19, 2024 12:47 AM UTC

The problem with trying to remove that background is that the edges of the white dots have to be perfectly clean,and yet because you’re trying to extract the dots from that image, the low resolution will be difficult to adapt to different images and still look good. It will probably look rough.


It would be much faster, easier, and cleaner to make your own white dot pattern. This can be done in about a minute if you’re experienced, a little longer if you’re learning.

1. Create a new blank document with a square canvas and no background (fully transparent). 

2. With the Shape tool, draw one circle and make it white. Leave some space around it because you don’t want the dots to touch. 

3. Define that as a pattern by choosing Edit > Define Pattern. (View > Pattern Preview can help you see if the dot spacing is correct.)

4. With the Triangle shape tool. draw a triangle. If needed, use the path editing tools to customize the triangle shape.  

5. With the triangle shape layer selected, choose Layer > New Layer > Pattern, and apply the pattern you created in step 3. In the Pattern Fill dialog box that appears, scale and angle the pattern as needed. 


You should now have a triangle with a white dot grid on a transparent background, that can be added to any image. You can add it to the Libraries panel so that you can easily drag it into whatever you‘re working on.

Translate