This turned out to be an interesting detective story…
The short answer is that the reason nothing works is because almost all of the layer pixels are the same value (RGB 0,0,0). The characters are visible using opacity, hiding the black! But there is no layer mask. So to edit the opacity, you have to edit the PNG transparency alpha channel because that’s how the image is actually formed. This isn’t obvious, I had to figure it out. Also, you’ve misinterpreted the “white spots”…they are actually transparent spots, because you can see the transparency checkerboard behind the spots. Again, it’s the alpha channel transparency that must be edited. The solution I use at the end of this reply involves converting opacity values to layer color values so that you can then edit it normally.
Clue #1:
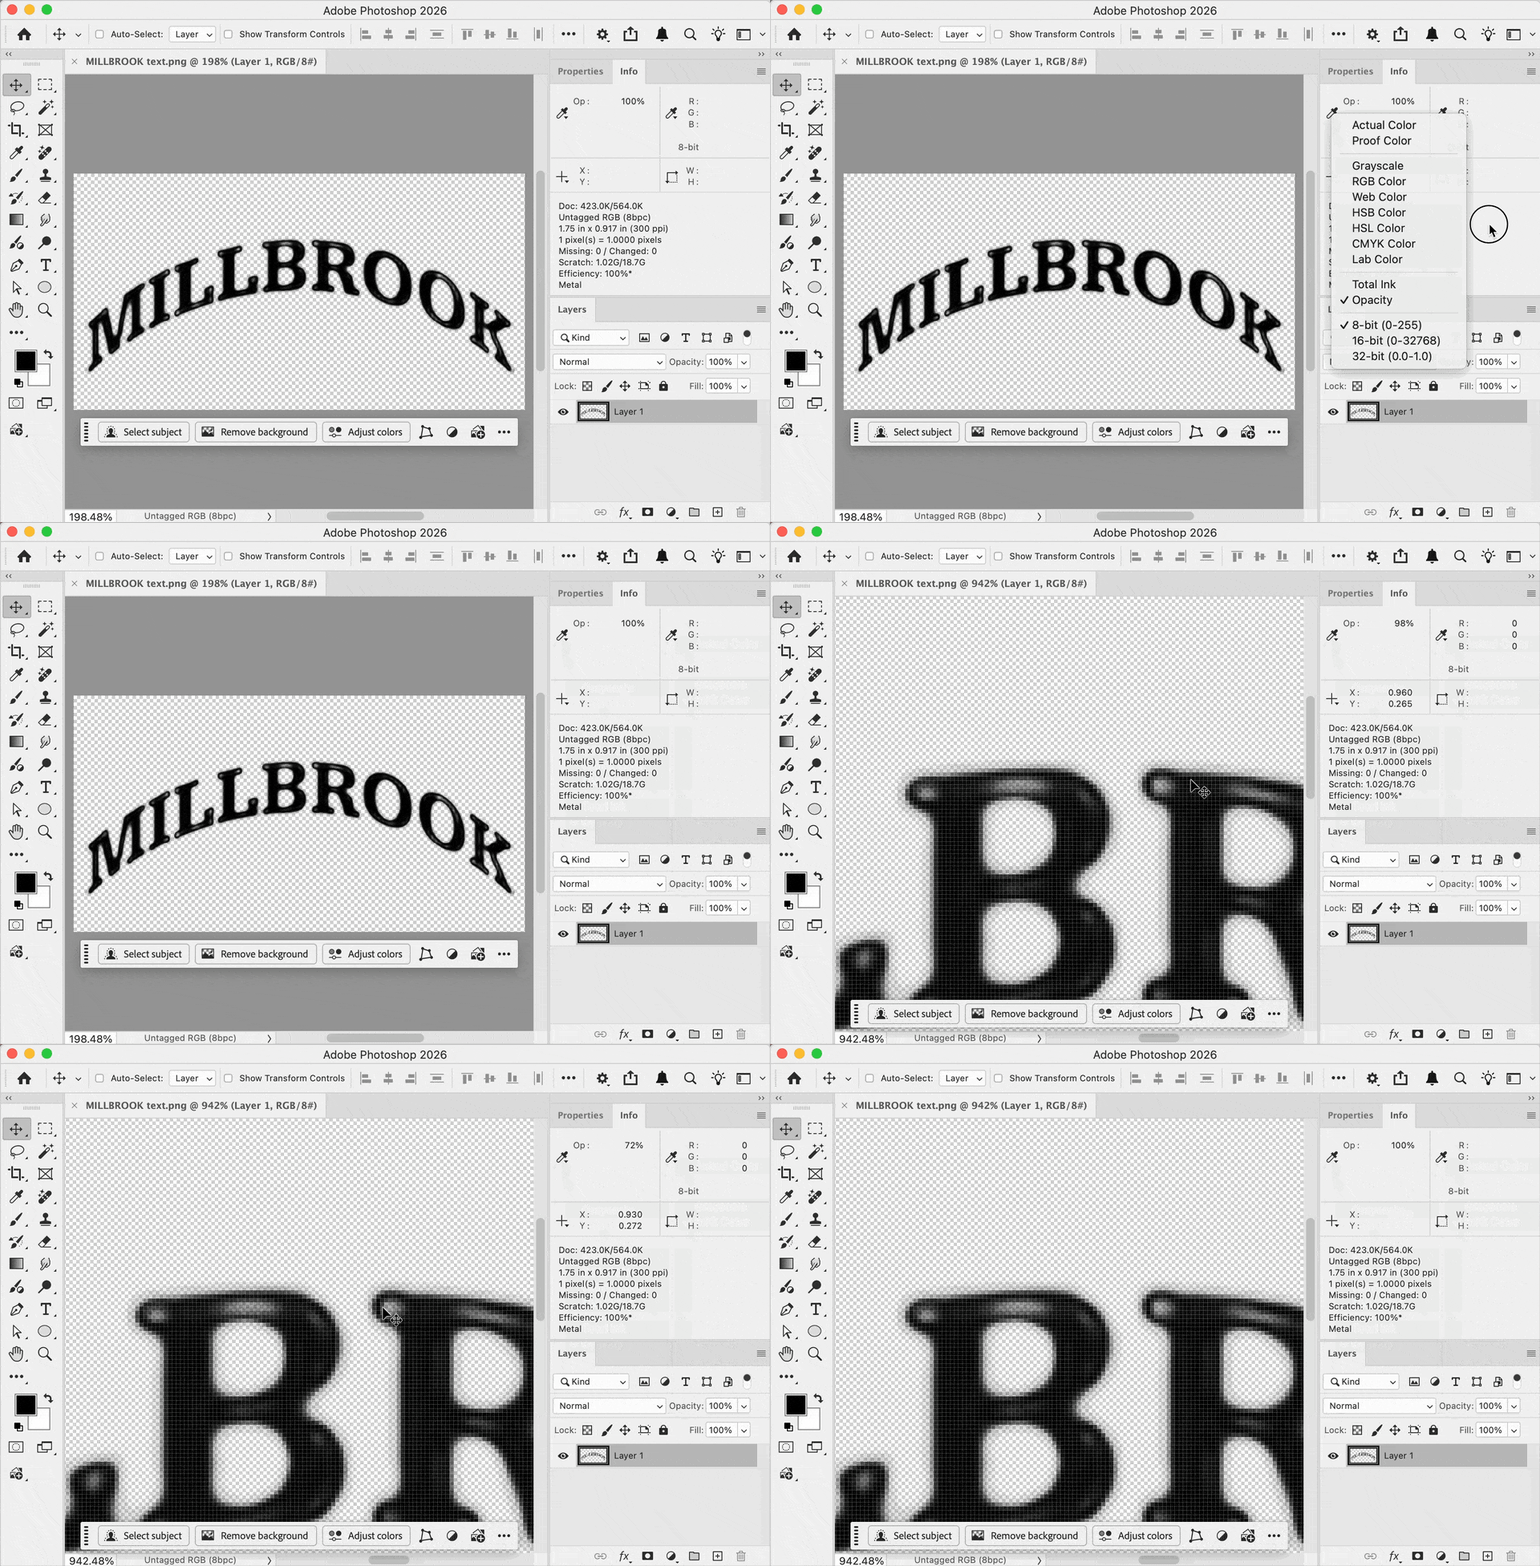
In the file attached with the question, moving the pointer around the layer reveals no change in RGB pixel values. But if one Info panel readout is set to Opacity, then…aha, there are value changes! So the image is formed by opacity changes, not pixel value changes. In the demo below, notice how when the pointer is moved over pixels of different color values, the Opacity readout in the Info panel shows changes, while the RGB readout is always RGB(0,0,0).
Clue #2:
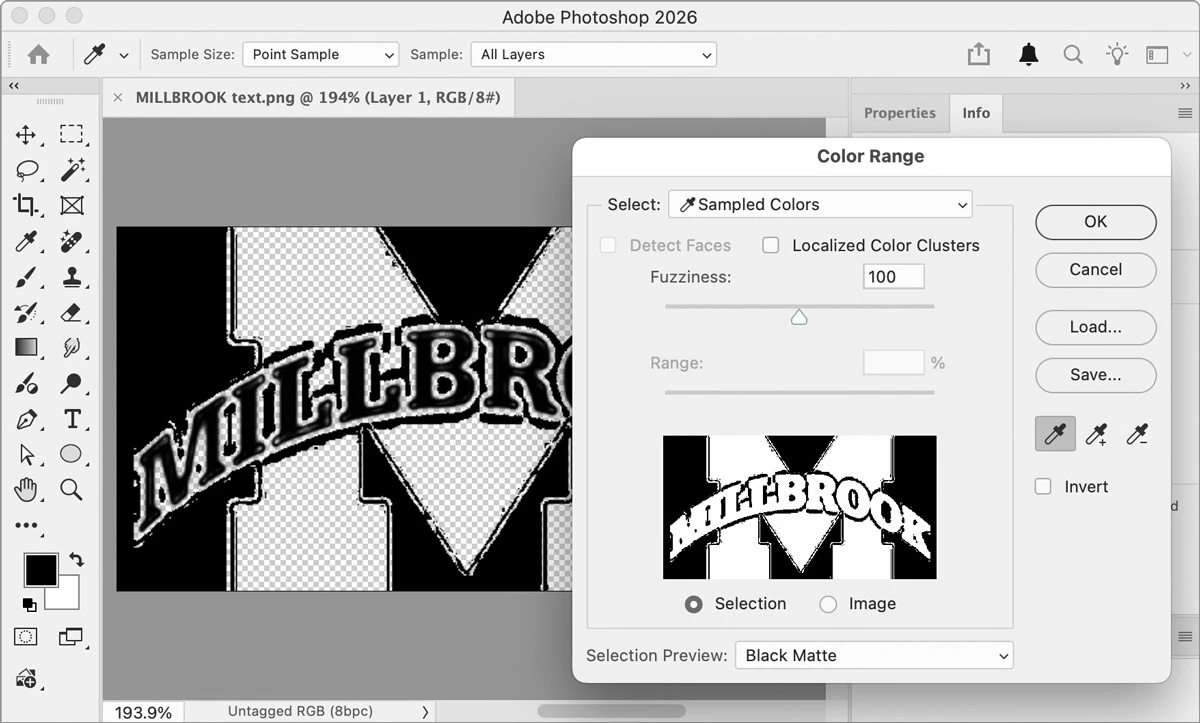
I tried using Select > Color Range, and when I started sampling values, a “ghost” image appeared. It isn’t visible in the normal composite view because it’s only one level above 0. The weird thing is, the Threshold feature does not reveal it, even though it can be revealed using Select > Color Range or with the Magic Wand tool (when set to Threshold 0).
Anyway, if someone isolated the Millbrook text by starting out from a bigger logo with effects and separating the text from the big M behind it, the way it was done was apparently not completely clean.
Solution:
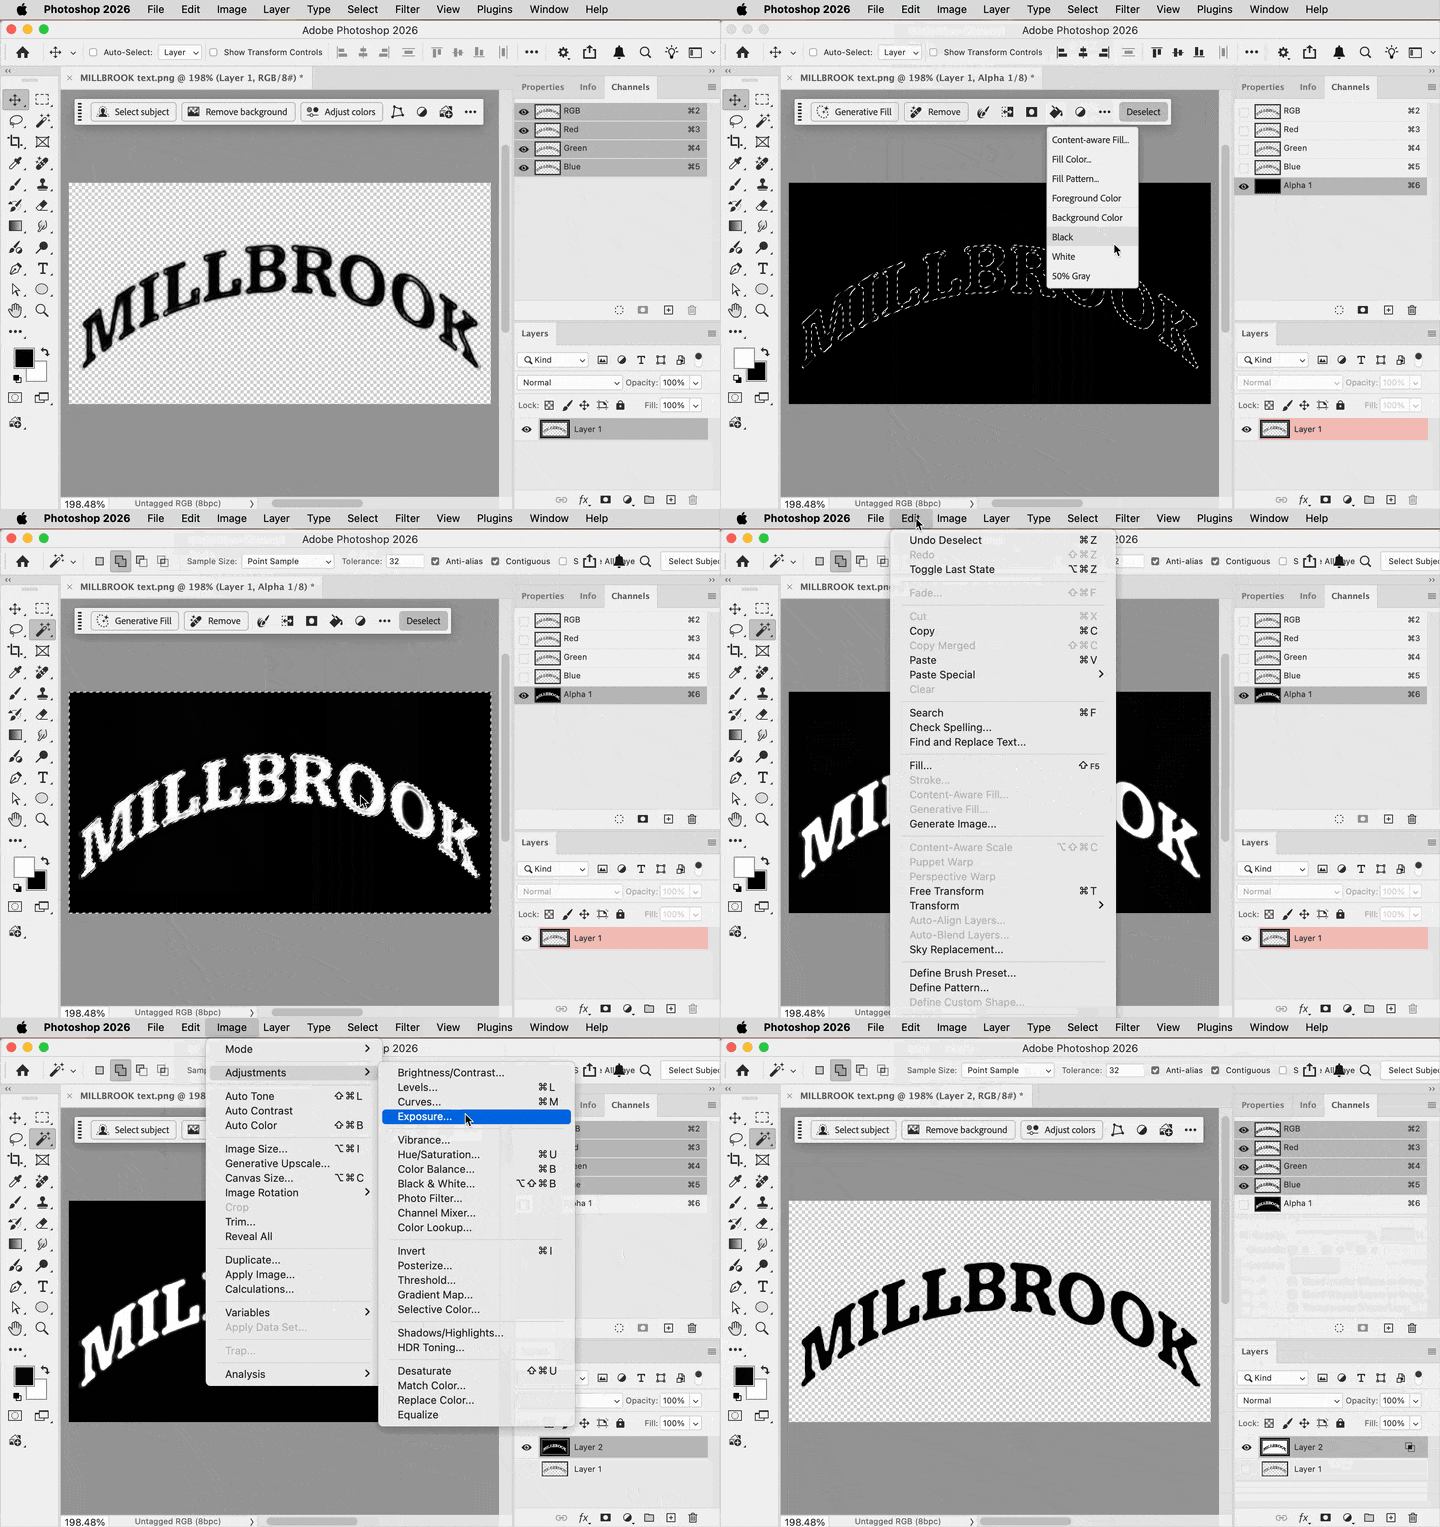
You need to get at the opacity values but there is no layer mask, so you have to get it done using the Channels panel as shown in the demo below…
1. Choose the command Select > Select All.
2. In the Channels panel, create a new channel, and paste into that.
3. Fill with white. That fills the selection, but doesn’t yet address the inner emboss holes. So…
4. Deselect, then use the Magic Wand Tool (with Tolerance above zero to include the ghost image) to select the outer solid black area.
5. Make sure the Magic Wand Tool is set to Add to Selection (or just hold down the Shift key), and click the counters (enclosed areas) of characters such as B, R, and O. Now just the characters have been isolated.
5. Invert the selection, and fill with White. The characters should now be solid white.
6. Select All in the channel, choose Edit > Copy, and switch the Channels panel to the RGB composite view.
7. Create a new layer and paste. Invert the image so it’s black on white.
8. (Optional) If you want the background to be transparent, double-click the layer (or choose Layer > Layer Style > Blending Options), and for Current Layer, use the white point Blend If Gray sliders to drop out the white to transparency. Note that this provides an opportunity to contract or sharpen the type edge a little. I also split the slider (Option-drag one half to pull it away from the other half) to feather the transition.




 AdChoices