This topic has been closed for replies.
Correct answer MahaB82A_

………….create a black to transparent gradient (most often a linear gradient), set the gradient layer to multiply and then clip the gradient layer to the appropriate smart object layer. Finally bringing the grad layer’s opacity up from zero to where it is just enough.


Thanks above one is a good idea.

3 replies

Srishti Bali
Community Manager
Community Manager
July 14, 2026

Hi everyone! 

A big thank you to everyone who has shared their creative shadow-making techniques in this community. It's been great to see the variety of workflows and tips you've contributed!

Realistic shadows play a key role in helping a subject feel naturally grounded in a scene. Since there are multiple ways to create them in Photoshop, depending on your subject, lighting, and creative intent, we've brought together some of the most effective techniques based on workflows shared by this community, along with recommendations from our Photoshop experts.

If you're looking for inspiration or want to explore different approaches, check out this page


Hope this helps! If you have other shadow creation workflows or tips that work well for you, feel free to share them on this page. We'd love to keep learning from each other.

Thanks, Srishti Bali | Community & Engagement Strategist, Digital Imaging | Adobe
johng44721896
Community Expert
Community Expert
March 12, 2026

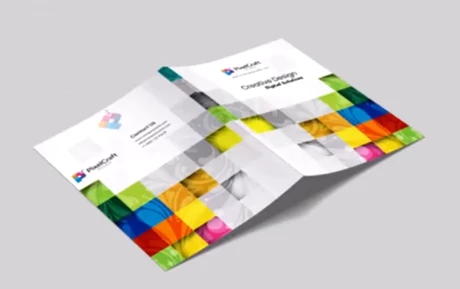
I too watched the video. I think that the presenter(s) of the video wanted to create some fall off of luminance on the folder. When we look at the blank folder at the start of the video we see that there is some subtle shading most notable at the back cover, near the crease between front and back covers. By duplicating the original background folder and converting the layer blend mode to multiply, the presenters were attempting to create that shading on the new covers.

I think the shading created by that multiply layer is too subtle to be easily seen in the video. What I’ve done in the past is to create a black to transparent gradient (most often a linear gradient), set the gradient layer to multiply and then clip the gradient layer to the appropriate smart object layer. Finally bringing the grad layer’s opacity up from zero to where it is just enough.

Hopefully, this screen shot will give you the idea. I’ve exaggerated the darkness of the gradient’s shading to be more easily seen.

MahaB82A_
MahaB82A_AuthorCorrect answer
March 12, 2026

………….create a black to transparent gradient (most often a linear gradient), set the gradient layer to multiply and then clip the gradient layer to the appropriate smart object layer. Finally bringing the grad layer’s opacity up from zero to where it is just enough.


Thanks above one is a good idea.

Legend
March 12, 2026

Personally, I feel the Grafix Studio of Karachi tutorial is bogus. The starting blank folder already has a shadow. From 5:10 on, the tutorial claims to be instructing how to make a realistic shadow. I watched it twice; even after running my eyes, I don’t see a change in the shadow.

Larry
MahaB82A_
MahaB82A_Author
March 12, 2026

Thanks.


I also notice this operation didn’t give even subtle changes to image. But it merely explain what steps have to be taken when doing Mockup.    


I know the country the video. How do you know “Grafix Studio of Karachi tutorial “?