Question
How to invert a Vector Mask in Photoshop (or just get the correct selection you want)
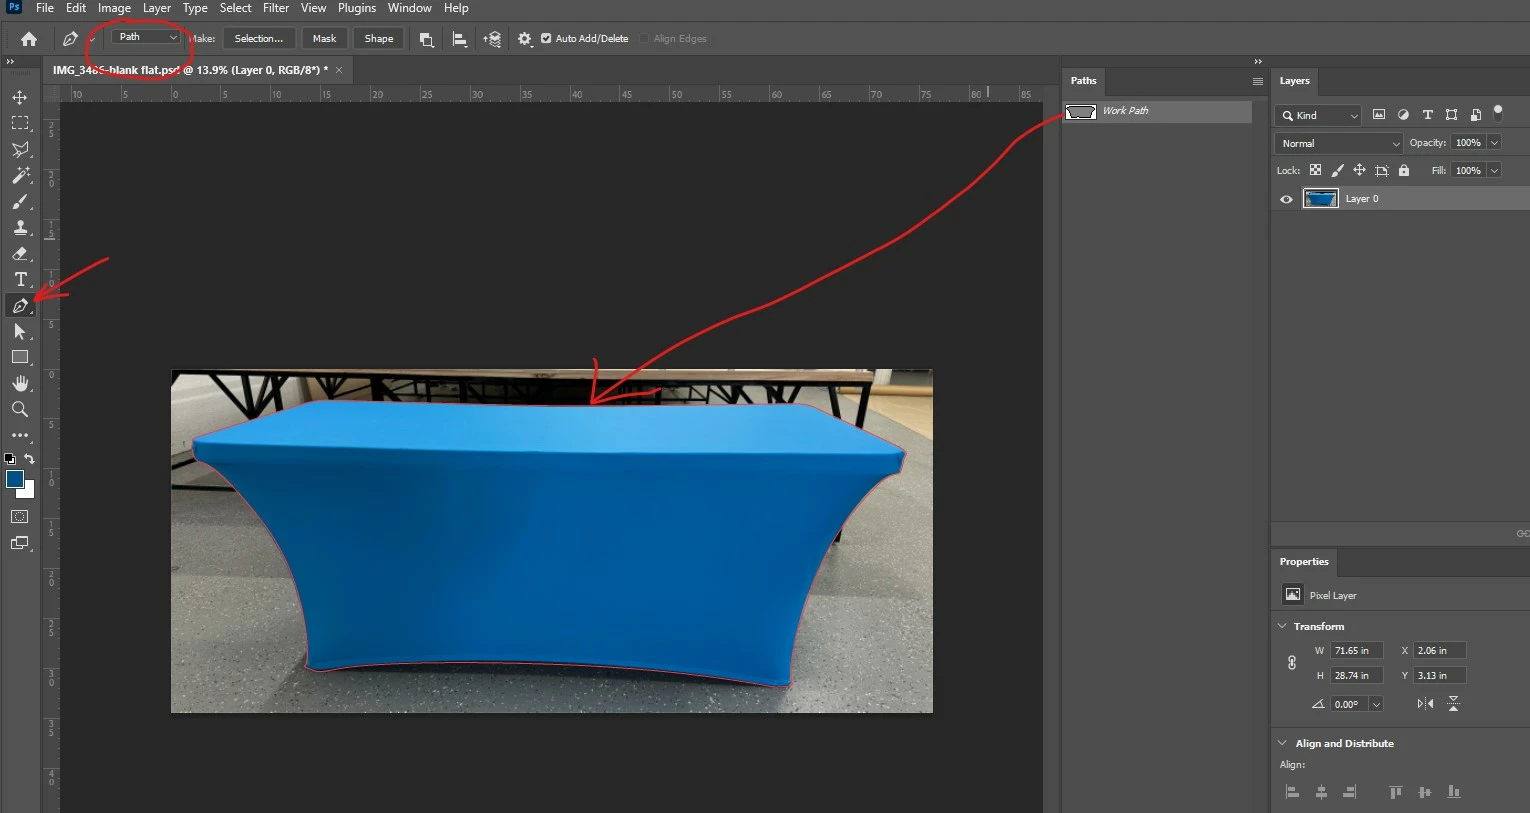
Step 1: Draw mask path with pen tool
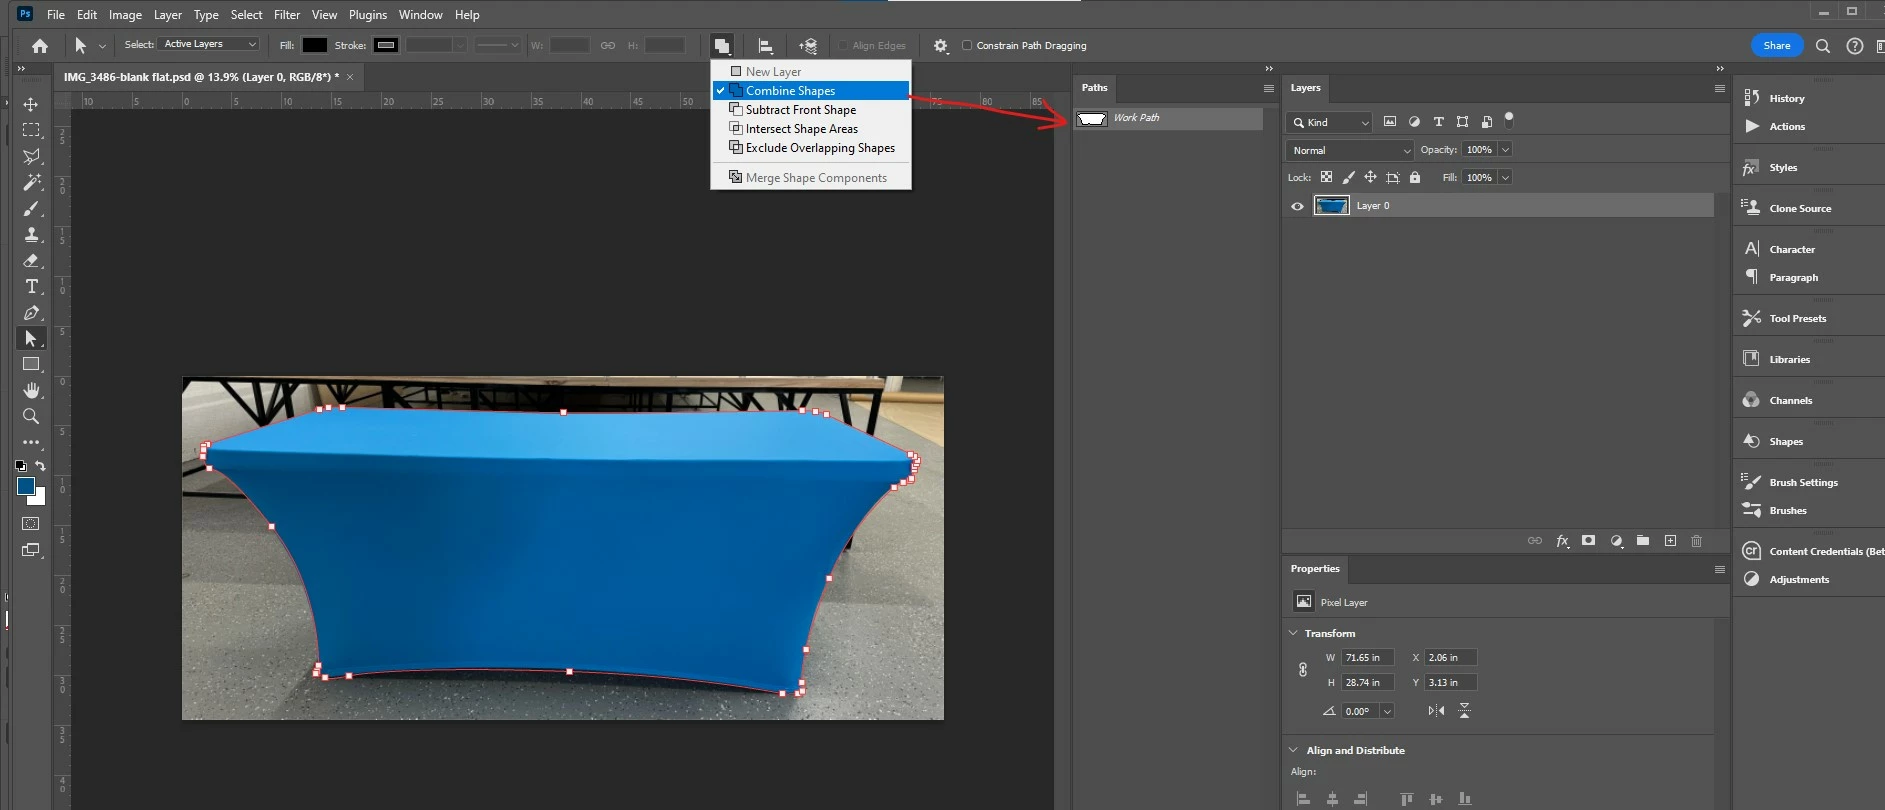
Step 2: VERT IMPORTANT
Notice that the path icon in the step 1 image shows white on the OUTSIDE of the table. Change the Path Operations dropdown to Combine Shapes.
Note: Your Path Operation might be set to something different, but the important part is to pay attention to what area shows up as WHITE as you try any of the different options in the Path Operations dropdown.
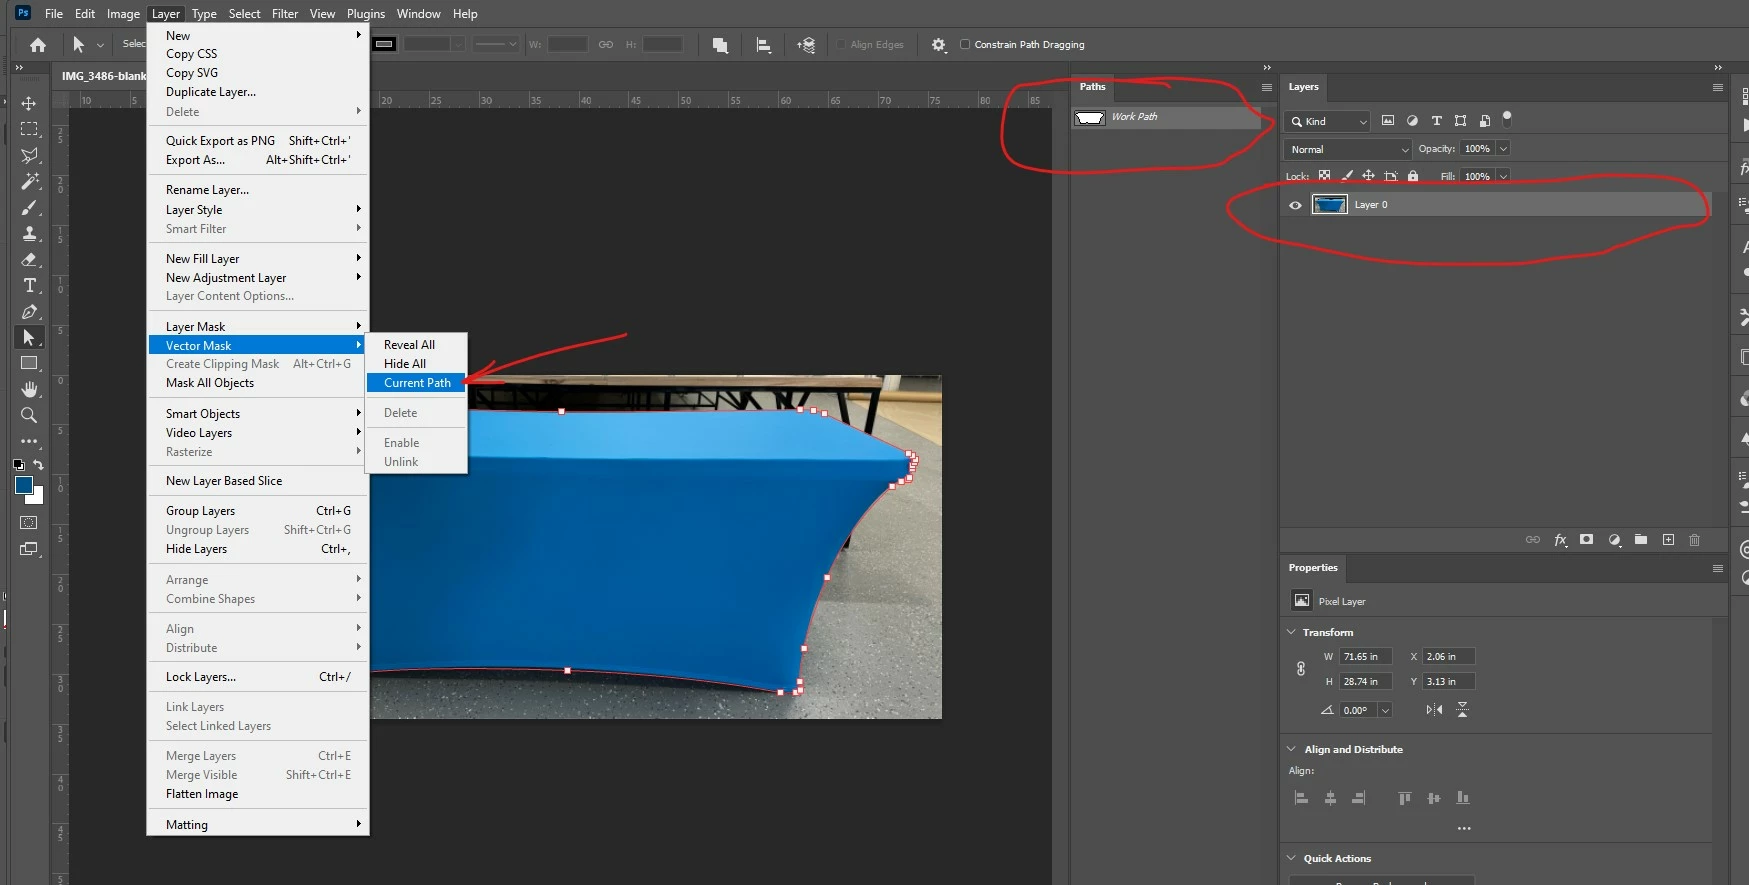
Step 3: With path selected and layer selected, ctrl/command+click on Layer mask icon
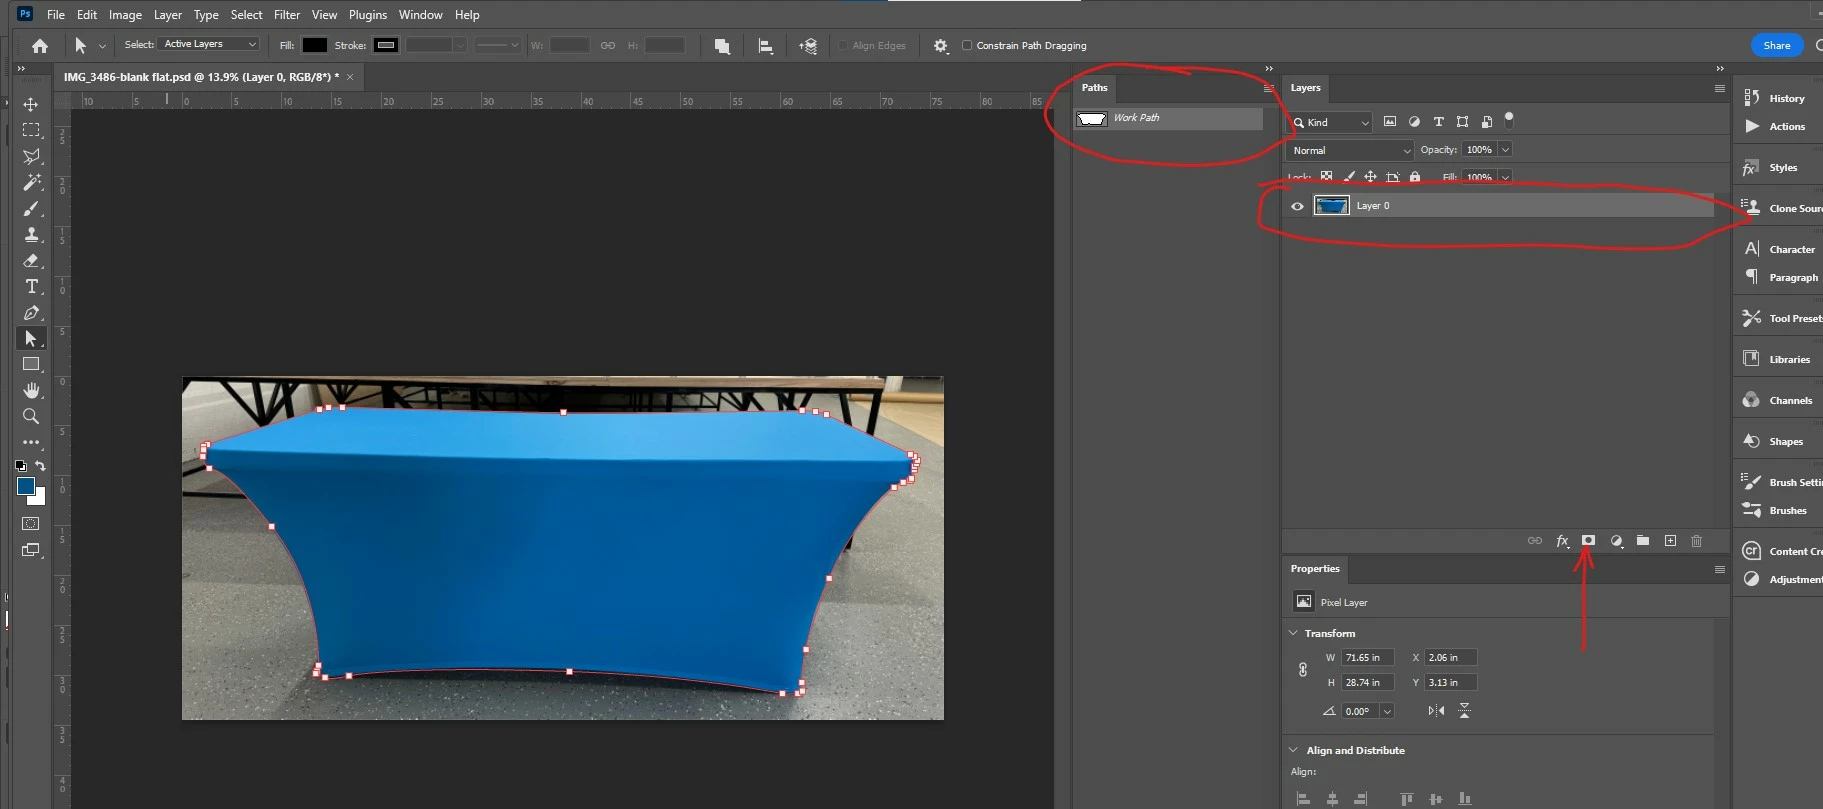
or just go to Layer->Vector Mask -> Current Path
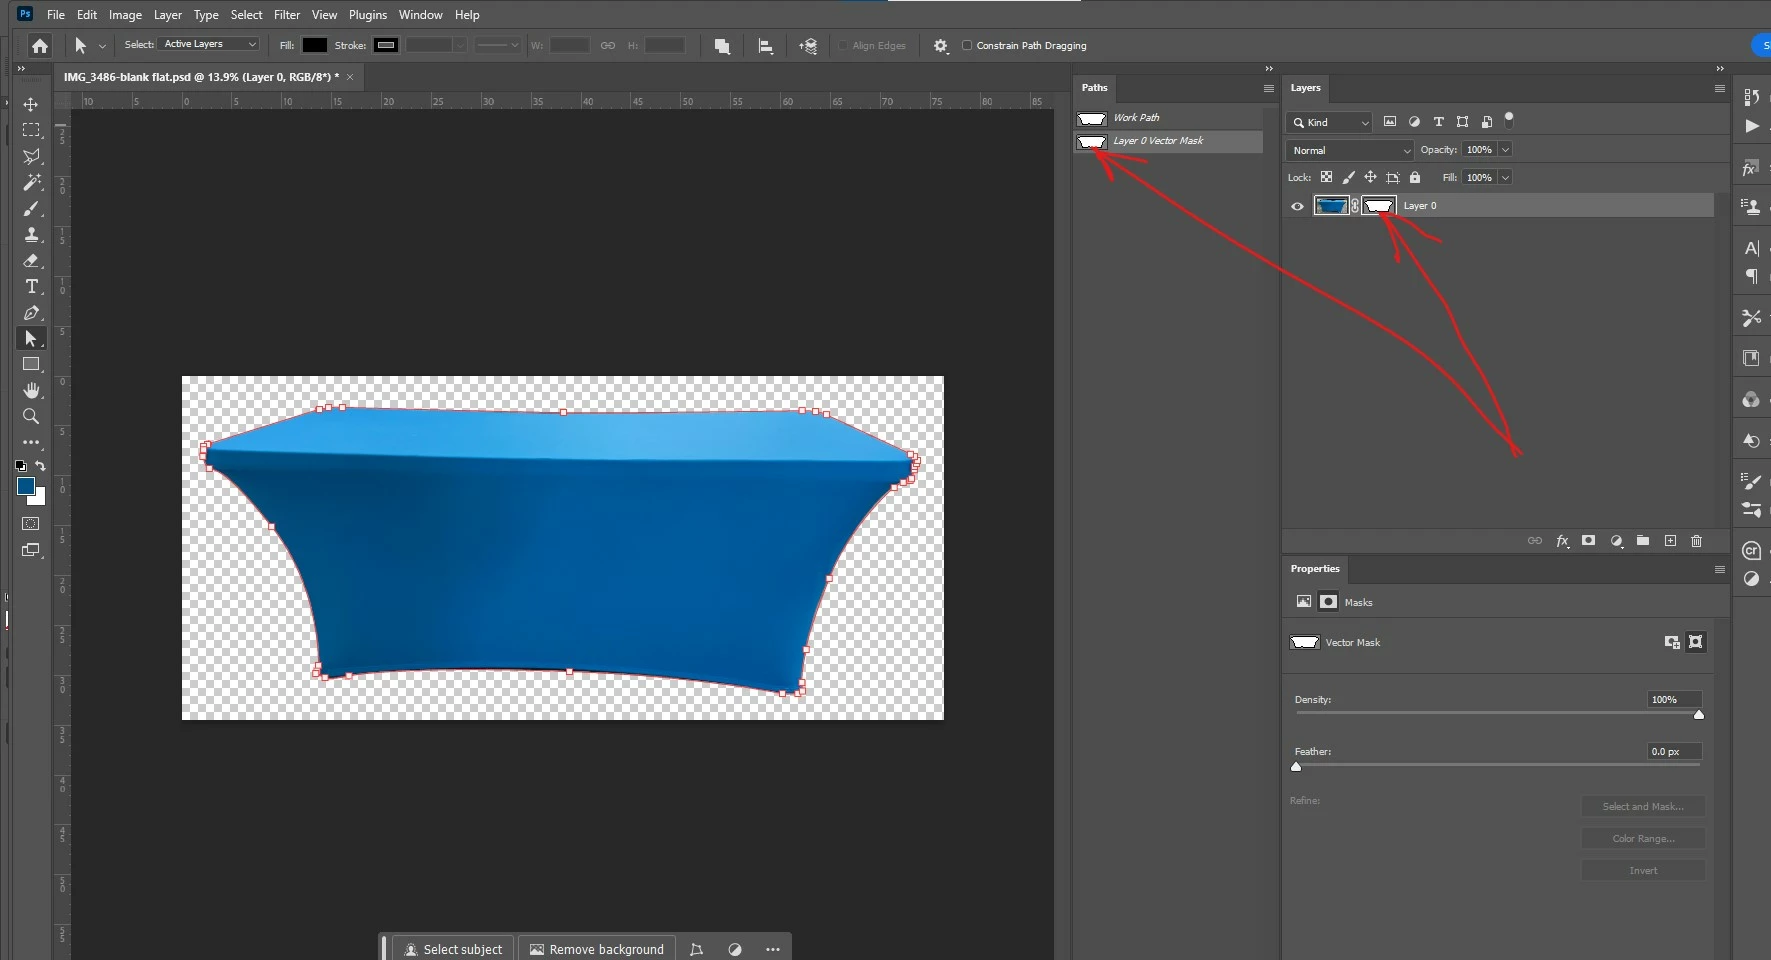
Final Result - A new Vector Mask has been created on the Layer and also in the Path List