Participant
December 22, 2018
Answered

Removing semi transparency from brush

  • December 22, 2018
  • 7 replies
  • 3393 views

Hello - I downloaded some star shaped custom brushes to add decoration to my project. Attached is one of the brushes on the background.

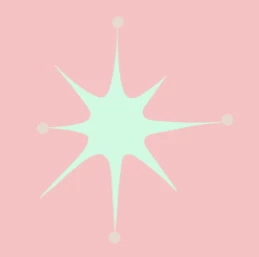
I was just wondering if there was any way I could make the whole brush 100% opaque, rather than the dots on the outside being semi transparent.

Thank you

    This topic has been closed for replies.
    Correct answer Bojan Živković11378569

    If I can understand your question then my answer is to resave brush.

    • Create blank new document with white bgr
    • Create new layer
    • Set Foreground color to black
    • Click with the brush once
    • Duplicate layer several times then merge them to single layer. Your brush shape should be black without any grey value.
    • Save brush from Edit > Define Brush Preset

    7 replies

    Participant
    November 1, 2024

    Illustrator has cleaner vector-based lines. I'd import the PLACE, and TRACE it in Illustrator. 

    macbitchAuthor
    Participant
    December 23, 2018

    Thank you for the responses. Just to clarify, the image is of the brush used on the project background in the colours I want. I looked into the brush files I downloaded and found that they came with PNG and PSD files of each brush. (this would have been a lot easier if I looked there to start with)

    Can I just use Fill to make the whole thing black (the middle part isn't entirely black either) and then Define Brush Preset to make it into a new brush? Thank you for bearing with me, I'm not familiar with this area of Photoshop. Always new things to learn, even for an old egg like me!

    Bojan Živković11378569
    Community Expert
    Community Expert
    December 23, 2018

    Yes, you can. Lock transparency (select layer then use lock transparent pixels icon in the Layers panel), fill with black then define brush.

    Chuck Uebele
    Community Expert
    Community Expert
    December 23, 2018

    Another way to create the brush would be to start with a white bg, and put down one sample of the brush with blade. Add a black and white adjustment layer to make it totally black and white. Adjust the adjustment layer to your liking. If it's too stark, add a little gaussian blur to soften the edges.

    Semaphoric
    Community Expert
    Community Expert
    December 23, 2018

    Maybe you could just use a different blending mode when painting with it.

    Trevor.Dennis
    Community Expert
    Community Expert
    December 22, 2018

    It's not going to be easy to get a full black version of that graphic because of the flat tones it has. Plus the circles have even less contrast with the background, so you couldn't build it up with copied layers without losing the circles.  It's an easy graphic to recreate from scratch using your graphic as a template, so that's the way to go IMO

    However, the OCD that is part of ALL content creators means I can't live with the non symmetric nature of the original, so I would absolutely need to fix that.

    macpawel
    Participating Frequently
    December 22, 2018

    Yes, Bojan is right - yor brush should be deifined as black and white image. White background is transparent and black is opaque

    Bojan Živković11378569
    Community Expert
    Community Expert
    December 22, 2018

    If I can understand your question then my answer is to resave brush.

    • Create blank new document with white bgr
    • Create new layer
    • Set Foreground color to black
    • Click with the brush once
    • Duplicate layer several times then merge them to single layer. Your brush shape should be black without any grey value.
    • Save brush from Edit > Define Brush Preset