OsakaWebbie
Inspiring
July 31, 2019
Answered

Semi-automatic healing of white dust spots

  • July 31, 2019
  • 9 replies
  • 19061 views

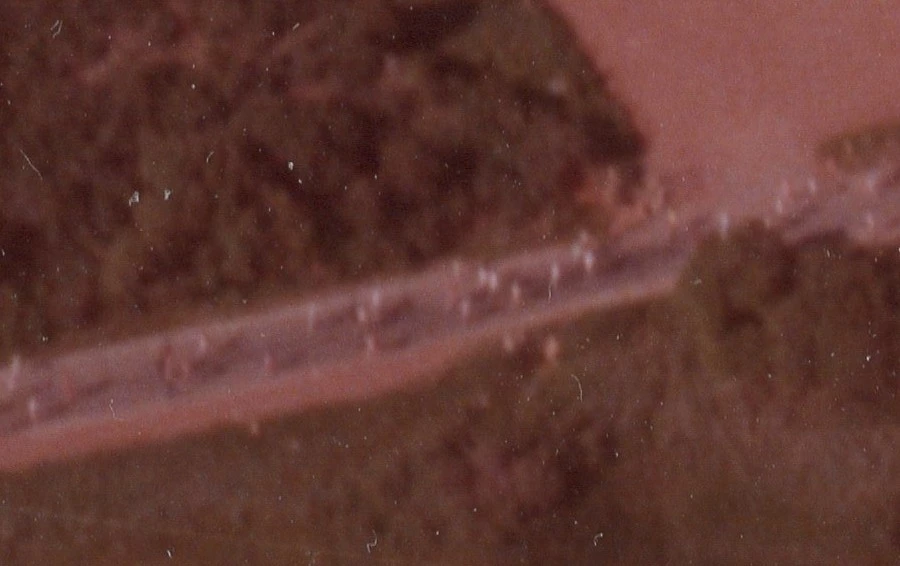
I have trouble with dust getting into the scanning process of printed photos. I know, I know - work harder on avoiding the dust in the first place. I will, but I will never eliminate it, and I'm getting ready to scan a LOT of photos. The content-aware Spot Healing Brush does a magical job, but it's laborious to click on all the spots one by one. While doing that on a a particularly dusty scan of an old 8x10 aerial photo of a marathon (see small snippet below), I decided to look for something more automatic. Because it was scanned at 1200dpi, the image content had no sharp color changes, making the dust distinctive by sharpness. I tried the Dust & Scratches filter, but even at a setting of only 2 or 3 pixels, I was not happy with the effect on the image content, and a setting of 1px didn't catch enough of the dust.

So my engineering brain started imagining how the various smarts of Photoshop could theoretically be combined to automate it, and I thought I'd ask if something like this is possible. Given a scan at a high resolution like my sample below, so that the dust is much sharper than any content, I imagine a tool doing something like this:

  1. Select all areas of white (or nearly white - perhaps a threshold like the Magic Wand tool has) that have edges sharper than some threshold (e.g. a luminosity change of at least 50 within 2px).
  2. Apply the same technology as the Spot Healing Brush (content-aware) to each of those selected areas.

Naturally that wouldn't catch everything - there are occasionally defects that are dark instead of light (dust in the camera instead of the scanner) or particles that are translucent, but the ugliest ones are the bright white ones, and I would happily do additional touches manually if a tool could eliminate the specks like this.

Does anything like this exist in Photoshop, or can I kluge a macro from existing tools? I'm also open to suggestions of third-party tools (PS plugins or standalone tools for Windows) if free or not too expensive.

Correct answer OsakaWebbie

I understand the process you are describing. The problem is that color alone will not distinguish the dust. In just that small sample that we have all been using to test, very few of the dust specks are lighter than the runners. Try your method, and I think you'll find that if you keep the setting low enough to avoid the runners, you won't have much dust in your selection - perhaps half a dozen of the brightest spots.

What's distinctive about the dust is the sharpness of the edges - apparently that's called high frequency (although I previously only knew that term for waves like audio, light, and electromagnetism). Like I said, partway through the steps in Stephen's action it looks like I have something usable, based on High Pass, Levels, and Maximum (plus some magic about Apply Image and different layer modes or something), but then it slips through my fingers.


I decided to try to manually do the parts of Stephen's action that I understand, and I might be getting somewhere. Here is what I did, starting from scratch, combining ideas from Stephen and S_Gans:

  1. I duplicated the background layer twice - once for the layer that will have Dust & Scratches applied with a layer mask, and the second copy as the sandbox to make the selection for the mask.
  2. On the sandbox layer, I ran Filter -> Other -> High Pass, selecting a radius that only barely showed a hint of the runners (that turned out to be 1.0 pixels).
  3. Then I ran Image -> Adjustments -> Levels. I slid the black input level marker to the right until there was no hint of the runners but plenty of dust (just at the right edge of the spike in the histogram), and then slid the white marker to the left until it almost touched the left one, so that the image is basically binary.
  4. I was surprised to see some dots in colors other than white, so at this point I ran Image -> Adjustments -> Black & White to solve that, selecting Maximum White so I get all the dots.
  5. Then I created a selection from that by running Select -> Color Range. All I had to do was click on any white spot, and all were selected. (Magic Wand might have worked just as well.)
  6. Then I did Select -> Modify -> Expand by 1px to make some breathing room for the D&S filter.
  7. In the layer pane I clicked the other duplicate layer and added a layer mask. I was pleasantly surprised that it automatically populated the mask with my selection (that's what I was about to do next!).
  8. Finally, I clicked the image part of the layer and applied Filter -> Noise -> Dust & Scratches, and set the radius at a level that would make all the dust bits disappear, which in this case happened to be 5px. (In this sample all the dust bits were small, so that worked, but I wouldn't go any bigger than that - if a few big blemishes remained, I'd do those manually with Spot Healing Brush, because otherwise they would be too much of an ugly blur.)

Here are the original, the final, and the layer mask:

I know that Stephen's was much more sophisticated, with the noise to prevent obviously blurry spots, more nuanced white areas on the mask, etc. But this might be good enough for me, depending on the content of the photos I scan in later. Here is an action of this, with stops on the places where adjustments or manual input (e.g. click on a white dot) would be needed: Dropbox - Karen dust removal.atn - Simplify your life

9 replies

Maruhana
Known Participant
January 11, 2021

There ais one main problem to all this.


We only need a good selection and not any median or other bluring tool. We have content aware fill or healing brush which works much better fixing film. Or if someone can automate content aware fill with radius around the defect / heling brush appied to all selected ...


barbara_a7746676
Community Expert
Community Expert
August 3, 2019

Sounds like you've got it solved, so I don't know if this would help, but in the Camera Raw filter if you select the Spot Removal tool, there is a checkbox in the lower right corner called Visualize Spots, and a slider to adjust.

OsakaWebbie
Inspiring
August 4, 2019

https://forums.adobe.com/people/Barbara+Ash  wrote

Sounds like you've got it solved, so I don't know if this would help, but in the Camera Raw filter if you select the Spot Removal tool, there is a checkbox in the lower right corner called Visualize Spots, and a slider to adjust.

Thanks, but that tool doesn't seem to have a clue for this type of "spot". At the default setting, there are massive white swirls all over the real photo content, and with the slider all the way to the left, it still picks up most of the runners and even the edges of the road but only about a dozen of the largest spots of dust.

S_Gans
Community Expert
Community Expert
August 1, 2019

OsakaWebbie​ - one way to apply that would be to use the Select>Color Range option - then when focused on that layer mask for the Dust/Scratch layer, just fill the selections with white (in fact, I'd modify my selection by 1px, if necessary, prior to the fill). That may allow you to select  based on the contrasts of the white, and still use only the tiniest necessary amount of the Dust/Scratches filter.

Adobe Community Expert / Adobe Certified Instructor
OsakaWebbie
Inspiring
August 2, 2019

S_Gans  wrote

One way to apply that would be to use the Select>Color Range option - then when focused on that layer mask for the Dust/Scratch layer, just fill the selections with white (in fact, I'd modify my selection by 1px, if necessary, prior to the fill). That may allow you to select  based on the contrasts of the white, and still use only the tiniest necessary amount of the Dust/Scratches filter.

"that layer mask"... As you can see from my previous post, I'm still stuck getting that far - I haven't yet been able to produce a mask anything like the one Stephen posted (picking up the dust but not the lighter parts of the content like the runners). I assume your idea here is for making gray specks in the mask more white, and that's great... once I get that far.

S_Gans
Community Expert
Community Expert
August 2, 2019

Hopefully, tomorrow, I can get in front of the computer and make a video. In the meantime - All you need to do to start is to dupe your original layer - run Dust and Scratches to your liking on the top layer. Add a layer mask using the icon at the bottom of the layer panel that looks like a circle in a rectangle. You’ll have a black box on your Dust and scratches layer next to the pixel info. To begin with, it’ll make your D&S layer invisible.

Then, go to the bottom layer - and do a Select Color Range to get as much of the white specks as possible (you click a white speck, then use the add eyedropper to get more specks or the minus one to delete “ranges” of specks (based on their similarities). You can adjust the slider on the top of the panel to limit or broaden the range of tones that get selected - and you should be seeing a preview of the specks in the big window in the dialog box. Then - what I’d likely do is, after hitting OK, I’d Select>Modify Selection, and add 1 pixel to your selection (making each of the selections 1px bigger). Once you have that Edit>Fill and fill with white. That should expose the D&S layer JUST where you have the marching ants, which will likely be the specks. That ought to limit your painting time by a lot

Just remember- when you do that fill with white - BE “FOCUSED” on that black layer mask on your D&S layer.

Hope that helps - or I’ll hope to have time for a video at the computer tomorrow….

Adobe Community Expert / Adobe Certified Instructor
S_Gans
Community Expert
Community Expert
July 31, 2019

Another quick and dirty way on white spots it to use the blur tool - just slightly bigger than your spots - but make sure to set your tool to "Darken" in the settings in the control bar. Of course, the healing brush has kind of duplicated that old method...

Adobe Community Expert / Adobe Certified Instructor
S_Gans
Community Expert
Community Expert
July 31, 2019

I'm a fan of the dust and scratches filter - but I use them in a particular way. I duplicate my original messy layer, then I run Dust and Scratches on the top layer - ensuring I leave enough noise in the image, but ending up with a semi-impressionistic image when finished - JUST enough to hide the dust and scratches.

Then, add a layer mask to the upper layer, and simply paint white over the areas or spots I want to hide with the upper layer. For some areas that already have a blur to them due to age or depth of field - sometimes just swiping over those areas result in a very usable image.

Adobe Community Expert / Adobe Certified Instructor
OsakaWebbie
Inspiring
August 1, 2019

S_Gans: Your layer mask technique would be a little better, a compromise between poking the Spot Healing Brush at every spot and having the whole thing blurred. But I'm still hoping for something that will attempt to "detect" the spots by the fact that they are sharper contrast than the real content.

Stephen Marsh
Community Expert
Community Expert
August 1, 2019

But I'm still hoping for something that will attempt to "detect" the spots by the fact that they are sharper contrast than the real content.

You can always make a mask out of a frequency separation version of the image, using the high frequency layer as the start point, then apply image the layer to itself in say colour burn blend mode and perhaps use maximum filter to expand, then play with contrast and blur etc.

All of this can be put into an action.

It should also be kept in mind that many of these spots will not resolve into a print, so you may wish to view at 50% or 25% magnification and remove the visible spots at that zoom level. Or resize to the intended print size and resolution and then evaluate after interpolation has potentially removed or reduced the spots.

Bob_Hallam
Legend
July 31, 2019

The easiest way I found to remove Dust of varying sizes is to set the History Palette to "Non-Linear History"  Then create an action that applies the Median Filter at about 4 Pixels, but put a stop in the action so you can change it as needed.  Then add noise to match the image. Placing a stop in here is a good idea too.  Then place the history source on that part of the history with the added noise, back up to before the Median filter and set the tool to history Brush.  

This gives you the ability to brush in from History the dust removal.   It's Semi automatic but better than Dust and scratches Filter in my opinion.   

ICC programmer and developer, Photographer, artist and color management expert, Print standards and process expert.
OsakaWebbie
Inspiring
August 1, 2019

(answering Bob_Hallam)

I have never used any of the functions/tools you described, so bear with my ignorance.

...Median Filter... I assume that's Filter -> Noise -> Median, right?

Then add noise to match the image.

I assume you mean Filter -> Noise -> Add Noise, but I don't understand what "match the image" means for the settings. The default settings are Amount=12.5%, Distribution=Uniform, Monochromatic=off. At this point it looks awful, something like cheap-digital-camera-in-low-light on steroids, but as part of the brushed action later, it doesn't do that. I don't know what role it plays in the dust removal or how to set its settings.

...set the tool to history Brush.

Is that the Art History Brush or something else?

Okay, my action contains: (1) Median, (2) Add Noise, (3) Set History Brush Source, (4) Select history state -2, (5) Select art history brush. The first two have the little box next to them that I think means a "stop".

This gives you the ability to brush in from History the dust removal.

When I play it, it opens the dialog of Median and then Add Noise, and after clicking OK to each, I can see that I'm primed and ready to brush in. But anywhere I click is blurred massively (well beyond the size of the brush and much blurrier that what the Median filter looked like on its own) - it's like dripping water on a watercolor painting. So I have to make the brush very small and apply it to each dust spot - that's not an improvement over using the Spot Healing Brush. What clue am I missing?

barbara_a7746676
Community Expert
Community Expert
July 31, 2019

If the dust specks are a unique color, you could select one and choose the Select > Similar command. The range that this command selects depends on whatever the current tolerance setting is for the Magic Wand.

OsakaWebbie
Inspiring
August 1, 2019

(in response to Barbara Ash's comments)

Photoshop has the Filter > Noise > Dust and Scratches filter.

I already said that I know about that and don't like it, at least when applying it to the whole photo.

If the dust specks are a unique color, you could select one and choose the Select > Similar command.

That's the same as doubling the Tolerance setting of the Magic Wand. Either one is indiscriminate - it doesn't have any regard for the sharpness, but only color, so it either selects lots of lighter areas of actual photo content (like the runners in my sample above, or even the runners, road, and field)) or misses most of the dust.

And even if I deselect areas I want to keep and get the selection just the way I want, then what? I don't know of a way to apply the Spot Healing Tool to a selection instead of clicking manually. Just now I experimented on just the sample I showed above - the best I could do was:

  1. Click the Magic Wand tool on the whitest pixel with a Tolerance of 50. That selected about half the dust spots, the road of runners, and the field.
  2. Use the Lasso tool to deselect the road and field. Of course then any dust in those areas is not selected.
  3. Select -> Modify -> Expand with a setting of 1-2 pixels. If I don't do this, the next step leaves a halo around every dust spot.
  4. Filter -> Noise -> Dust & Scratches with a generous Radius (I did 10 pixels).

This method would only remove the lightest dust, and only in dark areas of the photo, because I would have to manually deselect the light areas. And that was only with this limited sample - any photo that has a lot of small areas of light-colored content would require lots of deselecting.

(Next I'll try to figure out Bob_Hallam's suggested procedure, most of which I don't yet understand.)

barbara_a7746676
Community Expert
Community Expert
July 31, 2019

Photoshop has the Filter > Noise > Dust and Scratches filter.

Peru Bob
Community Expert
Community Expert
July 31, 2019

Some scanning software includes dust and scratch removal.  I haven't tried any, so I can't say how well they work.

Stephen Marsh
Community Expert
Community Expert
August 3, 2019

Some scanning software includes dust and scratch removal.  I haven't tried any, so I can't say how well they work.

Infrared cleaning - Wikipedia

SilverFast SRDx - Software-based dust and scratch removal tool

The Battle with Dust & scratches 2.0 — Sebastian Schlueter 

OsakaWebbie
Inspiring
August 3, 2019

Yes, I had run across SRDx in my searches before posting here. (It would just be the PS plugin version in my case, because (a) I'm scanning prints, not negatives, and (b) SilverFast doesn't appear to support either of my two scanners, perhaps because they were bought in Japan, where I live, or perhaps because they are cheap.) But user reviews are very sparse (in fact, this and this are the only reasonably thorough reviews I found, and neither are in the last year), the Windows version doesn't include masking, and I don't know if my PC even has the right graphics card to support it. I might try the 30-day trial, but I need to do that when I have time to scan a number of photos and really exercise the plugin. The design phase for a quarterly magazine I design is starting to heat up, so now is not a good time for new projects.