@lindal23280229 said: In the instructions, you have to bring the templates into the photo bin, then lock all layers on the template, then move it onto the canvas.
Using this approach, all that is going to happen is that the template is going to come into the new file as a Smart Object and will not contain any layers. (It doesn't matter whether the layers are locked on the template or not.)
There may be more than one way to solve this problem but here is one way that should work.
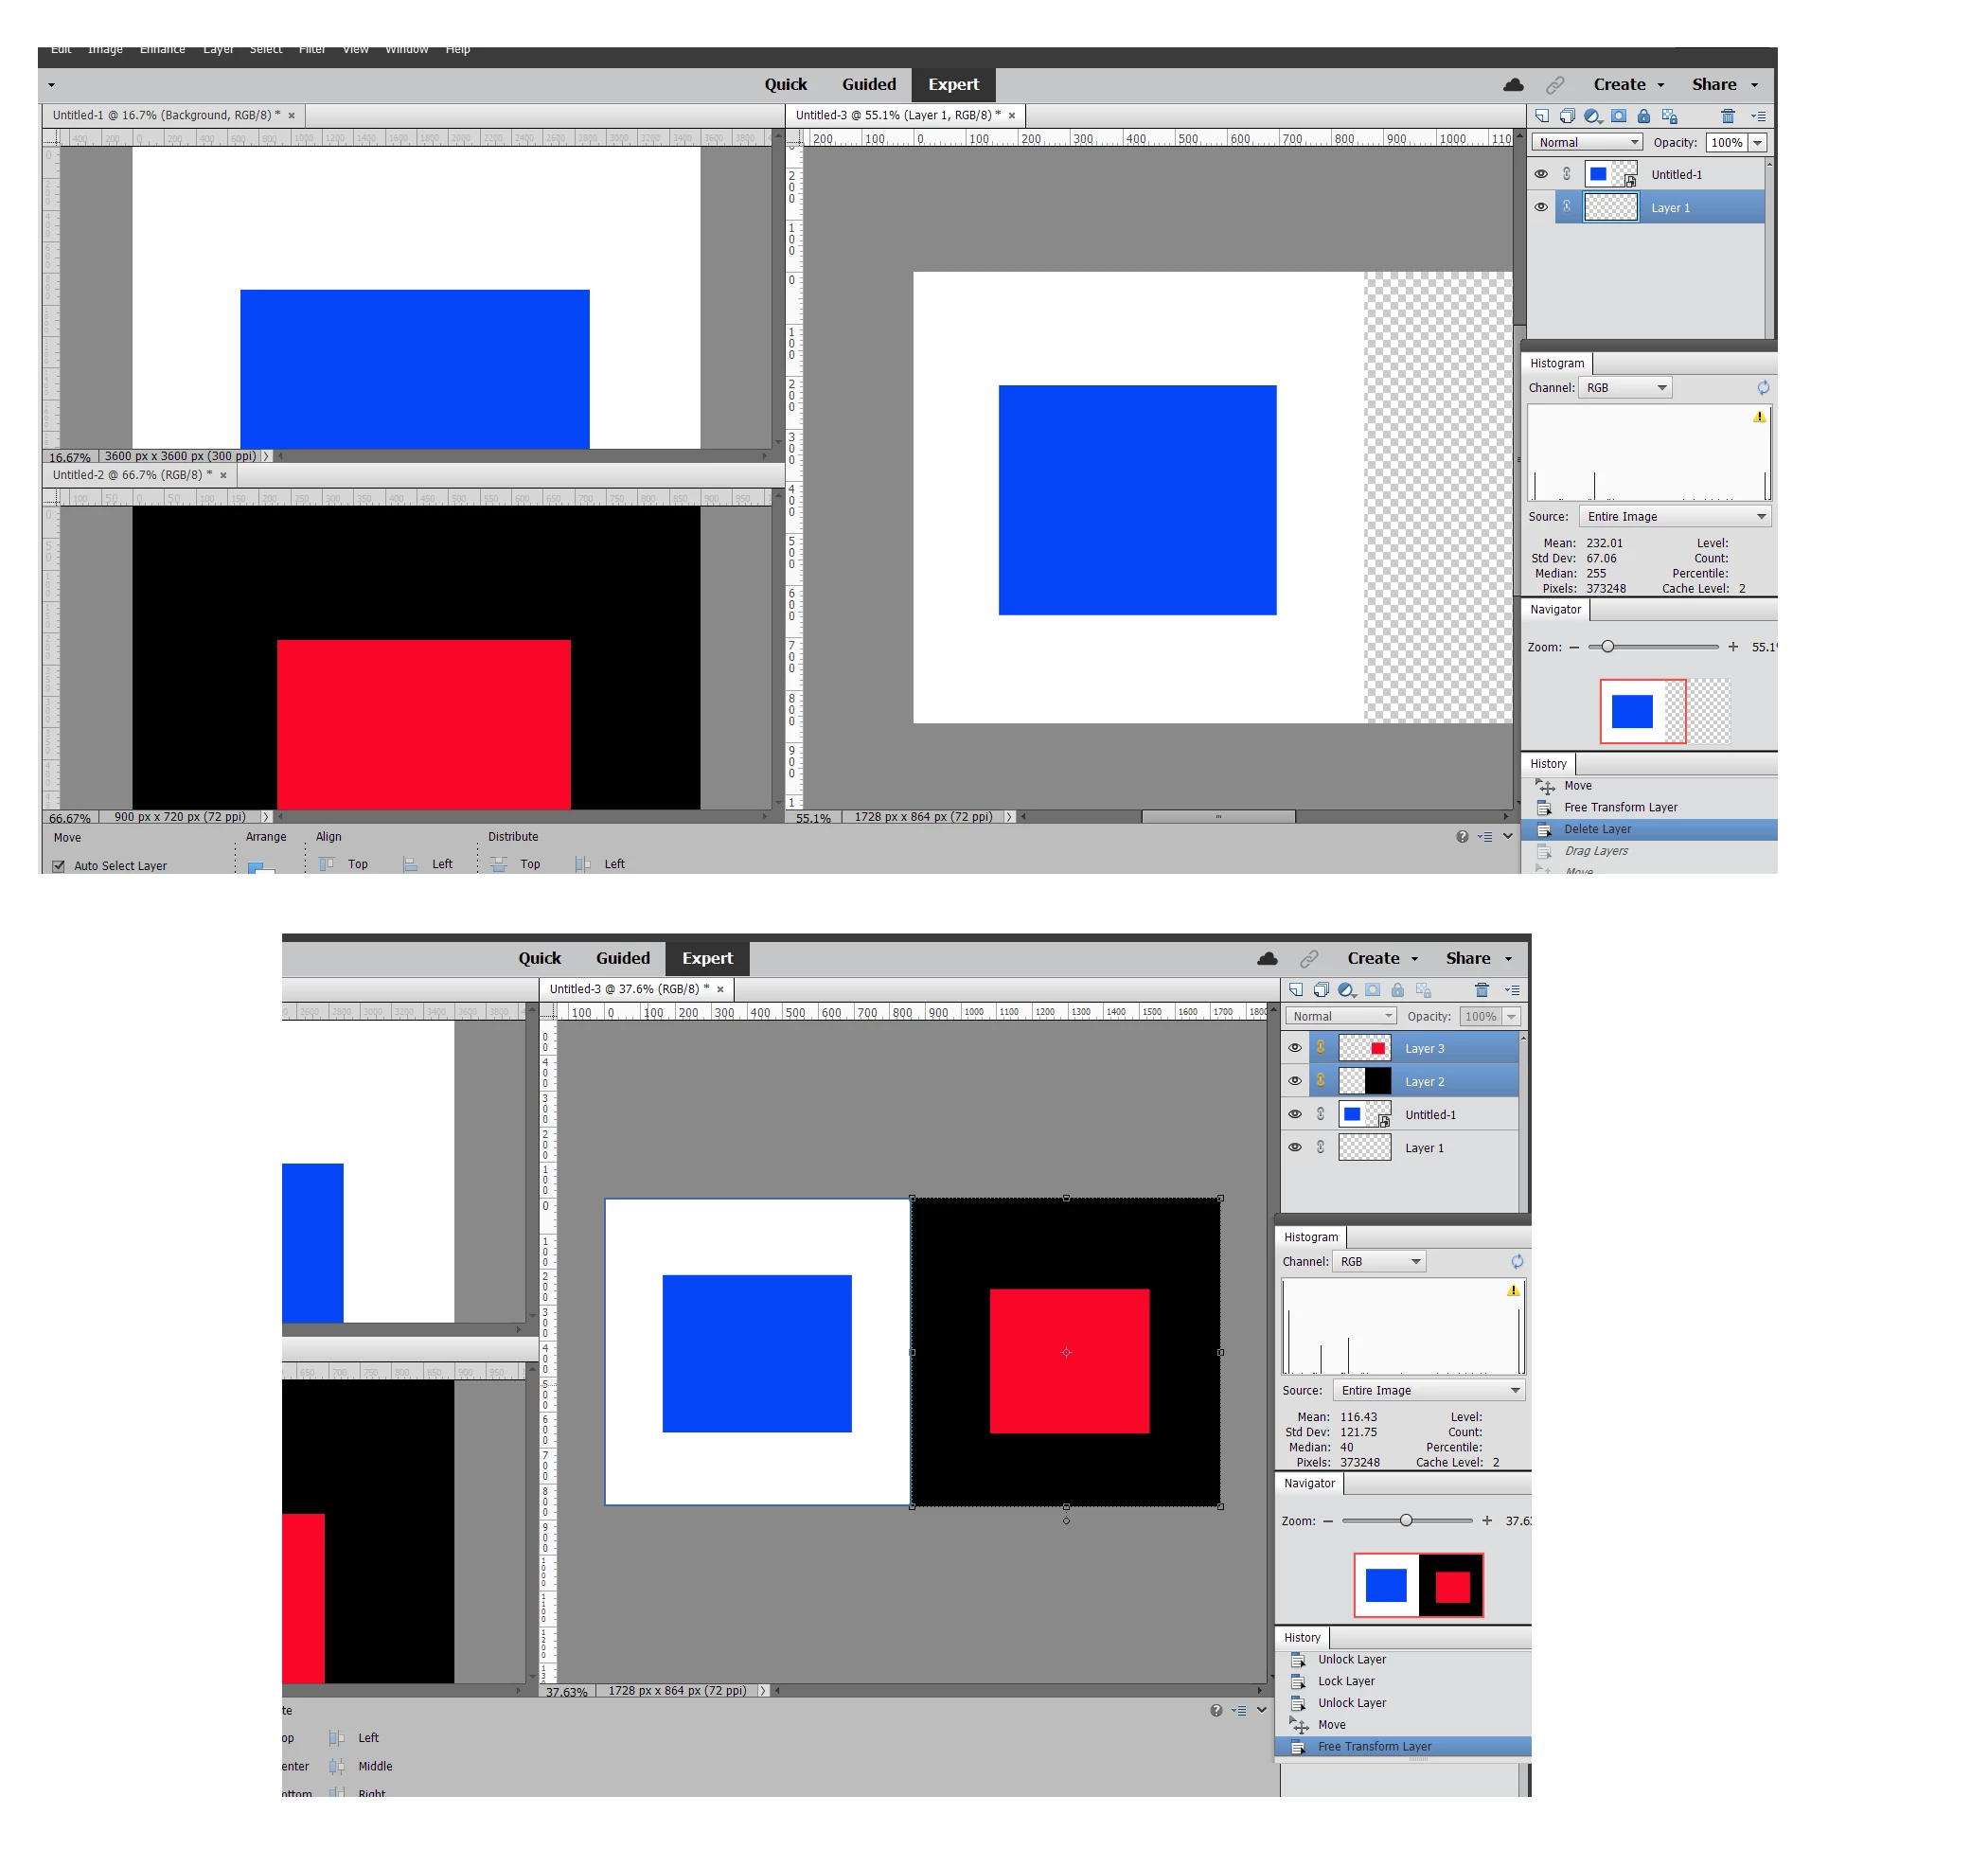
In the following example, I have created two 2-layered files, each 12x12. One is a blue rectangle on a white background and the other red on black. I have also created a third file 24x12.
- In the Window>Images menu, use the tile option so that all 3 files are in view.
- Select one of the layered template files.
- Select all the layers in the template.
- Link all the layers in the template.
- Click and drag the linked layers to the 24x12 file.
- Use the free transform tool to resize the linked layers to fit one side of the scrapbook page
- Wash, rinse and repeat for the second template file to fit on the other side of the scrapbook page.
All layers from both templates should now appear in the layers panel.
In the following screenshots, you will see that the blue on white image was dragged to the new file using your method. It appears as a Smart Object in the new file. In the second screenshot, I have used my method to drag the layers over. So the layers now appear in the document. I expect there are easier ways to do this. Perhaps somebody else will come along and give you other ideas.