Here is a way to completely fill the R with pictures. Bear in mind that I have the ancient PSE2 so there might be some minor differences from PSE9 (e.g., items on toolbar), but the steps should be the same.
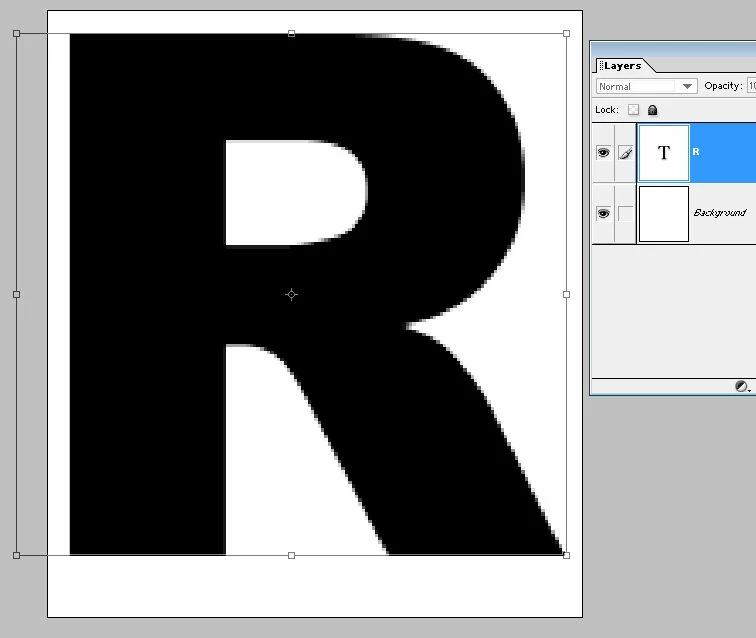
1. Create a blank file the size you want for the R. Activate the Type tool and enter R. I used the Arial Black font. The font size doesn't matter at this point. We will enlarge it in the next step.
2. Activate the Move tool. Holding down Shift key, drag any corner handle of the bounding box to enlarge the R to almost the file size. Allow enough room for an outline and drop shadow. You can also drag the top/bottom/side handles to "fatten" the R.
3. For each of the pictures to be placed inside the R:
Select > All. This selects the picture.
Edit > Copy. This places the picture on the clipboard.
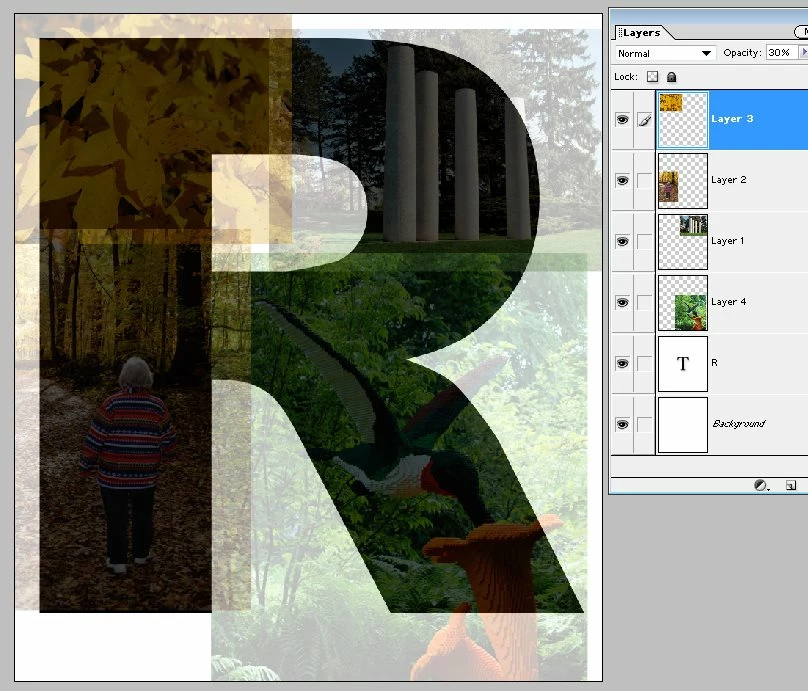
Activate the R picture and Edit > Paste. This places the picture on a new layer.
Lower the opacity of the picture layers so that the R shows through.
Using the Move tool, resize and reposition the pictures as needed so that the entire R is covered.
You can rearrange the thumbnails in the Layers Palette if you want a certain picture to overlap another.
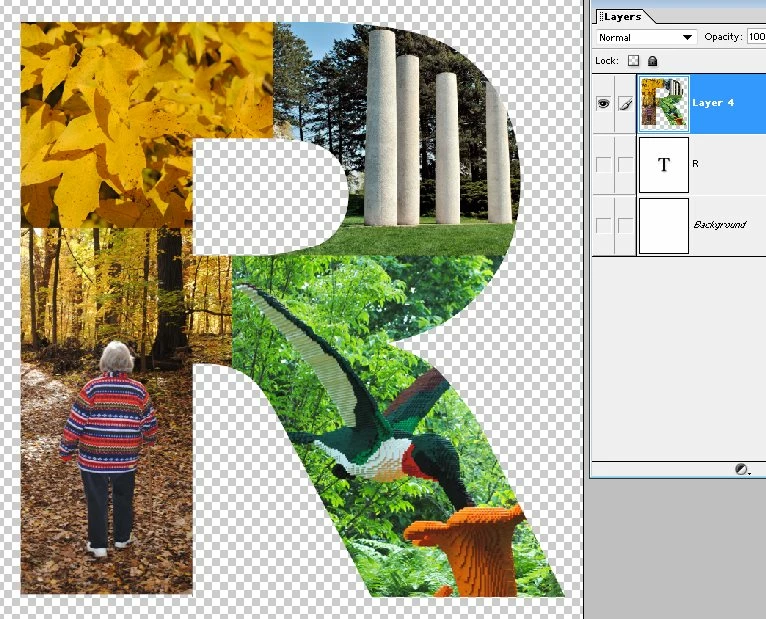
4. Change the layer opacities back to 100%.
Turn off the visibility of the R and Background layers.
In the Layers Palette, Select More > Merge Visible. This merges the pictures into one layer.
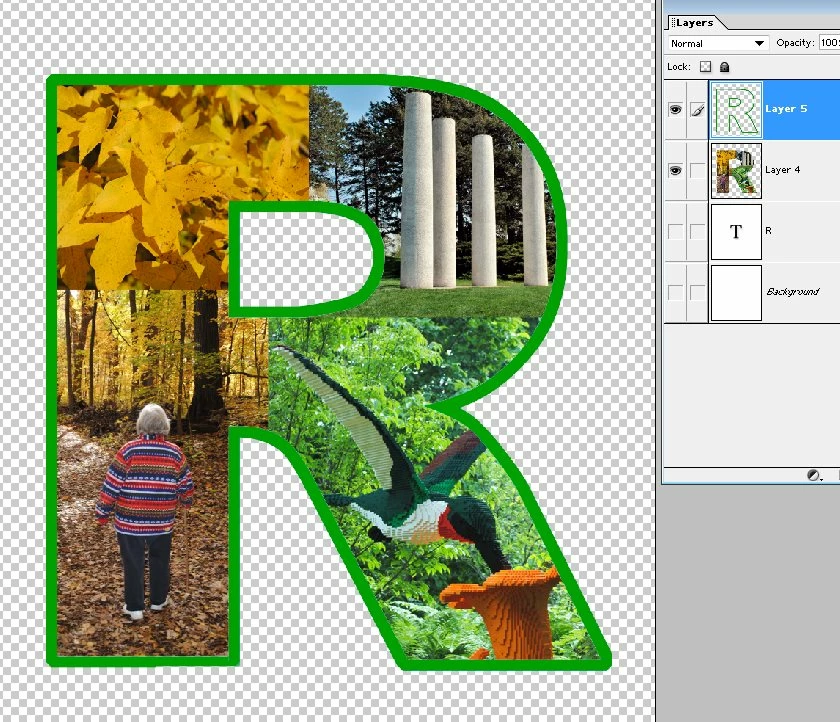
5. Ctrl-Click the R layer to select it. You will see "marching ants" around the selection.
Invert the selection: Select > Invert, or Shift-Ctrl-I.
Click the merged picture layer and Delete the selection. This deletes everything outside the R.
6. Now to create the outline.
Add a blank layer above the R layer and Edit > Stroke. Choose the Stroke Width (the outline), Color, and Location Inside. You might have to experiment with different stroke widths to get the size you want.
7. If you don't want the stroke around the inside portion, remove it with the Eraser tool.
8. Merge the outline and R layers.
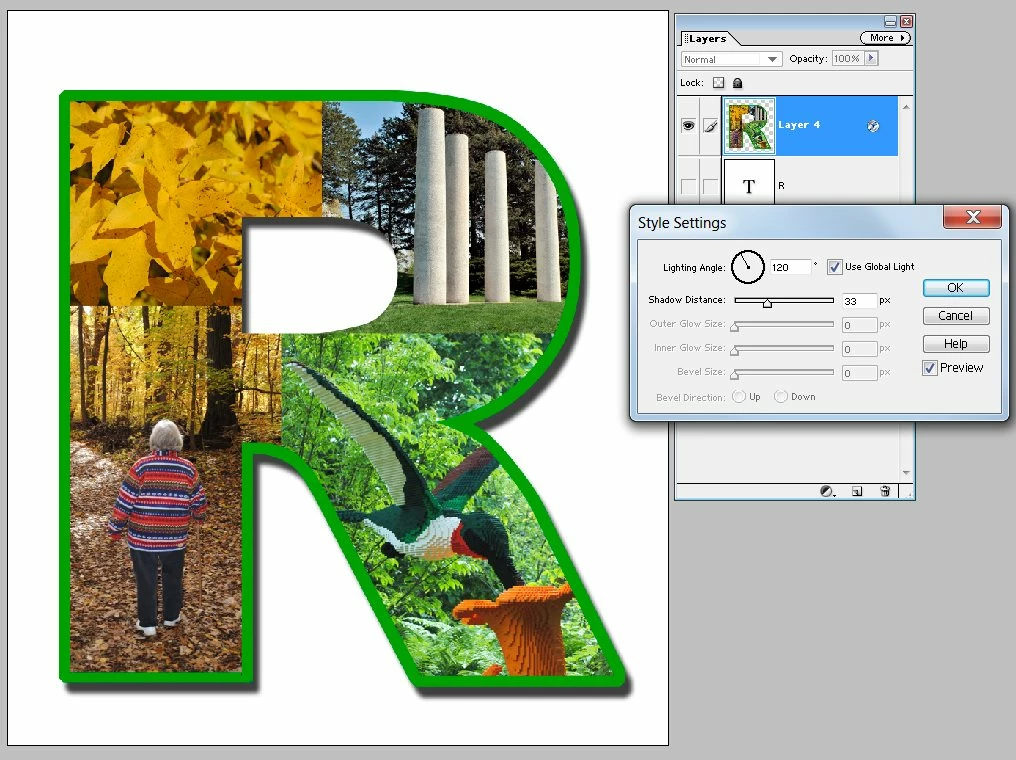
9. Now for the drop shadow. Open the Layer Styles window and select Drop Shadows from the pull-down list. I chose the Low drop shadow. The default shadow size is rather small. If you want a larger shadow click the small "f" icon on the R layer to open the Layer Styles window. Check the Preview box, and move the Shadow Distance slider to get the size you want.
Note that before you create the shadow you can make the Background layer visible to better see the shadow, as I have done.
10. Turn off the visibility of the T and Background layers (if not already done so), or delete them. All that is visible now is the R on transparent background. Save the file in a format that supports transparency, such as PNG. Note that file type JPG does not support transparency.
I hope this is what you are trying to do. If not, please clarify.