Participant
June 13, 2023
Answered

Rotated Print job incorrectly cropped in PSE Editor

  • June 13, 2023
  • 3 replies
  • 235 views

Hi. I have recently changed from using PS CS6 to PSE 2023. I never had a problem printing photos to my Canon printers before switching.

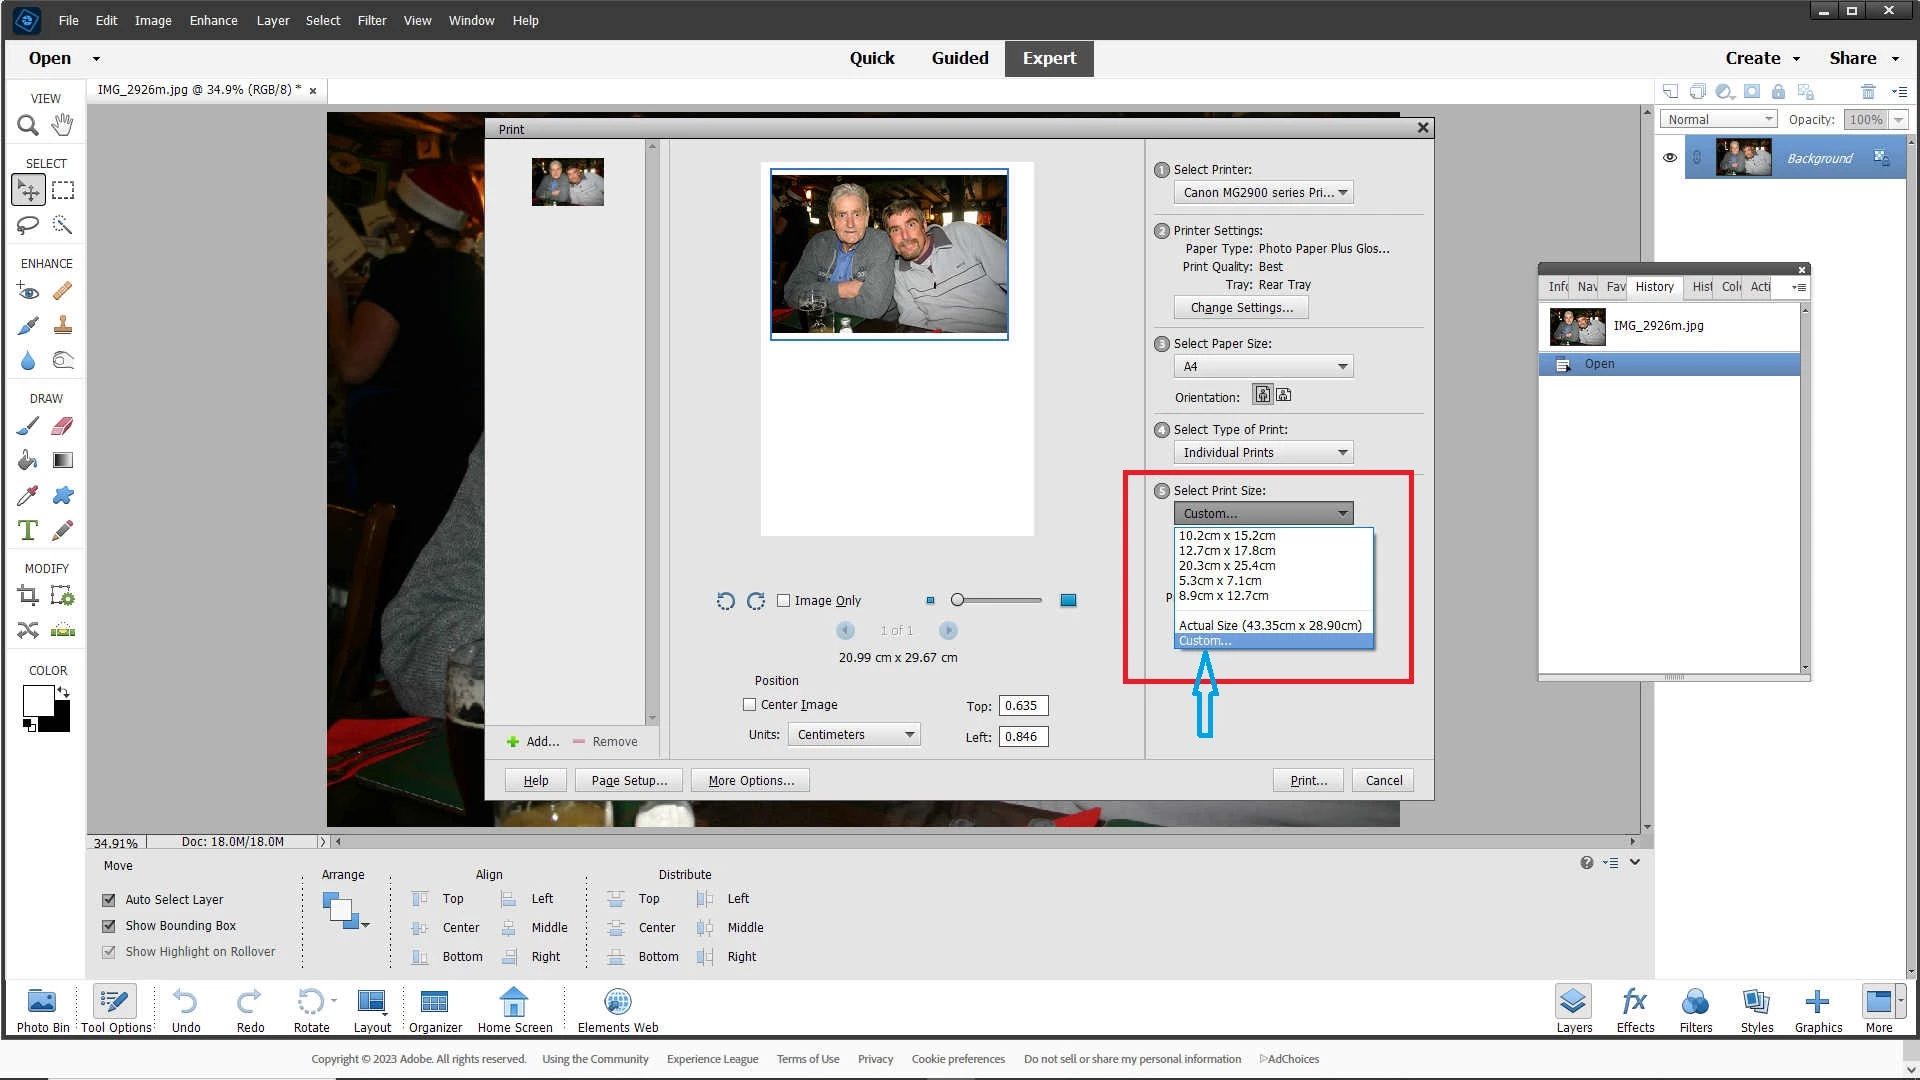
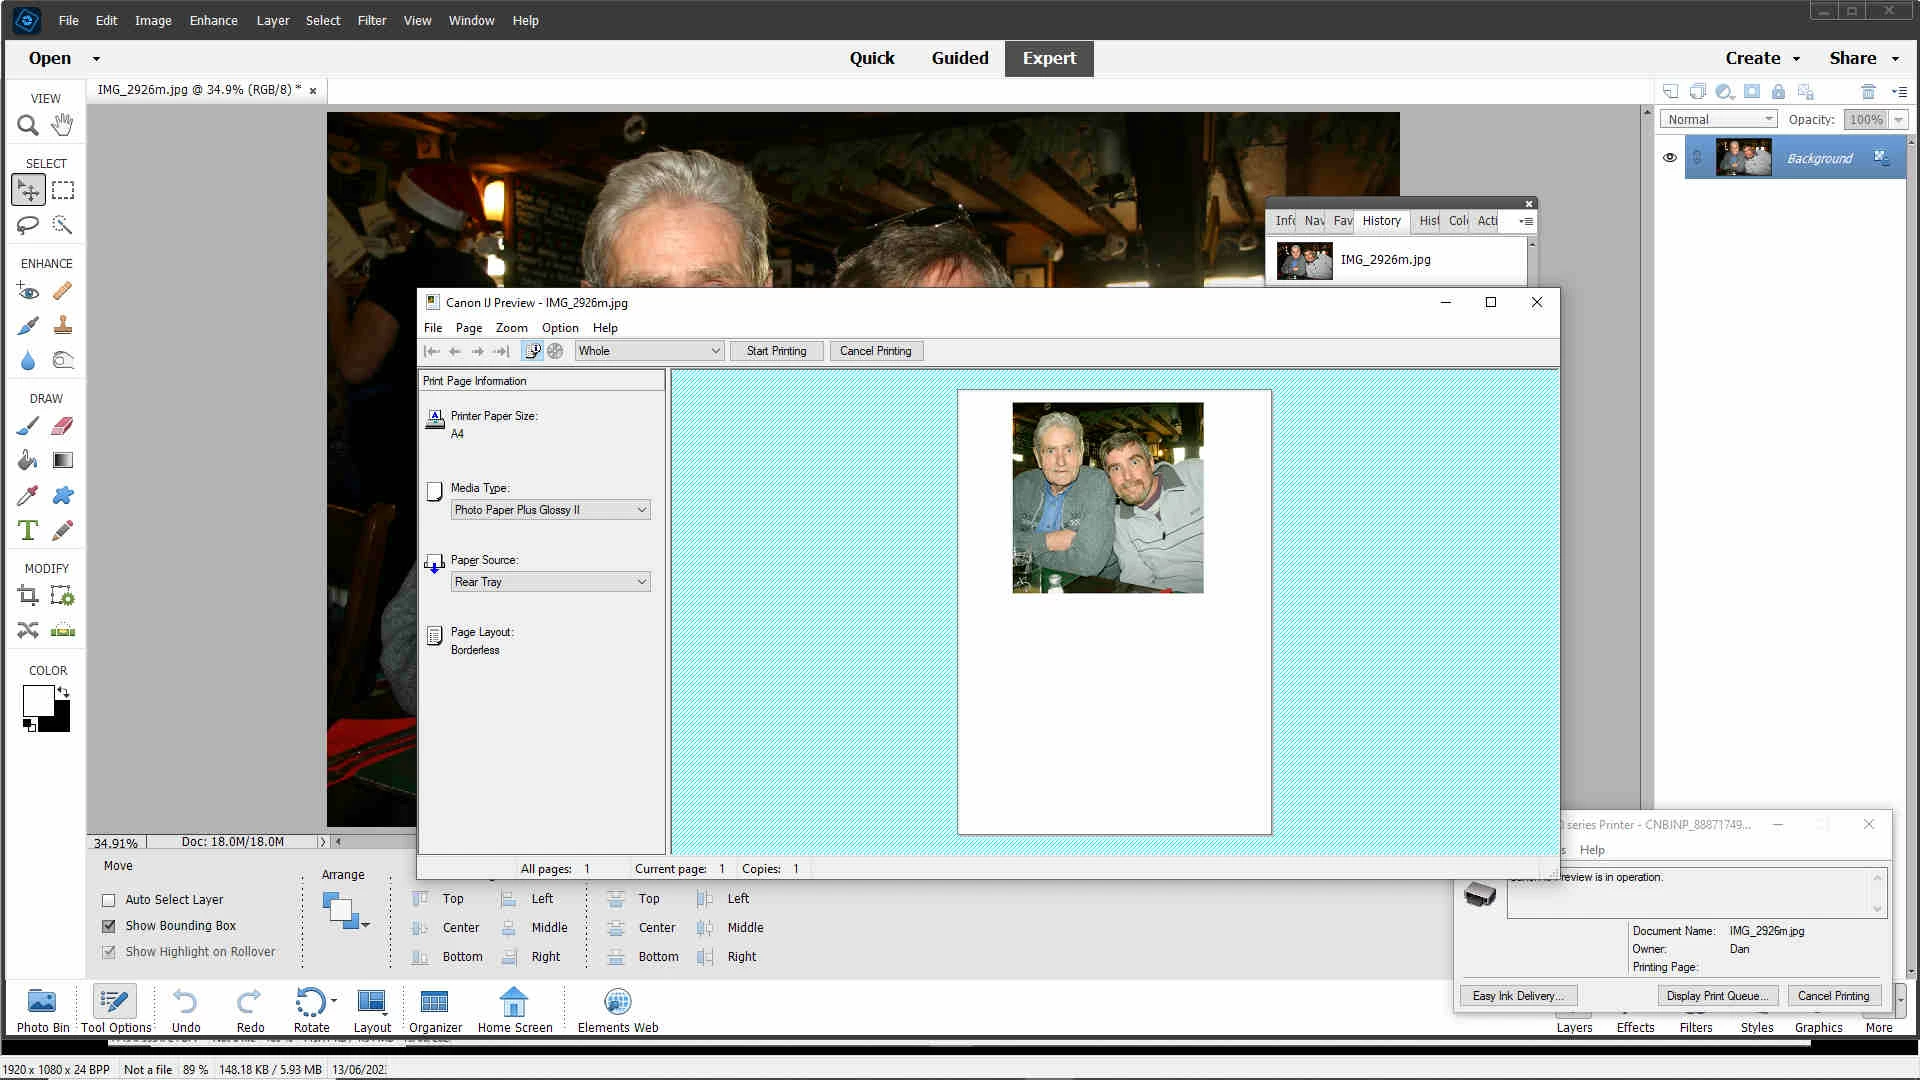
I often print out  e.g. 5x7" prints on A4 paper, getting 2 to a page. I have noticed that if I rotate and position a landscape format image to the top of the paper in the PSE Editor print dialog, the image is cropped to a square, when the Canon print preview window is shown.


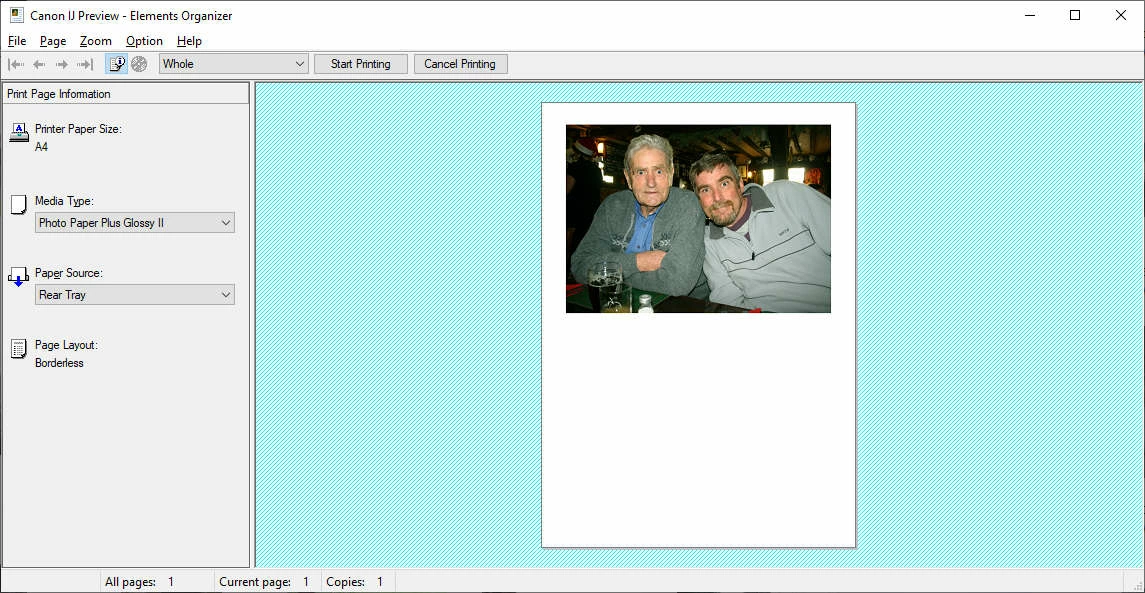
If I do the same from the PSE Organiser print dialog, the image is shown correctly.

The same problem occurs on both Canon printers, using different driver software, which is the latest available.

Printing from the Organiser after editing the image  wastes time. Why is there a difference between  Organiser and Editor?


This topic has been closed for replies.
Correct answer Dan287458175muj

Thanks for the replies.

I did some more investigating (I was a software tester for 30 years)

Actually, the workaround to this bug is much simpler.

Selecting the "Custom" option for the Print Size and typing in the same values, rather than using the preset selections, results in the Print being output correctly.


As this problem only becomes evident with larger print sizes, I suspect that a metric to imperial conversion is not being done correctly in the preset print sizes code. A very common coding error, as NASA found out. 😉

Cheers,

3 replies

Dan287458175mujAuthorCorrect answer
Participant
June 14, 2023

Thanks for the replies.

I did some more investigating (I was a software tester for 30 years)

Actually, the workaround to this bug is much simpler.

Selecting the "Custom" option for the Print Size and typing in the same values, rather than using the preset selections, results in the Print being output correctly.


As this problem only becomes evident with larger print sizes, I suspect that a metric to imperial conversion is not being done correctly in the preset print sizes code. A very common coding error, as NASA found out. 😉

Cheers,

hatstead
Inspiring
June 13, 2023

Dan,

Suggest that you create a template so that you can print correctly via the Editor :

1. Go to File>new>blank file and enter the dimensions of your paper stock

2. Activate the Rectangular Marquee tool, set it to fixed size>e.g. 5x7", then postion the outline at the top

3. Go to Edit>stroke(outline) selection and place the stroke outside

5. Repeat this for the lower half of the template.

6. Save this as a file on your desktop

7. Crop the 2 pictures to 5x7" and save them (A&B)

8. Open the template and go to File>Place and point to Picture A and invoke the Place command,and position. Repeat for B.

9. You will have absolute control and everything should fit.


Greg_S.
Community Expert
Community Expert
June 13, 2023

The Organizer and the Editor use different print engines.  But, having said that, what happens if you use the Editor's native print dialog?  And why not create a document in the Editor the same size as you want to print?