phil_1
Known Participant
March 12, 2017
Answered

A little foggy on how to keep vid and still frames the same size in render?

  • March 12, 2017
  • 2 replies
  • 653 views

I'm still a rookie in Premiere Pro CC and I'm trudging along but I just rendered and uploaded a video to youtube and, when I play it back, every still image has different size black borders and all of the videos shrink way down in size.

I thought the solution was to select all the stills in the time line and select "set to frame size". Apparently not the case.

As far as the video goes, they were all shot in 720 x 1280 59fps with a Canon T2i DSLR. These are older vids and I now shoot everything 1080 x 1920 24fps but that really doesn't matter here.

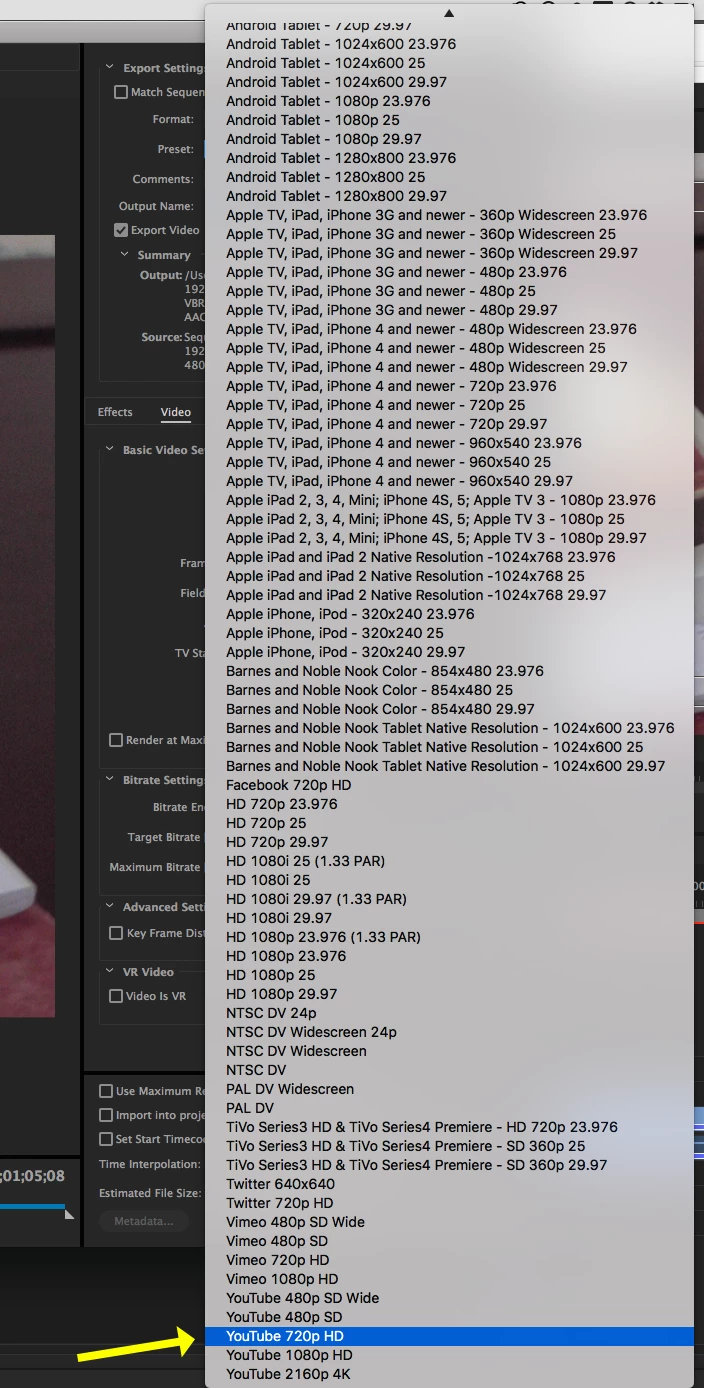
Anyway I rendered at 720hd 59fps so I thought they would fill the screen.

Guess this is one way to whore out some views on youtube but if you need to view the vid you can see it here https://www.youtube.com/edit?o=U&video_id=vEGZGIhJbf8&feature=vm

Can someone give me a little guidance here?

Thank You

    This topic has been closed for replies.
    Correct answer Meg The Dog

    phil_1  wrote

    The first object inserted in the timeline is what determines the final frame size.

    That is not accurate. If you drag or edit a clip into an empty timeline, Premiere Pro will offer to set the sequence frame size to match. You don't need to do that, and you should not do that if your source material is made up of non- standard sized material, as it is your case. There other reasons as well, so it is offered for convenience, but is not mandatory.

    Deciding what the simplest solution to your problem will be is dependent on what exactly are your sources for the sequence.

    If no video is involved - the entire sequence is made up of still images, then:

    In you project, duplicate your finished sequence, then WORKING ON THE COPY YOU JUST MADE (select the sequence in the project panel, and once selected go to the menu Edit > Duplicate):

    Click anywhere in your duplicated sequence to select it, and change your sequence settings (go to the menu Sequence > Sequence Settings)  to the ones you want to end up with (1280x720 with a 59.94 frame rate).

    Next select all the clips on the timeline and right click on any one of them. From the drop down menu choose "Set to Frame Size".

    No go to the lower left corner of the Program Monitor and make sure it is set to "Fit". This will now display correctly how all the images are appearing within the frame set by the sequence settings.

    If images need to be enlarged to fill frame, click on them in the timeline, and then go to the Effect Controls panel and adjust the scale of each selected image that needs to be adjusted.

    Once you have that to your liking, export the finished video via the YouTube 720p HD setting under the H.264 options:

    MtD

    2 replies

    Inspiring
    March 13, 2017

    Your source timeline sequence has a very odd frame size of 1680 x 1120, was that your intention?

    You are trying to fit a very odd aspect ratio (approx. 10:7)  into the standard HD 1280x720 16:9 aspect ratio. It is no wonder that you are getting a black border around the image(s).

    MtD

    phil_1
    phil_1Author
    Known Participant
    March 13, 2017

    Well MtD,

    As I'm told by my brother, who is a little more knowledgeable in PP, The first object inserted in the timeline is what determines the final frame size. This seems really dumb and I know in older versions I was able to set everything up when I started a new project. Now I guess it's auto set up by whatever the first object is. In this case it's my company logo which is 740 x 508 px.

    I have no idea where the 1680 x 1120 came from. Or how to change that.

    Does this sound like I'm on the right track to you?

    If so, what would the easiest fix be short of re-doing the vid from scratch?

    Thank You

    Meg The DogCorrect answer
    Inspiring
    March 13, 2017

    phil_1  wrote

    The first object inserted in the timeline is what determines the final frame size.

    That is not accurate. If you drag or edit a clip into an empty timeline, Premiere Pro will offer to set the sequence frame size to match. You don't need to do that, and you should not do that if your source material is made up of non- standard sized material, as it is your case. There other reasons as well, so it is offered for convenience, but is not mandatory.

    Deciding what the simplest solution to your problem will be is dependent on what exactly are your sources for the sequence.

    If no video is involved - the entire sequence is made up of still images, then:

    In you project, duplicate your finished sequence, then WORKING ON THE COPY YOU JUST MADE (select the sequence in the project panel, and once selected go to the menu Edit > Duplicate):

    Click anywhere in your duplicated sequence to select it, and change your sequence settings (go to the menu Sequence > Sequence Settings)  to the ones you want to end up with (1280x720 with a 59.94 frame rate).

    Next select all the clips on the timeline and right click on any one of them. From the drop down menu choose "Set to Frame Size".

    No go to the lower left corner of the Program Monitor and make sure it is set to "Fit". This will now display correctly how all the images are appearing within the frame set by the sequence settings.

    If images need to be enlarged to fill frame, click on them in the timeline, and then go to the Effect Controls panel and adjust the scale of each selected image that needs to be adjusted.

    Once you have that to your liking, export the finished video via the YouTube 720p HD setting under the H.264 options:

    MtD

    Inspiring
    March 13, 2017

    Please post a screen shot of you export settings, with the summary displayed, as in this example below:

    If you sequence is a 1280 x 720p sequence -

    When you use Set to Frame Size, Premiere adjust the images size so that the greatest pixel dimension if the image, falls within the corresponding horizontal or vertical frame size of the sequence -  so that if the still image is a vertical image, it will be reduced in size so that its longest dimension (Its height) falls with in the 720 pixel limit of the sequence. and there will be black bars on the side. Similarly if the image is landscape format, then the width will be reduced to fit within the 1280 pixel width of the sequence, leaving black bars on the top and bottom of frame.

    MtD

    phil_1
    phil_1Author
    Known Participant
    March 13, 2017

    I noticed there's no preset for 720HD 60fps. So I just chose 720HD in the presets but I changed the

    Frame Rate in the basic video settings to 60. Assuming this was the best choice. The video on youtube was rendered

    at HD 1080p 23.976fps but even when I rendered with these settings I got the exact same result.