
Inspiring
September 14, 2026
Answered

animating still image with bounding box

  • September 14, 2026
  • 4 replies
  • 23 views

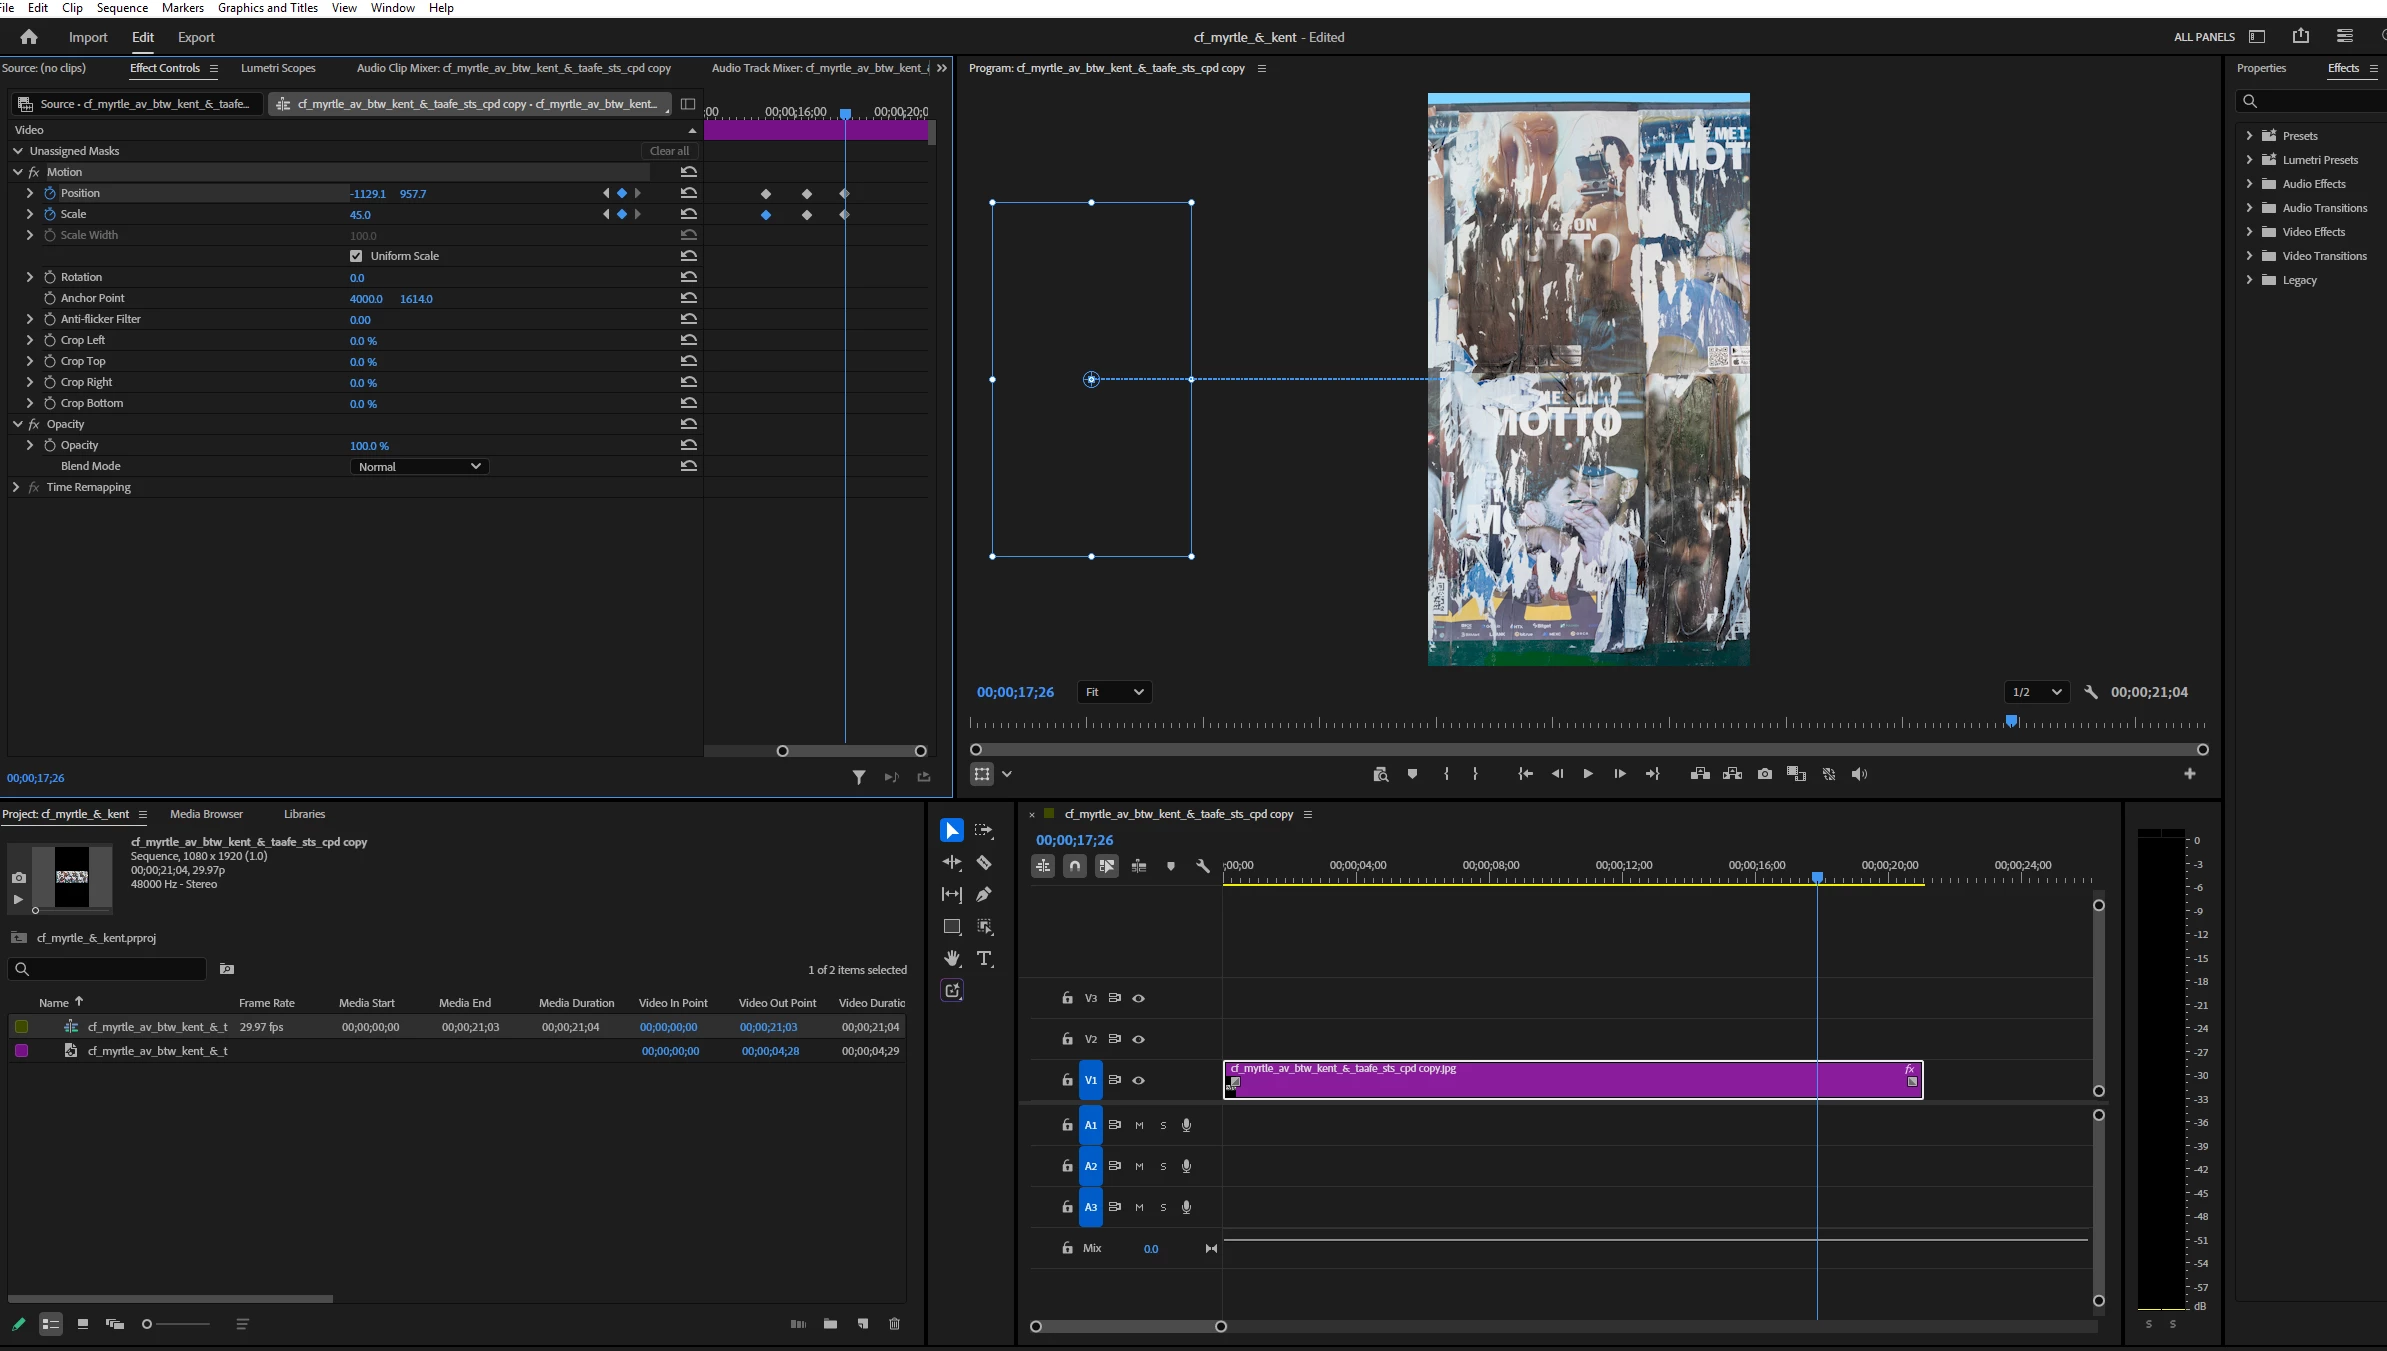
Lately I have been experiencing unfamiliar behavior animating still images.  Currently my issue is after defining keyframes and moving the image in the Program Monitor.  Typically I would click on “Motion” and move the image without a problem.  But now when I try to do that the image won’t move and a bounding box appears outside the image.  See screenshot. The only way I can move the image is by moving the bounding box.  It’s not impossible to achieve the result I desire but it’s somewhat more difficult, less intuitive and less familiar.  Why can’t I click and drag on the image inside the Program Monitor and move it that way?
 

    Correct answer PaulMurphy

    Apologies, that was my wording. I meant the still image clip itself, not the sequence.

    Dragging a sequence into another sequence nests it, which is why the tracks arrived merged into a single clip. That is expected behaviour for a nested sequence, and it is not what I was suggesting.

    Try this instead:

    1. In the Project panel, select the still image, not the sequence.
    2. Drag it into the Timeline of a new sequence.
    3. Go back to the sequence you are working in and select the image there.

    The bounding box should now match the clip. You can delete the extra sequence afterwards.

    4 replies

    Community Expert
    September 14, 2026

    I was able to recreate this.

    It works as expected when the clip is added to a sequence whose dimensions are already set. The problem appears when the sequence is created from the clip's own dimensions, which in this case is a very large resolution, and the sequence resolution is changed afterwards. From that point on, the bounding box matches the size of the sequence rather than the clip.

    The good news is that there is an easy fix. Drag the same clip to a new sequence, and the bounding box will display correctly in the sequence you are working in.

    Inspiring
    September 15, 2026

    Thanks.  I have never done this (drag a sequence into another clip) so I’m not sure I did this right.  While in the existing file, I went to File>New>Sequence.  I then dragged the original sequence (the highlighted, second one shown in the Project Panel) into the timeline of the new one.  What I got was a clip that had merged the different tracks.  This is not what I want because I want to be able to edit those tracks individually.  Was there another way to do it?  Also, I noticed that the new sequence reversed the dimensions - so it’s now 1920 x 1080 (instead of the other way around).  Not sure why that happened.  Thanks again.


    PaulMurphyCommunity ExpertCorrect answer
    Community Expert
    September 15, 2026

    Apologies, that was my wording. I meant the still image clip itself, not the sequence.

    Dragging a sequence into another sequence nests it, which is why the tracks arrived merged into a single clip. That is expected behaviour for a nested sequence, and it is not what I was suggesting.

    Try this instead:

    1. In the Project panel, select the still image, not the sequence.
    2. Drag it into the Timeline of a new sequence.
    3. Go back to the sequence you are working in and select the image there.

    The bounding box should now match the clip. You can delete the extra sequence afterwards.