Participant
January 22, 2019
Answered

blanking edges between two formats (16:9 + 4:3)

  • January 22, 2019
  • 6 replies
  • 464 views

Hi out there,

i have some trouble with varying sizes of my material. I am working on Prem CS6 and use a 16:9 setting. Some of may material is in 4:3, some in 16:9, and some in beweteen (enlarged phtographs). I would like to construct two grey stripes on both sides to fix a new format in between these two dimensions. What do I have to do to get this kind of "fake letterbox"?

Thanks for help...

Klaus

    This topic is closed to new replies. Start a new post to keep the conversation going.
    Correct answer Warren Heaton

    It sounds like you're describing "Pillar Box".

    1. Create a Color Matte (File > New > Color Matte...) with the desired Gray value (#808080 or 128, 128, 128 is 50% gray).
    2. Add it to a Video Track that's in front of all of your Clip Boundaries in the Timeline and extend it over your footage.
    3. Add a Barn Doors Wipe (Effects > Video Transitions > Wipes > Barn Doors) to the Color Matte in the Timeline.
    4. In the Timeline, extend the Barn Doors boundary it to the length of the Color Matte boundary.
    5. While the Barn Doors boundary is still selected in the Timeline, go the Effect Controls for the Barn Doors and set the following: Start to 25%, End to 25%, with Reverse enabled.

    It should look like this:
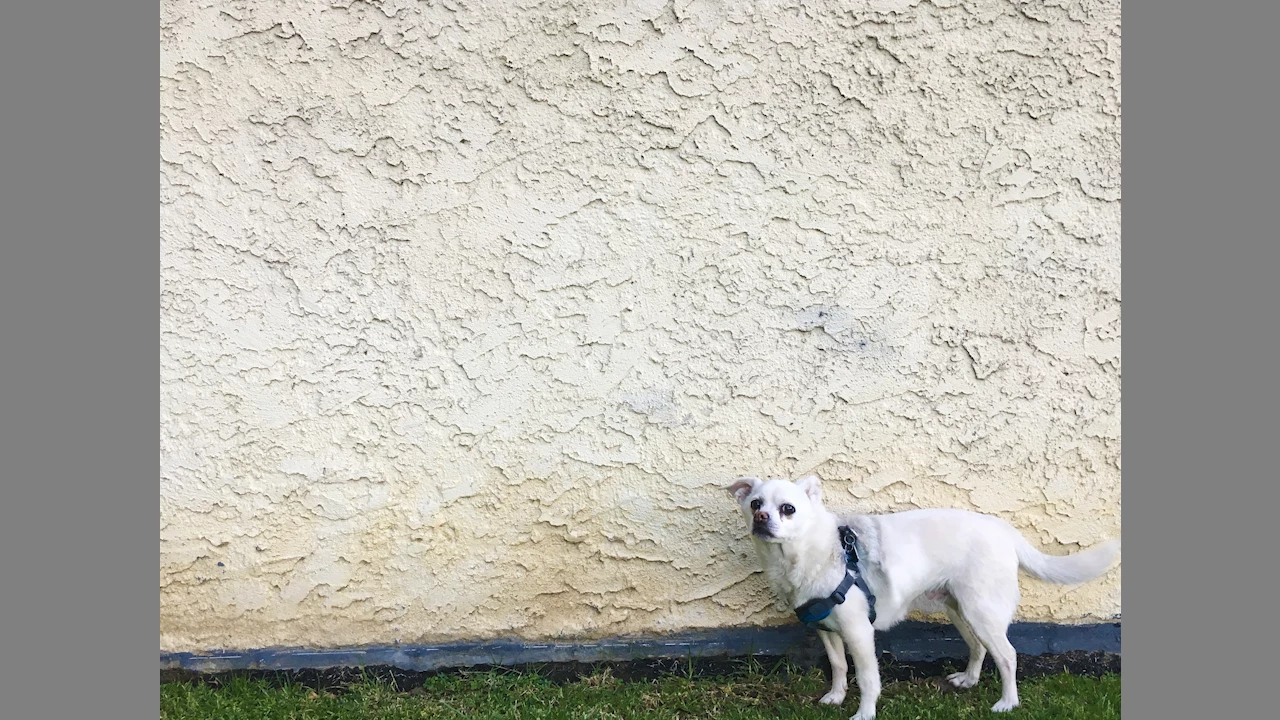
    It's probably worth noting that with the Transition set to the same duration as the Color Matte, it will be difficult to click and drag the Color Matte later.

    Have you considered matching what's done professionally for picture that doesn't fill the frame?  You'll notice in documentaries and news broadcasting that the picture is scaled to fit the width or the height of the frame and then the resulting pillars or letter boxing is filled with the image scaled up and blurred (behind the picture being shown).

    It would then look like this:
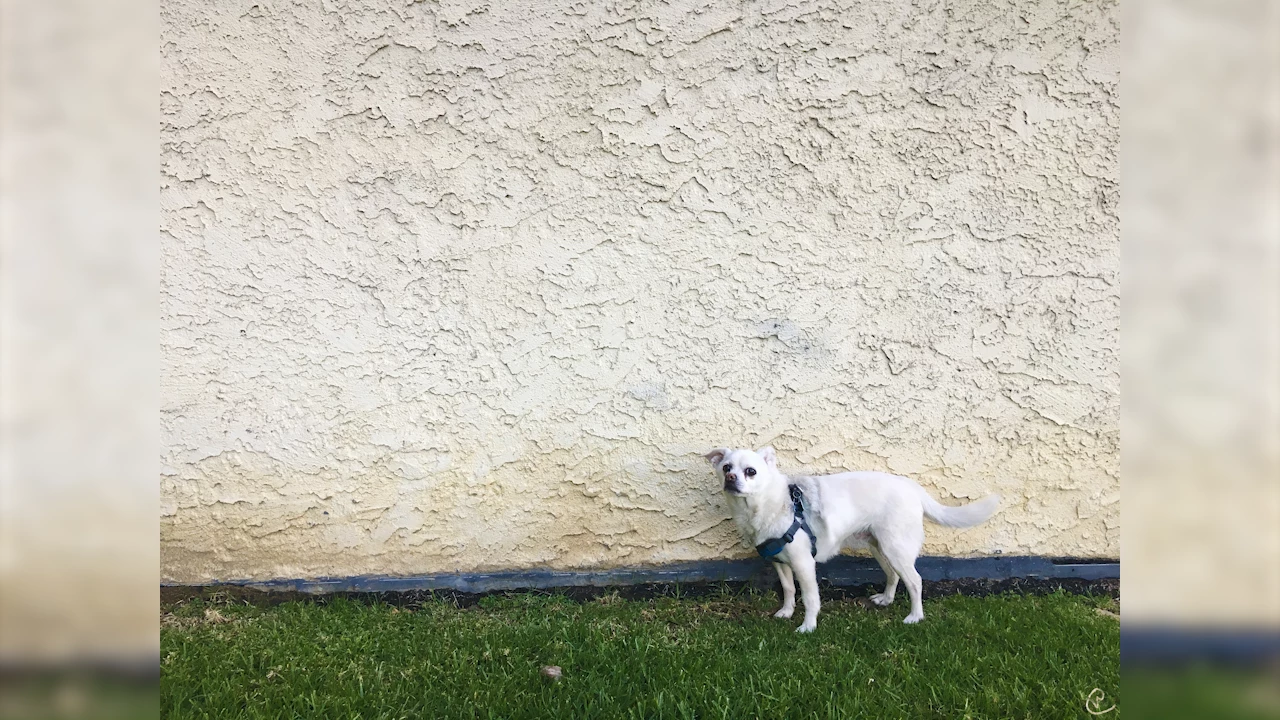
    (The dog in the photo is Buddy.)

    -Warren

    6 replies

    Participant
    January 23, 2019

    Hi, Warren,

    you really understood my question! Thanks!.Now, I only have to find these steps in my german menue. But it all sounds relevant. Thanks!

    Ann Bens
    Community Expert
    Community Expert
    January 23, 2019

    I would change the app to English...........

    Ann Bens
    Community Expert
    Community Expert
    January 23, 2019
    Warren Heaton
    Community Expert
    Warren HeatonCommunity ExpertCorrect answer
    Community Expert
    January 22, 2019

    It sounds like you're describing "Pillar Box".

    1. Create a Color Matte (File > New > Color Matte...) with the desired Gray value (#808080 or 128, 128, 128 is 50% gray).
    2. Add it to a Video Track that's in front of all of your Clip Boundaries in the Timeline and extend it over your footage.
    3. Add a Barn Doors Wipe (Effects > Video Transitions > Wipes > Barn Doors) to the Color Matte in the Timeline.
    4. In the Timeline, extend the Barn Doors boundary it to the length of the Color Matte boundary.
    5. While the Barn Doors boundary is still selected in the Timeline, go the Effect Controls for the Barn Doors and set the following: Start to 25%, End to 25%, with Reverse enabled.

    It should look like this:

    It's probably worth noting that with the Transition set to the same duration as the Color Matte, it will be difficult to click and drag the Color Matte later.

    Have you considered matching what's done professionally for picture that doesn't fill the frame?  You'll notice in documentaries and news broadcasting that the picture is scaled to fit the width or the height of the frame and then the resulting pillars or letter boxing is filled with the image scaled up and blurred (behind the picture being shown).

    It would then look like this:

    (The dog in the photo is Buddy.)

    -Warren

    Peru Bob
    Community Expert
    Community Expert
    January 22, 2019

    Just a suggestion on the Buddy clip:

    I would move the "pillars" so that all three "blue lines" are line up with each other.

    Then again, it's a matter of personal preference.

    Warren Heaton
    Community Expert
    Community Expert
    January 23, 2019

    https://forums.adobe.com/people/Peru+Bob  wrote

    I would move the "pillars" so that all three "blue lines" are line up with each other.

    I agree.  At the same time, when it's the 9,745th time you've done it and if it's video it's going to be constantly changing, I've gotten in the habit (for better or worse) of just setting it and forgetting it.