elizachristine
Known Participant
December 13, 2016
Answered

Color Correction - lighting difference and skintone

  • December 13, 2016
  • 3 replies
  • 2206 views

Hi Everyone!

I am looking for some help on a video that I am color correcting from anyone who is exceptionally good at recognizing color differences in images. The lighting changed in the room during the last take and dramatically changed the look of the footage. I am pretty familiar with most of the effects in premiere, but I cannot figure out how to get the two two to match. So far I have been playing with the Luma Corrector, Three Way CC and Lumetri Color effects. I did try the shadow/highlight as well, but not a fan of this.

First, I would like to attempt to get the highlights of the FIRST image to match as closely as possible to the SECOND image and then,

reduce the harsh shadow on the neck of the SECOND image here:

(These two are the original raw files, no CC)

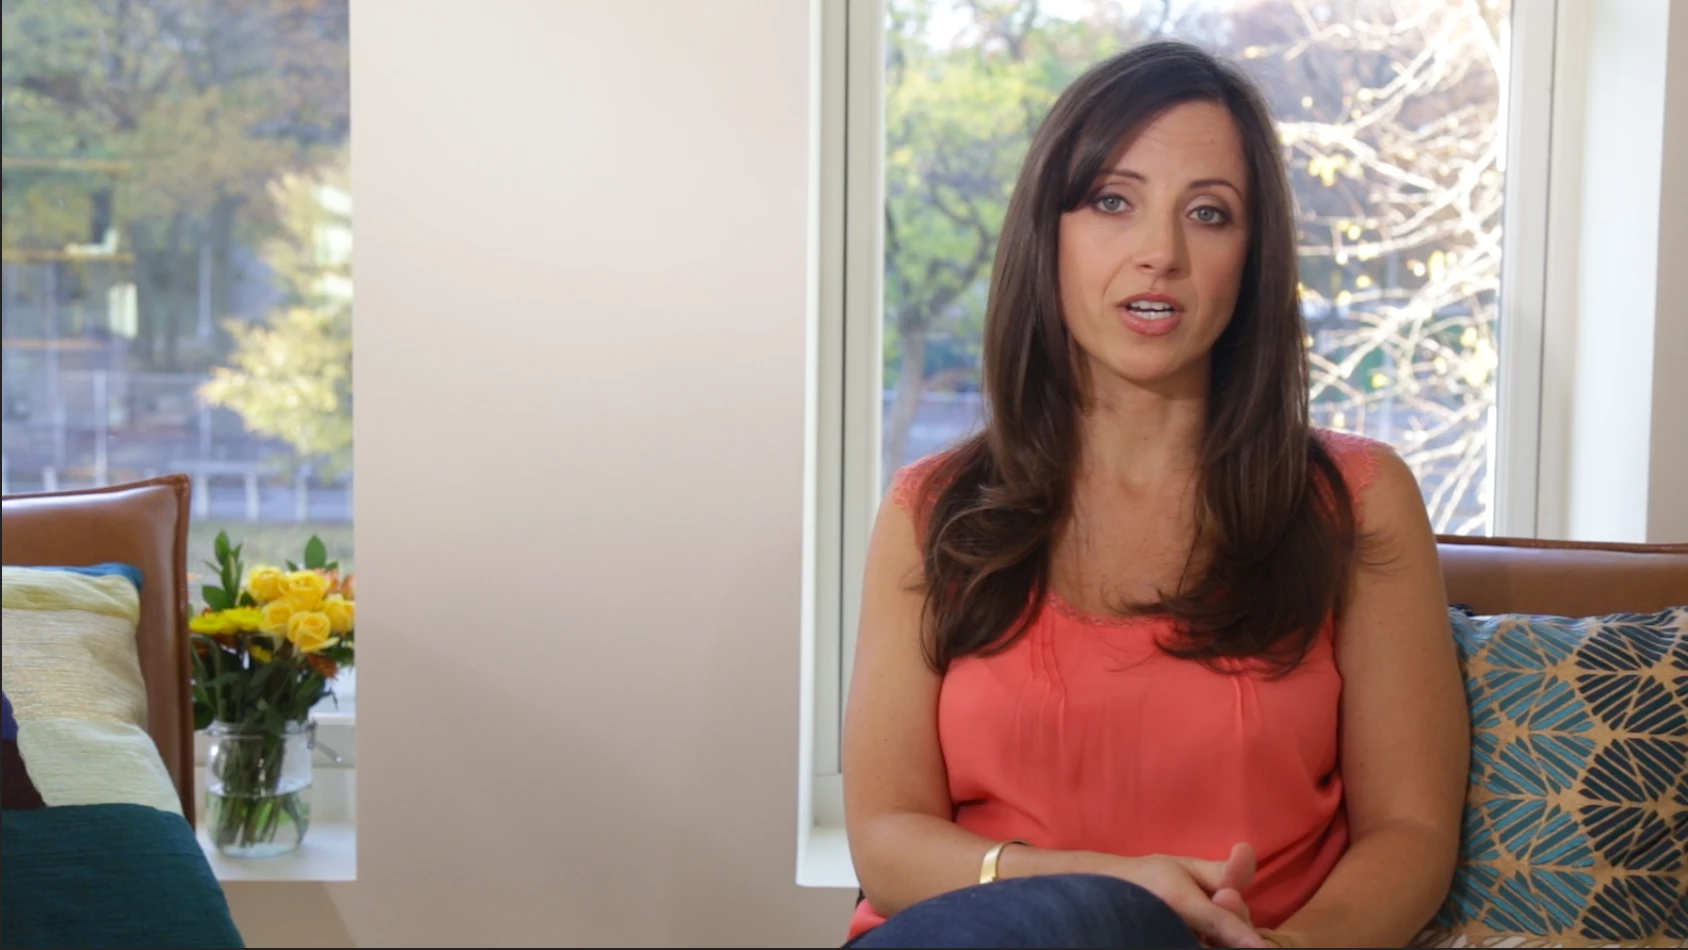
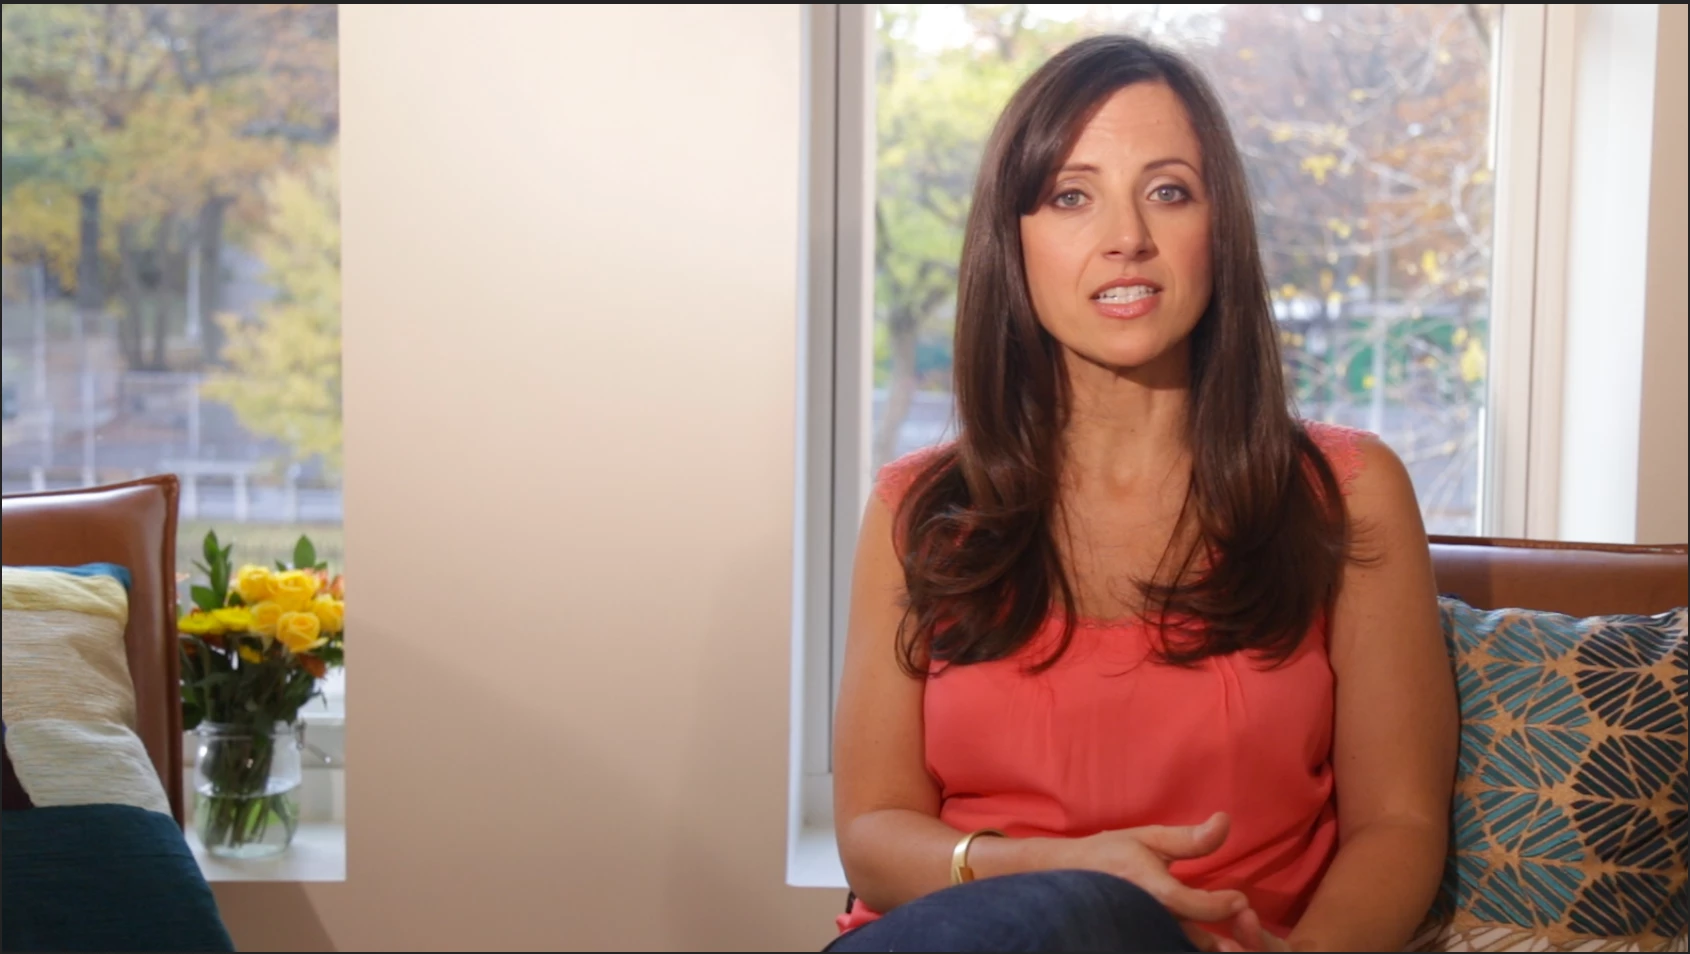
And last, I would like to match the skin tones as much as possible, however, I have not been able to figure out what the difference is between the two.  Whether it's hue, saturation, rgb, etc.

This is what I have been able to accomplish so far, but I really can't figure out what else I can change to make them more similar. There is something in the skintone that is off...orange, pink, too much red...

Thank you in advance.

This topic has been closed for replies.
Correct answer R Neil Haugen

As Jim queried ... if they're RAW files, you may be able to adjust using the special controls applicable to that. He's got more experience in PrPro with those than I.

As to the differences between the two clips ... first, the biggest change is luma contrast ... which you should see real fast if you bring up the Lumetri scopes. I suggest working with the Lumetri panel, scopes open, and look at the RGB Parade and Waveform (Luma) up together first. Watch the scopes, not the image ... and match the trace on the scopes of the second clip to the first one. Lowering general contrast some, and especially mids and highlight brightness.

In the Basic tab, try lowering the "contrast" slider a bit, or perhaps the "exposure" slider, and then the Highlights slider, or move to the Color Wheels tab and use the Mids & Highlights luma controls (vertical sliders) to match the scope traces.

After you've matched the tonality ... then check & see what differences you still have in color via the RGB Parade and Vectorscope. The Vectorscope is a color wheel, essentially, with "no color" at the center ... whites/gray/black ... and the strength of color of various hues shown by the excursion of signal out from the center. There's a line on the scope in the yellow/red area ... going up to the left of center ... and skin tones should be fairly close to that line. You can use it to compare the skin hues between the clips, and if needed, grab especially the Mids color wheel and move the center around to more closely align the skin hues between the clips.

Neil

3 replies

shooternz
Legend
December 13, 2016

Your first friend will be a mask around the actor.

The shot does not look as if it has a camera pan or movement so you can use the bg ( window bg space) as a constant by using a mask around the "actor".  The mask allows you to use bg from one shot on the other shot with the issue.

'

To a degree that gives some continuity of lighting and geography.

Now you have to deal with the actor inside the mask..

Assume that the hard shadow is not entirely fixable and it will be accepted by a viewer if you get most of the rest sorted.

It will be a matter of playing with chroma and luma controls.

Dont just try to adjust the clip with the issue.  Bring the other clips some way towards  the match as well. ie a compromise.

Lightly de-saturising your clips is another friend

elizachristine
Known Participant
December 13, 2016

Thanks Shooternz. Just to make sure I am on the same page as you, you are suggesting that I take the background from the first clip and put on the second correct? Then take both of the images of the actor and bring them slowly toward each other.

I was attempting this as well. The harsh shadow was extremely difficult to work with. What tool would you precisely work with, to fix that?

Also, are you or @R Neil Haugen able to tell what the main color difference in the skintone is?

And lastly, what tools would you recommend to work with the chroma and luma controls? I usually use the three way, luma corrector and the lumetri color. Would you go another route?

Thank you!

R Neil Haugen
R Neil HaugenCorrect answer
Legend
December 13, 2016

As Jim queried ... if they're RAW files, you may be able to adjust using the special controls applicable to that. He's got more experience in PrPro with those than I.

As to the differences between the two clips ... first, the biggest change is luma contrast ... which you should see real fast if you bring up the Lumetri scopes. I suggest working with the Lumetri panel, scopes open, and look at the RGB Parade and Waveform (Luma) up together first. Watch the scopes, not the image ... and match the trace on the scopes of the second clip to the first one. Lowering general contrast some, and especially mids and highlight brightness.

In the Basic tab, try lowering the "contrast" slider a bit, or perhaps the "exposure" slider, and then the Highlights slider, or move to the Color Wheels tab and use the Mids & Highlights luma controls (vertical sliders) to match the scope traces.

After you've matched the tonality ... then check & see what differences you still have in color via the RGB Parade and Vectorscope. The Vectorscope is a color wheel, essentially, with "no color" at the center ... whites/gray/black ... and the strength of color of various hues shown by the excursion of signal out from the center. There's a line on the scope in the yellow/red area ... going up to the left of center ... and skin tones should be fairly close to that line. You can use it to compare the skin hues between the clips, and if needed, grab especially the Mids color wheel and move the center around to more closely align the skin hues between the clips.

Neil

Everyone's mileage always varies ...
R Neil Haugen
Legend
December 13, 2016

After playing with it on my old laptop a bit ... not nearly as good as my editing rig, mind you ... shooternz has a good point. You've got enough areas with contrast differences in both color & luma, and it's gonna be fun to 'match' precisely. Go for the actor in a mask, and work both images towards each other, as it would be very difficult to get the second one clear to the first.

SpeedGrade won't run on this ol' laptop, but ... I'd be tempted to see what I could get from the "match clip" function in Sg if I was at the studio.

Neil

Everyone's mileage always varies ...
chrisw44157881
Inspiring
December 13, 2016

i took a quick peak with crop effect on the skin and, *sigh* once again, the missing hue angle tool in lumetri, lol.

Legend
December 13, 2016

What format are the RAW files?

elizachristine
Known Participant
December 13, 2016

This is just a MOV file, H.264 codec.