Inspiring
July 27, 2024
Question

Export issues

  • July 27, 2024
  • 1 reply
  • 554 views

First time using Premiere and just finished editing a 180 clip project. I figured how to do things as I went :). Good results BUT running into some issues when exporting, so I have to ask a simple question:


1. In the past I have always done the following (using SONY VEGAS). Shooting in 60P, creating project timeline in 24P so I can slow mo somce of my clips, then exporting in 24P. Everything always looking smooth, especially my cinematic slow moving drone shots.


2. This time not really knowing how to do it in premiere, I followed the same above principles (since they always worked for me in the past). I shot in 60P, set my sequence settings at 24P, edited everything.  When playing timeline back everything looked smooth (no judder). Clips that were slowed to 40% look perfect :)) BUT then I exported the project to 24P and end product has a lot of judder during pans (yes even SLOW ones) my drone footage looks horrible now (say what???), but when playing the timeline it looked great and when playing the raw footage directly from window it is smooth as a baby's bottom :). 


What am I doing wrong?


Should I have set my sequence to 59.94P instead of 23.978? I tried this but then the export info was telling me  that my 12  minute long project was going to be 4 minutes (I still don't understand why).


I obviously am missing some basic Premier Pro 24 knowledge, but since I am on a deadline to deliver this project, I am turning to you guys for guidance. Thank you I appreciate you!


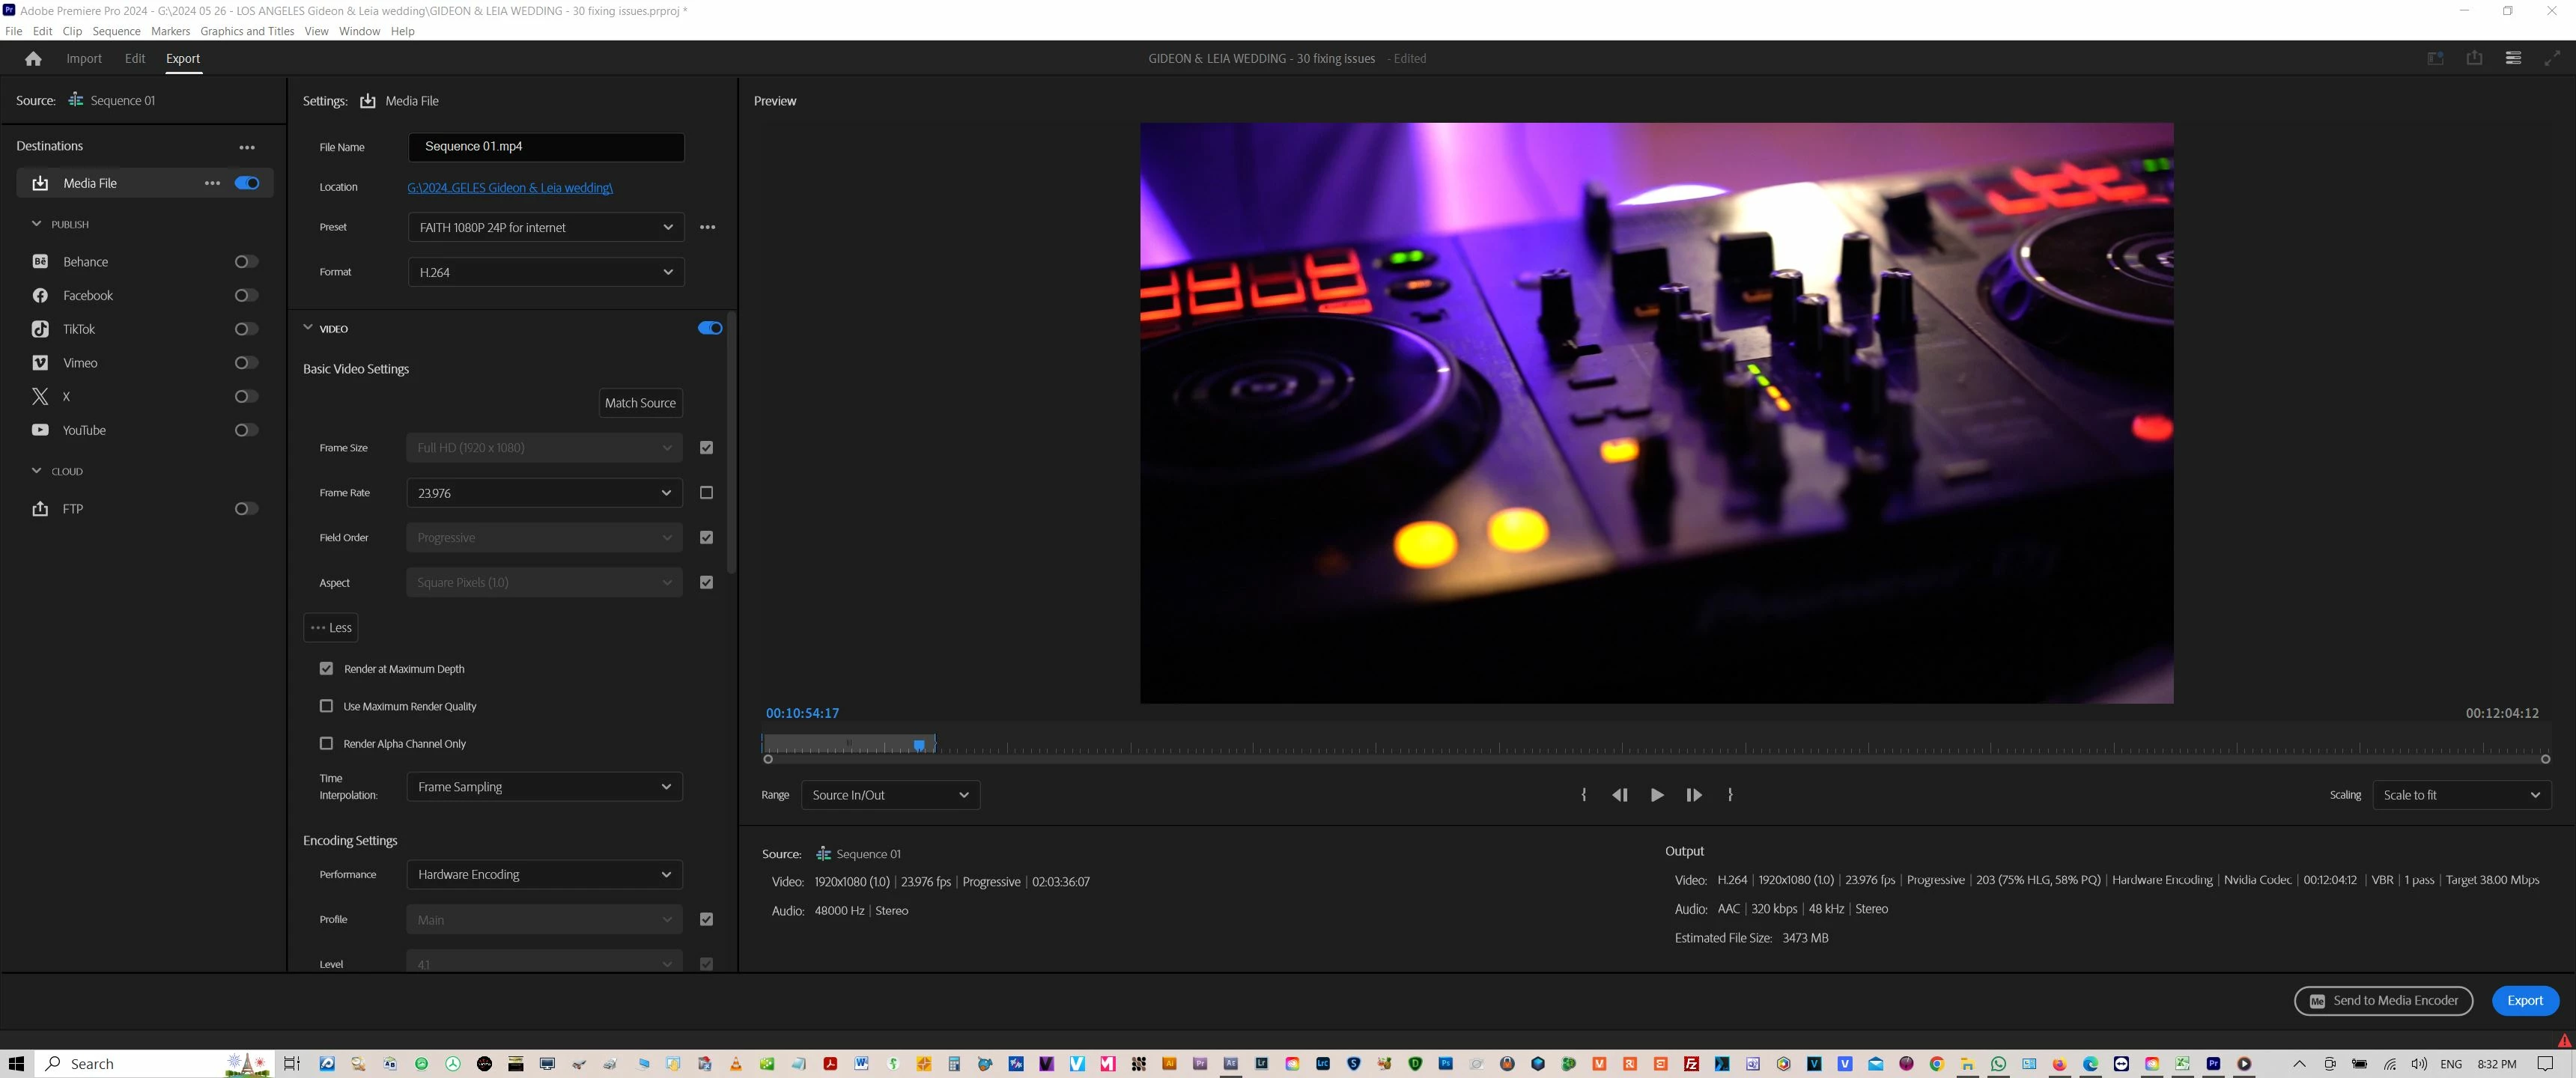
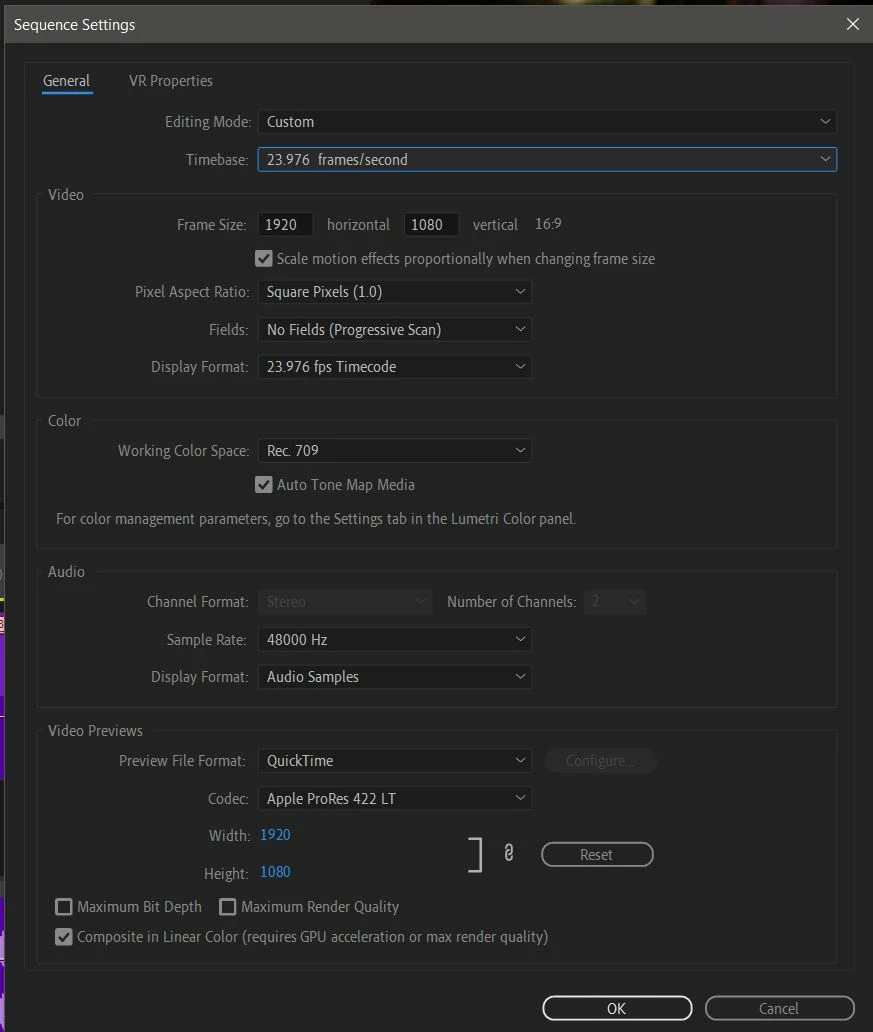
Below screenshots of my sequence settings and export settings:


[title edited by mod]

This topic has been closed for replies.

1 reply

Community Expert
July 28, 2024

Hi Faith,


The way you have set up your sequence and slowed down your footage makes sense to me. I tested these same settings on my system and got smooth playback, so I'm unsure why yours is not.


A couple of thoughts:


  1. Check your footage interpretation: Select your clips in the Project panel and choose Clip > Modify > Interpret Footage. Make sure that they have been interpreted as 59.94 and not 23.976.
  2. Ensure correct frame rate in export settings: In your Export settings, tick the box next to the Frame Rate to ensure it's using the sequence's native frame rate and not interpolating.
  3. Switch encoding performance: In your Export settings, go to Encoding Settings and try switching Performance from Hardware Encoding to Software Encoding.
  4. Consider interpreting footage differently: It may help to interpret your footage as 23.976 using Interpret Footage rather than adjusting the speed on the timeline.


Cheers,
Paul

Inspiring
August 8, 2024

Thank you Paul, I made notes of your tips and exported a new project I was working on trying the "switching Performance from Hardware Encoding to Software Encoding". the resulting rendered video did not display any studdering, however it was a very fast paced one with no slower, longer pans in it so hard to tell just yet if this fixed the problem (but it very well might have). When I find a moment I will re-render the other project, the one that was giving me studdering issues and see if changing encoding to software fixes that project and I will post outcome on here so we may leave useful info for other users facing the same problem in the future.

Ishan Y
Inspiring
August 8, 2024

Hi! If switching to Software Encoding fixes the problem for you, please check if you have any graphics driver updates available. Usually, outdated or corrupt GPU drivers can cause similar issues. I'll also recommend changing the time interpolation while changing the clip speed to see if that makes any difference.