rphils35
Participant
October 12, 2017
Answered

Highlighted Regions in Premiere CC

  • October 12, 2017
  • 2 replies
  • 12835 views

Today I was working on a project when I accidentally hit the X key and most the regions in my timeline became highlighted (see below).

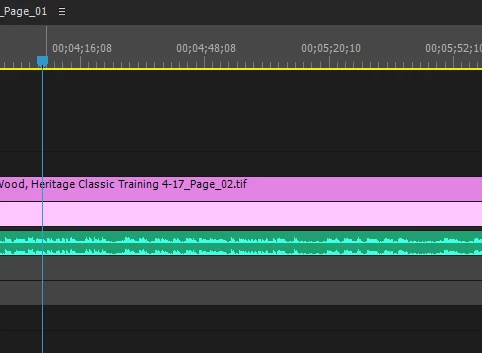
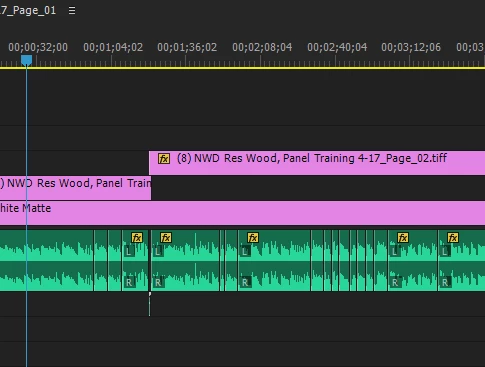
I hit X again and it didn't go back to normal. It doesn't seem like an issue really, besides the fact that it's a bit annoying looking and I'm not sure what I did. For reference, here is what another project looks like (what I'm used to seeing):

Any information on what happened/ solutions would be much appreciated!

    2 replies

    TaranVH
    Inspiring
    October 12, 2017

    I can tell that you are new to Premiere.

    I recommend that you take some time to familiarize yourself with the program. Take some tutorials. I recommend lynda.com.

    Otherwise, behaviors like this will only continue to baffle you, and you'll be spinning your wheels a lot... wasting far more time than you'll spend learning about the software in the first place.

    If you go to Edit > Keyboard Shortcuts, and type X in the find box, you will discover that the default mapping is "mark clip."

    This command will set IN and OUT points around whatever CLIP in the TIMELINE is under the PLAYHEAD (also known as the CTI), but only if the TRACK TARGETING for that layer is ACTIVE.

    To remove this, you can right-click at the top of the timeline, and select "clear in and out."

    If you don't understand all of that, then, again, you really should spend some time becoming more familiar with the software.

    rphils35
    rphils35Author
    Participant
    October 12, 2017

    You're right, I should learn more about the program so that I don't get confuse by things like this. Thank you for your help though.

    Richard M KnightCommunity ExpertCorrect answer
    Community Expert
    October 12, 2017