Chris has a good answer. I'll add my experience also.
I'm the guy what initially figured out the PC 'hack' into the PrPro project files, following the actual posting of how to do it on Mac's. I just applied the same method he'd found to the similar PC process. So I 'hacked' PrPro into Sg and back manually for a while.
Then Patrick Zadrobilek of Austria created the marvelous little app that Chris mentioned, the PrProBCC, and sells it for a very small amount on his NTown website. I've purchased that and use it on a regular basis. It still works with PrPro CC2018, as long as you don't include any AE comps on the sequences. If you have a comp, you need to go to Ae, render that out to full media, replace the comp on the timeline with the media. A lot of the folks I know using Ae normally do this anyway when they figure they have 'lock' on that comped part of the sequence as it's a more solid playback situation then.
Interesting note ... if you send a PrPro 2018 project to Sg & bring it back (running it through PrProBCC both ways) ... when you load it into PrPro, playback will not normally be affected at all, even with a fair number of primaries & several secondaries ... I tend to do maybe 5-10 layers in Sg for a number of clips ... with no playback 'penalty' in PrPro. That much work will take 4-7 "instances" of Lumetri, or ... using both Lumetri's ability to export itself as a .cube LUT, and Red Giant's old Lut Buddy plugin to draw and read a pattern of say a pair of Lumetri "instances", then export a LUT from that so that I can take the work of the 6 Lumetri instances down to say 3 ... I'll still often get a playback penalty.
And that 2018 project, with an Sg trip? Bring up the Lumetri panel, and at the bottom is an extra tab. Open it ... all it is, is a checkbox for SpeedGrade ... checked, the Sg work is applied. Uncheck, the Sg work is turned off. Hmmm.
Some pairs of clips work very well with the "Shotmatch" button in Sg, and some ... don't. Even when they don't, you have the easy ability to set up a good 2/3-up view in your playback monitor.
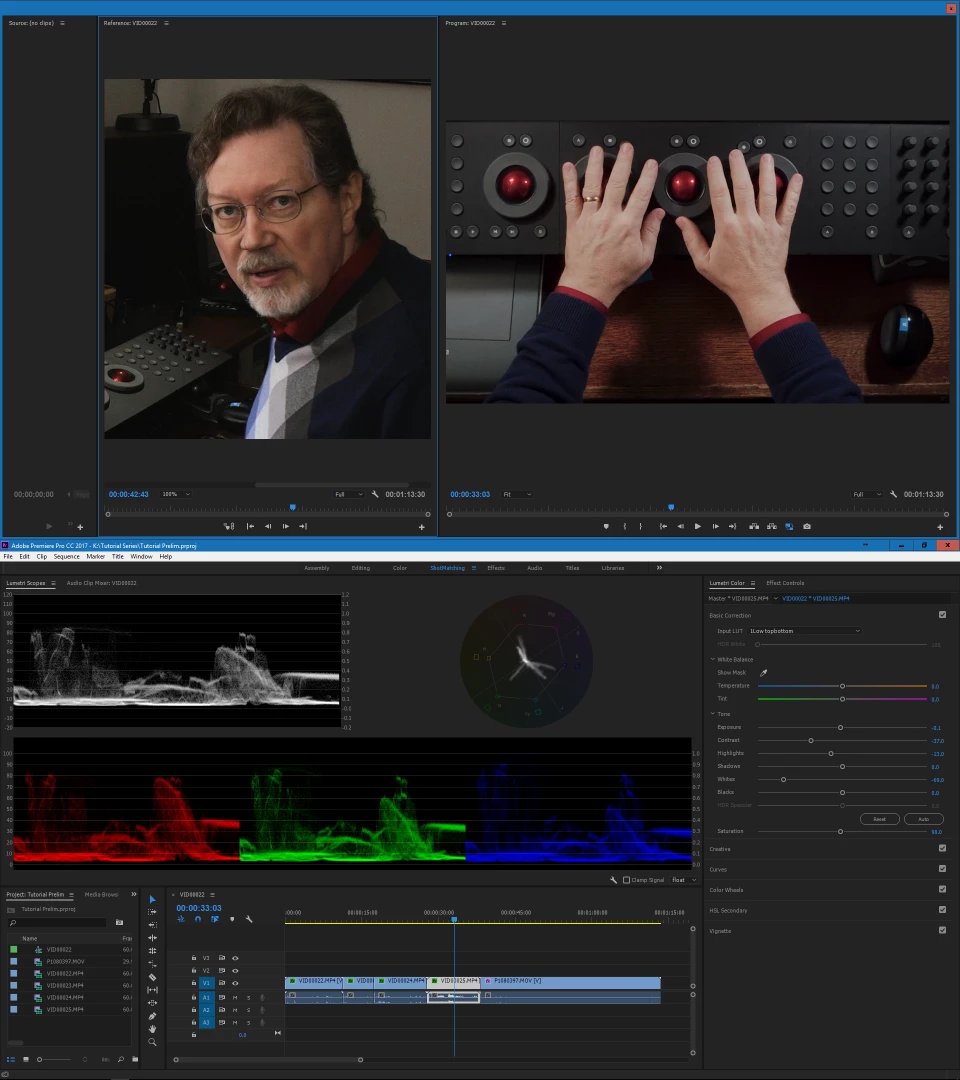
Now ... some times I do shotmatching in PrPro with Lumetri. I've created a custom workspace, with a second PrPro window on my playback monitor. I have Shift-C set to toggle Mercury Playback so I open the playback monitor for this use. In the upper (playback) monitor, the window has a nearly-closed Source monitor to the far left that I use on the odd occasion I want to match to a still. The majority of the left side is the Reference monitor open to the sequence in use, and the right half is the Program monitor. You can use the scaling controls (fit, percentage sizing) and the sliders to get the appropriate part of the shots up for matching ... setting the Reference monitor from the timeline at the bottom of that tab, and the Program monitor from the main timeline panel.
This allows me to see the two images crucial areas at decent size, and by clicking between the monitor panels I can change which image is shown in the scopes. NOT as handy as a real 2/3-up but ... workable for smaller jobs. This image is my two 1920x1080 monitors shown together ... top, the playback area; bottom, the main UI.
Neil
