Question
Masking Techniques in Premiere Pro 2021
Instructions
- Set your workspace to the Editing layout
- Move the clip up one track and make sure any video tracks beneath it are empty.
- Position the playhead over the clip that needs masking and then click to highlight it.
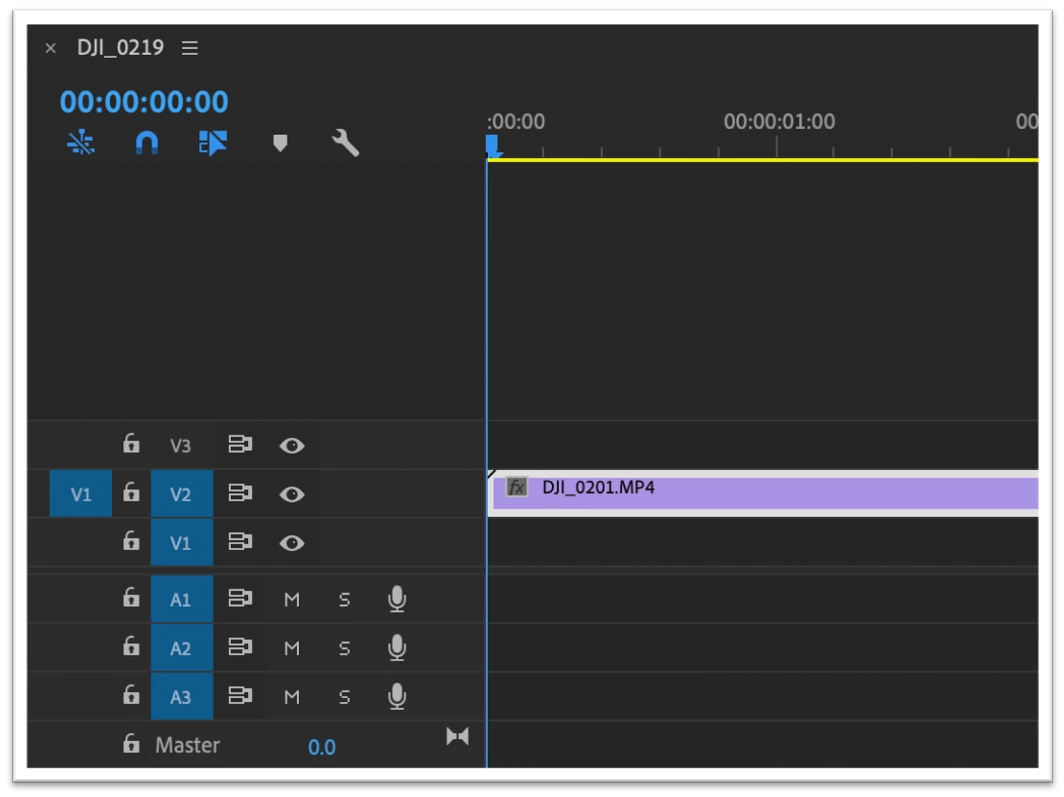
- Locate the Effects Controls Tab. This will be inside the Source window.
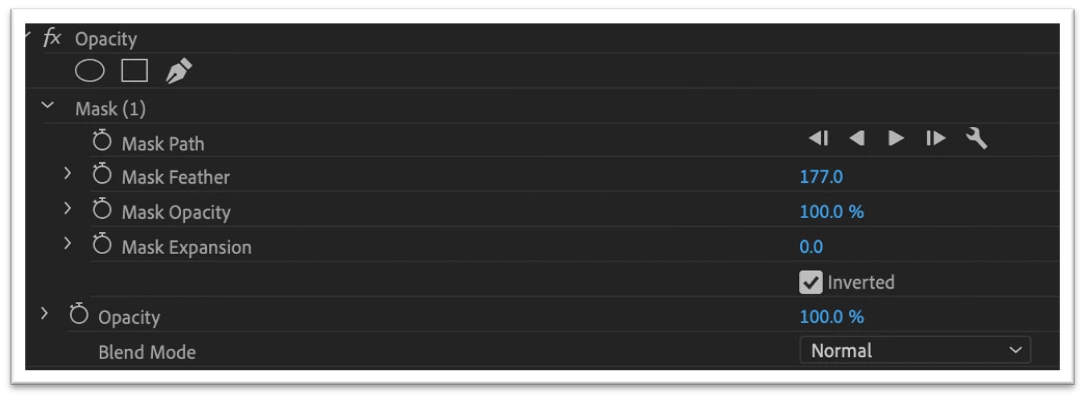
- Locate the Opacity controls
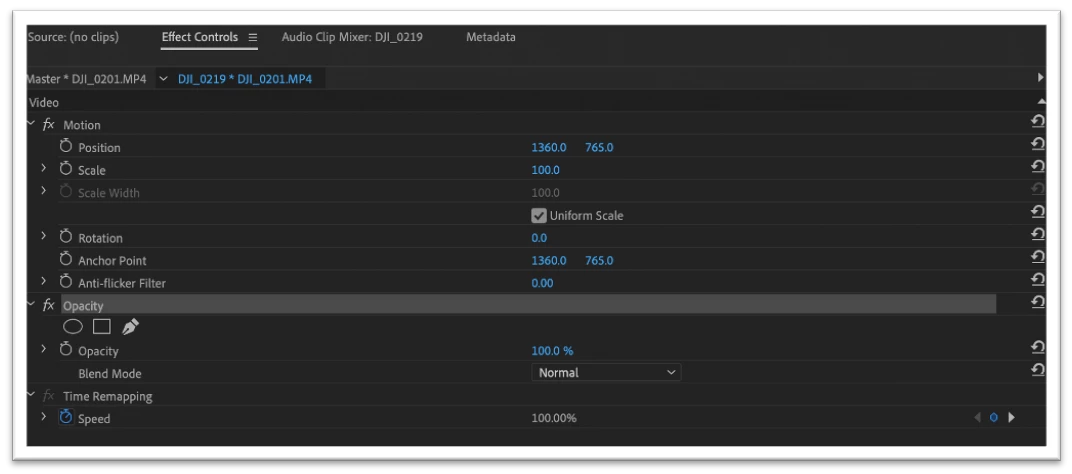
- Once you open the Opacity controls, you will see three icons directly beneath the Opacity heading:
Ellipse,
Four-point polygon mask
Pen tool - These are the three options for creating a custom mask. For this example we will create a Mask using the Pen Tool.
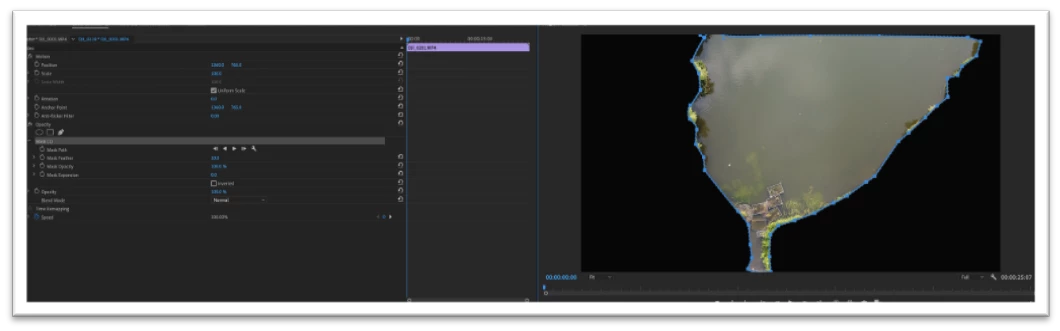
- Select the Pen Tool. Once selected you will see the Mask Control Menu.
- Locate back to the Program window
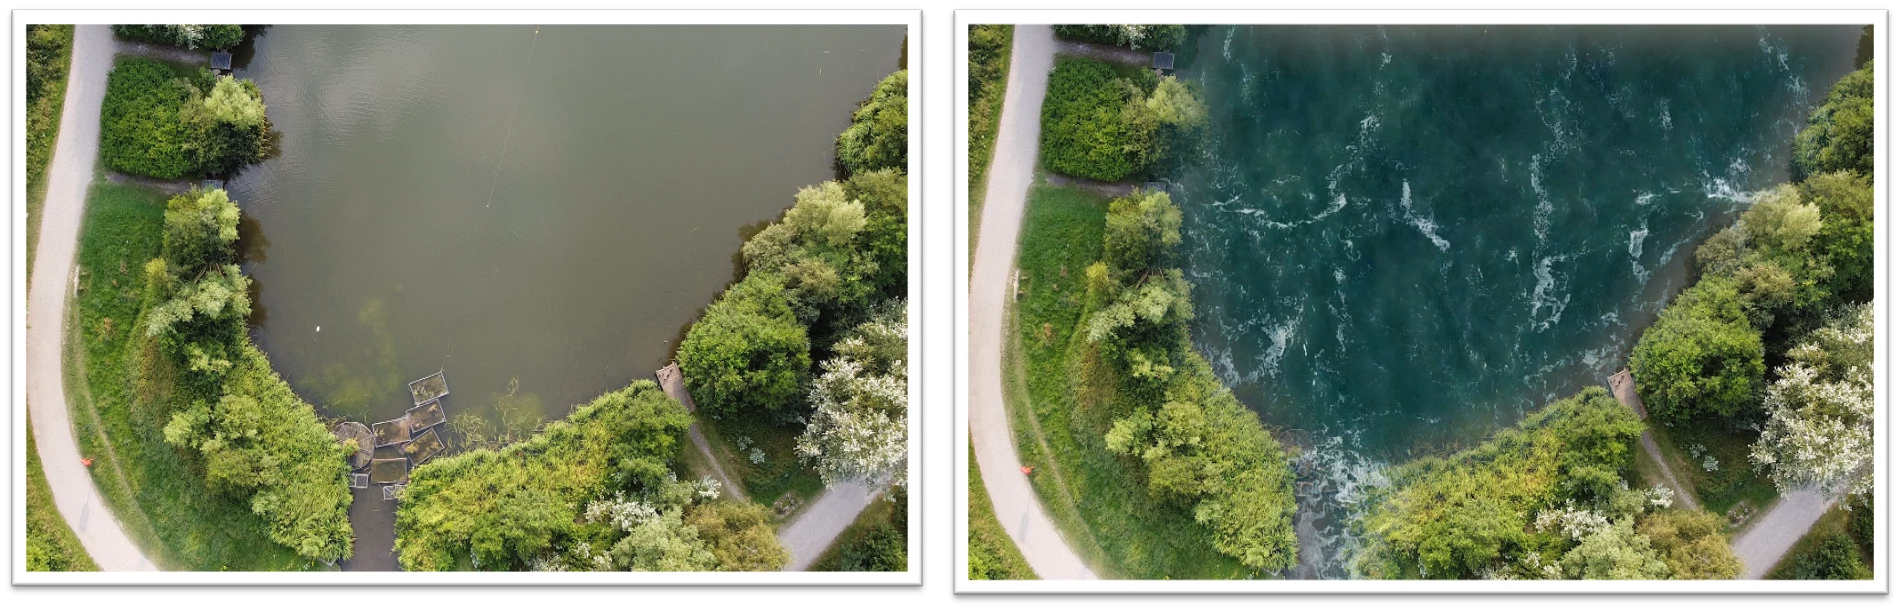
- Select inside the program window to create a mask. For this example I will mask around a lake.
- You will need to connect both the start and end points to close the mask.
- Once you’ve finished creating the shape, you will see the mask surrounded by empty space.
- Locate back to the Effects Control Panel.
- Locate the Mask Controls
- Click the check box labelled Inverted, which makes the interior of the mask black, allowing you to see the original footage surrounding it.
- Adjust the Mask Controls by using the numerical controls provided.
- Choose the footage you want to appear within your mask, and place it beneath the clip you just adjusted. For example; Video Track 1.
- You will now be able to see the footage in the area that you cut out in the previous steps.
- Adjust the controls and placement within the Effect Controls Tab.

Before and After