Inspiring
September 23, 2025
Answered

Recalculate Anchor Point at center of previous keyframe

  • September 23, 2025
  • 2 replies
  • 291 views

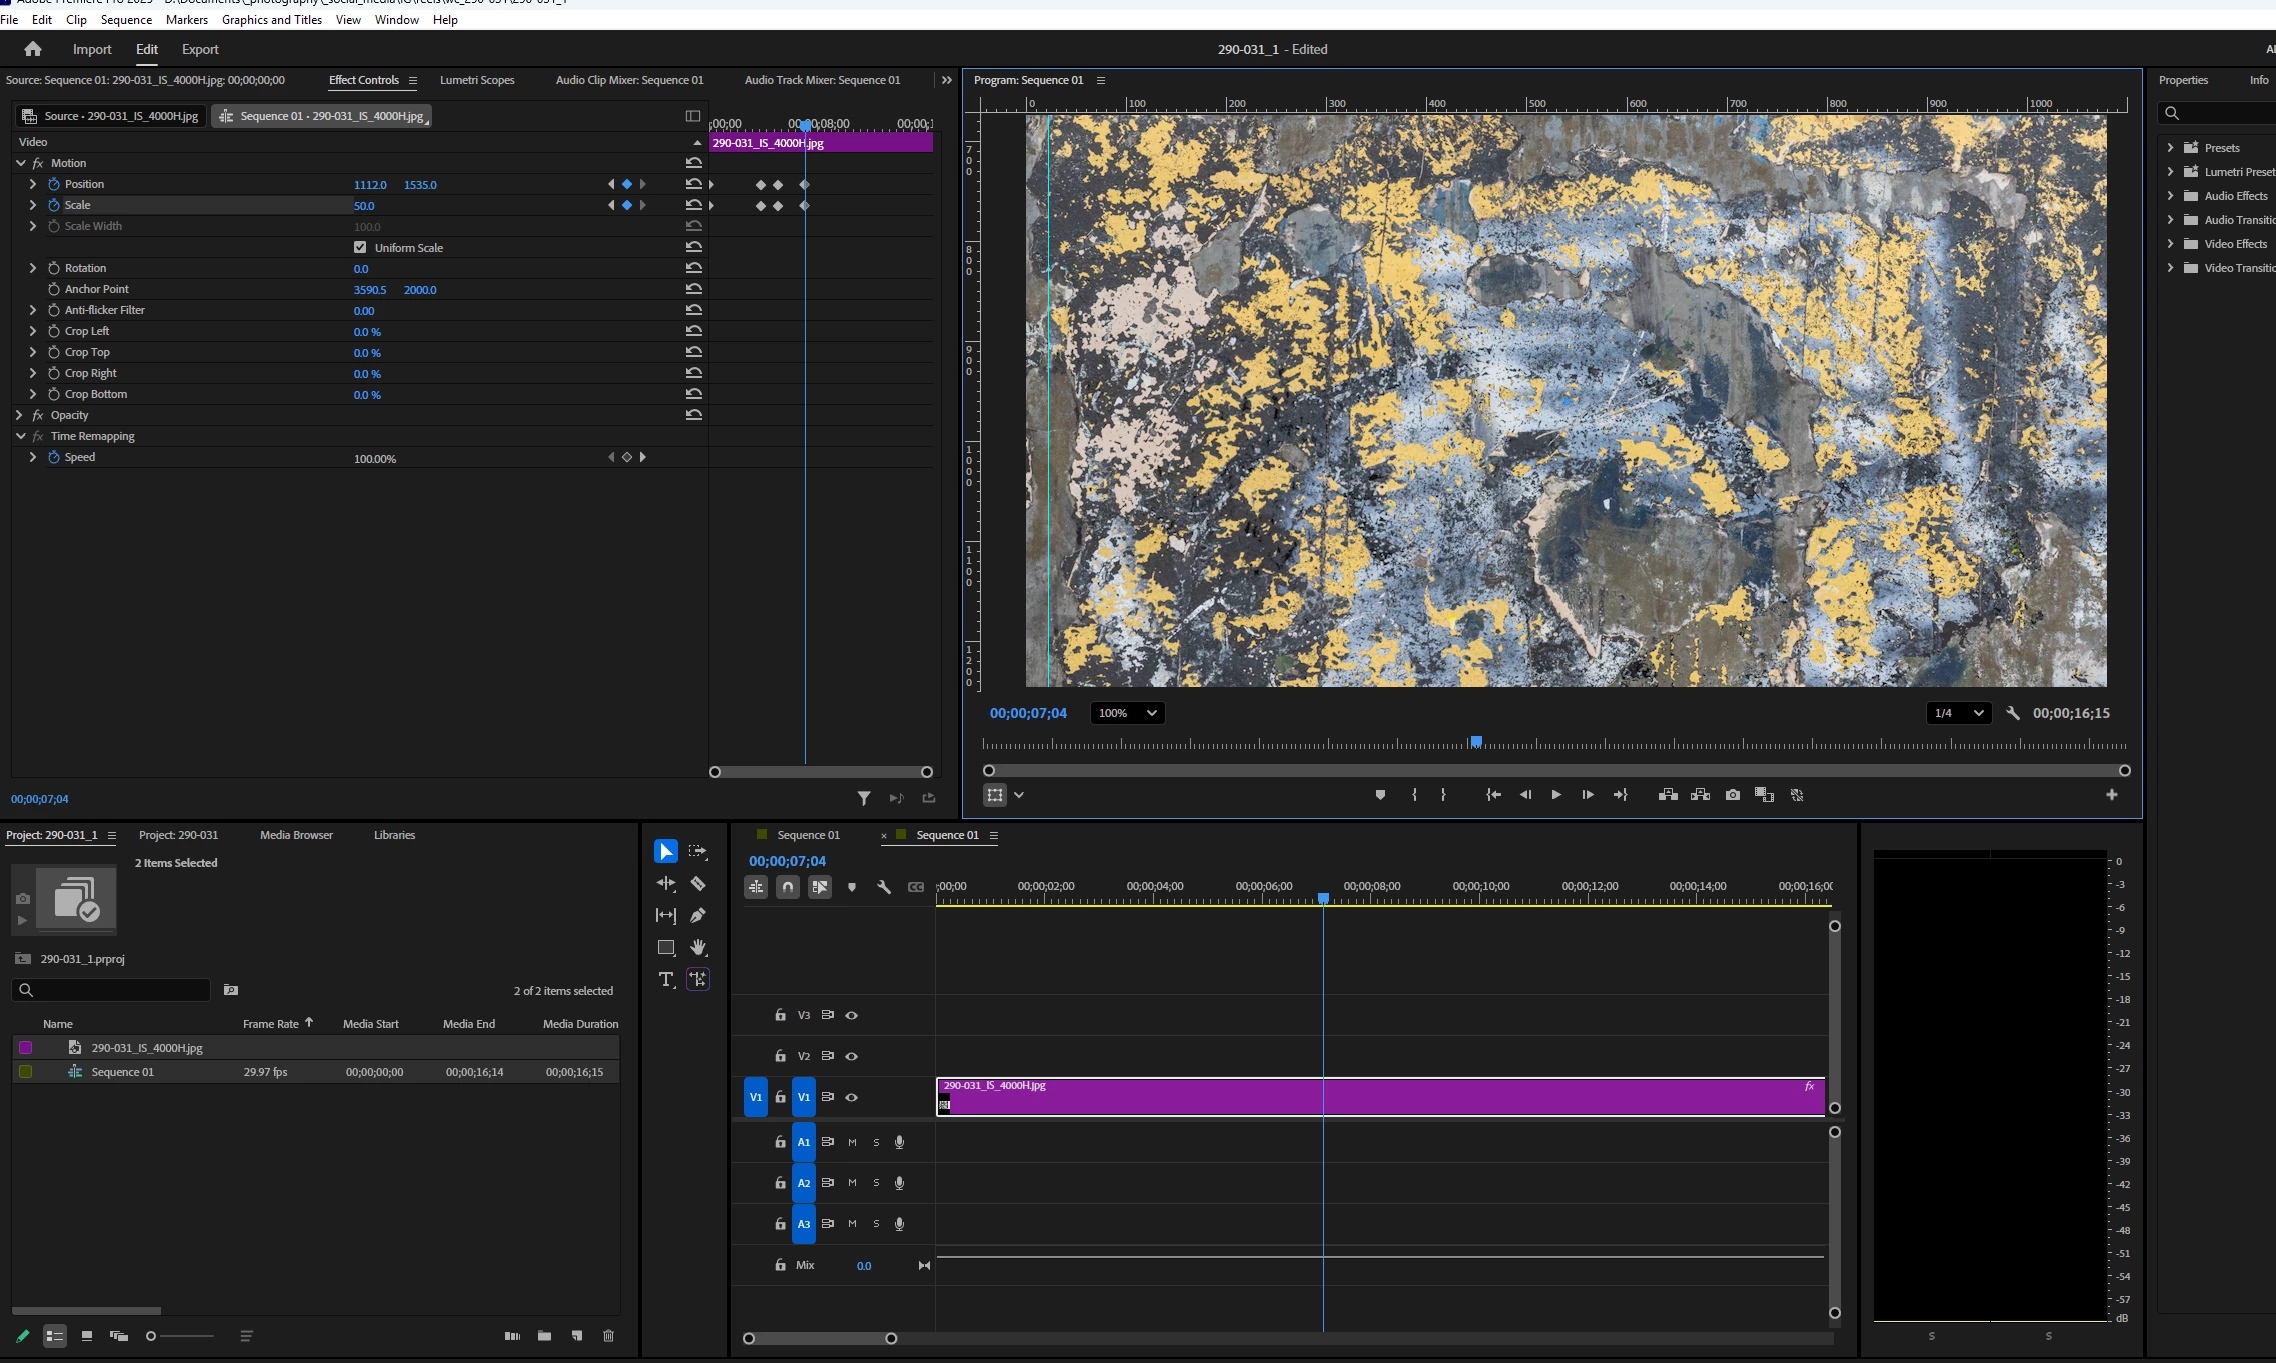
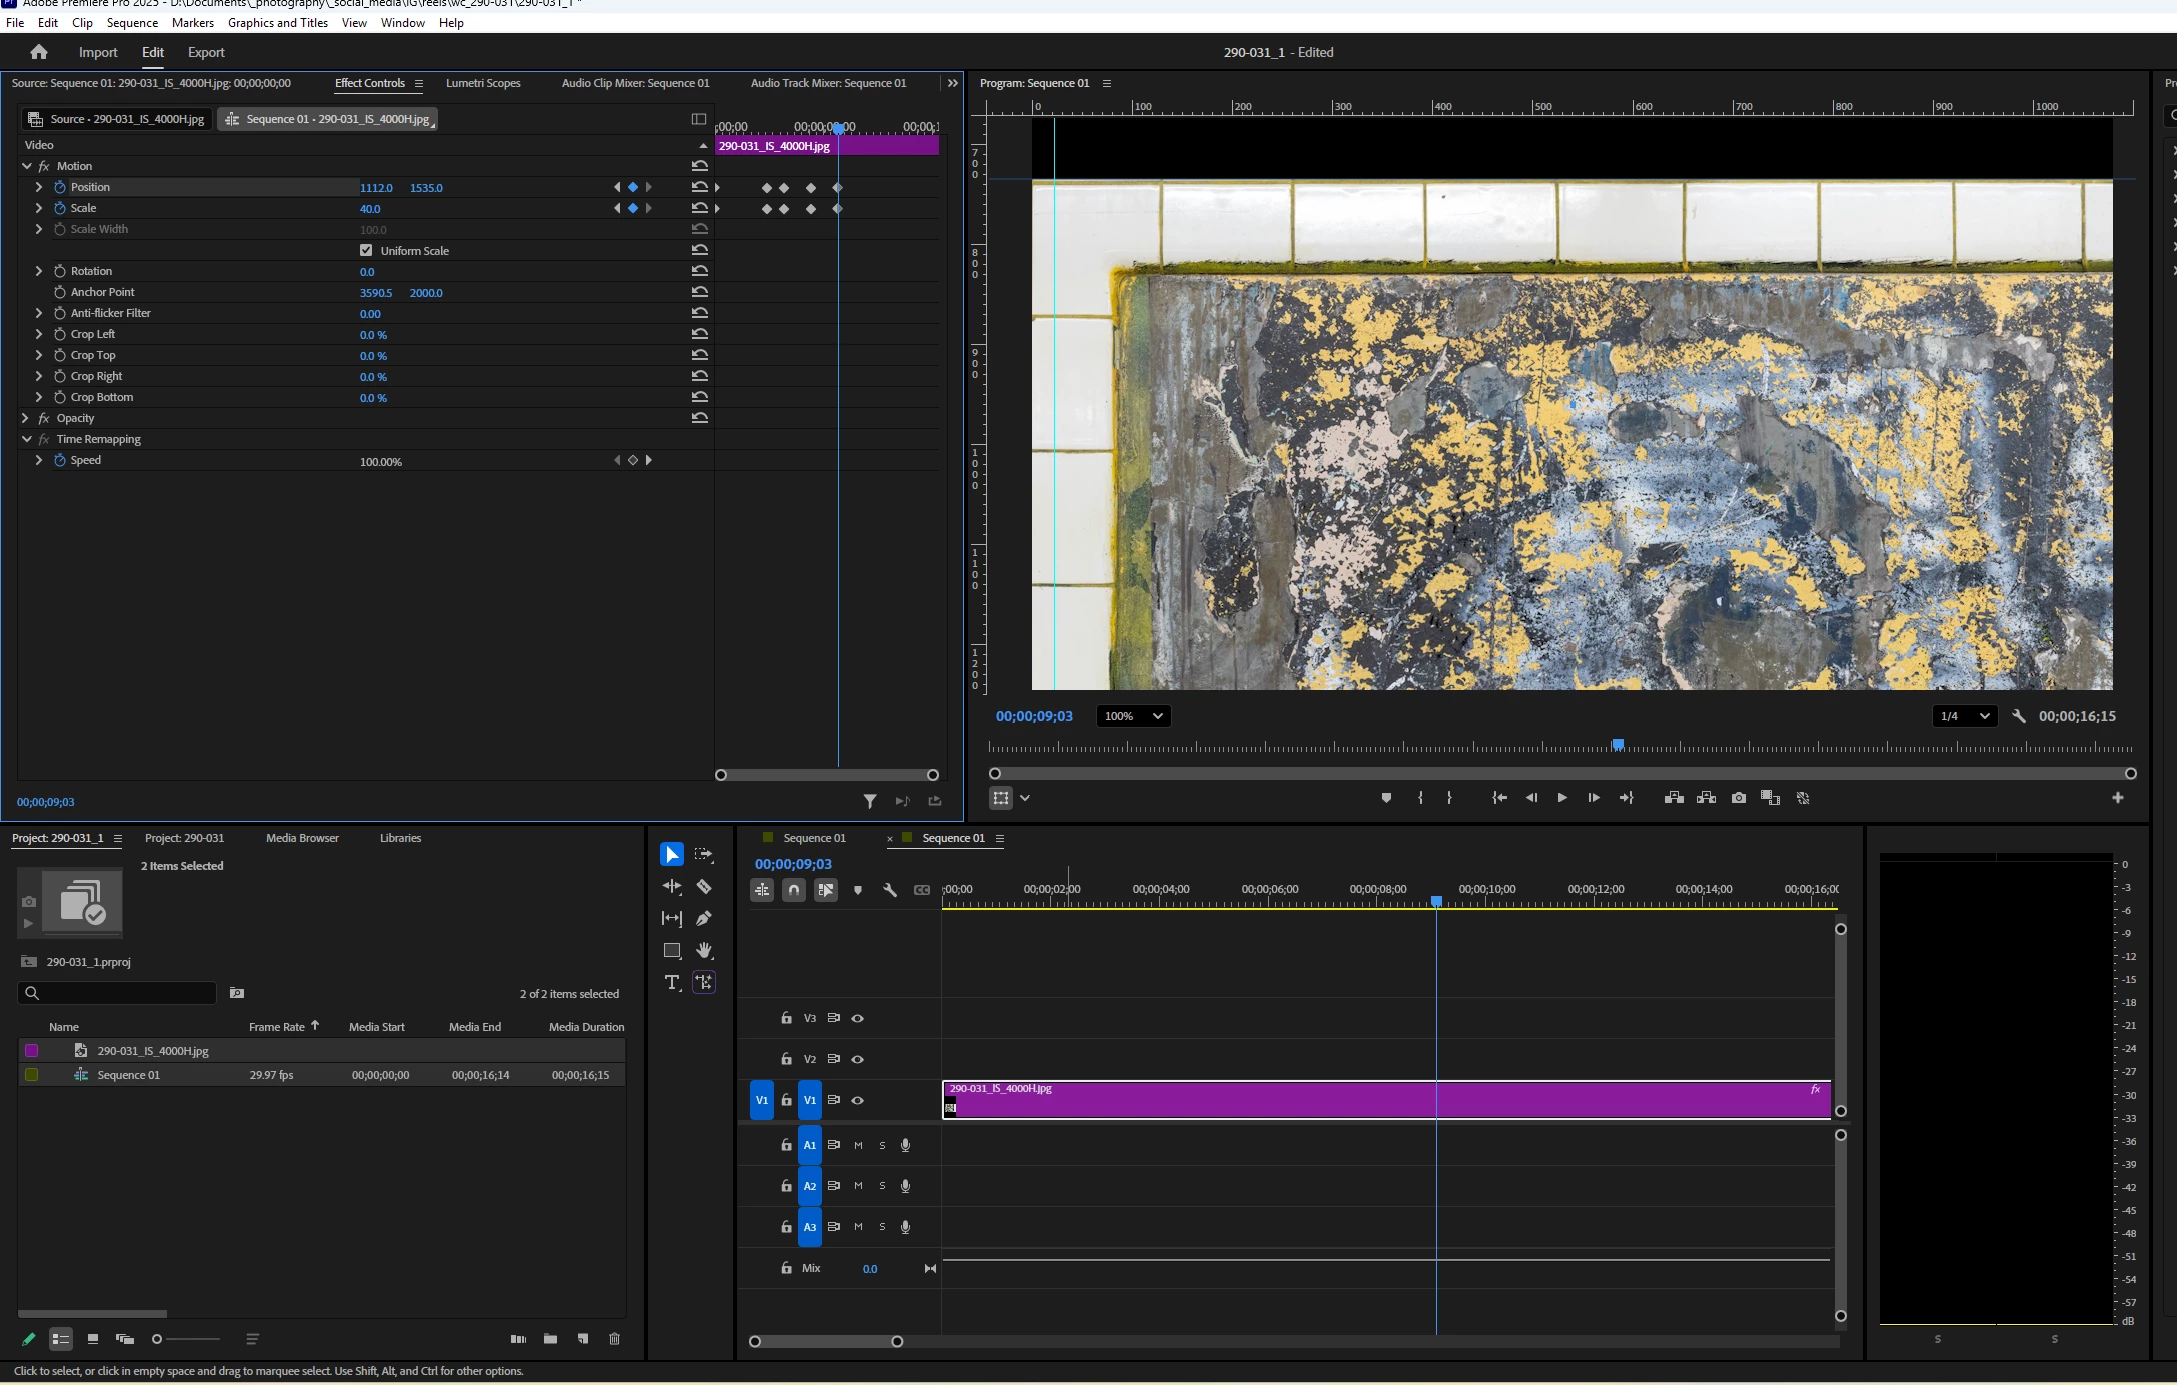
I double-clicked on the footage in the Program Monitor while the Selection Tool was active to see my motion path and anchor point, but they're not showing up.  Why?  I want to zoom out slightly while centered - and in my 2d screenshot have reset Scale from 50% to 40% - but how do I recalculate my anchor point so that it's at the center of the previous keyframe?  In other words, between the last 2 sets of keyframes, I only want to scale - not pan L to R or up and down.  In the 2d screenshot, the image has drifted up towards the left top of frame.  I don't want that.  Thanks for your help!  


Correct answer Warren Heaton

To see the Motion Path and the Anchor Point, zoom out in the Program panel.  You can do this by hovering your mouse over the picture and using a middle mouse button or clicking the Magnificaiton pop-up menu at the lower left.

2 replies

Warren Heaton
Community Expert
Warren HeatonCommunity ExpertCorrect answer
Community Expert
September 24, 2025

To see the Motion Path and the Anchor Point, zoom out in the Program panel.  You can do this by hovering your mouse over the picture and using a middle mouse button or clicking the Magnificaiton pop-up menu at the lower left.

caroline_edits
Community Manager
Community Manager
September 23, 2025

Hey Barton, let's see how we can help. 

I've had a similar issue before! The most important thing for my workflow was to make sure the anchor point was adjusted where I want it before I started keyframing.


As for revealing your motion path – I see you have "Toggle direct manipulation" enabled in the bottom left of the Program monitor. That's usually what reveals/hides the motion path. Is your image zoomed in? Try changing the zoom from "100%" to "Fit" and see if it reveals the motion path. See screenshot attached to see where to change it.


Please let us know if you found your motion path controls.

Caroline

Inspiring
September 24, 2025

Thank you.  Zooming to Fit worked.  As to the other part of my question, it doesn't reflect sufficient knowledge or information to warrant an answer.  In an earlier post I had with @LarryJordan and a follow-up exchange of emails, I learned that panning around an image, zooming in and out at different locations was difficult to achieve using one clip, and I had to break up the clips.  I was also hindered by an imperfect understanding of the process.  Now, I'm creating animations to see how Anchor Points and repositioning images work in tandem.  I'm extremely grateful to all the generous people on this platform, including especially and most recently @Conrad_C and @Warren Heaton10841144 for their time and knowledge.  

caroline_edits
Community Manager
Community Manager
September 24, 2025

Glad we've all been able to help! One more tip about zooming in and out. The latest version of Premiere has many new transitions and effects available. If you go to the Effects panel, open "Video Effects" and then open "Film Impact Motion FX" you will see effects to "Grow" and "Shrink."


If you drag and drop that to a clip it will automatically zoom in or out of your image depending on which effect you picked. These are new, so I wanted to make sure you knew the effects are there for you if you need them!


Let us know if there's anything else.

Caroline