
Discuss: Mask Only Fill for Text and Shape Layers
Premiere Pro has supported using Text and Shape Layers as masks for several versions now. With this new feature, users will be able to apply a mask only to a layer's fill, allowing the strokes and shadows to render without being part of the mask.
How to use the feature:
1. Create a Text or Shape Layer
2. With your Text or Shape Layer selected, check on "Mask with Text" or "Mask with Shape" under the Appearance section of the Essential Graphics Panel.
3. With your layer still selected, check on the box for "Mask Only Fill"
4. Add one or more Strokes and/or Shadows to your layer and see that they are excluded from the Mask. This means that only the fill area is revealing things below.
Also try importing a textural image or video and add it as a clip layer at the bottom of your Graphic's layer stack.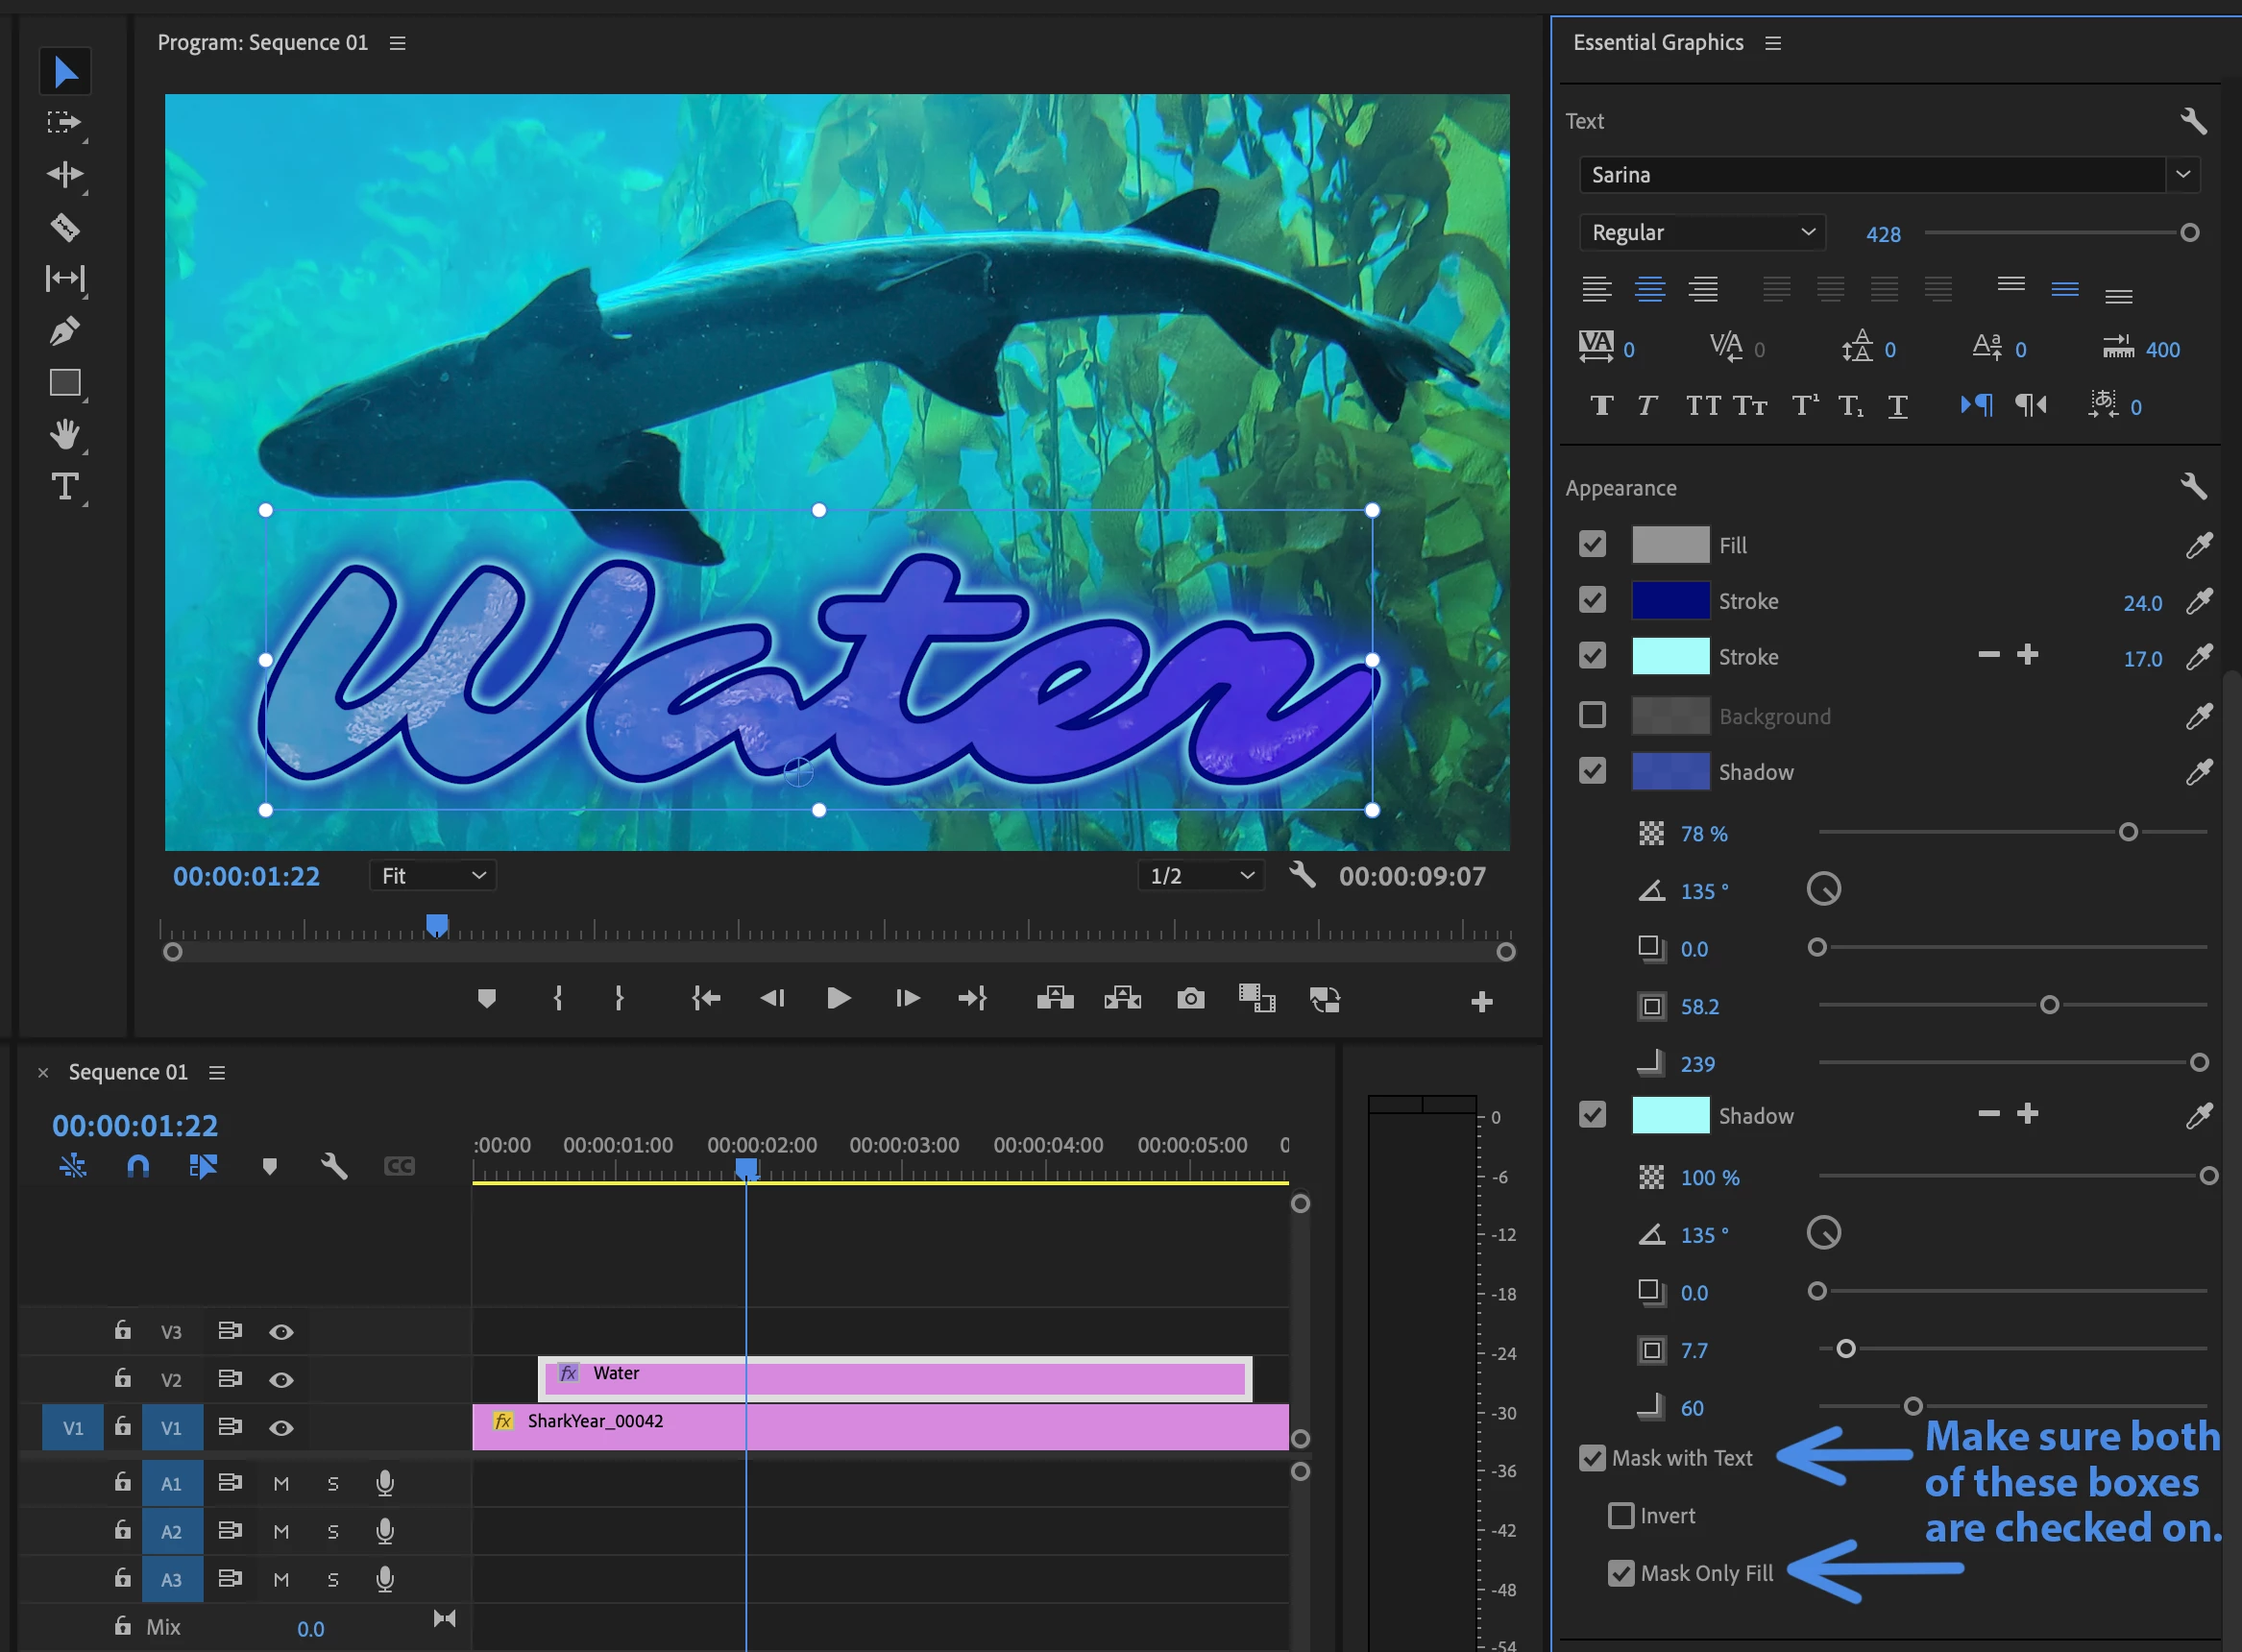
Create a gradient fill that spans across an entire Text Layer:
1. Create a Text Layer. (Here I used Chinese text for "nihao" or hello)
2. Check on Mask with Text and Mask Only Fill for the Text Layer.
3. Create a Shape Layer and put it behind the Text. Make sure it is bigger than the text.
4. Give the Shape Layer a Linear Gradient Fill.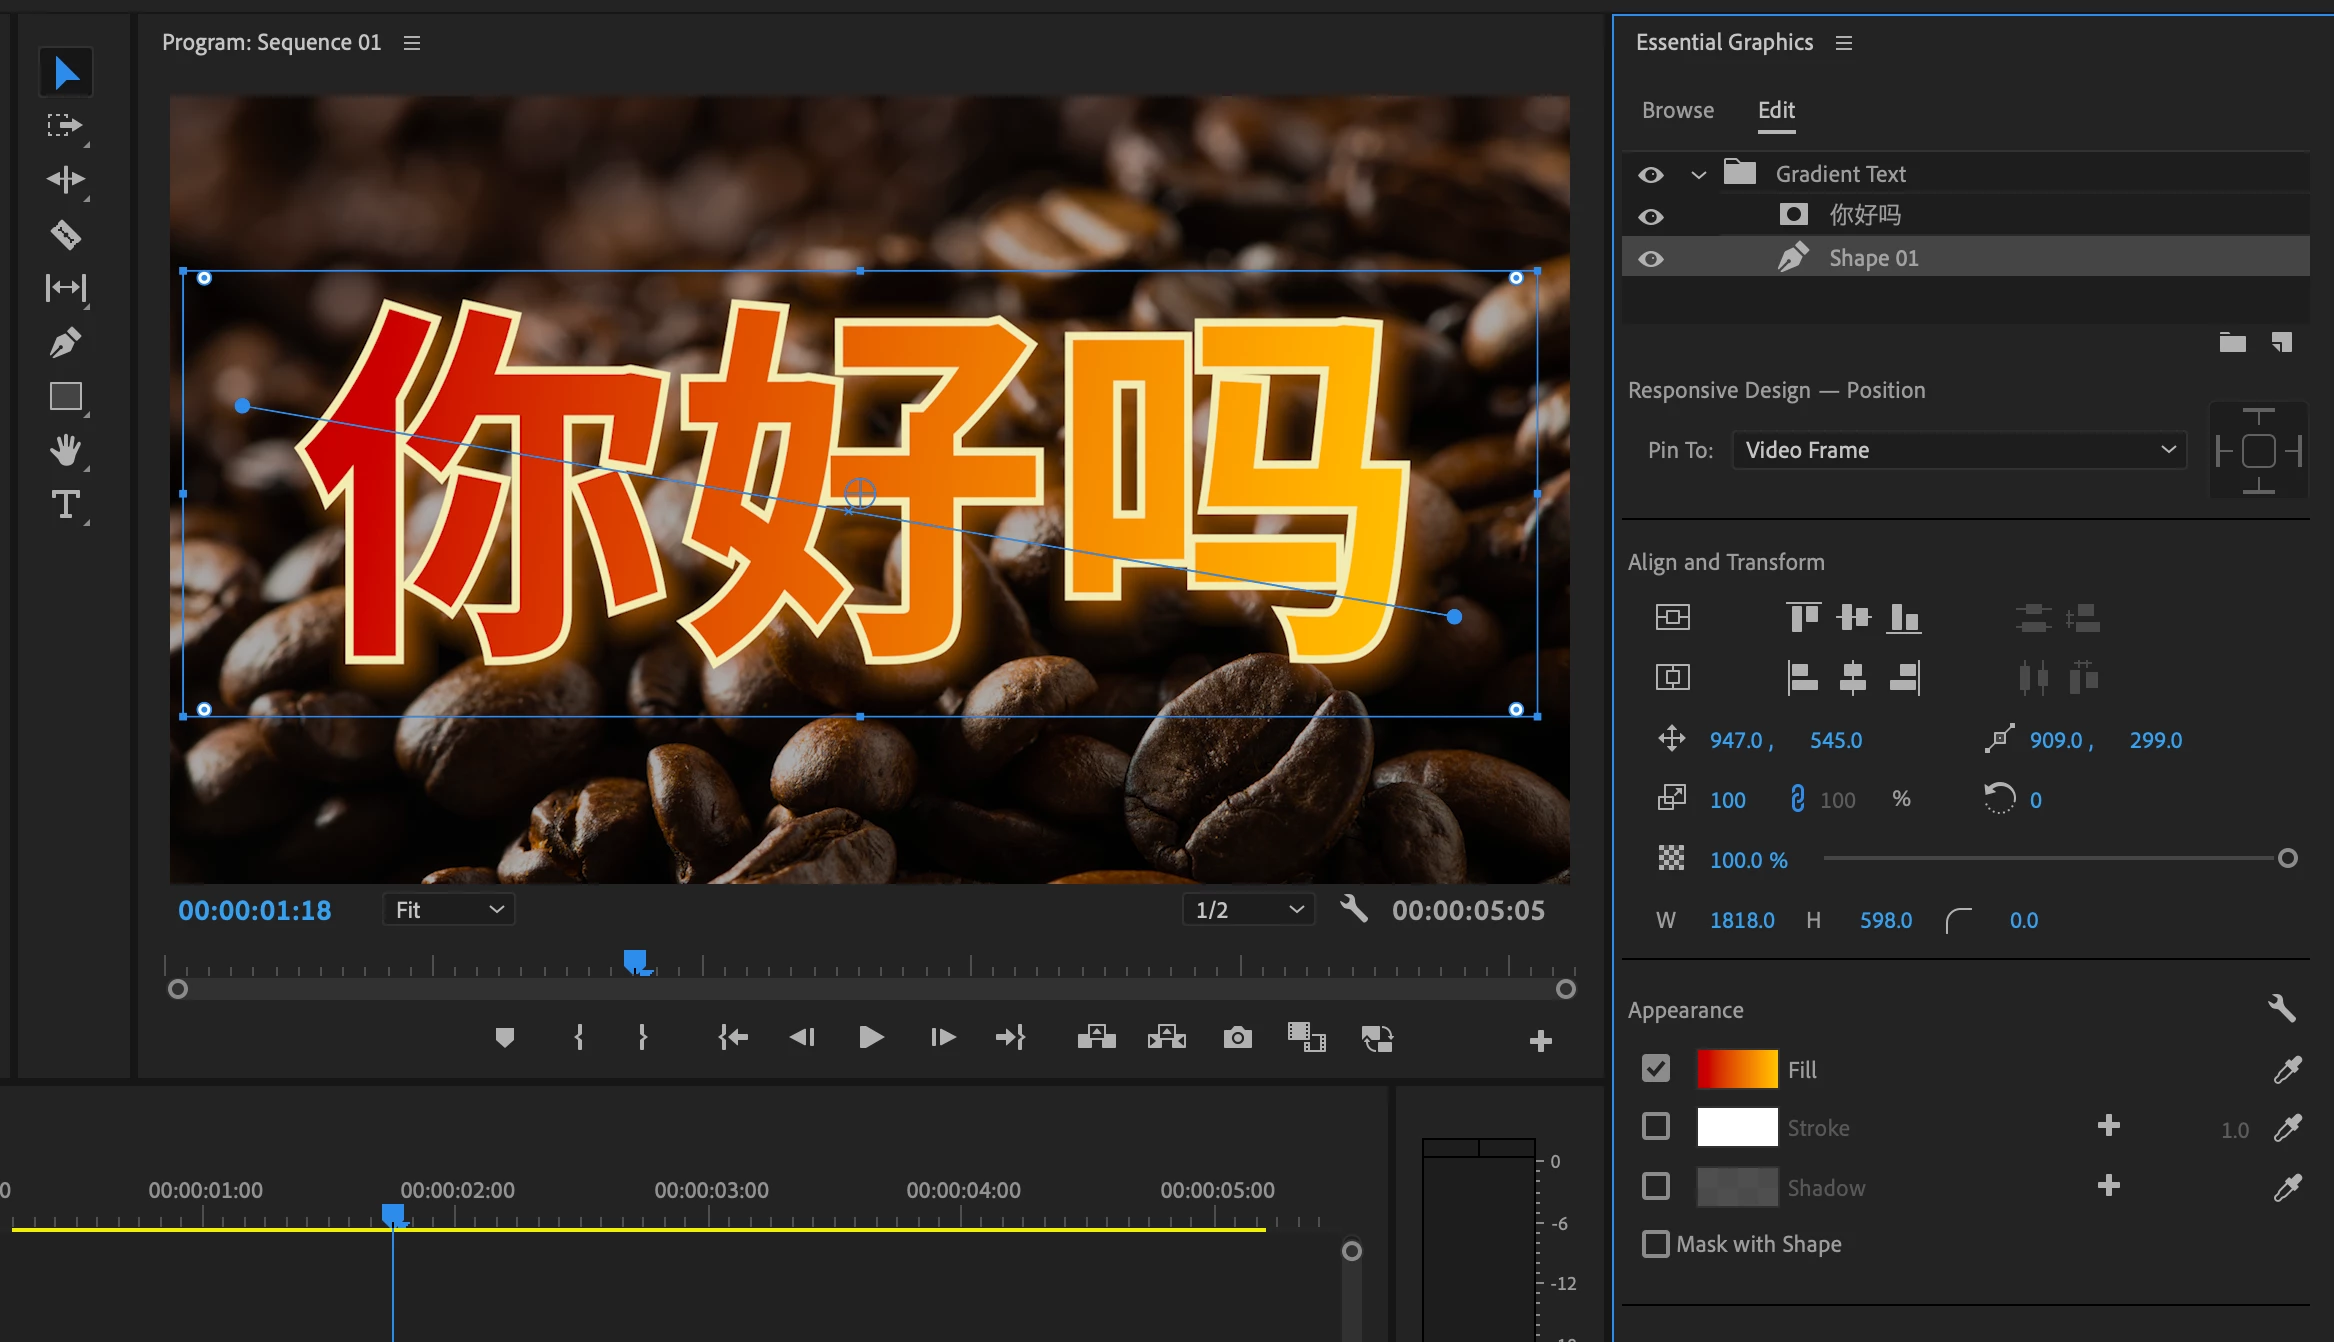
Use multiple layers beneath a mask to build up a rich effect within a single Graphic:
1. Create a Text Layer. I used some beautiful Japanese characters as the masking Text.
2. Check on Mask with Text and Mask Only Fill for the Text Layer.
3. Give the Text Layer a Stroke and a Shadow. I used a dark blue stroke and a blue-gray shadow with 0 distance.
4. Import a textural image with transparency and add it to the Graphic. I animated its Rotation a little to make it slowly move beneath the Text Layer.
This example video uses Mask Only Fill over other layers within a single Graphic.
5. Create a Shape and put it at the bottom of the layer stack.
6. Make the Shape's fill the same color as the Text's stroke, but give it a 50% opacity value
https://youtu.be/gKthoCO82BE
