nermie
Known Participant
February 28, 2018
Answered

How to set out a Book Cover with Indesign, including spine and inside F&B pages

  • February 28, 2018
  • 2 replies
  • 61969 views

Hi,

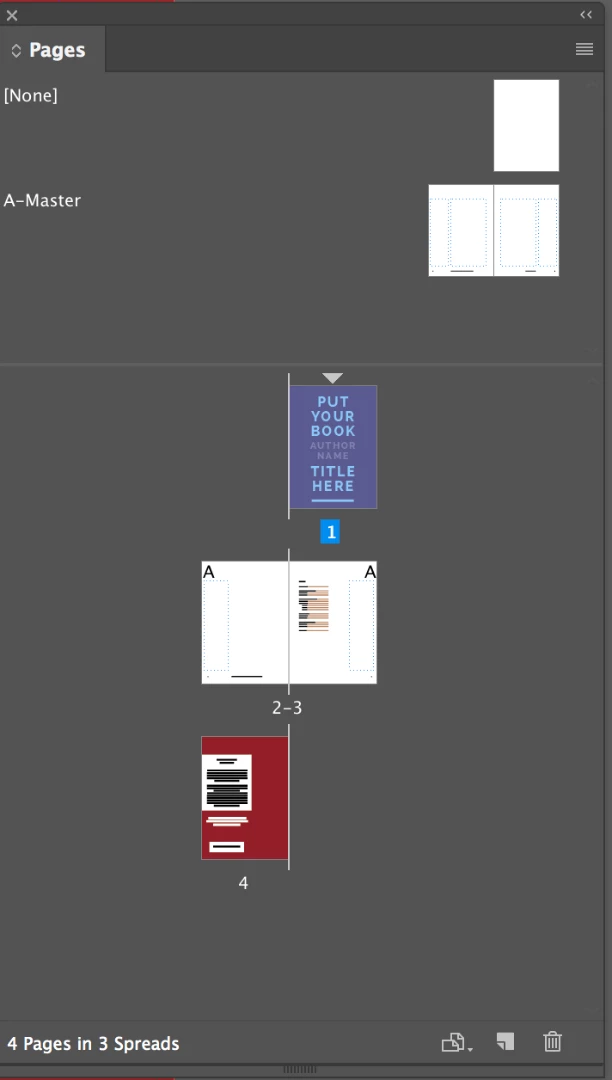
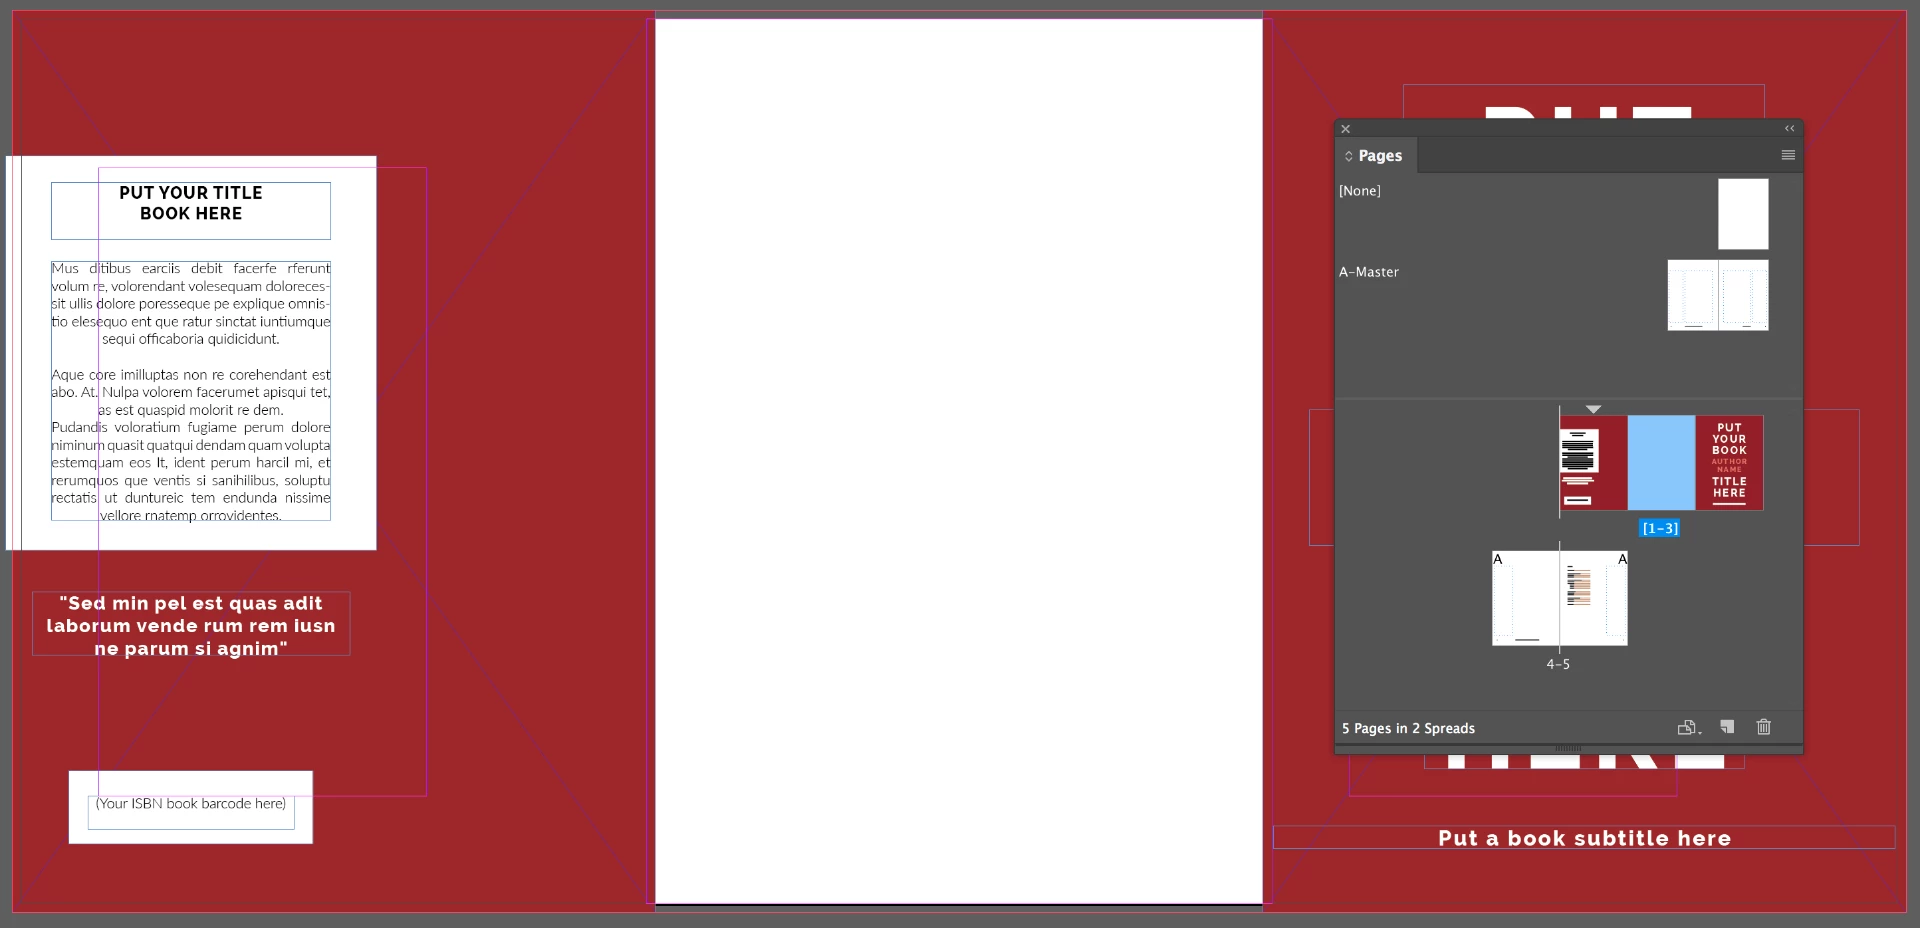
I have been using an Indesign Book Cover template that includes the Front and back covers plus the Front and back inside covers. It is a 4 page template, with page 1 being front cover, page  2 inside front  page 3 inside back and page 4 the back cover.4

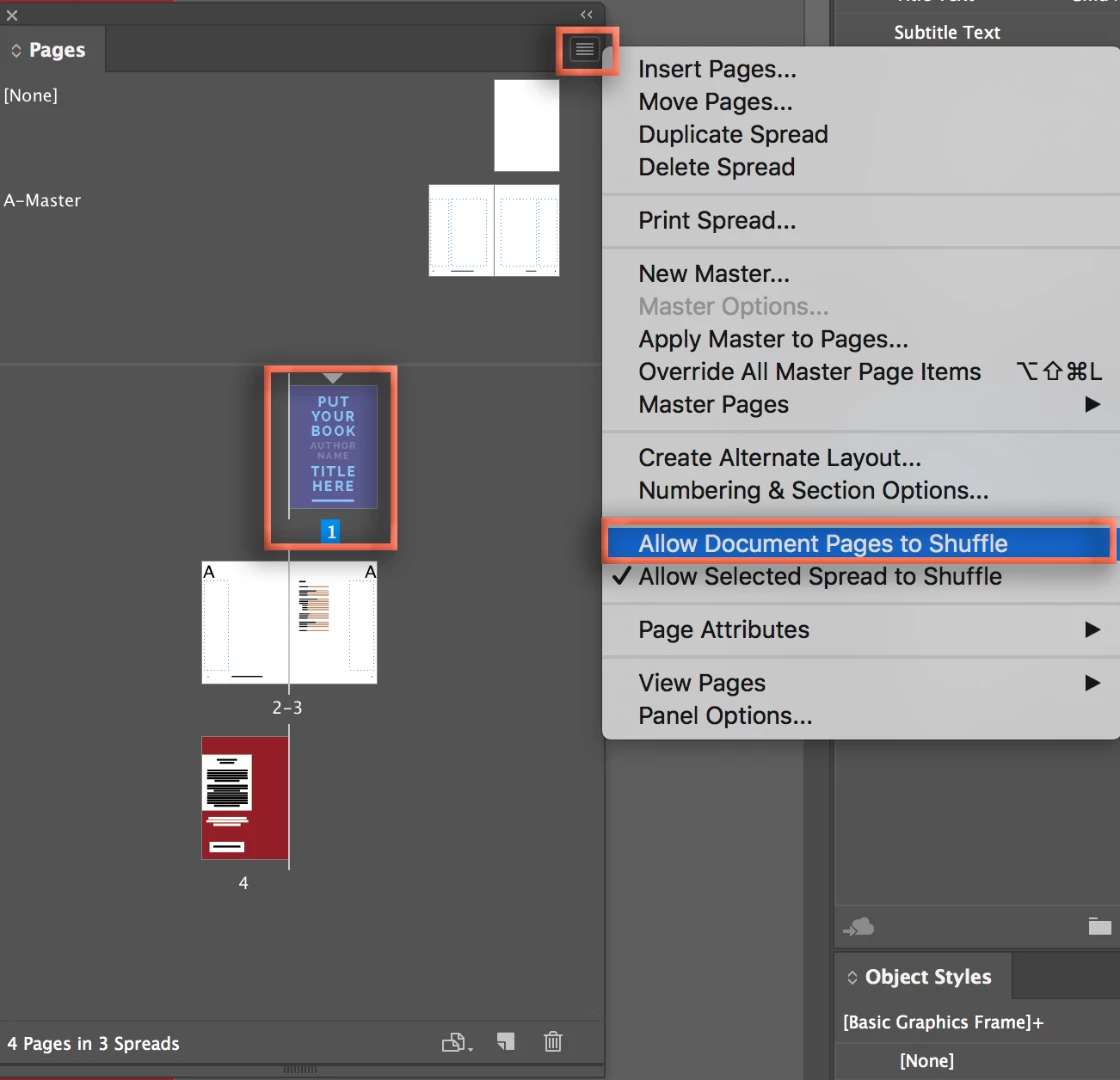
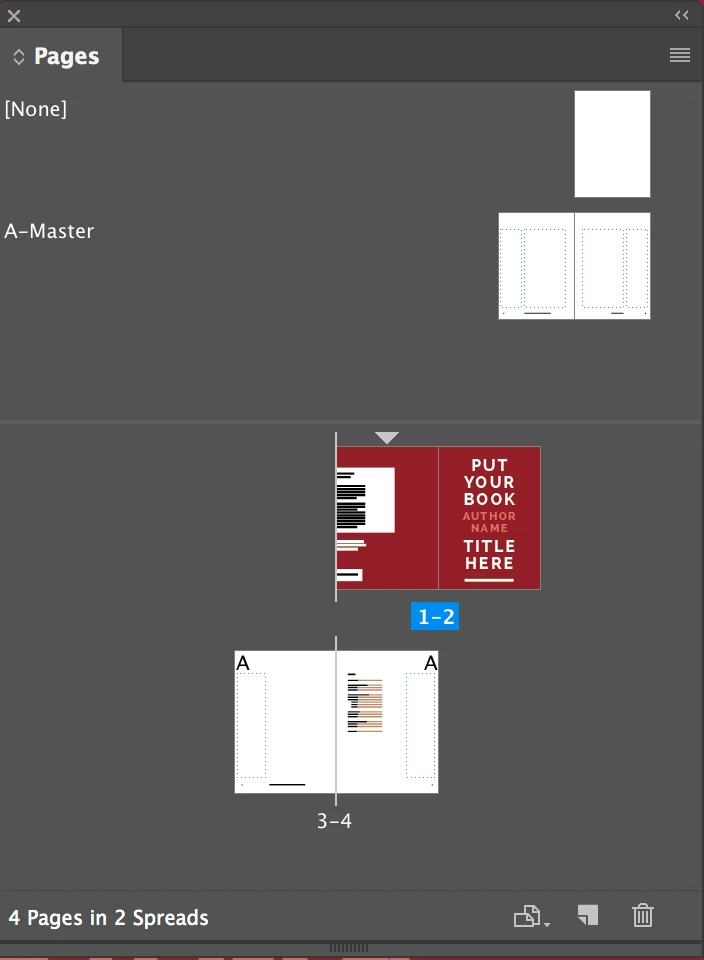
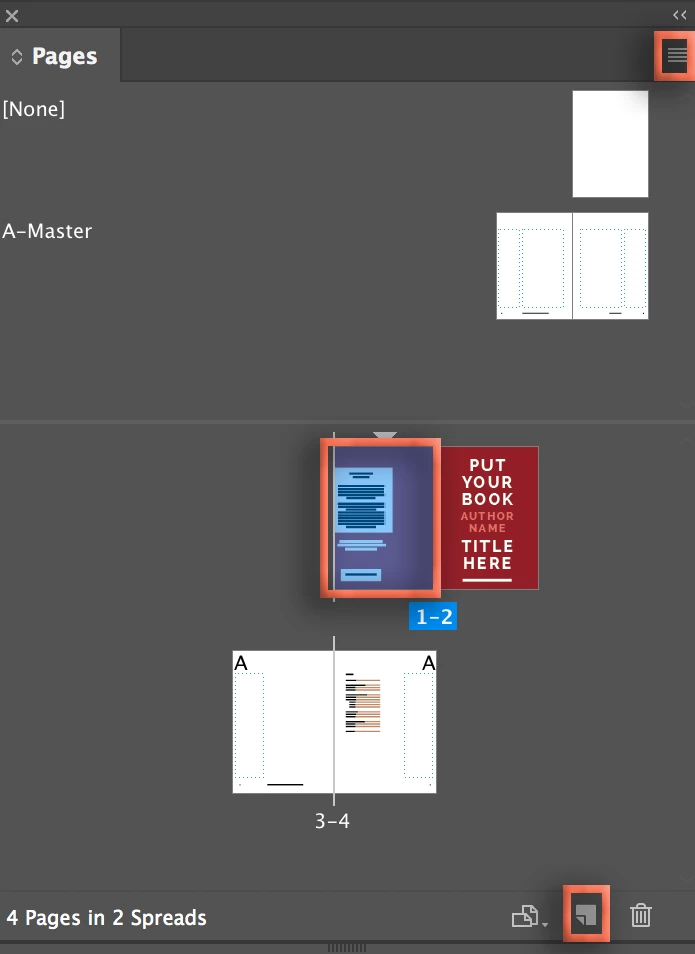
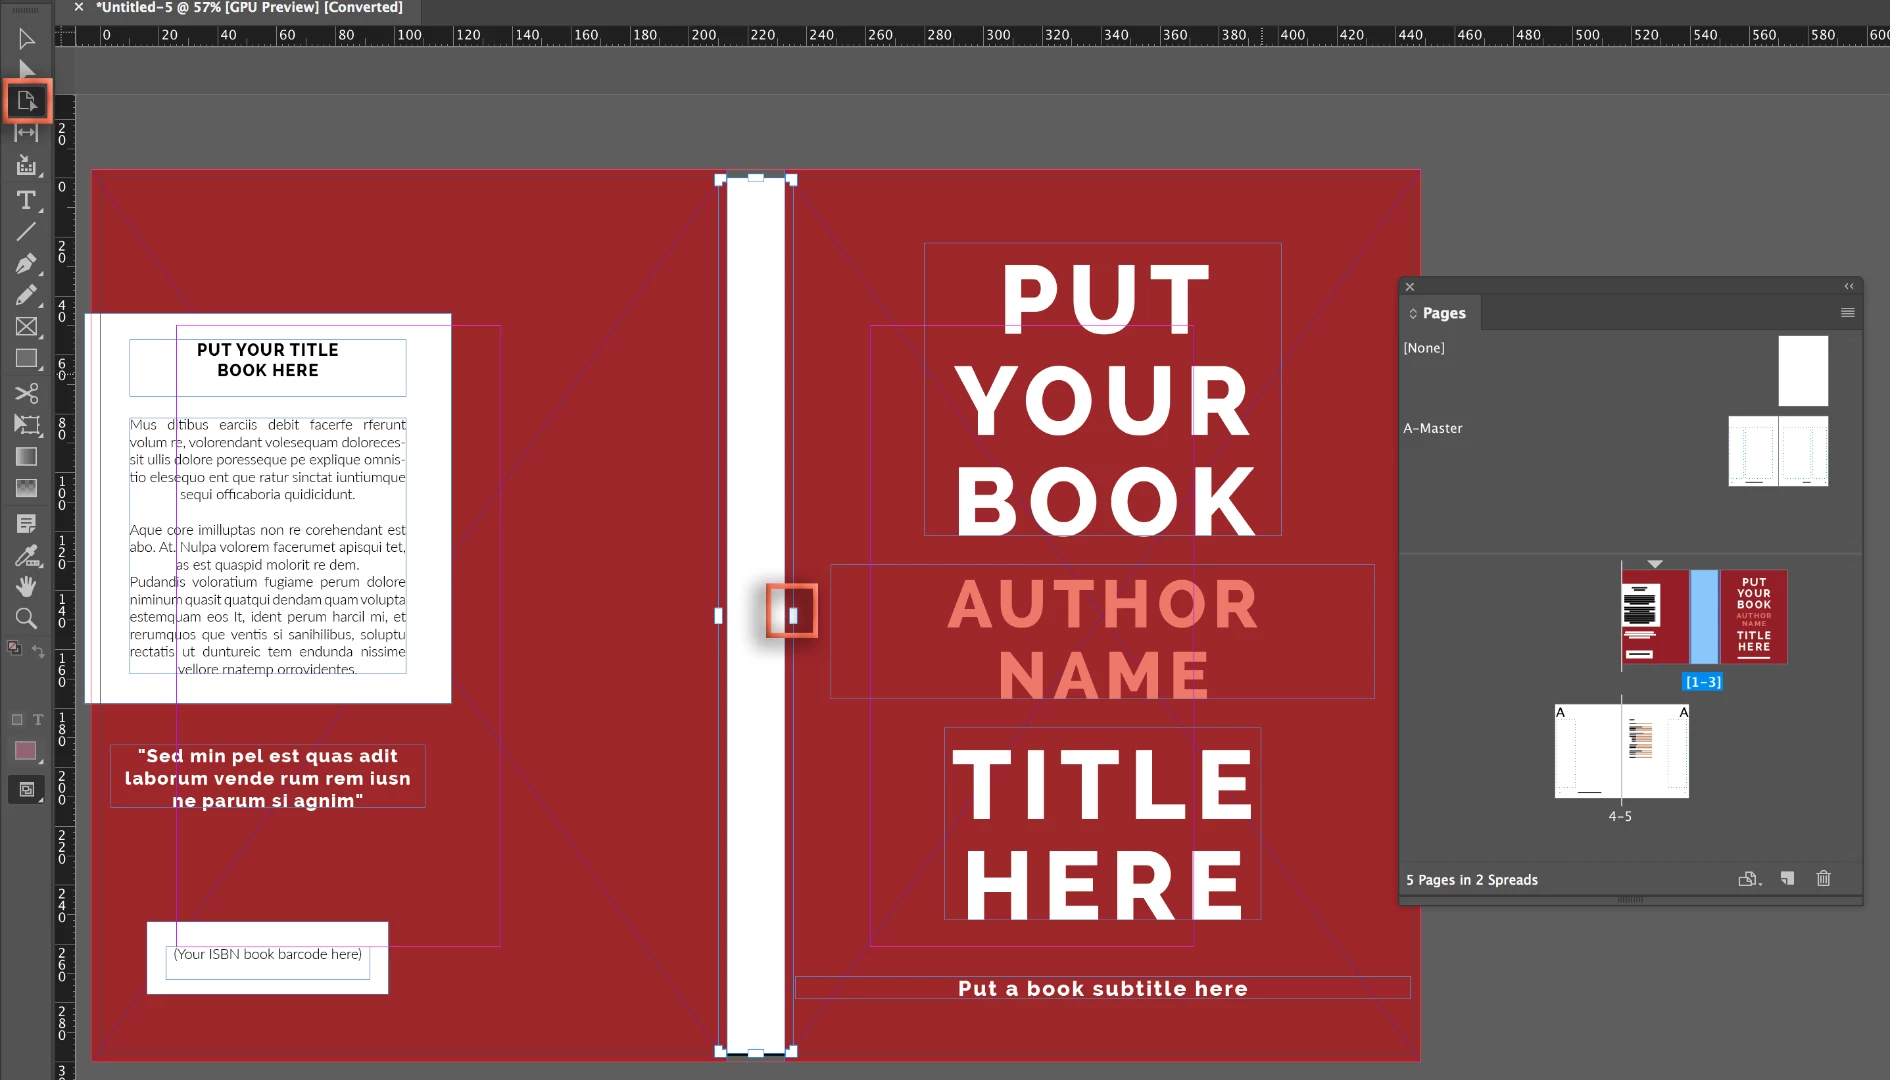
What I am needing help with is that I want to expand the template so that I can add a spine to the book cover.

All the guides and help videos I have seen show only a 3 page spread to do this with page 2 as the spine.

Can anyone show me a video tutorial of how I can set up a cover with a spine and also include pages for the front and back inside and outside pages.

Thank You

This topic has been closed for replies.
Correct answer Barb Binder

Your printer can handle this for you or...

Starting here:

Select page 1 and uncheck Allow Document Pages to Shuffle.

Drag page 4 in front of page 1.

Select the back cover page. Uncheck Allow Selected Spread to Shuffle from the panel menu, then click the Create New Page button.

Result

Using the Page tool in the tool box, hold Alt/Opt to resize the new page to the desired size for the spine.

~Barb

2 replies

Barb Binder
Community Expert
Barb BinderCommunity ExpertCorrect answer
Community Expert
February 28, 2018

Your printer can handle this for you or...

Starting here:

Select page 1 and uncheck Allow Document Pages to Shuffle.

Drag page 4 in front of page 1.

Select the back cover page. Uncheck Allow Selected Spread to Shuffle from the panel menu, then click the Create New Page button.

Result

Using the Page tool in the tool box, hold Alt/Opt to resize the new page to the desired size for the spine.

~Barb

~Barb at Rocky Mountain Training
nermie
nermieAuthor
Known Participant
February 28, 2018

Thank You.

Exactly what I was looking for.

Barb Binder
Community Expert
Community Expert
February 28, 2018

That's great news, nermie. Glad we could help.

~Barb

~Barb at Rocky Mountain Training
Community Expert
February 28, 2018

Hi nermie ,

is it a facing pages document or a non-facing one?

I would do two spreads with 3 pages each in a facing pages document.

Result:

( from my German InDesign )

Why a facing-pages document?
Because if you want to change the width of the spine you can do that easily with the Page Tool and the adjacent pages will automatically snap. Not so in non-facing pages documents.

To achieve that you would start with a new facing pages document with:

Number of pages: 6

Start page number should be an even page, let's say 2.

Important: Set margins to 0.

The pages on spread one are for back cover and spine.

The pages on spread two are for cover and cover page 2.

The pages on spread three are for spine and cover page 3.

Before doing anything else select all pages in the Pages Panel and set Allow Pages To Shuffle to false.

Use the menu that is behind the little triangle in upper right corner of the tab saying "Pages".

Now the page numbers in the Pages panel should read like that:

[ 2-3 ]

[ 4-5 ]

[ 6-7 ]


Next step is to change the width of the pages for the spine as you wish using the Pages Tool.

Here I set the pages for the spine to width: 30 mm. Page 3 and page 6 in this document.

Then you'll move pages around leaving two spreads in the document instead of three.

Important: Move and drag pages around in the Pages panel only. Do not try this with the Pages Tool.

Page 6 and 7 moved to right of page 5 in spread two.

Page 4 moved to the left of the spine of the same spread ( optional ).

Page 3 moved to the right of page 2 in spread one:

Regards,
Uwe

nermie
nermieAuthor
Known Participant
February 28, 2018

Thank You,

also a perfectly correct answer and a clear solution to my issue.