• Global community
    • Language:
      • Deutsch
      • English
      • Español
      • Français
      • Português
  • 日本語コミュニティ
    Dedicated community for Japanese speakers
  • 한국 커뮤니티
    Dedicated community for Korean speakers
Exit
6

New in Beta: Shadow Catchers and Shadow Colors

Adobe Employee ,
Apr 12, 2024 Apr 12, 2024

Copy link to clipboard

Copied

Version 24.5x4 of After Effects Beta introduces support for two new 3D features in the Advanced 3D renderer: shadow catchers and shadow colors.


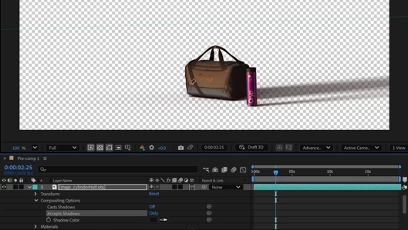
Shadow catchers are 3D layers that “catch” shadows cast by 3D models but are otherwise transparent. They’re a great way to make a 3D model look like it’s part of a 2D video or image.


Beta users can also customize a shadow’s color tint and opacity for a more realistic composite. Color can be set per-layer rather than per-light, which makes it possible to do things like cast pink-toned shadows on a model while the model casts blue shadows onto the ground. Shadow Color also works with shadow catchers. 


VictoriaNece_4-1712939682996.png


Getting Started

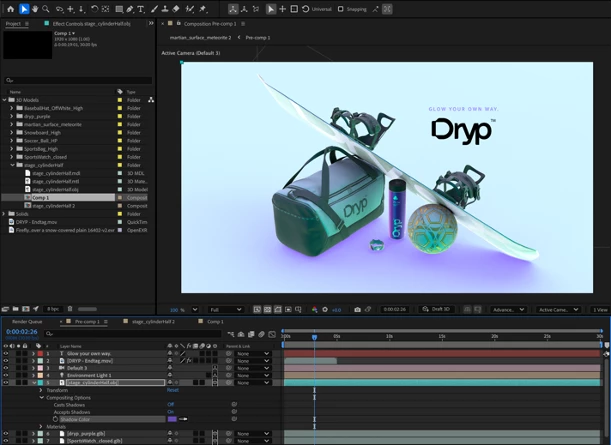
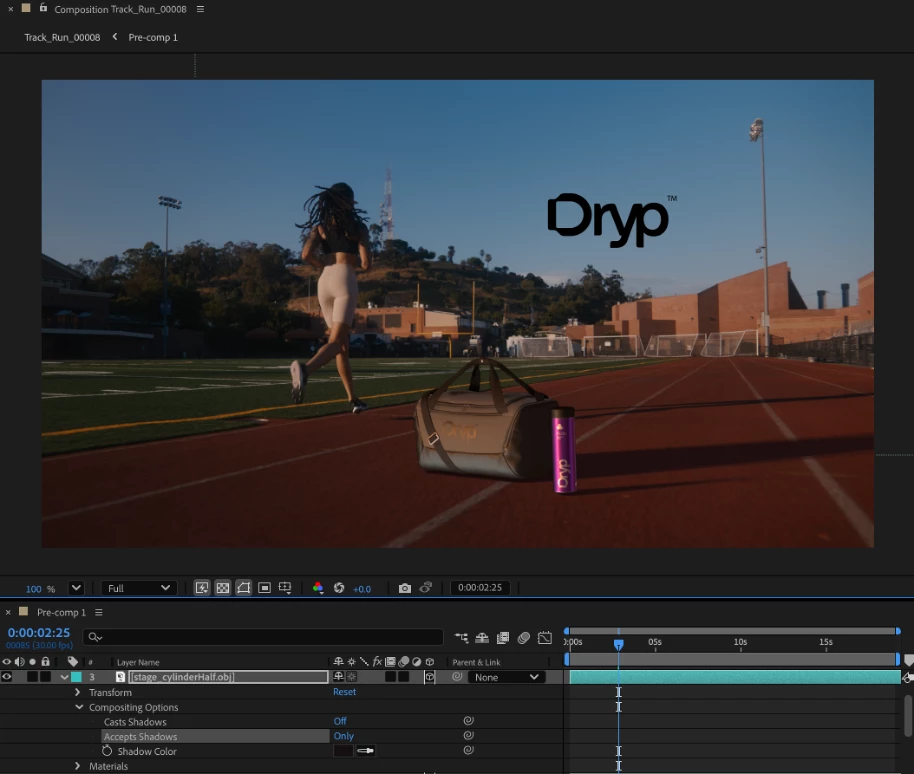
Shadow catchers and shadow colors work with any 3D layer that can accept shadows using the Advanced 3D renderer. The Accepts Shadows and Shadow Color properties can be found under Compositing Options for 3D model layers and Material Options for native AE 3D layers (3D text, shapes, solids).


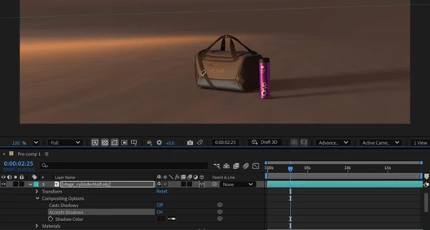
To create a shadow catcher, set your 3D layer to Accepts Shadows – Only. This mode renders shadows cast by other 3D layers over an otherwise-transparent layer, allowing for the seamless integration of 3D objects into a 2D scene.


VictoriaNece_0-1712939567997.png

VictoriaNece_1-1712939580656.png


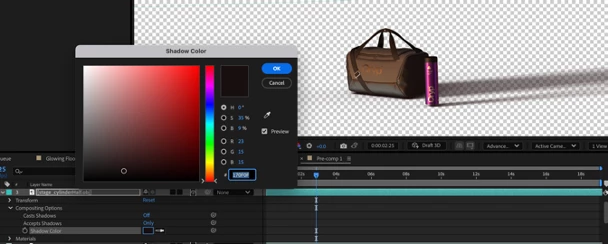
To change the color of a shadow, adjust the Shadow Color property to give your shadows a more natural or creative hue. Shadow Color defaults to black, but real-world shadows are rarely true black and even subtle shifts in tone can create a much more realistic composite.


VictoriaNece_3-1712939662635.png


VictoriaNece_2-1712939611002.png


You can adjust shadow quality and where shadows are cast in Advanced 3D’s Renderer Options.


Known Issues and Feature Limitations

  • Shadow Colors are not currently retained when round-tripping projects between beta and release versions of After Effects and back.
  • Shadows cast onto shadow catchers are not visible if the shadow catcher layer is referenced in an effect or used as a luma-based Track Matte.
  • Multiple overlapping (coplanar) shadow catchers may result in artifacting.
  • Shadow properties cannot be used as Essential Properties.
  • If shadows disappear, you may need to reset the shadows’ Casting Box in Renderer Options. Let us know if this is an issue for you.


Please give these new options a try; we're looking forward to your feedback (and to seeing your projects)!

TOPICS
Feature request , Feedback

Views

1.0K

Translate

Translate

Report

Report
Community guidelines
Be kind and respectful, give credit to the original source of content, and search for duplicates before posting. Learn more
community guidelines
Explorer ,
Apr 14, 2024 Apr 14, 2024

Copy link to clipboard

Copied

Only Environment lights cast shadows in the Advanced Renderer? I'm not seeing any shadow with other lights. They work as expected in the Classic renderer though...


Votes

Translate

Translate

Report

Report
Community guidelines
Be kind and respectful, give credit to the original source of content, and search for duplicates before posting. Learn more
community guidelines
Adobe Employee ,
Apr 17, 2024 Apr 17, 2024

Copy link to clipboard

Copied

That's correct, only Environment lights for now with Advanced 3D. 

Votes

Translate

Translate

Report

Report
Community guidelines
Be kind and respectful, give credit to the original source of content, and search for duplicates before posting. Learn more
community guidelines
New Here ,
Apr 21, 2024 Apr 21, 2024

Copy link to clipboard

Copied

I have this composition, but I'm not able to see the shadows in Beta 24.5
NoShadows.png

Votes

Translate

Translate

Report

Report
Community guidelines
Be kind and respectful, give credit to the original source of content, and search for duplicates before posting. Learn more
community guidelines
Explorer ,
Apr 21, 2024 Apr 21, 2024

Copy link to clipboard

Copied

Is the Dino layer set to Cast Shadows? It doesn't appear to have an hdr chosen in the Environment light Source but maybe that's not needed with .glb... not sure.


Votes

Translate

Translate

Report

Report
Community guidelines
Be kind and respectful, give credit to the original source of content, and search for duplicates before posting. Learn more
community guidelines
New Here ,
Apr 21, 2024 Apr 21, 2024

Copy link to clipboard

Copied

Hi, I added an enviroment, but not shadows yet, The dino and the solid changed its colors but not shadows yet.
NoShadows2.png

Votes

Translate

Translate

Report

Report
Community guidelines
Be kind and respectful, give credit to the original source of content, and search for duplicates before posting. Learn more
community guidelines
Adobe Employee ,
Apr 21, 2024 Apr 21, 2024

Copy link to clipboard

Copied

Check that your dino is inside the Casting Box in your Renderer Options.

Votes

Translate

Translate

Report

Report
Community guidelines
Be kind and respectful, give credit to the original source of content, and search for duplicates before posting. Learn more
community guidelines
New Here ,
Apr 21, 2024 Apr 21, 2024

Copy link to clipboard

Copied

Casting Box??? where can I found that??


Votes

Translate

Translate

Report

Report
Community guidelines
Be kind and respectful, give credit to the original source of content, and search for duplicates before posting. Learn more
community guidelines
Explorer ,
Apr 21, 2024 Apr 21, 2024

Copy link to clipboard

Copied

Advanced Renderer options 

JohnDickinson3D_0-1713746577451.png


Votes

Translate

Translate

Report

Report
Community guidelines
Be kind and respectful, give credit to the original source of content, and search for duplicates before posting. Learn more
community guidelines
New Here ,
Apr 21, 2024 Apr 21, 2024

Copy link to clipboard

Copied

what should I do to see that windows??
in that windows how can I see if the dino is inside, what should I see??


Votes

Translate

Translate

Report

Report
Community guidelines
Be kind and respectful, give credit to the original source of content, and search for duplicates before posting. Learn more
community guidelines
New Here ,
Apr 21, 2024 Apr 21, 2024

Copy link to clipboard

Copied

How can I know that, comparing the coordinates of the dino and the casting box?
Should the dino's coordinates be within the ranges of the casting box? Thanks

Votes

Translate

Translate

Report

Report
Community guidelines
Be kind and respectful, give credit to the original source of content, and search for duplicates before posting. Learn more
community guidelines
Explorer ,
Apr 21, 2024 Apr 21, 2024

Copy link to clipboard

Copied

It appears as a pink dotted box in the comp panel 

JohnDickinson3D_0-1713747535793.png


Votes

Translate

Translate

Report

Report
Community guidelines
Be kind and respectful, give credit to the original source of content, and search for duplicates before posting. Learn more
community guidelines
New Here ,
Apr 21, 2024 Apr 21, 2024

Copy link to clipboard

Copied

Thanks a lot. It's working. Thanks


Votes

Translate

Translate

Report

Report
Community guidelines
Be kind and respectful, give credit to the original source of content, and search for duplicates before posting. Learn more
community guidelines
New Here ,
Apr 21, 2024 Apr 21, 2024

Copy link to clipboard

Copied

I have an other questions for you guys. Is there a way to remove the grains from the shadow and make it look like the child's shadow?

Votes

Translate

Translate

Report

Report
Community guidelines
Be kind and respectful, give credit to the original source of content, and search for duplicates before posting. Learn more
community guidelines
Adobe Employee ,
Apr 23, 2024 Apr 23, 2024

Copy link to clipboard

Copied

Increase the shadow smoothness in the same settings box to reduce noise. Higher smoothness settings will slow down rendering, so you'll want to increase this a bit at a time.

Votes

Translate

Translate

Report

Report
Community guidelines
Be kind and respectful, give credit to the original source of content, and search for duplicates before posting. Learn more
community guidelines
Explorer ,
Jun 23, 2024 Jun 23, 2024

Copy link to clipboard

Copied

To get the Advanced Renderer option open the "Advanced" drop down list and choose Renderer Options. You can choose "Fit to Scene" as the easist way to set size of the Casting Box.  if that doesn't work, close the Advanced 3D Render Options by clicking on OK.  Then, open two views and set one of the views to TOP.  You will see the Casting Box in red with the Environment Light layer selected.  Then, open the Advanced Render Options again and use the Casting Box Center x, y, z coordinates to reposition the casting box around the area where the 3d object and Shadow Catcher are located.  Click OK and return to one view (Active Camera), resize to FIT and you should see the shadow now.  PS:  I had the same problem but eventually figured this out.  PS:  Rendering time increase dramatically with the Environment Light on so you might want to turn the visibility off for preview rendering to check animation. Here's part of a tutorial I've started working on:


ANIMATING A GLB FORMAT CAR IN AE

  1. Add the “GLB” format model to the timeline… this will change the renderer from the “default”  Classic 3D Renderer to the Advanced Renderer.  The problem is that the Advanced Renderer doesn’t support Blending Modes or Effects.
  2. Select the Model and choose Pre-Compose to “move” the 3D model into another composition.  Name it, something like CAR or Mercedes, etc., so you know what’s in the newly created composition.
  3. Select the “track solid” that you will be using as a shadow catcher, the 3D Tracker Camera AND the PLATE  and “Copy” them using Ctrl + C.
  4. Open the “pre-comped” composition, I’ll call it the Mercedes Composition and paste the copied  layers into the pre-comp. (Ctrl + V)
  5. Animate the CAR Model.
    1. Move the Anchor Point of the Car model so that it is placed over the rear axle of the car.  This will allow the car to turn more realistically.  Do this in the Top View with the Car object layer selected.
    2. Confirm that the Car is oriented in the same direction of the motion/or path.  It it isn’t, it will appear to be sliding sideways.  Even a little bit can ruin the realistic appearance of the moving car.
    3. The car needs to be moving forward during a turn.  Depending on how sharp the car is turning, adjust how far the car moves forward.  A sharper turn results in less forward movement.
      1.      Note that if you can’t see the Gizmo, toggle the Mask and Path Shape to turn it on in the viewport.
      2.      Creating a realistic looking turn is easiest to achieve in the Top View while also watching the Active Camera View.
    4. Remember to set “key frames” for the positioning and rotation of the car.
    5. Select Key Frames to change Keyframe Interpolation (right click on a keyframe) to change the Temporal and Spatial Interposition from Linear to Bezier so that a smooth curve can be created for a turn.
    6. If desired, can also apply Easy Ease to Keyframes for realistic starting and stopping motion, unless you want a “hard” stop as would be the case if the Car slams the brakes on quickly.
  6. Downside of using MLB format files in AE.
    1. Can’t be edited easily.  Can do some editing in Blender or 3DS, etc but that’s kind of defeating the purpose of using simple models.
    2. Only the entire  model can be animated, not its individual components, like rotating or turning tires on a car to match the cars motion.
    3. Tilt if the car’s body that occurs when a car starts and stops or turns also can’t be achieved with the GLB models because a tilt up or down would also raise the front tires up above or down below the “ground” surface.   A tilt to the side during a sharp turn would also do the same thing to both of the tires on one side.  If you want to create a more realistic start/stop/turn, a 3D program like Cinema 4D, 3DS Max or Blender, etc., would need to be used since the car’s frame could be tilted independently of the tires.
  7. Make sure the Shadow Catcher is under the car.
  8. Create an ENVIRONMENT LIGHT
    1. Review above about Lights and Shadows if you don’t see a shadow on the ground under the car.
    2. Make adjustment to the Environment Light for INTENSITY & SHADOW DARKNESS as desired to achieve a matching appearance to the shadows record in the Back Plate scene.
    3. Adjust the Advanced 3D Renderer Option as needed for Render Quality and Smoothness.
  9. If appropriate, adjust the Shadow Color for the Shadow Catcher.  Shadow Color defaults to black, but real-world shadows are rarely true black and even subtle shifts in tone can create a much more realistic composite.
  10. Confirm that the car’s tires appear to be in contact with the ground based on their contact with their shadows during the entire path of the animation.  If there is space between the bottom of the tire and the shadow, the car will appear to be floating above the road surface. 
  11. Also confirm that the tires are not being cut off by the “ground” because the car is sitting below the Shadow Catcher’s plane.
  12. Before returning to the original composition, turn off the visibility of the Back Plate layer in the Car Composition.  The Car Composition should now have on the car and its shadow over a transparent background (if you have the Transparency Grid Toggle set to Transparency).  You may also want to preview render the Car Composition so the rendering goes faster in the original composition.

Return to the original composition…

Check to see that the car and shadow appear correctly in the scene.

FAST PREVIEW

To really see how realistic the movement of 3D models that have added appear, the scene needs to be preview rendered.  More often than not, the models motion paths and timing will need to be adjusted, not just once many times to achieve the most realistic appearing movement.  But that brings us to the most time consuming process… rendering.   Even with all the improvements, AE is still pretty slow when many effects are applied to a scene.  This is especially true with the new Environment Lighting.  While it can appear super realistic, it can take extremely long times to render.  Here are few tips that you can use to speed up rendering when just previewing for motion.

PREVIEW PREFERENCES

  • Purge All Memory and Disk Cache
  • Preferences > Previews> Adaptive Resolution  (1/6)

If just previewing to check MOTION, turn off Environment  Light.  But… must turn Environment Light back on to render shadows and realistic lighting for final render.

  • Lower Resolution to Quarter
  • Skip (1 or 2) Frames
  • Reduce Magnification of View

Votes

Translate

Translate

Report

Report
Community guidelines
Be kind and respectful, give credit to the original source of content, and search for duplicates before posting. Learn more
community guidelines
Adobe Employee ,
Jun 24, 2024 Jun 24, 2024

Copy link to clipboard

Copied

LATEST

A recommendation for your tutorial: try working in Draft 3D. It's a one-click way to get fast previews, instead of changing a whole bunch of settings. Draft 3D will automatically turn off slower features (shadows are really the big one -- Environment lights without shadows enabled are quite fast!) and give you access to a ground plane and extended viewer so you can see beyond the frame boundaries. It makes setting up a scene like this a lot easier.

Votes

Translate

Translate

Report

Report
Community guidelines
Be kind and respectful, give credit to the original source of content, and search for duplicates before posting. Learn more
community guidelines
Resources